|
Let's start the lesson.

- Preparation
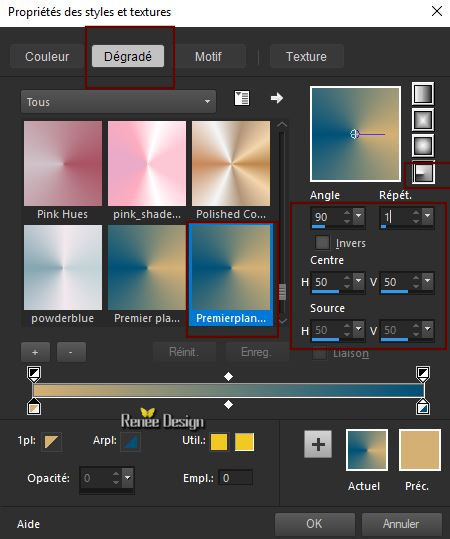
- Material Properties: Set your foreground color to color #d5b075 = No1 – Set your background color to color #005078= No 2
-Set your Foregroundcolor to foreground-background radial gradient configured like this
1. Open the BG-Image ‘’Fond_salome’’-
- Window - Duplicate (or shift+D) - Close the original and proceed on the copy -Promote Background Layer = Raster 1
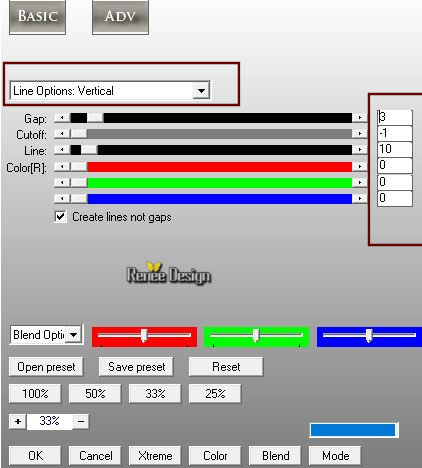
2. Effects -Plugins-AP [Lines silverling ]use the settings below
3. Layers- New Raster Layer
4. Selections- Select All- Selections - Modify- Contract with 50
Pixels
5. Activate Flood Fill Tool  –
Flood Fill the selection with the gradient –
Flood Fill the selection with the gradient
Keep selected
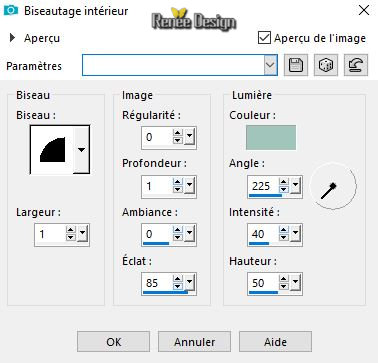
6. Effects- 3D Effects- Inner Bevel use the settings below / Color #a1c5bb (take a light color if you work with other colors)
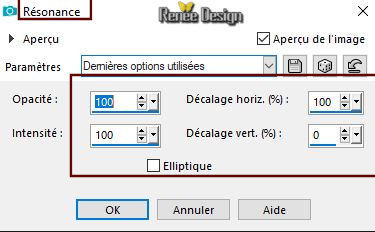
7. Effects- Reflection Effects-Feedback use the settings below
(
In case of problems with this effect, replace the layer of raster 2 with that of the tube from the material and continue with point 8 )
Selections- Deselect All
8. Layers-
Duplicate
9. Image - Mirror - Mirror vertical ( Image - Flip in older versions of PSP)
- Lower the Opacity of the layer to 50%
10. Layers- Merge- Merge Down
11. Effects –3D Effects – Drop Sheadow with these settings: 2/2/60/60 color black
12. Effects – Plugins - AAA Frame - Foto frame use the settings below
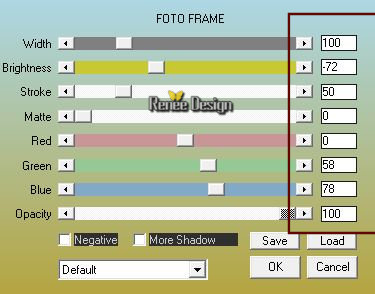
13. Layers- Duplicate
14. Image - Mirror - Mirror Horizontal (Image - Mirror in older versions of PSP)
15. Effects – Image Effects - Offset with these settings
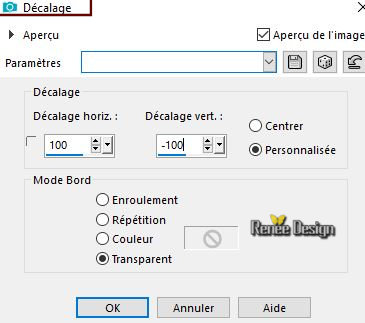
16. Effects –3D Effects – Drop Sheadow with the same settings
17. Image - Free rotate 90 ° left
18. Effects – Reflection Effects – Rotating Mirror use the settings below

19.Layers-Duplicate
20.Image - Mirror - Mirror vertical ( Image - Flip in older versions of PSP) – Lower the Opacity of the layer to 50%
21. Layers- Merge- Merge Down
22. Effects – Image Effects - Offset with these settings H = - 300 and V = 0
23. Layers-Properties-Set the Blend Mode to "Multiply"
- Material Properties: Set your foreground color to color #f5eddf = Nr 3 – Set your background color to color# 005078 =Nr 2
- Set your Foregroundcolor to foreground-background linear gradient configured like this
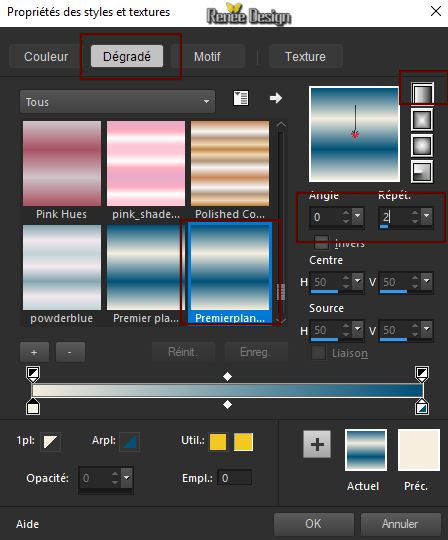
- Activate the Bottom Layer = Raster 1
24. Layers- New Raster Layer
25. Activate Flood Fill Tool
 –Flood Fill the layer with the gradient –Flood Fill the layer with the gradient
26. Effects- Distortions Effects-Polar Coordinates-Polar to Rectangular
27. Effects –Plugins-
Unlimited 2.0 - penta.com- VTR2 using the default setting
28. Layers-Properties-Set the Blend Mode to " Hard Light "
- To replace the top of the layer-palette
29. Layers- New Raster Layer
30. Selections –load/save selection –load selection from disc and select my selection:‘’Salome_1’’
31. Activate Flood Fill Tool
- Flood Fill the selection with the foreground color #f5eddf= Nr 3
Selections- Deselect All
32. Effects –3 D Effects – Drop Shadow with these settings 1/1/100/1 - color #005078= Nr 2
- Activate the Bottom Layer = Raster 1
33. Activate Selection Tool -Custom Selection (S) -Rectangle with these settings


34. Selections- Promote selection to layer
35. Layers- Arrange- Bring to Top
36. Adjust- Blur- Gaussian Blur: Radius 65
37. Layers-Properties-Set the Blend Mode to "NORMAL" (important for your characters )
38. Effects –Plugins-
Unlimited 2.0- VM1 - Mighty Maze using the default settings
39. Effects – Plugins – Transparency – Eliminate white
40. Selections-
Modify– Contract with 15 Pixels
DELETE
Selections- Deselect All
41. Effects -Plugins– Eye Candy 5 Impact – Perspective Shadow –use the settings below - Color #005078=Nr2
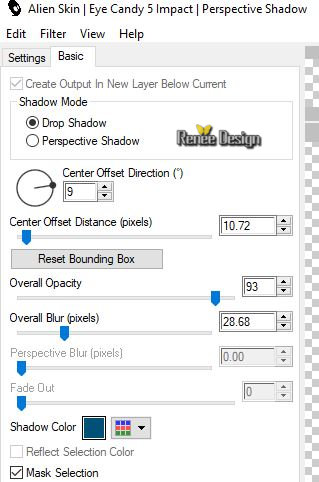
42. Effects –Plugins-
Unlimited 2.0- Alf's Border FX - Border Checkers

43. Effects – 3D Effects – Drop Shadow with these settings 1/1/100/1 color black
44. Open the tube
‘’ Renee_TUBES_Visage’’
-Edit - Copy- Activate your work -Edit - Paste as a new layer and move as shown in the screen below
- Your work and Layer Palette look like this now-You should have this result

48. Activate Pen Tool – Line style -Solid Line– Width 1

- Draw a line along the skull like this line (Color black)
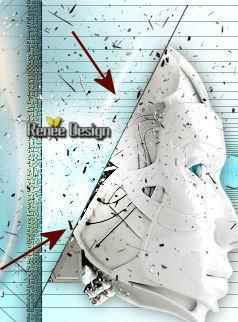
-Convert to Raster Layer
- Properties foreground: Set your Foreground color to color #ffffff
49. Layers- New Raster Layer
50. Selections –load/save selection –load selection from disc and select my selection:‘’Salome_2’’
51. Activate Flood Fill Tool
 -
Flood Fill the selection with the foreground color #ffffff -
Flood Fill the selection with the foreground color #ffffff
Selections- Deselect All
52. Layers-Properties-Set the Blend Mode to "Overlay"
(Repositioning if necessary the tube effect must be slightly shifted from the black line drawn previously)
53. Layers- New Raster Layer
54. Selections –load/save selection –load selection from disc and select my selection:‘’Salome_3’’
5. Activate Flood Fill Tool - Flood Fill the selection with the background color # 005078 =Nr 2
56. Effects -Plugins – Eyecandy 5 Impact Glass use the settings below

Selections- Deselect All
57. Open the
tube’’Salome_texte’’
- Edit - Copy- Activate your work -Edit - Paste as a new layer
- Move Tool(M) place it in the right place (see finished image )
58. Layers-Properties-Set the Blend Mode to " Luminance " –Lower the Opacity of the layer to 30%
59. Properties foreground: Set your Foreground color to color #f5eddf = Nr 3
– Activate the Preset Shape Tool and select ‘’Spiral Binding’’

-Draw like this (attention first leave off with style retained (conserv.style see above) then set continuous stripe, then put tick again then it stays that way and you determine the thickness with the drawing of the shape.(Background color Black )
Adjust the shape if necessary

60. Convert to Raster Layer
61. Effects –3 D-Effects
- Drop Shadow with these settings 1/1/100/1 color black
62. Activate the Preset Shape Tool -Select Triangle - Draw 2
triangles and move (Do you have problems with this- png image is into the zipfile and paste as a new layer on your working area and move)
63. Open the ‘’ Tube_2 billes’’ / Edit - Copy- Activate your work -Edit - Paste as a new layer and move in the right place
- Material Properties: Set your foreground color to color #f5eddf = Nr 3 – Set your background color to color # 005078 = Nr 2
64. Layers- New Raster Layer
65. Selections –load/save selection –load selection from disc and select my selection:‘’Salome_4’’
66. Activate Flood Fill Tool
 make one click with the foreground color - 2 clicks with the background color make one click with the foreground color - 2 clicks with the background color
Selections- Deselect All
67. Open the tube
‘’ Renee_tubes-Salome_paysage’’
- Image -Resize twice to
85%
- Edit - Copy- Activate your work -Edit - Paste as a new layer
68.Layers-Properties-Set the Blend Mode to " Screen "– Lower the Opacity of the layer to 51%
69. Layers- New Raster Layer
70. Selections –load/save selection –load selection from disc and select my selection:‘’Salome_5’’
(Replace the tube if needed to have this
)
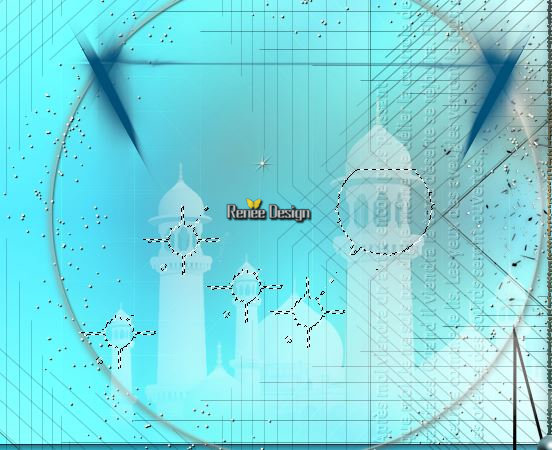
71. Set your foreground color to color #ffffff -Activate Flood Fill Tool
 -Flood Fill the selection with #ffffff ( 2 clicks)
Selections- Deselect All
72.Effects- Edge Effects Enhance
73. Open the tube
‘’ @nn_141107_strange_258_woman_tdstudio’’
-Edit - Copy- Activate your work -Edit - Paste as a new layer
- Move Tool : Move to the bottom left side
74. Layers- Arrange- Move Down
75. Adjust- Blur- Gaussian Blur: Radius 35
76. Layers-Properties-Set the Blend Mode to " Darken "– Lower the Opacity of the layer to 75%
- Activate the layer above (original)
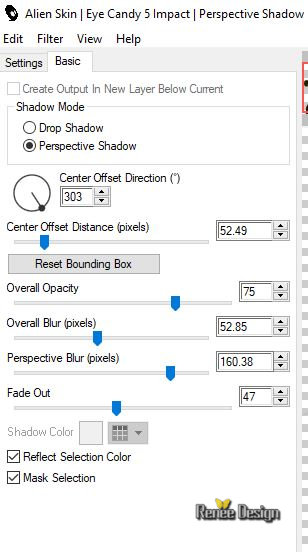
77. Effects – Plugins – Eyecandy 5 Impact – Perspective Shadow use the settings below
78. Image - Add borders-Symmetric checked 1 Pixel Color # f5eddf =Nr 3
79. Image - Add borders-Symmetric checked 40 Pixels #ffffff
80. Layers- New Raster Layer
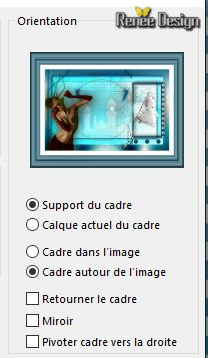
81.Image – Picture Frame –
‘’cadresalome.pfr’’ – use the settings below
82. Text Tool - Write the title Salomé with the font (is into the zip), Size and Colors to your taste
83. Effects- 3D-Effects – Drop Shadow with these settings :( Renée choose 1/1/10/1 color black)
84. Layers- Merge-Merge All
85. Image
Resize to 1005 Pixels Width
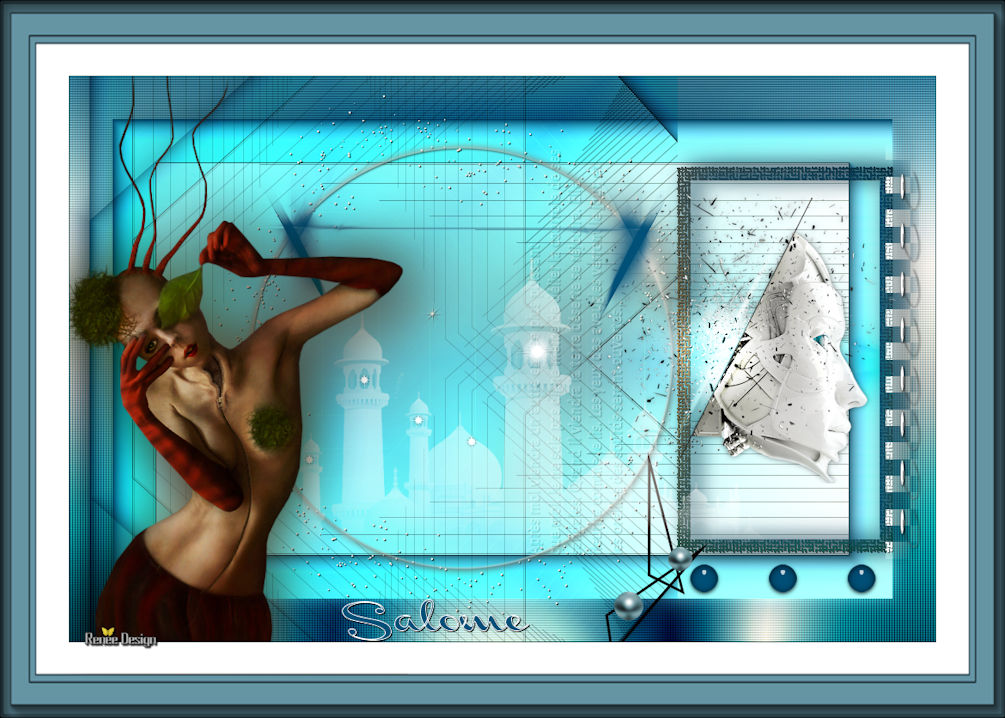
Save as JPG
I hope you enjoyed this lesson
Renée
This lesson was written by Renée 18 Novembre 2018
Edited and Update
2018
*
Any resemblance with an existing lesson is a coincidence
* Do not forget to thank the people who work with us and for us I have appointed the tubeurs and translators
Thanks
*
|


 Translations


