|
Let's start the lesson.
-
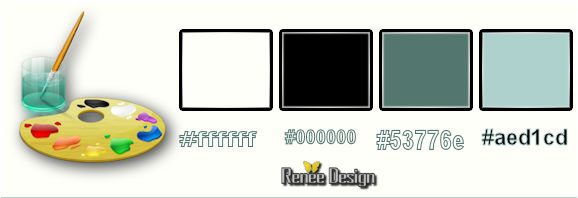
Color-Palette : Set your foreground color to color #ffffff -Set your background color to color black
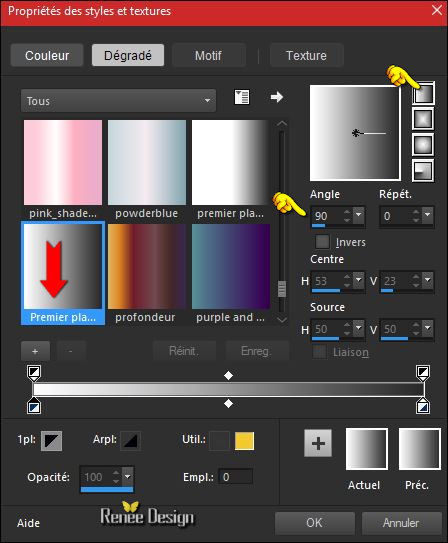
- Properties Foreground: Set your Foregroundcolor to Foreground/Background linear Gradient configured like this.
1.
File: Open a New Image – Transparent 1005 x 615 pixels
2.
Activate Flood Fill Tool and fill the layer with the gradient
3.
Selections –load/save selection –load selection from disc and choose my selection:« seconde
_face_1 »
Do not add a new layer
4. Activate Flood Fill Tool and fill the selection with the background color
5.
Selections –Modify – Contract 3 pixels
5.
Activate Flood Fill Tool and fill the selection with the gradient
6.
Selections- Promote Selection to Layer
Selections- Deselect All
7.
Effects- 3 D Effects-Drop Shadow with these settings: 2/2/50 /12 black
8.
Layers- Duplicate
9.
Effects-Image Effects-Offset with these settings: H = 25 and V =
- 9 /transparent
10.
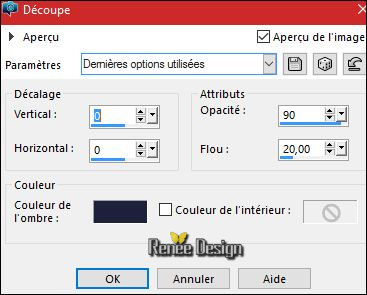
Effects- 3 D Effects- Cutout use settings below
11.
Layers- Merge- Merge Layers Down
12.
Effects- 3 D Effects-Drop Shadow with these settings: 2/2/50 /12 black
13.
Layers-New Raster Layer
14.
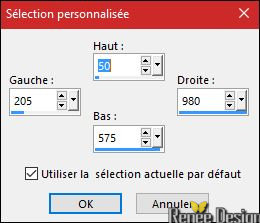
Activate Selection Tool -Custom Selection (S) -Rectangle with these settings 
-
Activate Flood Fill Tool and fill the selection with the gradient
15.
Effects –Plugins - Unlimited - Andrew's Filters 39- Net
Curtain...

Selections- Deselect All
16.
Effects- Plugins –EyeCandy 5 Impact – Perspective
shadow use settings below
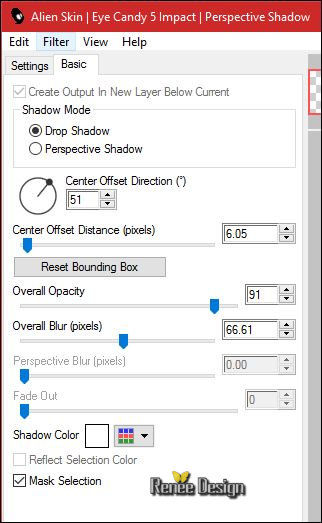
17.
Effects- Plugins – Medhi – Sorting Tiles
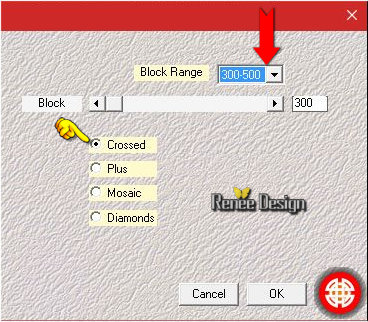
18. Adjust-Sharpness-Sharpen
19.
Effects –Plugins - Unlimited – Distorsion Filters – Scanline Shifter with these values:
9/23
20.
Activate Selection Tool -Custom Selection (S) -Rectangle with these settings

21.
Selections-Invert
Hit the Delete Key of your Keyboard 
Selections- Deselect All
22.
Open the tube
‘seconde_face_effet_lignes.png
-
Edit/ Copy-Edit - Paste as new layer on your working image
23.Effects- Image Effects- Offset with these settings: H = 71 and V =
0 / transparent
-
Layers- Merge- Merge- Layers Down
24.
Selections –load/save selection –load selection from disc and choose my selection:« seconde _face_2 »
25.
Effects- Plugins - Flaming Pear
Flexify2 use settings below
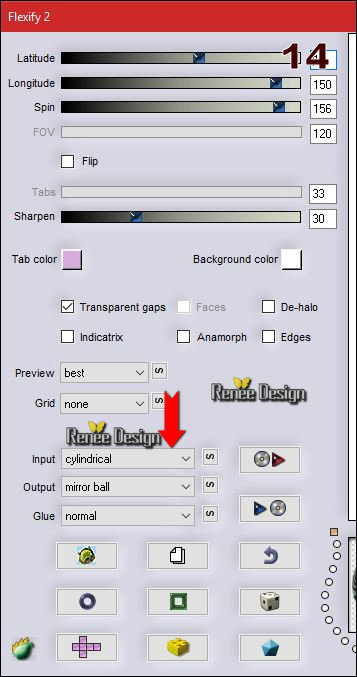
26.
Selections- Promote Selection to Layers
-
In the Layer-Palette-Activate the layer underneath =(Raster 2)
27.
Effects- 3 D Effects- Cutout use settings below

Selections- Deselect All
-
Your work and Layer Palette look like this now-You should have this result
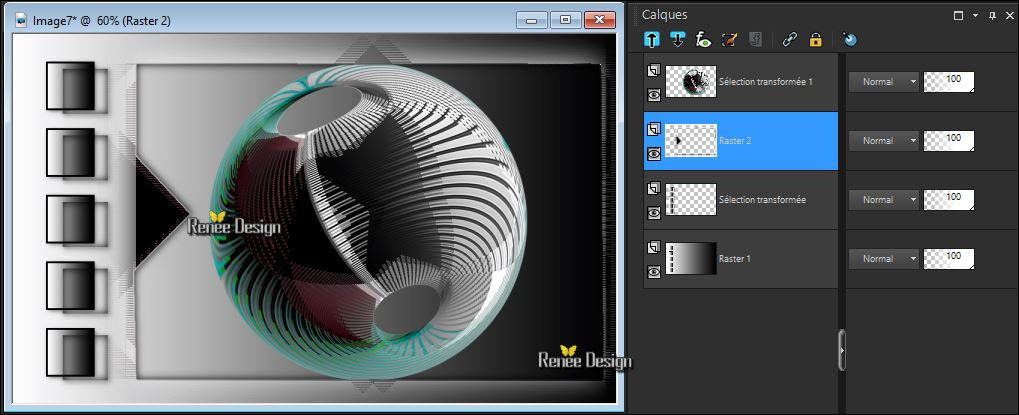
-To replace the top of the layers palette
28.
Image Resize to 45 % all layers not checked
29.
Activate Selection Tool -Custom Selection (S) -Rectangle with these settings
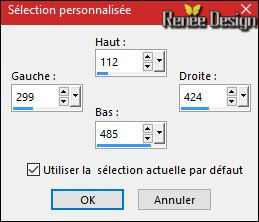
Hit the Delete Key of your Keyboard 
Selections- Deselect All
30.
Effects- Image Effects- Offset use settings below
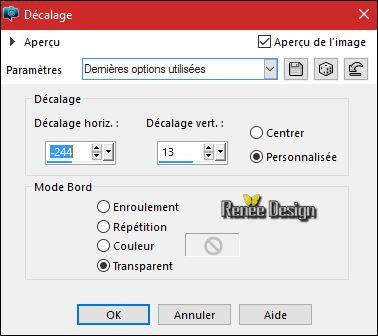
-
Layers- Arrange- Move Down
-
Activate the top of the layer palette
31.
Layers- New Raster Layer
32.
Activate Selection Tool -Custom Selection (S) -Rectangle with these settings
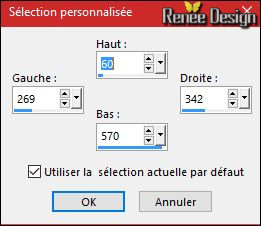
33.
Activate Flood Fill Tool and fill the selection with the gradient
34.
Effects- Reflection Effects- Feedback use settings below
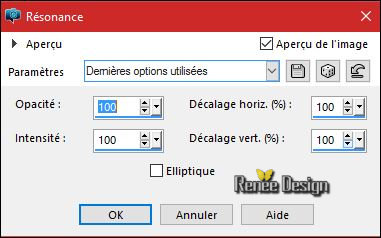
Selections- Deselect All
35.
Effects- Edge Effects- Enhance
36.
Effects- Distortion Effects- Spiky Halo use settings below
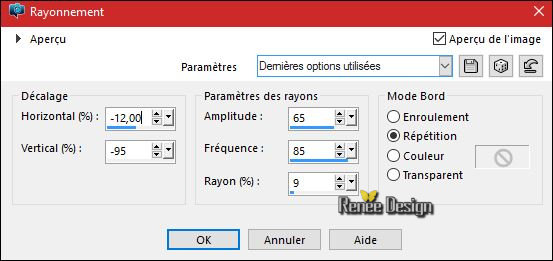
37. Layers- Arrange- Move Down (3 times) ( above
Raster 1)
38. Effects- 3 D Effects- Drop Shadow with these settings -Color#747474
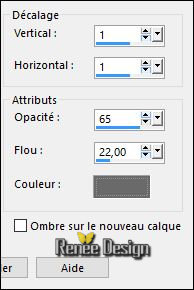
- Activate the top of the layer palette
39. Open the tube ‘’ Renee_tube_second_face.pspimage’’
Do not close we need it later for the rest of the work
- Activate Raster 1 of the tube
- Edit/ Copy-Edit - Paste as new layer on your working image
40. Effects- Image Effects- Offset with these settings : H = 244 and V =
-36
- Back on the tube -’’Renee_tube_second_face.pspimage’’
41. Activate -Raster 2 of the tube
- Edit/ Copy-Edit - Paste as new layer on your working image
- Layer Palette -double click on this layer and set the Blendmode to "Hard Light " and set the layer opacity of this layer to 77%
42. Layers- Duplicate / Image Resize to 65% All layers not checked
- Activate Move Tool (M) place against the top edge of your image - as shown in the example below
Layer Palette -double click on this layer and set the Blendmode to "Difference " and set the layer opacity of this layer to 100%
Your work and Layer Palette look like this now-You should have this result
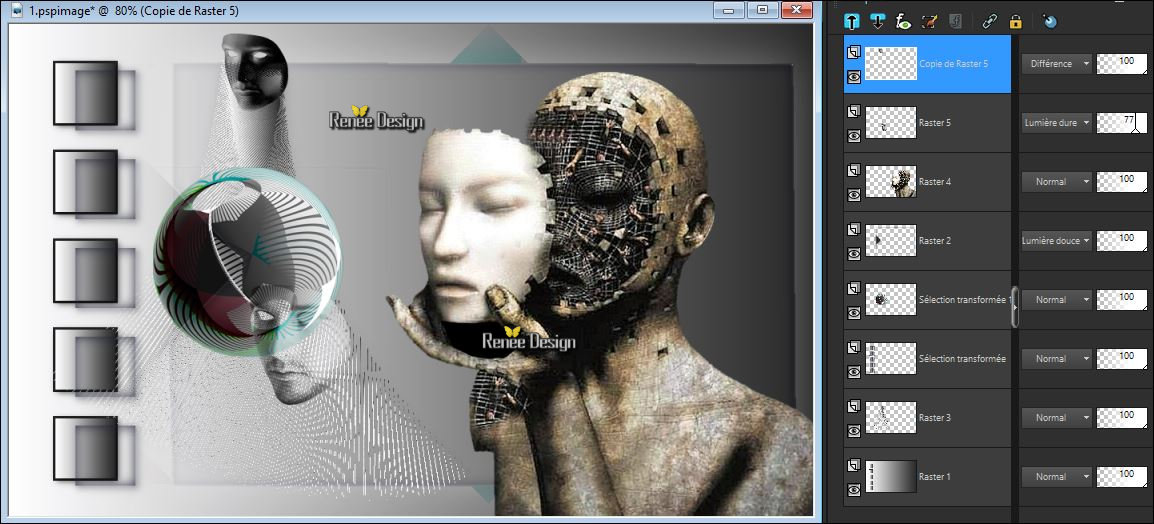
43. Layers-New Raster Layer
44.
Activate Selection Tool -Custom Selection (S) -Rectangle with these settings
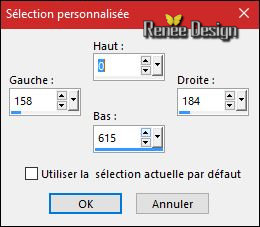
45. Activate Flood Fill Tool and fill the selection with the selection with the gradient
Selections- Deselect All
46. Effects
–Geometric Effects– Circle / transparent
47. Layers- Duplicate – Image Mirror
48. Layers- Merge- Merge- Layers Down
49. Effects
– Distorsion Effects– Twirl / Degrees: –345
50. Effects- Plugins – EyeCandy 5 Impact – Motion trail –tab Settings/User settings choose my Preset
‘’second_face_Motion_trail »
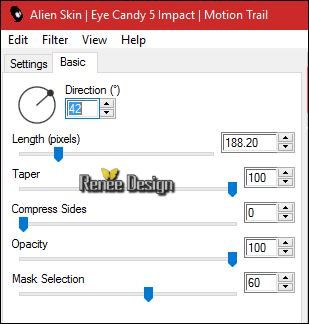
- Double click on this Layer and set the Blend Mode to "Overlay " -Set the layer opacity of this layer to 73 %
51. Layers- New Raster Layer
- Properties Foreground: Set your foreground color to color #ffffff
52. Activate Flood Fill Tool and fill the layer with the foreground color white
-
Open the Mask ‘’Renee_Masque-Double_face’’ Minimize the mask.
53. Layers - New Mask Layer - From Image:
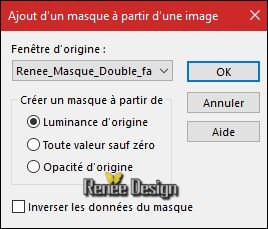
- Layers-Merge- Merge Group.
54. Effects- Plugins – Filter Forge 2 or 4
–Creative-Cross
Blur
you get this message >>Click Ok -and the window opens and you can use the filter 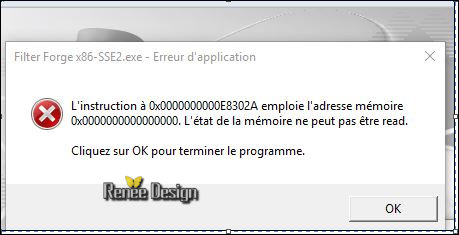
Choose "which" version of Filter Forge that you have
and apply that filter."
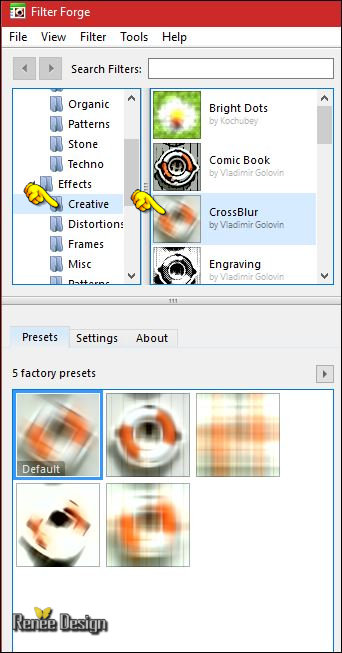
- Do you have problems with this?-png image ‘’effet-filtre_forge.png’’ (included into the zipfile) and paste as a new layer on your working area
- replace your layer (Delete Group_Raster 7)
- Color-Palette - Set your foreground to gradient
-Swap your materials, so the white color is on the bottom as shown below
– Set your foreground to gradient 'Foreground-background' - Prepare a linear gradient configured like this.

55. Layers- New Raster Layer
56. Activate Flood Fill Tool and fill the layer with the gradient
57. Effects- Plugins – Innovations 1.5 – Wavy City use settings below (This filter need time)
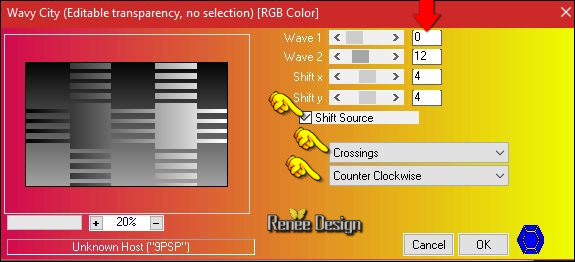
58. Effects- Geometric Effects- Perspective- Horizontal use settings below
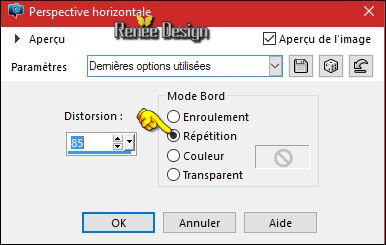
59.
Effects- Plugins -Transparency- Eliminate
Black
- Layer Palette -double click on this layer and set the Blendmode to "Screen"
- Layers- Arrange - Send to the second layer from the bottom above Raster 1
Your work and Layer Palette look like this now-You should have this result

- To replace the top of the layers palette
-
Color-Palette : Set your foreground color to color #53776E -Set your background color to color #ffffff
60. Layers- New Raster Layer
61.
Selections –load/save selection –load selection from disc and choose my selection:
‘’seconde _face_3’’
62. Activate Flood Fill Tool and fill the selection with the background color white (Zoom In if necessary)
63. Layers- New Raster Layer -Activate Flood Fill Tool and fill the selection with the foreground color #53776E
Selections- Deselect All
64. Effects- Image Effects- Offset with these settings : H = - 17 and V =
0
65. Effects-Distortion Effects-Wind-Winddirection From Right -Wind strength 31

66. Effects- Edge Effects- Enhance
- Layers- Merge- Merge- Layers Down
67.Repeat: Effects-Distortion Effects-Wind-Winddirection From Right -Wind strength 31
68. Layers-New Raster Layer
69.
Selections –load/save selection –load selection from disc and choose my selection:
‘’seconde _face_4’’
70. Activate the Flood Fill Tool-and fill in the center of the selection with the background color white ( 3 clicks )
Selections- Deselect All
71. Open the tube ‘’ Renee_tube_masque_double_face »
Edit/ Copy-Edit - Paste as new layer on your working image
- With the Move Tool, move it in the right place as shown in the example below - Your work look like this now-You should have this result
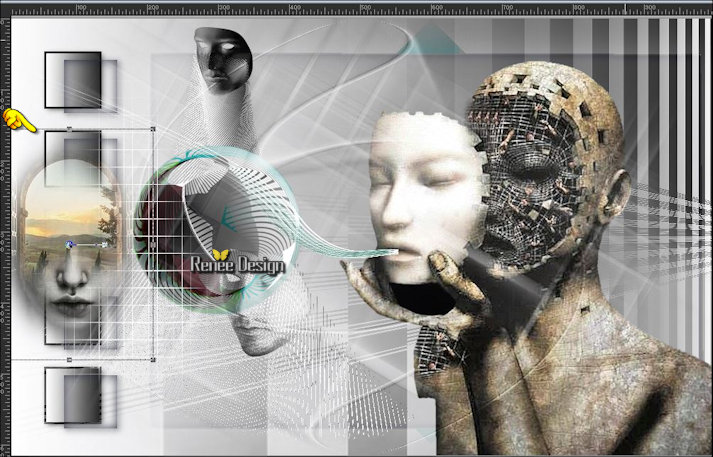
- Double click on this Layer and set the Blend Mode to "Normal"
72. Layers- Duplicate – Double click on this Layer and set the Blend Mode to "Overlay "
73. Layers- Merge- Merge- Layers Down
- Double click on this Layer and set the Blend Mode to "Multiply "
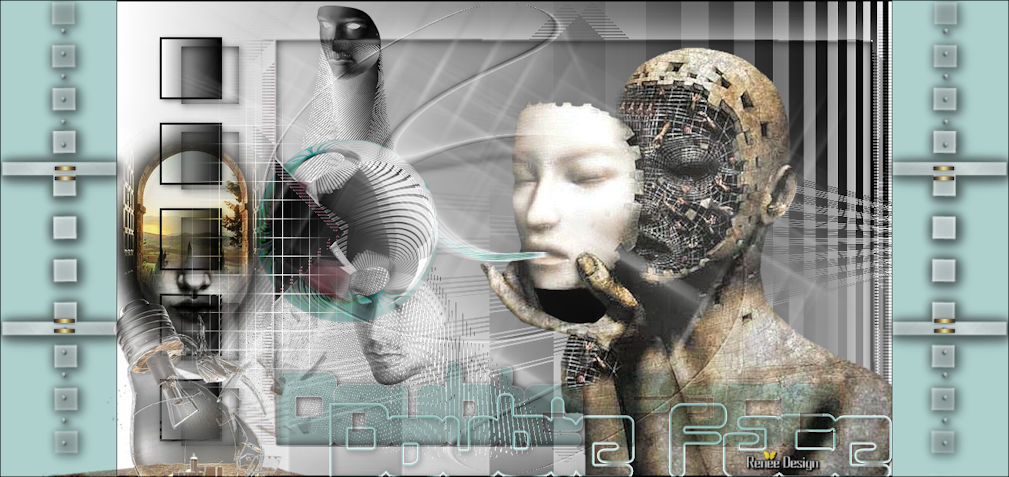
74. Layers- Merge- Merge Layers Visible
75. Image - Add borders-Symmetric checked: 1 pixel black
76. Image - Add Borders NO SYMMETRIC with these settings- Color #aed1cd
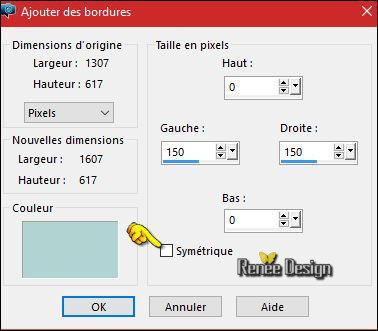
-
Promote Background Layer =Raster 1
76. Open the
tube ’’Deco_double_face’’
- Edit/ Copy-Edit - Paste as new layer on your working image
- Do not move it is in the right place
- Double click on this Layer and set the Blend Mode to "Normal " Set the layer opacity of this layer to 81 %
77. Effects- 3 D Effects- Drop Shadow with these settings : 2/2/50/12 black
78. Open the tube ‘’ Double_face_lampe_brisee’’
- Edit/ Copy-Edit - Paste as new layer on your working image
- Move Tool / place your tube in the bottom left corner
79. Open the tube ‘’texte_titres » raster 1 and raster 2
- Edit/ Copy-Edit - Paste as new layer on your working image and move to the bottom
- Or write your own text .(Font- Included into the zipfile)
80. Image - Add borders-Symmetric checked: 1pixel black
81. Image
Resize to 1009 Pixels width
Save as JPG
I hope you enjoyed this lesson
Renée
This lesson was written by Renée 09/06/2016
Edited and Update
2016
*
Any resemblance with an existing lesson is a coincidence
* Do not forget to thank the people who work with us and for us I have appointed the tubeurs and translators.
Thanks Renée
*
| 
 Translations


 When you see this logo the filter is imported in Unlimited


 All rights reserved