|
Let's start the lesson.

-
Material Properties:Set your foreground color to:#a4c3b6
- Set your background color to: #cdb545
1.
Open the background image ‘’fond_soif ‘’/ /Window - Duplicate (or shift+D) - Close the original and proceed on the copy -Promote Background Layer =Raster 1
2.
Effects- Texture Effects – Mosaic Glas use settings shown below

3.
Layers- Duplicate
4.
I have resized that tube at 85 %
Resize all layers not checked
5.
Effects -Plugins- Unlimited – Colorave- Atmospherizer 1.1 use settings shown below

6.
Selections - Load/save selections - Load selection from disk and select my file:‘’soif_sel_1’’
DELETE
Selections- Deselect All
7.
Layers- Duplicate
8.
Effects- Plugins – Unlimited- It@lian Editors Effect - Effetto
Fantasma 41/41
-Double click on this Layer and set the Blend Mode to "Hard Light "
9. Layers Merge- Merge Down
10. Effects- Plugins – AP 14 Motion – Video Reapeat 4 with these settings
(This filter need time )Attention: Set the background color to#20261b

This filter can result in a slightly different effect ,play with color bars as shown in the example below

11. Layers- Duplicate
12. Effects- Distortions Effects-Polar Coordinates-Polar to Rectangular

13. Effects- Plugins – Mura’s Meister – Perspective
Tilling use settings shown below

14. Adjust-Sharpness- High Pass sharpen use settings shown below

15. Layers- Arrange- Move Down
- Activate the top of the layer palette
16. Activate the tube ‘’ Renee_tube_fenetre_tuto_soif’’
- Edit/ Copy-Edit - Paste as new layer on your working image
17.
Effects- Plugins – Andromeda – Perpsective Tilling-
Side walls
(If problems with the filter take the tube with the filter effect "Andromeda '' ‘’ Renee_tube_fenetre_tuto_soif’’)

18. Effects- Image Effects- Offset with these settings

- Double click on this layer and set the Blendmode to" Luminance-Legacy "
- Material Properties:Set your foreground color to: #a3b676
19. Layers- New Raster Layer
20.
Selection Tool ( S ) Custom selection use settings below

21. Activate Flood Fill Tool and fill the selection with the foreground color: #a3b676
22. Effects- Plugins -Eyecandy 5 textures – Briques-tab Settings/User settings choose my preset: ‘’texures_briques_soif’’
Selections- Deselect All
23. Selections –load/save selection –load selection from disc and choose my selection: ’’soif_sel_6’’
Hit the Delete Key of your Keyboard
Selections- Deselect All
24.Effects –Plugins-
Unlimited ICNET FILTERS – Paper Textures- Structure
paper4 128/92
Activate the tube ‘’
renee_deco_tuto_soif’’ You may minimize your working area for a moment, but do not close, we will need it again soon
25. Activate Raster ‘’pan_mur’’of the tube
26. Edit/ Copy-Edit - Paste as new layer on your working image
27. Effects- Image Effects- Offset with these settings H = -
195 and V = 57
Layers- Merge- Merge- Down
28. Layers- New Raster Layer
29. Selections –load/save selection –load selection from disc and choose my selection: ‘’ soif_sel_7’’
30. Activate Flood Fill Tool and fill the selection with the background color #20261b
31. Click on your Pen Tool -draw a small line -Size 4 as shown in the screen
- Layers – Convert to Raster Layer
32. Layers- Merge- Merge- Down
33. Activate Selection Tool (S) Selection Type-Ellipse -draw a small selection – Activate Flood Fill Tool and fill the selection with color white

Selections- Deselect All
34. Layers- Merge- Merge Down
(wall and lamp are on the same layer)
- Layer Palette look like this now-You should have this result

35. Effects- Plugins – Graphic plus – Cross shadow use settings shown below

36. Layers- New Raster Layer
37.
Selections –load/save selection –load selection from disc and choose my selection: ‘’
soif_sel_8’’
38. Activate Flood Fill Tool and fill the selection with color white #ffffff
Selections- Deselect All
39. Double click on this Layer and set the Blend Mode to "Screen" Set the layer opacity of this layer to 69%
40. Layers Merge- Merge Down
41.
Effects- Plugins – Flaming pear Flood /click on the red arrow>>select my file :Preset‘’
settings.q8r’
can be used in any folder of your choice by clicking it.
Open it will be ok in your filter

42. Activate the tube again‘’ renee_deco_tuto_soif’’
- activate raster ‘’lampe’ of the tube
- Edit/ Copy-Edit - Paste as new layer on your working image
43. Activate your Pick Tool (K) and place as shown in the example below

- Material Properties:Set your foreground color to:#a4c3b6 - Set your background color to: #cdb545
44. Layers- New Raster Layer
45.
Selections - Load/save selections - Load selection from disk and select my file:‘’soif_sel_2’’
46. Activate Flood Fill Tool and fill the layer with :
1 click FG-Color
1 click BG-Color
1 click
VG-Color
1 click
BG-Color
47. Double click on this layer and set the Blendmode to "Screen "
Selections- Deselect All
(move it in the middle of the lamp)
- Layer palette – Make Copy 2 of Raster 1 active
48. Activate the tube again ‘’ renee_deco_tuto_soif’’
- Activate raster ‘’desert’’ of the tube
- Edit/ Copy-Edit - Paste as new layer on your working image
- With the Move Tool, move it in the middle
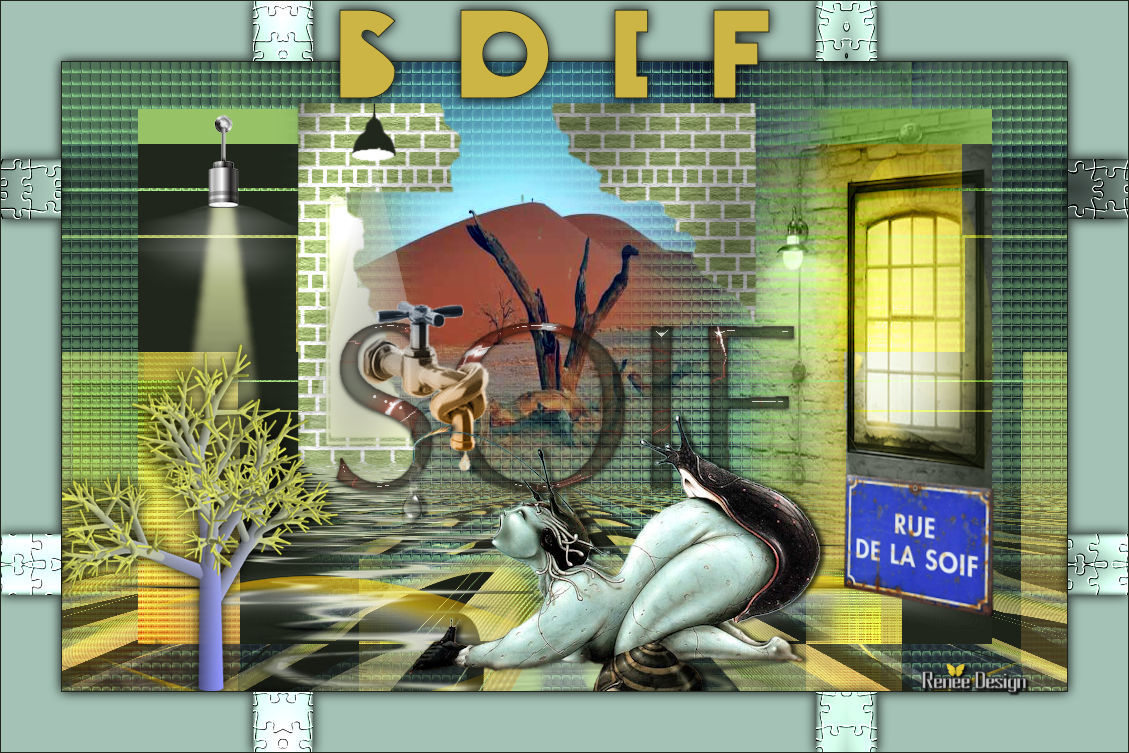
(see finished image)
49. Effects- Plugins - Fotomatic – Sky grad use settings below

Your Layer palette look like this now-You should have this result

- Activate the top of the layer palette
50. Layers- New Raster Layer
51.
Selections –load/save selection –load selection from disc and choose my selection:‘’
soif_sel_3’’
52. Activate Flood Fill Tool and fill the selection with the background color :#cdb545 (click 5 a 6 times in the selection )
53. Effects- 3 D Effects- Drop Shadow with these settings :10/10/100/25 #ffffff
Selections- Deselect All
54. Effects- Distortion Effects- Wave use settings shown below

55. Layers- Duplicate – Image Mirror
56. Layers Merge- Merge Down
57.Double click on this Layer and set the Blend Mode to "Hard Light "
Material Properties:Set your foreground color to:#20261b
58. Layers- New Raster Layer
59.
Selections - Load/save selections - Load selection from disk and select my file: « soif_sel_4 »
60. Pot of Paint: Change the opacity of the color at 50% –Activate Flood Fill Tool and fill the selection with the foreground color #20261b
61.
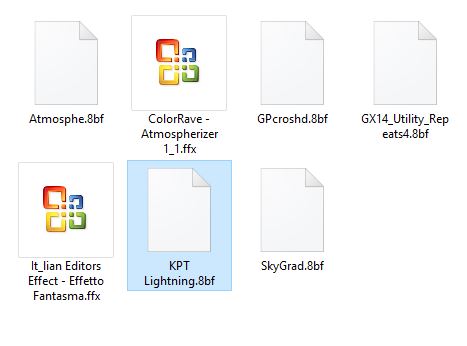
Effects- Plugins –KPT Effects- KPTLighting with settings below (First, click on the icon with the colors. A new window will open so you can select a color
)

62.
Effects- Plugins – Eyecandy 5 Impact – Glass-tab Settings/User settings choose my preset:
‘’soif_glass’’
Selections- Deselect All
63. Activate the tube again ‘’ renee_deco_tuto_soif’’
- Activate raster ‘’plaque_rue’ of the tube
- Edit/ Copy-Edit - Paste as new layer on your working image
-With the Move Tool, move it in the bottom right corner (see finished image)
64. Layers- New Raster Layer
65. Selections –load/save selection –load selection from disc and choose my selection: ‘’ soif_sel_5’’
66. Pot of Paint: Change the opacity of the color at 100% –Activate Flood Fill Tool and fill the selection with the background color
67. Effects- Plugins – Graphic plus cross shadow use settings below

68. Double click on this layer and set the Blendmode to "Overlay "
Selections- Deselect All
69. Activate the tube again ‘’ renee_deco_tuto_soif.pspimage’’
- Activate raster ‘’robinet’ of the tube
- Edit/ Copy-Edit - Paste as new layer on your working image
- Activate Move Tool (M) move it the right place (see finished image)
70. Activate the tube ‘’ Renee_tube_soif.pspimage’’ /activate raster escargot_seul’’of the tube
-
Image Mirror
- I have resized that tube at 65 %
- Edit/ Copy-Edit - Paste as new layer on your working image
- Activate Move Tool (M) move it the right place (see finished image)
71. Effects- 3 D Effects- Drop Shadow with these settings : 0/5/72/6 black
72. Activate the tube ’’ Renee_tube_arbre_tuto_soif’’
- I have resized that tube at 80 %
- Edit/ Copy-Edit - Paste as new layer on your working image
- Activate Move Tool (M) move it in the bottom left corner
73. Effects- 3 D Effects- Drop Shadow with these settings :0/0/100/18 black
74. Image - Add borders-Symmetric checked:1 pixel black
75.
Selections- Promote selection to Layer
76. Image - Add borders-Symmetric checked:60 pixels en #a4c3b6
77. Effects- 3 D Effects- Drop Shadow with the same settings
78.
Selections- Selections- Invert
79. Effects- Plugins - AAA Multi Filter use settings shown below

80.
Selections- Promote selection to Layer
81. Effects- Plugins – Graphic plus cross Shadow using the default settings
82.
Effects –Plugins - unlimited- Texturize- Puzzle (tiled) a
211
83.
Effects –Plugins- Simple Zoom out and flip
Selections- Deselect All
84. Effects- 3 D Effects- Drop Shadow with the same settings
85. Image - Add borders-Symmetric checked:1 pixel black
86. Click on your Text Tool / Font ''Cheatin ''–size 150 - Write your text " S O I F
"capitalize (a space between each letter)
87. Effects- 3 D Effects- Drop Shadow with the same settings
88. Layers- Merge- Merge All
Save as JPG
I hope you enjoyed this lesson
Renée
This lesson was written by Renée 03/11/2015
Edited and Update
2015
*
Any resemblance with an existing lesson is merely a coincidence *
* Don't forget to thank the people who work for us and with us. I named the tubeurs - Testers and the translators.
Thanks Renée.
| 

 Translations


 When you see this logo the filter is imported in Unlimited


 _All rights reserved