|
Let's start the lesson
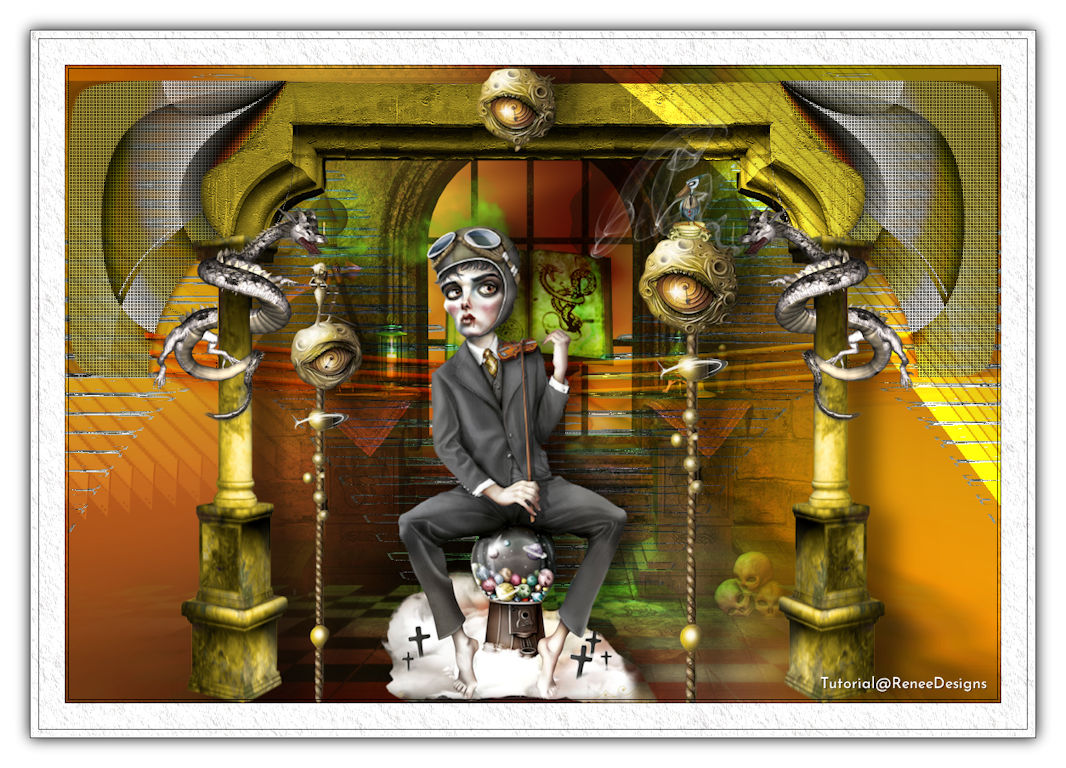
Sonate de Vampire
- Preparation
-Material Properties: Set your foreground color to color #f5f5f5 =2 Set your background color to color #b0a147=3
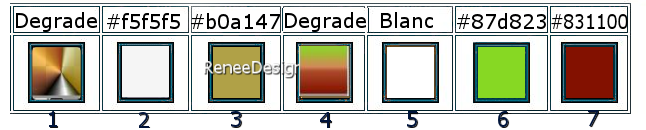
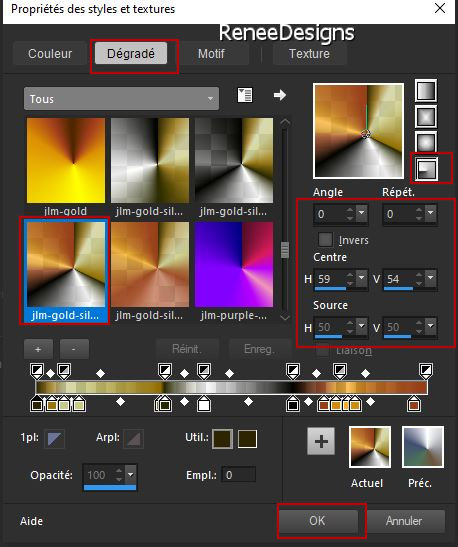
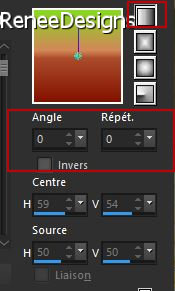
-Material of the foreground: Set your foreground color to gradient and choose gradient ‘’jlm-gold-silver-copper’’- Style
Radial configured like this
1. File: Open a new transparent image in this size: 1100 x 750 Pixels
2. Activate Flood Fill Tool
 –
Fill the layer with the gradient –
Fill the layer with the gradient
3. Layers- Duplicate
4. Image - Mirror - Mirror vertical ( Image - Flip in older versions of PSP)
5.
Image - Mirror - Mirror Horizontal (Image - Mirror in older versions of PSP)
6. Layers-Properties-Set the Blend Mode to " Overlay "
7. Layers- Merge- Merge Down
8. Effects – Plugins – Toadies – What are you with these settings: 20/20
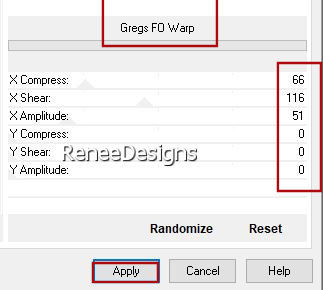
9. Effects –Plugins-
Unlimited 2.0 - &<BKg Designer sf10 II> -Gregs FO Warp use the settings below
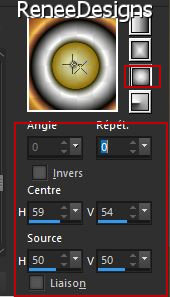
- Material of the foreground: change your radial gradient into a sunburst gradient configured like this
10. Layers- New Raster Layer
11. Selections –load/save selection –load selection from disc and select my selection:‘’ Sonate-de-Vampire1’’
12. Activate Flood Fill Tool
–
Fill the selection with the gradient
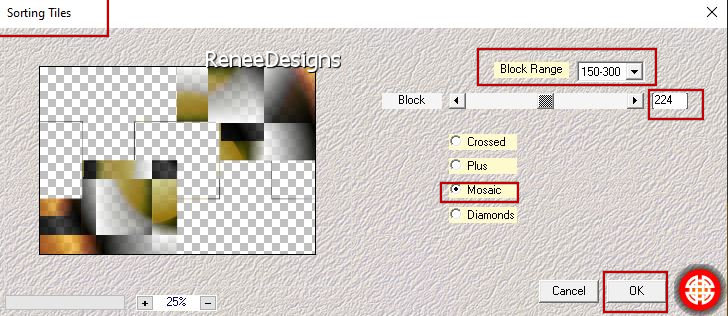
13. Effects – Plugins – Medhi - Sorting Tiles use the settings below
14. Effects- 3D Effects- Drop Shadow with these settings:0/0/100/25 Color black

-
Stay on this layer and do not add a new layer
15. Selections –load/save selection –load selection from disc and select my selection:‘’ Sonate-de-Vampire2’’
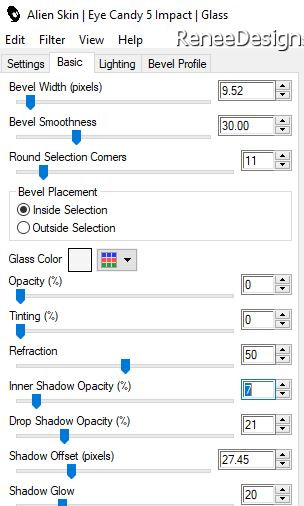
16. Effects - Plugins - Alien Skin EyeCandy 5 - Impact – Glass-use the settings below -
Color #f5f5f5=2
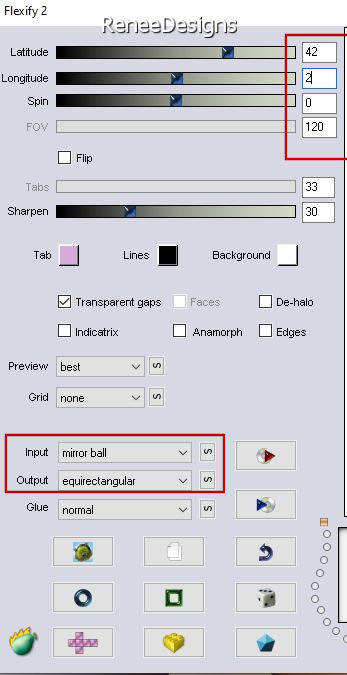
17. Effects –Plugins- Flaming Pear – Flexify 2 use the settings below
18. Image - Resize by 65 %- Resize all layers not checked
19. Image - Free Rotate 90° Right
20. Objects – Align
-Left
21. Layers- Duplicate
22.
Image - Mirror - Mirror Horizontal (Image - Mirror in older versions of PSP)
23. Layers- Merge- Merge Down
24. Effects –Plugins-
Unlimited 2.0 - &<Bkg Designer sf10 III> -SW Hollow Dot
25. Selections –load/save selection –load selection from disc and select my selection:‘’ Sonate-de-Vampire3’’
26. Edit- Cut !!! –
Edit paste as new layer (do not move it)
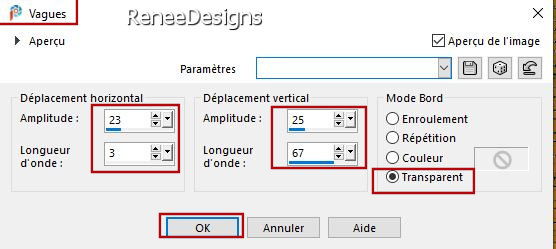
27. Effects-Distortion Effects- Wave use the settings below
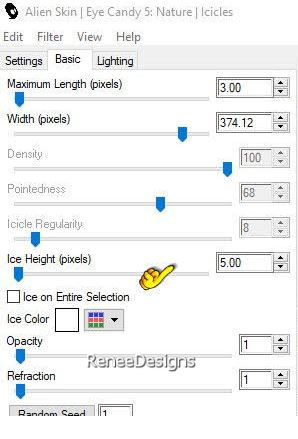
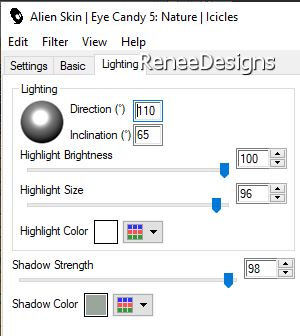
28. Effects - Plugins - Alien Skin EyeCandy 5 –Nature –Icicles use the settings below -Colors #ffffff and #9aa69b
29. Layers- Arrange- Move Down
30. Open the Tube ‘’ Renee-Tubes-SonateVampire-Image1’’ -Edit - Copy- Activate your work -Edit - Paste as a new layer
31. Pick Tool: (K) on your keyboard -Enter these parameters on the toolbar
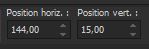 144/
15 144/
15
Press ( M ) to close the Pick Tool
- To replace the top of the layer-palette
32. Layers- New Raster Layer
33. Selections –load/save selection –load selection from disc and select my selection:‘’ Sonate-de-Vampire4’’
- Material of the foreground: change your sunburst gradient into a radial gradient configured like this
34. Activate Flood Fill Tool -
Fill the selection with the gradient
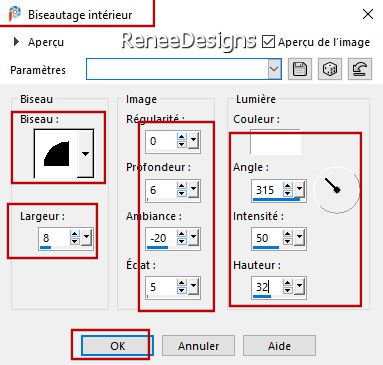
35. Effects- 3D-Effects – Inner Bevel use the settings below
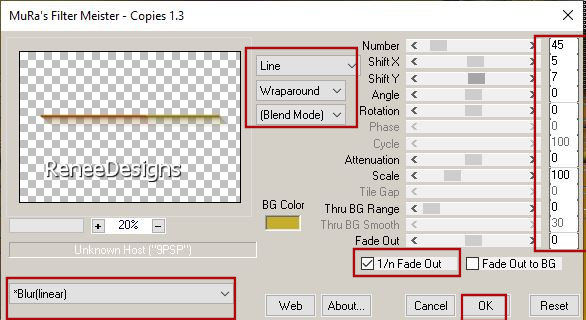
36. Effects – Plugins – Mura’s Meister - Copies use the settings below
37. Effects –Plugins-FM
Tile Tools – Blend Emboss using the default settings
38. Effects- User Defined Filter - Emboss 3 using the default settings
39. Layers- Duplicate
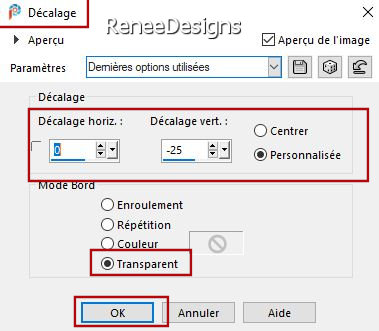
40. Effects – Image Effects – Offset use the settings below
41. Layers- Duplicate
42. Effects – Image Effects – Offset use the settings below
43. Layers - Merge -Down and repeat one more time
44. Effects – Distortion-Effects – Lens Distortion-Distortion Type-"Pincushion" use the settings below

45. Activate Pick Tool (K) – Place in the Default settings and select my file -Preset
‘’sonate’’ – Click OK

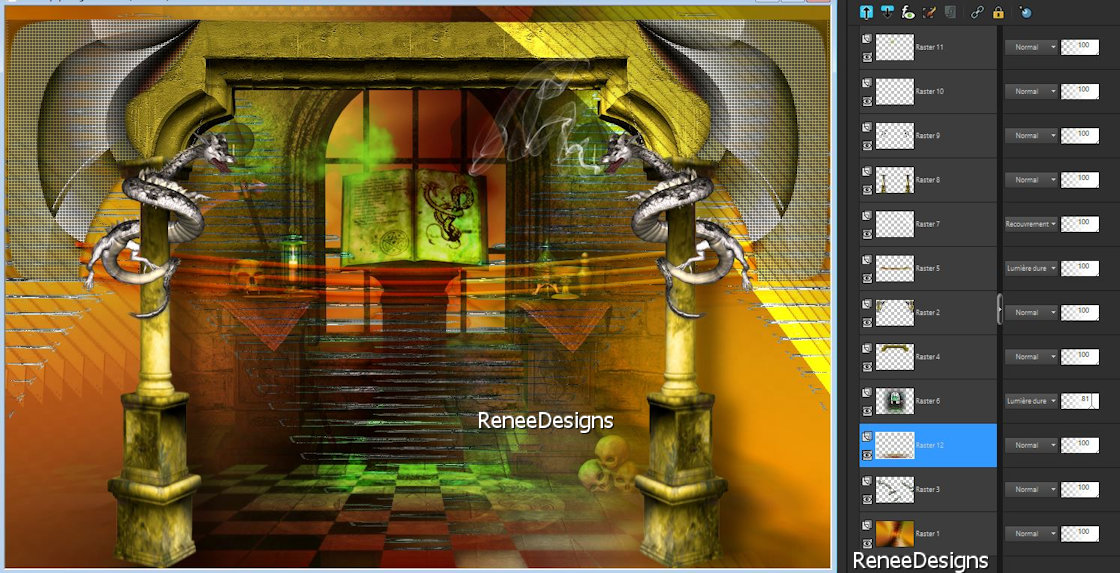
46. Layers-Properties-Change the Blend Mode to " Hard Light "
- Activate Raster 3 in the layer palette
47. Open the Tube ‘’ Renee-Tubes-SonateVampire-Image2’’ -Edit - Copy- Activate your work -Edit - Paste as a new layer
48. Layers-Properties-Change the Blend Mode to " Hard Light " Reduce the Opacity of this layer to 81%
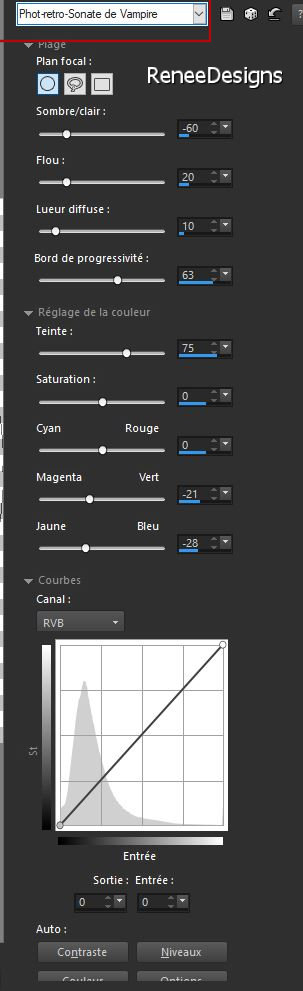
49. Effects – Photo Effects- Retrolab – select my file - ‘’ Preset_Retro_Phot-retro-Sonate
de Vampire’’
( if you choose another image play with the settings to have a color related to the colors of your image)
you find this effect here on your Psp
50. Selections –load/save selection –load selection from disc and select my selection:‘’ Sonate-de-Vampire5’’
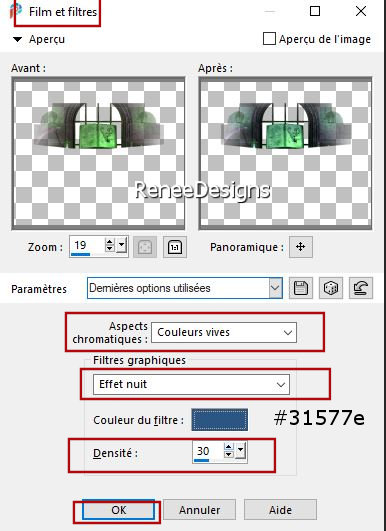
51. Effects– Photo Effects– Film and Filters-Film looks "Vivid" - Creative filters "Night effects"

- To replace the top of the layer-palette
52. Layers- New Raster Layer
53. Selections –load/save selection –load selection from disc and select my selection:‘’ Sonate-de-Vampire6’’
54. Color Palette-Set the Foreground color to color #ffffff=5
Activate Flood Fill Tool –
Fill the selection with the foreground color = 5
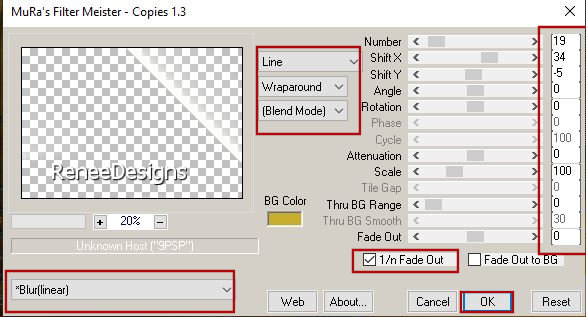
55. Effects – Plugins – Mura’s Meister – Copies use the settings below
56. Effects – Edge Effects – Enhance
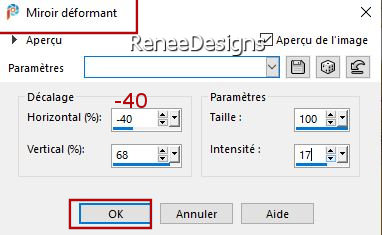
57. Effects – Distortion Effects – Warp use the settings below
58. Layers-Properties-Set the Blend Mode to " Overlay "
59. Open the Tube ‘’Renee-Tubes-SonateVampire-Image3’’ Edit - Copy- Activate your work -Edit - Paste as a new layer
60. Pick Tool: (K) on your keyboard -Enter these parameters on the toolbar
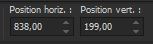 838
/ 199 838
/ 199
Press ( M ) to close the Pick Tool
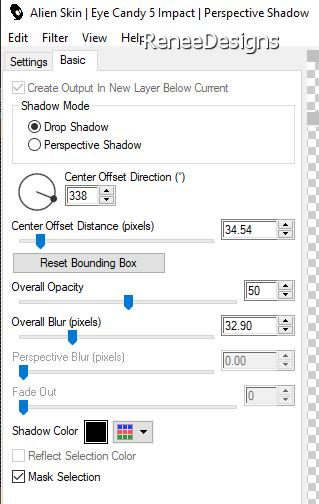
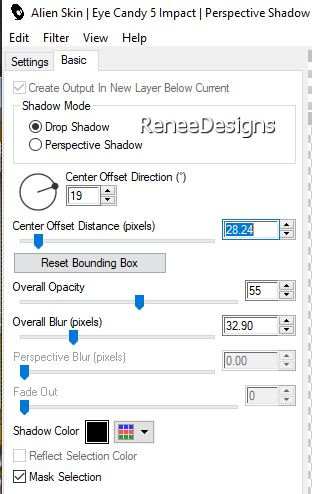
61. Effects - Plugins - Alien Skin EyeCandy 5 - Impact – Perspective
Shadow use the settings below
62. Layers- Duplicate
63.
Image - Mirror - Mirror Horizontal (Image - Mirror in older versions of PSP)
64. Layers- Merge- Merge Down
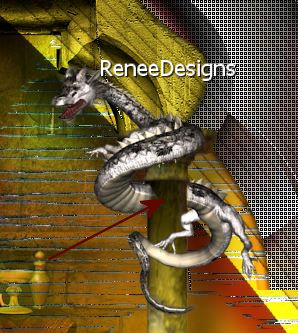
65. Open the Tube ‘’Renee-Tubes-SonateVampire-Image4.’’ -Edit - Copy- Activate your work -Edit - Paste as a new layer
- Place on the right on the column
66. Eraser Tool - Eraser here- see red arrow (to give effect winding around the column )
67. Layers- Duplicate
68. Image - Mirror - Mirror Horizontal (Image - Mirror in older versions of PSP)
69. Layers- Merge- Merge Down
70. Open the Tube ‘’Renee-65. Tubes-SonateVampire-Image5’’ -Edit - Copy- Activate your work -Edit - Paste as a new layer
-Place on the snout of the right dragon ( see finished image )
71. Open the Tube ‘’Renee-Tubes-SonateVampire-Image6’’ -Edit - Copy- Activate your work -Edit - Paste as a new layer
-Place on the snout of the left dragon
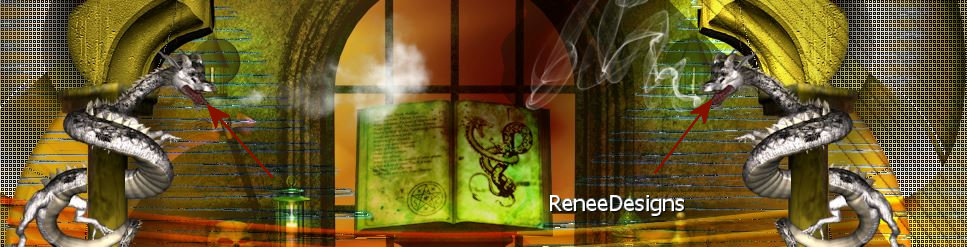
You have this as a result
72. Activate Color Change Tool
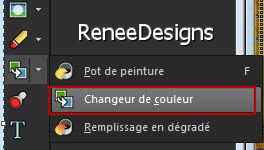
(identify a dominant color in your image ) For Renée
#87d823
-Change the color of the breath of the left dragon (so that it looks like it is the one who changes the color of the image) adapt it if you choose a different color image.
- Activate the bottom of the layer-palette = Raster 1
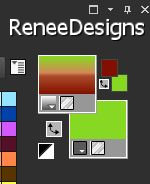
- Material Properties: Set your foreground color to color #831100 =7 – Set your background color to color #87d823=6
- Material of the foreground: Set your foreground color to gradient and choose gradient ‘’ASDwebs_Gradient_Spoiled’’ -Prepare a foreground linear gradient configured like this
73. Layers- New Raster Layer
74. Selections –load/save selection –load selection from disc and select my selection:‘’ Sonate-de-Vampire7’’
75. Activate Flood Fill Tool -
Fill the selection with the gradient
76. Layers- Arrange- Move Up
- Your work and layer palette look like this now-You should have this result
- To replace the top of the layer-palette
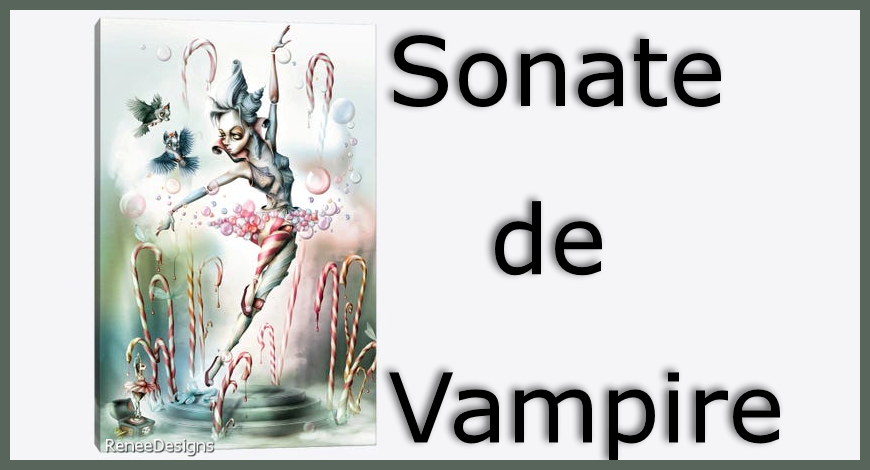
77. Activate the Tube
‘’ Renee-TUBES-Sonate-de-vampire-1.pspimage’ -Don't close we still need it
-Activate layer ‘’Vampire’’ –of the tube. Image resize to 80% and 85%.
- Edit - Paste as a new layer
- Move it in the right place ( see finished image)
On the sameTube
- On the same Tube-Activate layer " Branche 1"
of the Tube -Image resize to 80% - Edit - Paste as a new layer
Place the tube on the left of the character
- On the same Tube-Activate layer " Branche 2" of the Tube -
Edit - Paste as a new layer
Place the tube on the right of the character
- On the same Tube-Activate layer "Œil " of the Tube –
Image resize to 80% - Edit - Paste as a new layer
Place to your liking
78. On these images I applied Renée a shadow
- Effekte- Plugins - Alien Skin EyeCandy 5 - Impact – Perspective
Shadow use the settings below
79. Image - Add borders-Symmetric checked: 1 Pixel Color black
- Image - Add borders-Symmetric checked: 30 Pixels Color white
- Image - Add borders-Symmetric checked: 1 Pixel Color black
- Image - Add borders-Symmetric checked: 45 Pixels Color white
80. Selections –
Select All
81. Selections –
Modify - Contract of 35 Pixels
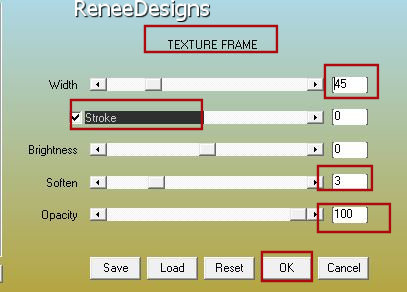
82. Effects – Plugins -AAA Frame -Texture Frame use the settings below
83. Effects- 3D Effects- Drop Shadow with these settings: 0/0/100/25 Color black
84. Image - Resize to 85%
- Paste the author's watermark on your work and your own watermark
Layers- Merge- Merge All (flatten)
Save as JPG
That's it - Thank you / I hope you enjoyed this lesson
Renée
This lesson was written by Renée 14/12/2021
Edited and Update
2021
*
Any resemblance with an existing lesson is a coincidence
*
Do not forget to thank the people who work with us and for us -I have appointed the tubeurs and translators
Thanks
*
|
 Translations