|
Let's start the lesson
Steampunk 63

- Material Properties: Set the foreground color to color number 1. Set the background color to color number 2
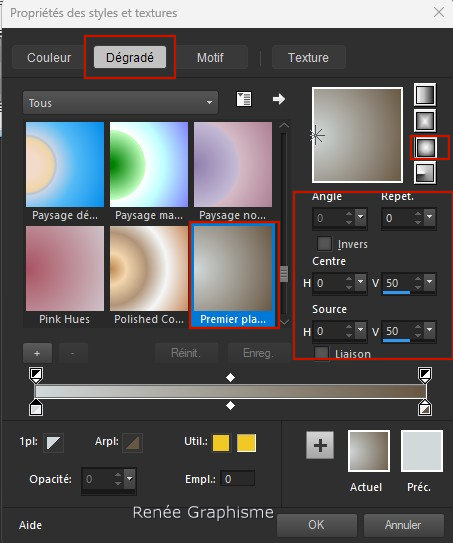
- Replace your foreground with a foreground/background sunburst gradient configured like this:
1. File-Open a new transparent image in this size :950 x 700 Pixels
2. Activate Flood Fill Tool
 -
Fill the layer with the gradient. -
Fill the layer with the gradient.
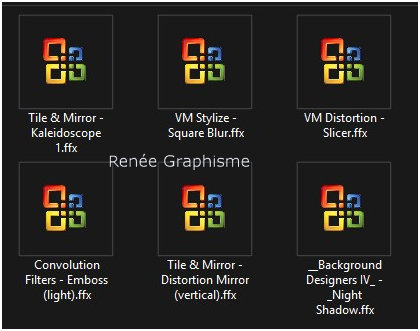
3. Effects – Plugins - Filters in Unlimited 2.0 - ICNET-Filters - Tile
& Mirror - Kaleidoscope 1 by default
4. Effects – Plugins - Filters in Unlimited 2.0 - VM Stylize - Square
Blur by default
5. Effects - Edge Effects - Enhance
- Again - Effects - Edge Effects - Enhance
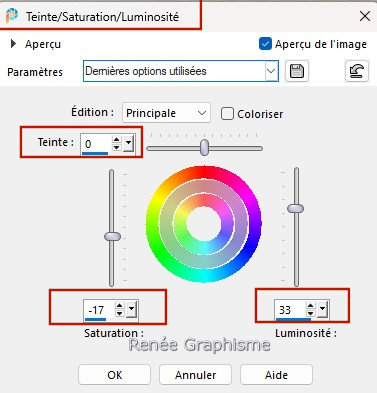
6. Adjust - Hue and Saturation - Hue/Saturation/Lightness use the settings below
7. Effects – Plugins - Filters in Unlimited 2. - VM Distortion –
Slicer by default
8. Effects – Plugins - Filters in Unlimited 2.0 - ICNET-Filters
-Convolution Filters - Emboss (light) at 255
9. Layers - New raster layer
- Material Properties: Set the foreground color to color number 3
10. Activate Flood Fill Tool
 -
Fill the layer with the foreground color (number 3) -
Fill the layer with the foreground color (number 3)
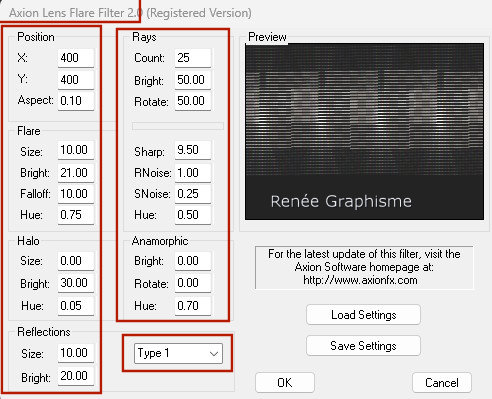
11. Effects – Plugins – Axion – Lens Flare use the settings below
12. Layers - Properties - Set the blend mode to "Hard Light" and reduce the opacity of this layer to 79%
13. Layers - Duplicate
14. Effects – Plugins - Filters in Unlimited 2.0 - ICNET-Filters -
Tile & Mirror - Distortion Mirror (vertical) at 48
- Activate Raster 2 in the layer palette
15. Adjust - One Step Photo Fix
- Activate the top of the layer palette
- Material Properties: Set the foreground color to color number 4 - Set the background color to color number 3
16. Layers - New raster layer
17. Selections –load/save selection –load selection from disc and select my selection: ‘’ STP-63-1’’
18. Activate Flood Fill Tool
 –
Flood fill the selection with color number 4 (Foreground) –
Flood fill the selection with color number 4 (Foreground)
SELECTIONS – INVERT
19. Activate Flood Fill Tool –
Opacity at 60
- Flood fill the selection with color number 3 (Background)

20. Layers - Duplicate
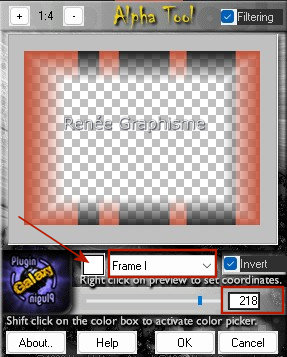
21. Effects – Plugins – Plugin Galaxy – Alpha Tool use the settings below /WHITE
22. Effects – Plugins - Alien Skin EyeCandy 5 – Impact – Perspective
Shadow- Preset : Drop Shadow Blury
- Activate the layer below (Raster 3)
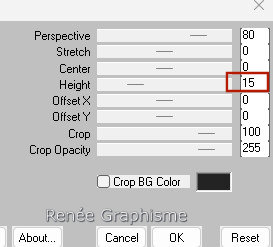
23. Effects – Plugins – Mura’s Meister – Perspective Tiling use the settings below
24. Effects - Edge Effects - Enhance
25. Effects – Plugins - Filters in Unlimited 2.0 - &<Background
Designers IV> - @Night Shadow use the settings below
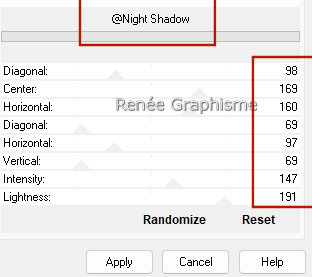
26. Effects – Plugins - Alien Skin EyeCandy 5 – Impact – Perspective
Shadow use the settings below
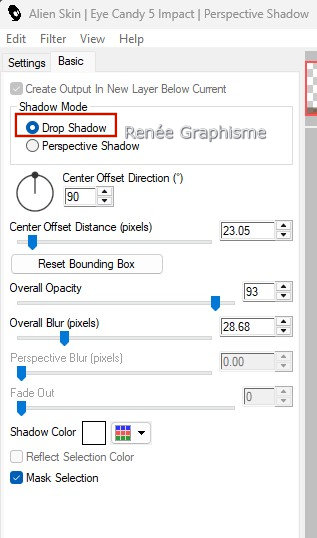
- Activate the top of the layer palette
- Material Properties: Set the foreground color to color number 1 - Set the background color to color number 3
27. Layers - New raster layer
28. Selections –load/save selection –load selection from disc and select my selection: ‘’ STP-63-2’’
29. Activate Flood Fill Tool –
Opacity 100%
- Flood fill the selection with color number 1 ( Foreground )
30. Selections – Modify – Contract 2 Pixels
- Replace your foreground color with a linear gradient configured like this:
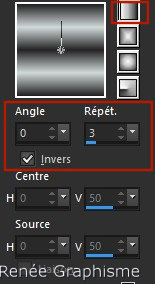
31. Activate Flood Fill Tool
 –
Flood fill the layer wit the gradient –
Flood fill the layer wit the gradient
32. Effects – Plugins - Alien Skin EyeCandy 5 – Impact – Glass
Preset : Clear, No Drop
Shadow

33. Layers - Duplicate
34. Layers - Arrange - Move Down
35. Effects – Plugins- Alien Skin EyeCandy 5 – Impact – Black Light
–Tab - Settings - User Settings and select my file - Preset : ‘’STP63 Light’’
36. Effects – Distortion Effects – Wind - Wind direction - From left - Wind strength 80
- Activate the top of the layer palette
37. Layers - New raster layer
38. Selections –load/save selection –load selection from disc and select my selection: ‘’ STP-63-3’’
39. Activate Flood Fill Tool –
Opacity 60%
- Flood fill the selection with color number 4

40. Effects – Distortion Effects - Ripple use the settings below
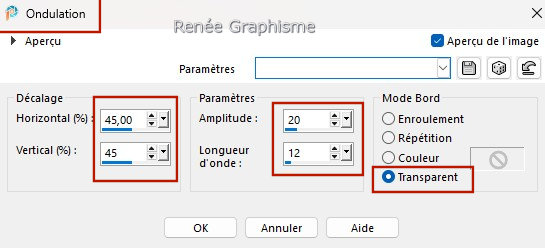
41. Selections –load/save selection –load selection from disc and select my selection: ‘’ STP-63-3’’
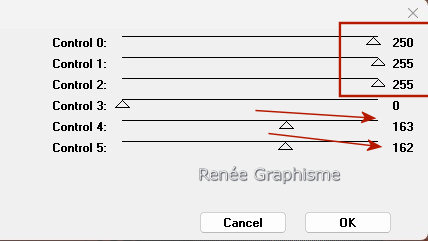
42. Effects – Plugins – L&K’s - Trouble with these settings
(Play with the measures in controls 4 and 5 according to your colors.)
43. Layers - New raster layer
44. Activate the tube ‘’Renee-TUBES-STP63- 1’’ - Edit - Copy- Activate your work -Edit - Paste as new layer

-Replace this tube slightly (To properly position the next tube = cloud)
45. Activate the tube ‘’nuage’’ - Edit - Copy- Activate your work -Edit - Paste as new layer
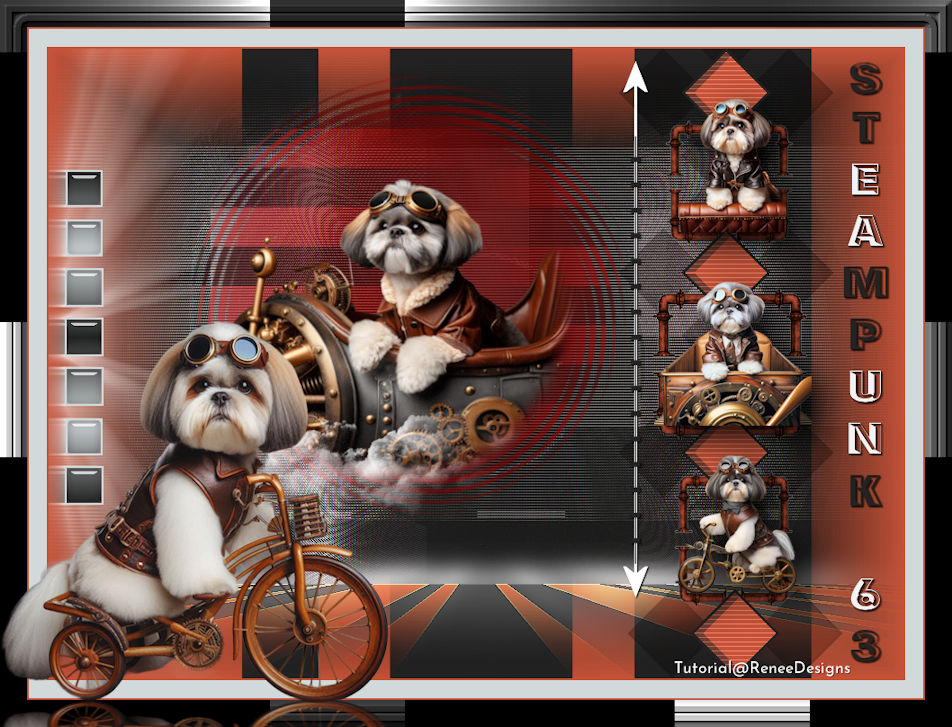
Put this tube in the right place ( see finished image )
46. Layers - New raster layer
47. Selections –load/save selection –load selection from disc and select my selection: ‘’ STP-63-4’’
48. Activate Flood Fill Tool –
Opacity 100%
– Flood fill the selection with the background color (color number 3)
49. Selectons – Modify –
Contract 3 pixels
50. Activate Flood Fill Tool
 -
Flood fill the selection with the foreground color (color number 4) -
Flood fill the selection with the foreground color (color number 4)
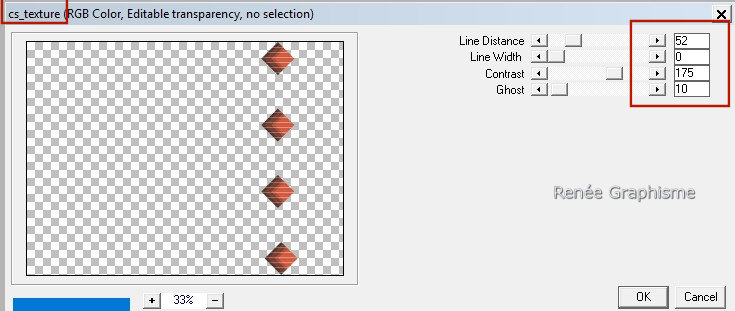
51. Effects – Plugins – Carolaine & Sensibility - C_S _texture use the settings below

52. Layers - Duplicate
53. Layers - Arrange - Move Down
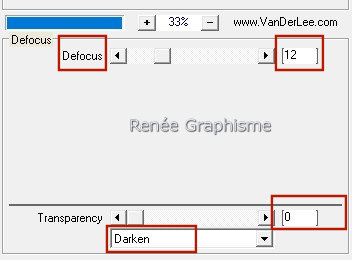
54. Effects – Plugins – VanDerLee – Unplugged X - Defocus with these settings
55. Layers Properties - Set the blend mode to "Multiply" and reduce the opacity of this layer to 73%
56. Activate the tube ‘’Renee-TUBES-STP63-2.’’ - Edit - Copy - Activate your work - Edit - Paste as new layer
57. Pick Tool: (K) on your keyboard - Enter these parameters on the toolbar
 671/
78 671/
78
- Press the (M) button to close the tool.
- Activate the top of the layer palette
58. Activate the tube ‘’Renee-TUBES-STP63-3.’’ - Edit - Copy- Activate your work -Edit - Paste as new layer
- Put the tube in the right place ( see finished image )
- Drop shadow of your own choice
59. Activate the tube ‘’Renee-TUBES-STP63-4.’’ - Edit - Copy- Activate your work -Edit - Paste as new layer
- Put the tube in the right place ( see finished image )
60. Image - Add Borders - Symmetric checked: 2 Pixels – Color number 4
- Image - Add Borders - Symmetric checked: 20 Pixels – Color number 1
- Image - Add Borders - Symmetric checked: 2 Pixels – Color number 4
61. Selections - Select All
62. Image - Add Borders - Symmetric checked: 30 Pixels – Color number 3
63. Selections - Invert
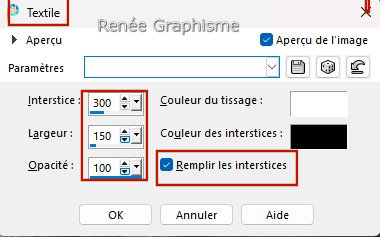
64. Effects – Texture Effects – Weave use the settings below (Black and white)

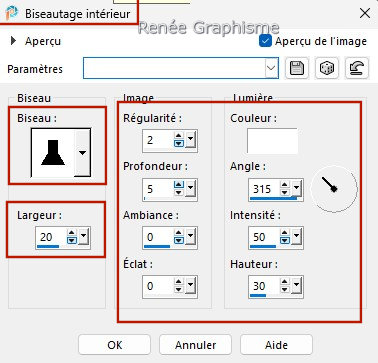
65. Effects – 3D Effects – Inner Bevel use the settings below


66. Activate the tube ‘’Renee-TUBES-STP63-5’’ - Edit - Copy -Activate your work - Edit - Paste as new layer
Place the tube at the bottom left
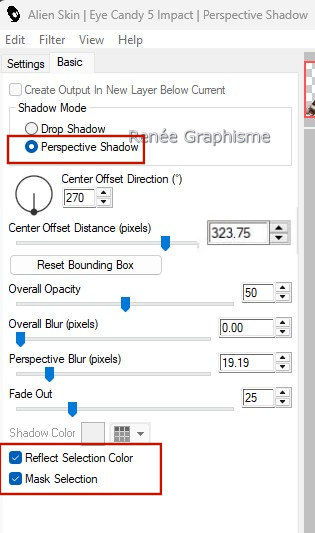
67. Effects – Plugins - Alien Skin EyeCandy 5 – Impact- Perspective
Shadow - Select Preset : Reflect in front.
Look carefully at the top and bottom first
and then the settings

68. Open the text and paste as a new layer on your work. Put the text in the right place ( see finished image )
Renée attached the font to write your own text
69. Add the author's watermark and your own watermark.
70. Layers - Merge - Merge All (flatten)
71. Image - Resize - 90% - Resize all layers checked
Save as JPG
******
I hope you enjoyed this lesson
Renée
This lesson was written by Renée 14/07/2025
Edited and Update
2025
***
Any resemblance with an existing lesson is a coincidence
* Do not forget to thank the people who work with us and for us .
I have appointed the tubeurs and translators
Thanks
*
|

 Translations




 671/
78