|
Let's begin
View - toolbars - Script checked !!!!!
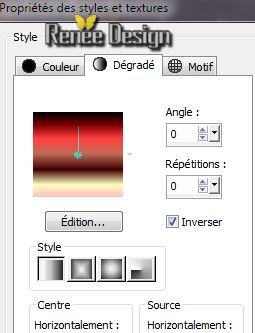
Material Properties: Foreground color to :
#e18f4d Background color to : #3e444f
1.
File - New - New Image 1125 x 665 pixels
2.
Material Properties: Change material from the foreground into a linear Foreground/background gradient with these settings 0/0 checked invert
3.
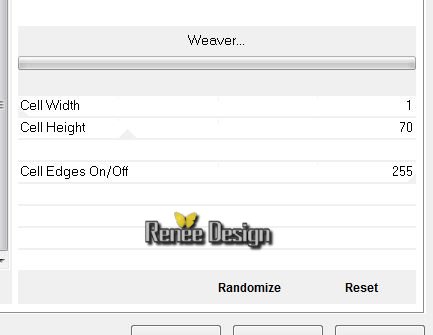
Effects - Plugins Unlimited - Toadies / Weaver
4.
Effects - Edge Effects- Enhance More
5.
Layers- Duplicate
6.
Effects - Plugins Simple - Blintz /repeat 1x
7.
Layers- Duplicate /Image Mirror /Lower the opacity down to 50 % /
Layers- Merge- Merge Down
8.
Layers- Duplicate
9.
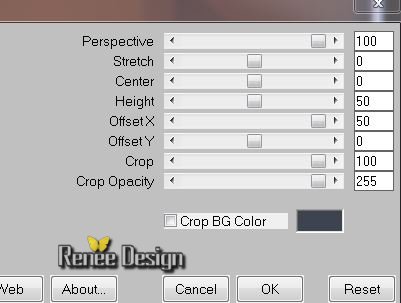
Effects -Plugins Mura's Meister -Perspective Tilling
10.
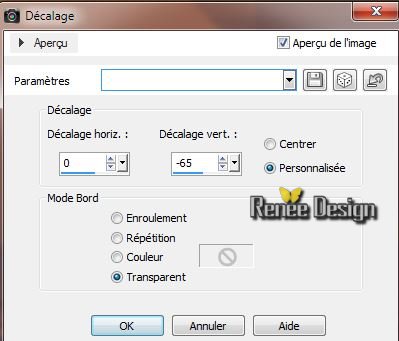
Effects - Image Effects- Offset
11.
Effects- User Defined Filter-Emboss 3 /
default
12.
Activate the layer underneath (Copie de Raster
1)
13.
Effects-Plugins Unlimited &<Bkg Designer sf10 II> /
Quilt02 162/124
14.
Effects-Plugins Unlimited &<Bkg Designer sf10 II/
Kaleidoscope8 150/220
15. Open the tube''
calguismisted17022014.pspimage'' / Edit/copy-Edit/paste as a new Layer (do not move, it is the right place) )/Image
Mirror
Layer Palette: Set the Blend mode to "Screen"
Aktivate the top of the Layers palette
16. Layers-New raster layer
17.
Selections - load/save selection- load selection from disk and select my file ''steampunk_10_1''
Material Properties: foreground to gradient and select gradient ''@ann_170810_GR-aleandra.tdsstudio'' with these settings
Flood Fill Tool: Fill the selection with the gradient
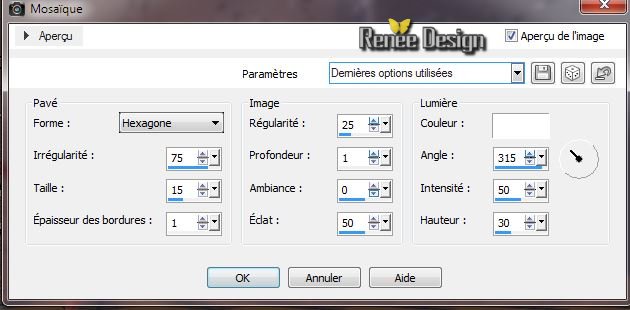
18. Effects
- Texture Effects- Tiles
-
Selections - Deselect all
19. Effects
-Plugins EyeCandy 5-Impact -perspective /Preset
''steampunk_10_perspective ''
20. Open the tube ''Tube_014'' / Edit/copy-Edit/paste as a new Layer and place.Layers- Arrange-Move Down
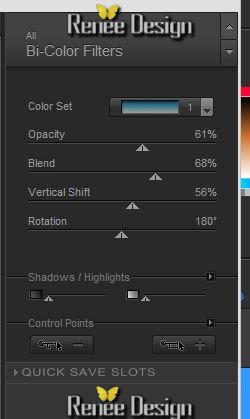
21.
Effects - Plugins Nick Color Effex Pro 3/ Bi color Filters - Color set
Cool Warm
This is the result
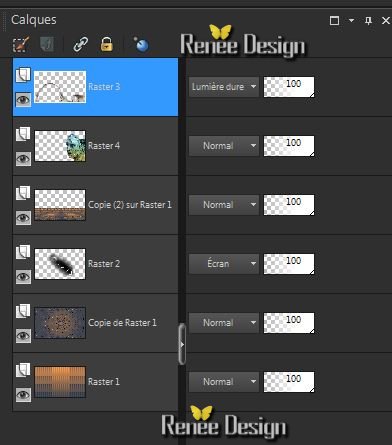
Aktivate the top of the Layers palette
22. Layers - New raster layer
23.
Selections - load/save selection- load selection from disk and select my file ''steampunk_10_2''
Flood Fill Tool: Fill the selection with the gradient (same settings)
24. Effects
- Texture Effects- Mosaic Glass
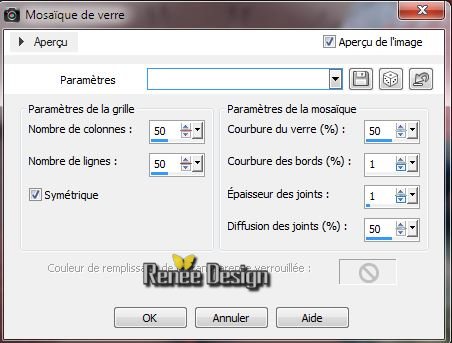
-
Selections - Deselect all
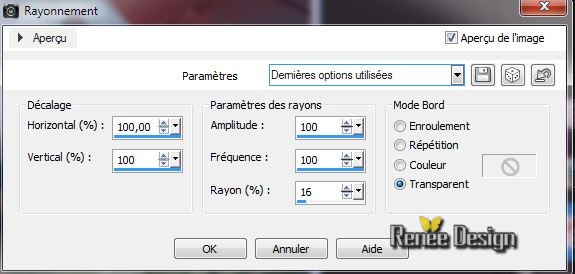
25. Effects
- Distortion Effects- Spiky Halo
26. Layers- Arrange- 2x Move Down (under Raster 4)
Aktivate the top of the Layers palette
27.
Layers - New raster layer
28.
Selections - load/save selection- load selection from disk and select my file
''steampunk_10_3''
29
.Change the gradient in a radial gradient configured like this
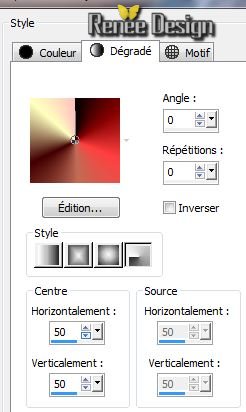
Flood Fill : Fill the selection with the gradient / Flood Fill Tool: lower the opacity to 25 % (
Click 2 or 3 times in the selection )

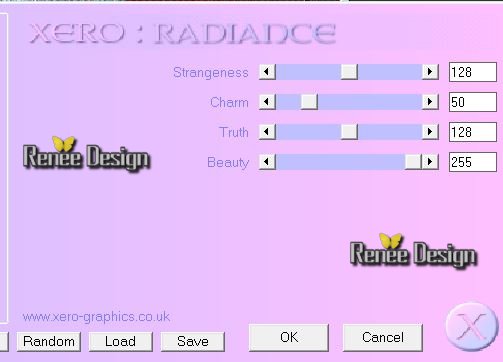
30.
Selections - Deselect all
31. Effects-Plugins Effet Xero - Radiance
32. Open the tube ''steampunk_10_printer_.pspimage''/Edit/copy -Edit/paste as a new Layer and place
33.Open the tube '' steampunk_10 _rouage.pspimage''/Edit/copy -Edit/paste as a new Layer and place
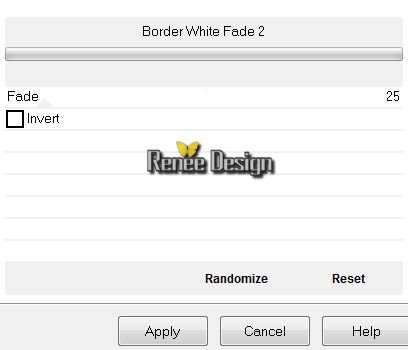
34.
Effects-Plugins ICNET Filters / Special Effect 2/ Border White Fade
2
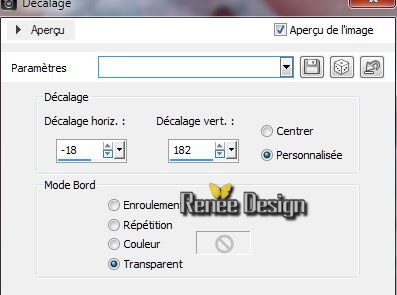
35. Open the tube ''steampunk_10_livre ""/ Edit/copy -Edit/paste as a new Layer
36. Effects
- Image Effects - Offset
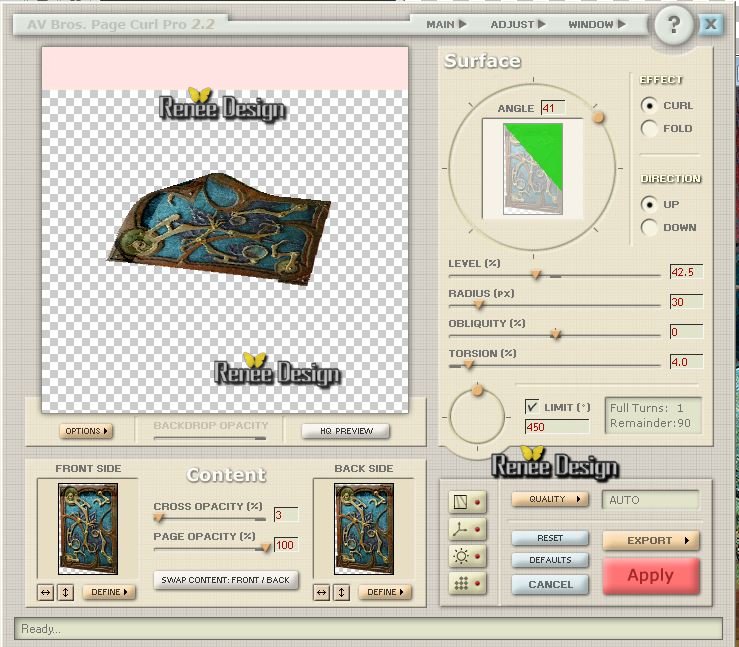
37. Effects
-Plugins AVBros - Page Curl 2.2
38. Layers- Duplicate
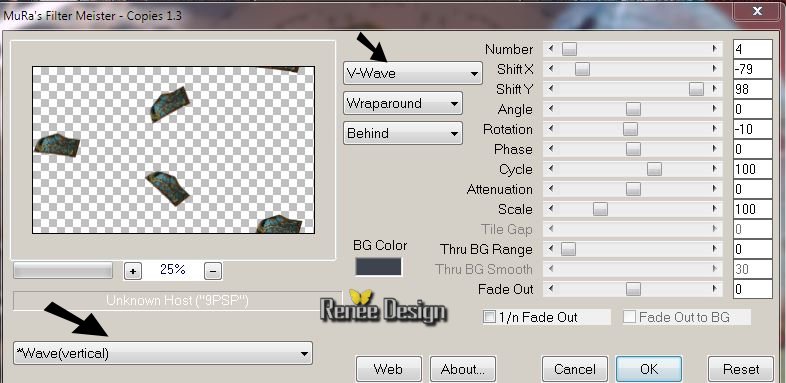
39.
Effects -Plugins Mura's Meister -Copies(
Attention-First, click Reset, and then the settings)
40. Layers- Arrange - Move Down
Layer Palette: Set the Blend mode to "Luminance "/Lower the opacity down to 77%
41. Effects
- Edge Effects- Enhance
Aktivate the top of the Layers palette
42.
Layers- New Raster layer
43.
Selections - load/save selection- load selection from disk and select my file ''steampunk_10_4'' /
Flood Fill Tool: lower the opacity to 45% .Flood Fill : fill the selection with the gradient with the same setting
-
Selections - Deselect all
44.
Effects -Plugins ICNET FILTERS - Tile & Mirror /Distorsion Mirror
(horizontal) 126
45. Effects
- Distortion Effects - Polar Coordinates
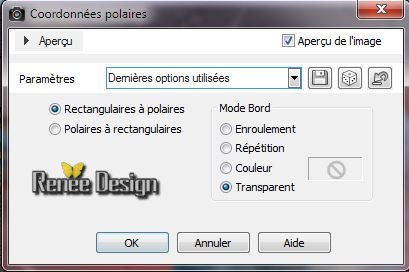
46.
Repeat: Effects
- Distortion Effects - Polar Coordinates
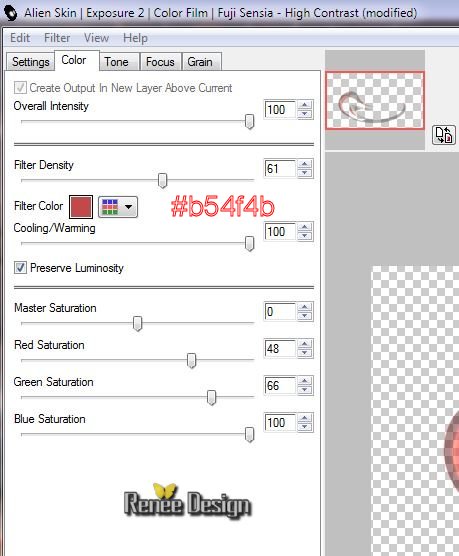
47. Effects
-Plugins Alien skin - Exposure 2/ Color Film
48. Layer Palette: Blend mode "Dodge"
49. Layers-Merge-Merge Visible
50. Activate toolbar Script, choose my file in the list ''steampunk_10 -Script'' / click the little blue arrow
51. With the magic wand -select the border of 15 pixels
52.
Change the gradient in a linear gradient configured like this
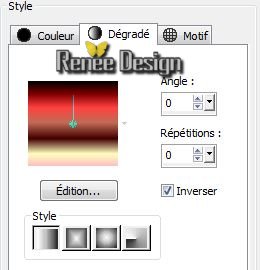
53.
Food Fill:fill the selection with the gradient/ Flood Fill Tool: opacity 100%
54. Effects-3D Effects-Drop Shadow default
55.
Selections - Deselect all
56. Open the tube text/ Edit/copy -Edit/paste as a new Layer and place. Or write your own text
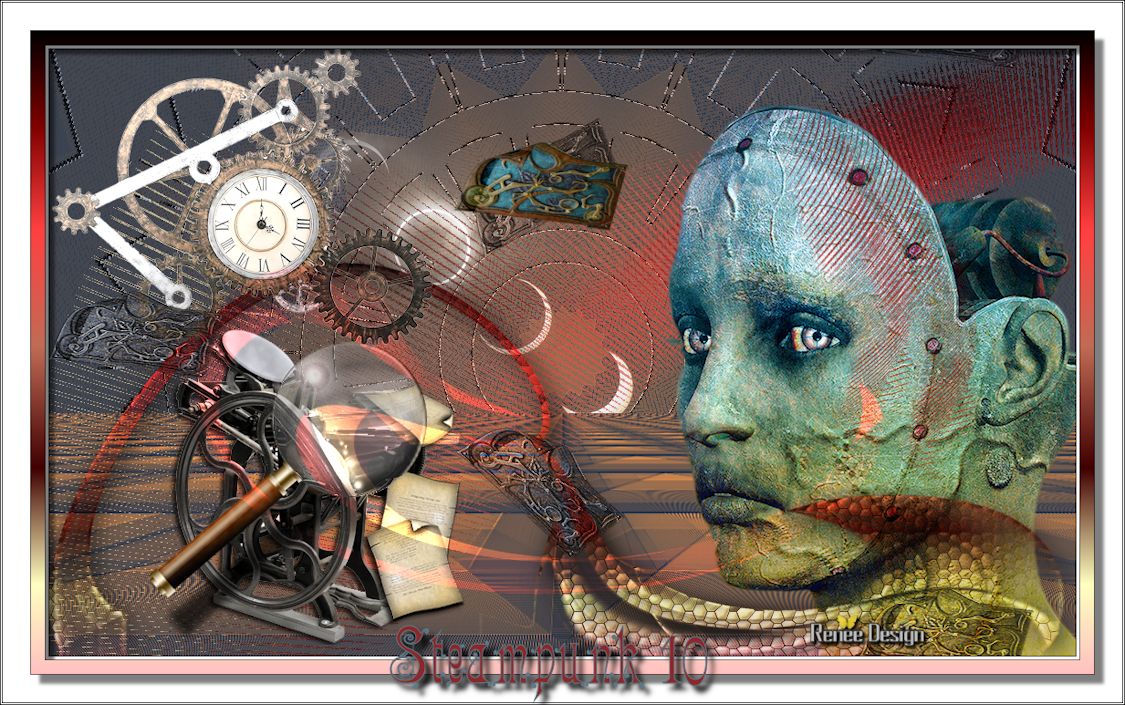
57. Image
Resize 1125 Pixels Width
I hope you enjoyed this lesson
Renée
This lesson was written by Renée the 18/02/2014
Created the
22/02/2014
*
Any resemblance with an existing lesson is merely a coincidence
*
Don't forget to thank the people who work for us and with us. I named the tubeurs - Testers and the translators.
Thanks Renée | 


 Translation