|
Let's start the lesson

-
Color Palette- Set your foreground color to #c8c6ba
- Set your background color to #826d48
1.
Open Image ‘’Fond_Steampunk_38’’- Window - Duplicate (or shift+D) - Close the original and proceed on the copy -Promote Background Layer = Raster 1
2.
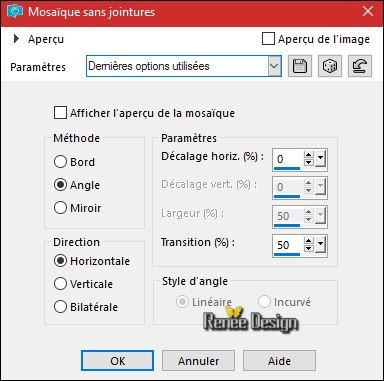
Effects- Image Effects- Seamless Tiling use settings below
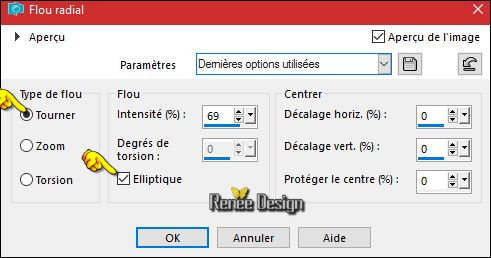
3.Adjust- Blur- Radial Blur use settings below
4.
Layers- Duplicate
5.
Adjust- Blur- Gaussian Blur: Radius 65
6.
Effects –Plugins- Unlimited - Filter Factory Gallery G – Panel
Stripes 189/133/48
7. Effects –
Edge- Effects- Enhance More
8.
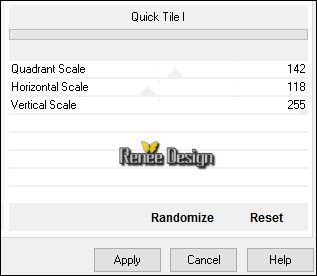
Effects –Plugins- Unlimited – Graphic plus - Quick Tile I
9. Open the tube ‘’DECOS_Steampunk_38’’
-
Do not close we need it later for the rest of the work (some are hidden layers to lighten the weight of the tube simply open)
- Activate the layer "Raster 1" of the tube DECOS
-Edit - Copy- Activate your work -Edit - Paste as a new layer
10.
Layers-Properties-Set the Blend Mode to "Hard Light "
11. Layers- Merge- Merge Down
12. Effects
–Plugins - Mura’s Meister – Perspective Tilling –using the default settings
13. Effects- Image Effects- Offset with these settings: H = 0 and V = - 450/
transparent
14. Effects
– 3D Effects- Drop Shadow with these settings: 0/0/85/55 black
15. Layers- Duplicate
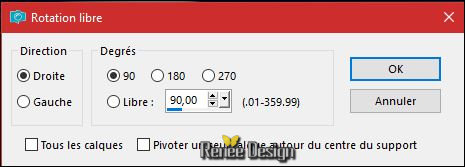
16. Image
– Free Rotate 90 Right
17. Effects- Image Effects- Offset with these settings:
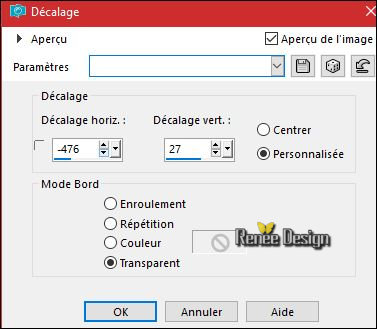
18. Layers- Duplicate
- Image -
Mirror (CTRL+B)
- Layers- Merge- Merge Down
19. Activate Selection Tool -Custom Selection (S) -Rectangle with these settings
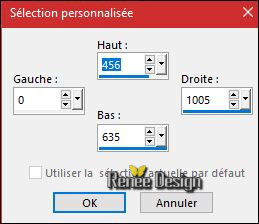
20.
Effects –Plugins- Unlimited – Graphic plus – Spot
Lite
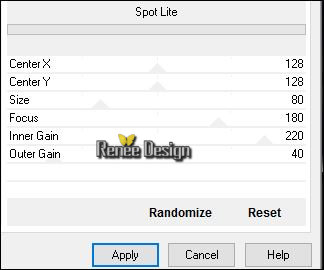
Selections- Deselect All
- Activate the bottom layer in the layer palette = Raster 1
21.
Layers- Duplicate
22.
Effects –Plugins- Unlimited - &<Background Designers
IV>-@Random Smelter
-
Rename this layer ‘’nuages’’
23. Images
- Mirror (CTRL+B)
24.
Layers-Properties-Set the Blend Mode to " Hard Light " -Set the layer opacity of this layer to 71%
- Stay on this layer ‘’nuages’’
25.
Effects –Plugins - Unlimited – ICNET Filters - Buttons & Frames- 3D
Glass Frame 1 50/128
26.
Effects –Plugins- Unlimited - Filter Factory Gallery B- Jame
Bondage
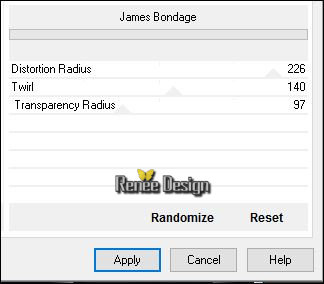
27. Layers-New Raster Layer
28.
Selections –load/save selection –load selection from disc and select my selection: ‘’
Steampunk_38_1’’
29. Open the tube ‘’ ldavi-SirCauw-part21.pspimage’’
- Edit - Copy -Activate your work, Edit - Paste into selection
Selections- Deselect All
30.
Layers-Properties-Set the Blend Mode to " Hard Light " -Set the layer opacity of this layer to 59%
Layer Palette: Stay on Raster 2
31. Open the tube ‘’ Renee_tube_steampunk_vue.pspimage’’
- Image
Resize 2 x to 75%
-Edit - Copy- Activate your work -Edit - Paste as a new layer
- With the Move tool/ move it in the right place
(see finished image)
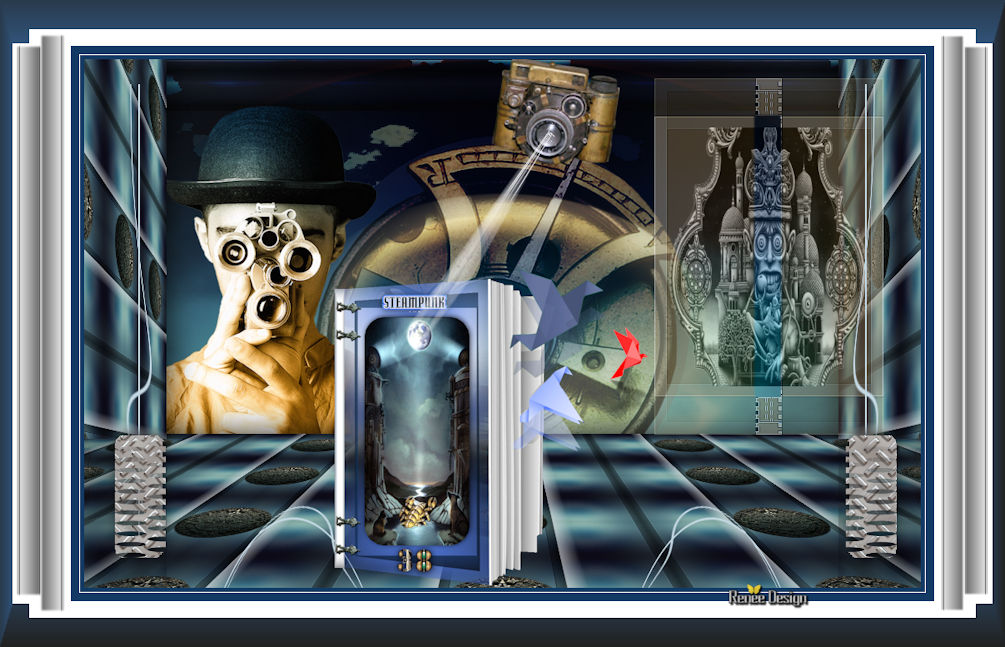
Your Layer palette look like this now-You should have this result
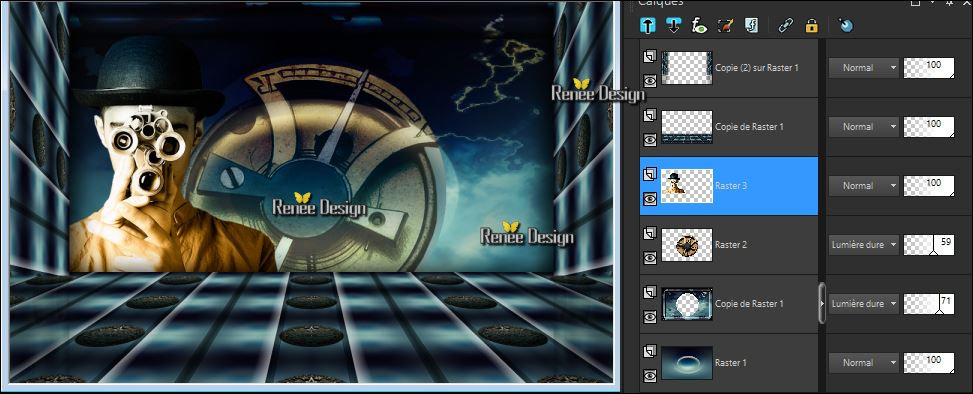
- To replace the top of the layers palette
32. Layers-New Raster Layer
33.
Activate Selection Tool -Custom Selection (S) -Rectangle with these settings
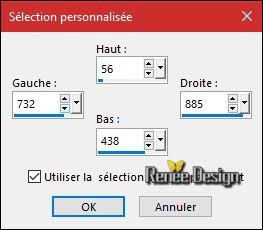
34. Flood Fill Tool – Opacity of the color at 100%
- Fill the selection with the foreground color
35.
Selection -Modify -Contract 15 pixels
- Fill the selection with the background color
Selections- Deselect All
36.
Effects –Plugins- Toadies What are you
31/19
37. Effects
– Image Effects- Offset with these settings H = 14 and V = 10
38. Effects
– Edge Effects- Enhance
39.
Activate Selection Tool -Custom Selection (S) -Rectangle with these settings
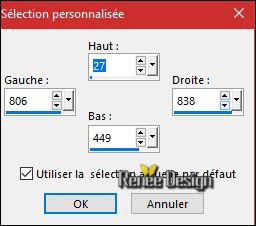
40. Effects
– Plugins – Visual Manipulation – Transmission
25/25/0
41. Effects
– Edge Effects- Enhance More
Selections- Deselect All
42. Layers- New Raster Layer
43.
Activate Selection Tool -Custom Selection (S) -Rectangle with these settings
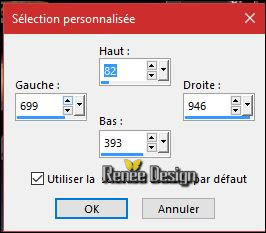
44. Back on tube ‘’DECOS _Steampunk_38’’
Activate the layer " raster 2" of the tube
- Edit - Copy -Activate your work, Edit - Paste into selection
45.
Layers-Properties-Set the Blend Mode to "Luminance-Legacy " -Set the layer opacity of this layer to 69%
- Activate the layer underneath =(Raster 4)
46.
Activate Selection Tool -Custom Selection (S) -Rectangle with these settings
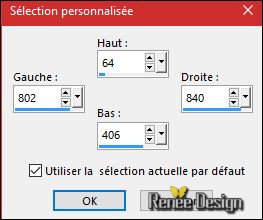
Hit the DELETE key of your keyboard 
Selections- Deselect All
-
To replace the top of the layers palette
- Color Palette- Set your foreground color to #c4d8e3 - Set your background color to #133a65
47. Layers- New Raster Layer
48.
Activate Selection Tool -Custom Selection (S) -Rectangle with these settings
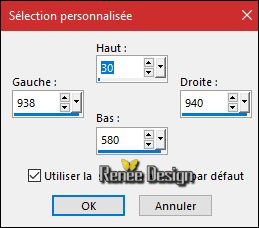
49. Activate Flood Fill Tool and fill the selection with the foreground color
Selections- Deselect All
50. Layers- Duplicate
51. Effects- Distortion Effects- Ripple use settings below
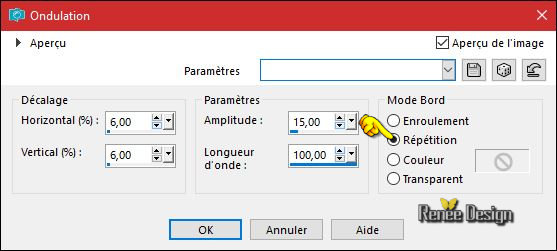
52. Layers-Merge- Merge Down
- Layers- Duplicate – Image Mirror(CTRL+B)
- Layers-Merge- Merge Down
53. Layers- Duplicate
54. Effects
–Distortion Effects - Polar Coordinates -Polair to Rectangular
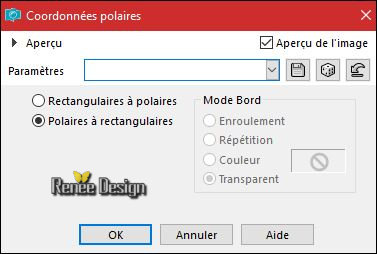
55. Open the tube ‘’ Steampunk_38_image1’’
-Edit - Copy- Activate your work -Edit - Paste as a new layer
-
With the Move Tool/ move it in the right place (see finished image)
- Layers- Merge Merge Visible
You may minimize your working area for a moment, but do not close, we will need it again soon
- Color-Palette: Set your Foregroundcolor to gradient and select
« chrismonster » Prepare a radial gradient configured like this.
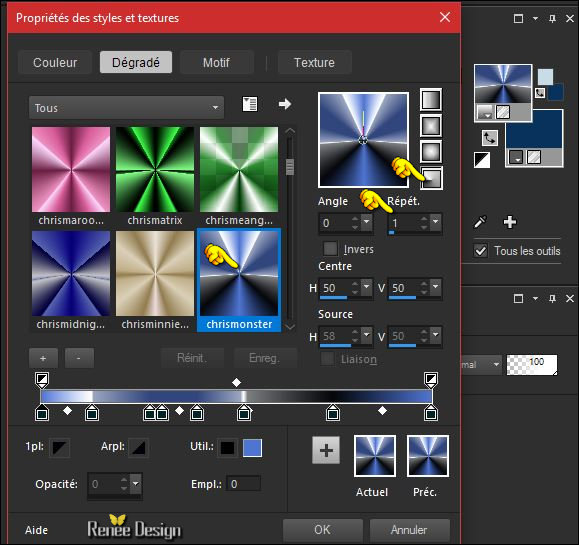
56. File: Open a new transparent image 900 x 900 pixels
57.
Selections –load/save selection –load selection from disc and select my selection: ‘’
Steampunk_38_2’’
58. Activate Flood Fill Tool and fill the selection with the gradient
59. Adjust- Blur Gaussian Blur: Radius 30
60.
Selections- Modify – Contract 30 pixels
61. Layers-New Raster Layer
62. Effects- 3 D Effects- Buttonize with these setting-BG-Color
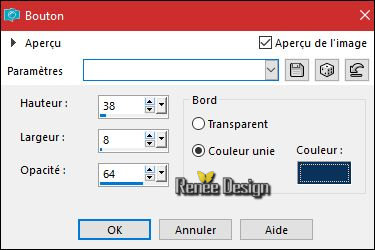
63. Layers-New Raster Layer
64.
Selections –load/save selection –load selection from disc and select my selection: ‘’
Steampunk_38_3’’
65. Back on tube DECOS
- Activate the layer "raster 3"of the tube
- Edit - Copy -Activate your work, Edit - Paste into selection
Selections- Deselect All
66.
Effects- 3 D Effects- Drop Shadow with these settings: -2/2/68/18 black
- Color Palette- Set your foreground color to #ffffff
67. Activate Pen Tool (V) – Line Style " Solid "- Width 7
- Draw a line on the right side of the book by using the foreground color #ffffff

-
Layers- Convert to Raster Layer
68. Back on tube DECOS
- Activate the layer "raster 4"of the tube
-Edit - Copy- Activate your work -Edit - Paste as a new layer
- Move on the right side of the book
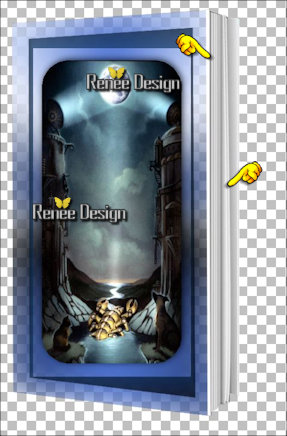
69. Activate '' Change to Target Brush" use settings below -FG-Color #ffffff

- Then click with the right mousebutton on to the tube as shown on the print screen below.
The cover - the white border and the pages
70.Back on tube DECOS
- Activate the layer " raster 5"of the tube
-Edit - Copy- Activate your work -Edit - Paste as a new layer
- Move to the right side ( see print screen)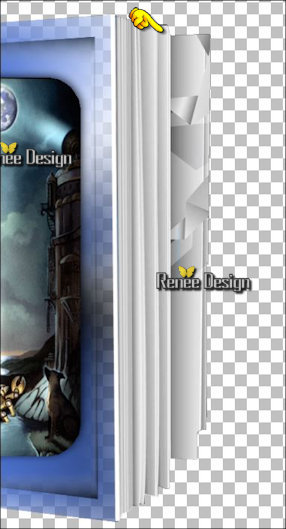
71. Activate Selection Tool (S) Rectangle -Draw a selection as shown in the example below-Fill the selection with the foreground color #ffffff

72. Effects
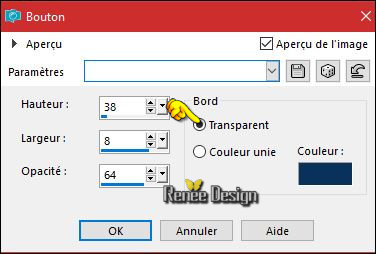
– 3D Effects – Buttonize with these settings
Selections- Deselect All
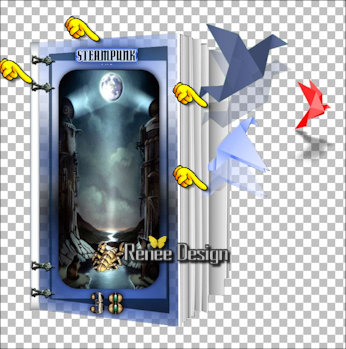
73. Back on tube DECOS
(raster 6,7,8,9, 10 of the tube)
- Place the various origami birds in place
- Fasteners- and Text
You should have this result
- Ist all in Place????
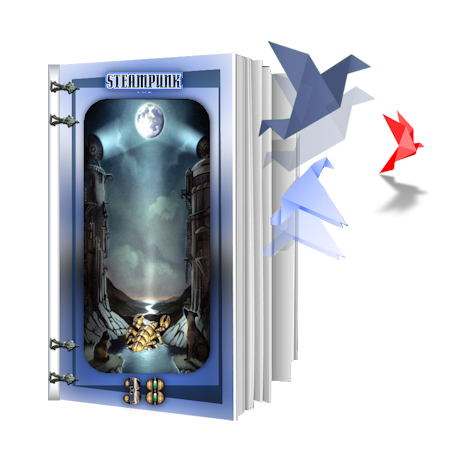
74. Layers- Merge Merge Visible
75. Image
Resize to 50 %- Edit-Copy !!
-
Activate your minimized image you created earlier on in the lesson (point 55)
- Activate your work-Edit - Paste as a new layer
- Activate Move Tool (M) move it the right place at the bottom of your image
( If you want to keep your book project saved in png )
76. Open the tube ‘’ Renesteampunk_38_photo’’
-Edit - Copy- Activate your work -Edit - Paste as a new layer
- Activate Move Tool (M) move it the right place at the top of your image
77. Image - Add borders-Symmetric checked: 5 pixels #133a65
78. Image - Add borders-Symmetric checked: 1 pixel #ffffff
79. Image - Add borders-Symmetric checked: 10 pixels #133a65
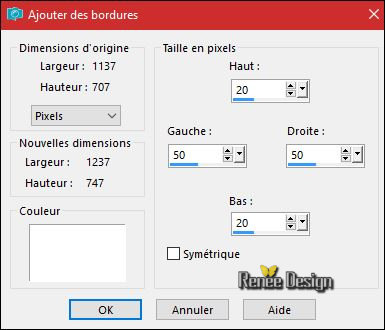
80. Image - Add borders-Symmetric NOT checked #ffffff
81.
Selections – Select All
82. Image - Add borders-Symmetric checked: 25 pixels#ffffff
83.
Selections -Invert
84. Effects
–3D Effects - Buttonize with these settings

85. Repeat: Effects –3D Effects - Buttonize with the same settings
86.
Selections –load/save selection –load selection from disc and select my selection: ‘’
Steampunk_38_4’’
87.
Effects -Plugins – DCspecial books 18/140
88.
Selections- Promote Selection to Layer
Selections- Deselect All
89. Layers- Duplicate
- Image
Mirror (CTRL+B)
90.Layers- Merge- Merge All (flatten)
91. Image
Resize to 1005 pixels width.
Save as JPG
I hope you enjoyed this lesson
Renée
This lesson was written by Renée 12/11/2016
Edited and Update
2016
*
Any resemblance with an existing lesson is a coincidence
* Do not forget to thank the people who work with us and for us I have appointed the tubeurs and translators
Thanks Renée *
*
| 
 Translations


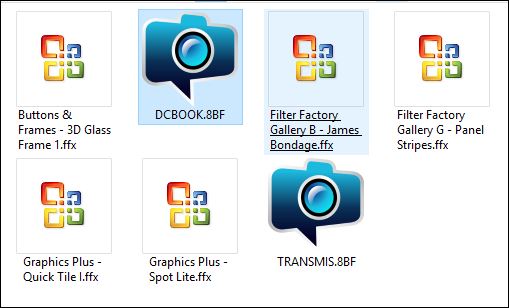

 If a plugin supplied appears with this icon it must necessarily be imported into Unlimited *


 All rights reserved