|
Let's start the lesson.
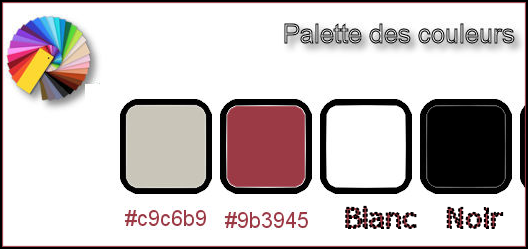
Used Colors
-
Preparation - Color Palette: Set your Foreground color to #c9c6b9
-Set your Background color to #9b3945
1.
Open the Image ’’Fond_Steampunk_41’’- Window - Duplicate (or shift+D) - Close the original and proceed on the copy -Promote Background Layer = Raster 1
2.
Effects -Plugins – Crescent moon – Cutglass
2/30/0
3.
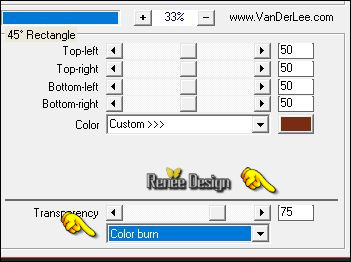
Effects –Plugins – Vanderlee Unplugged X/ 45°
Rectangle /color #792c14
4.
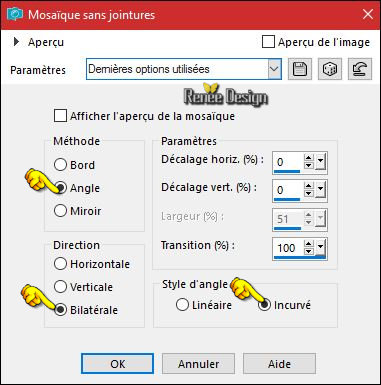
Effects- Image Effects- Seamless tiling use the settings below
5.
Open your tube ‘’
Steampunk_41_effets1.pspimage’’
-
Edit - Copy- Activate your work -Edit - Paste as a new layer.
6.
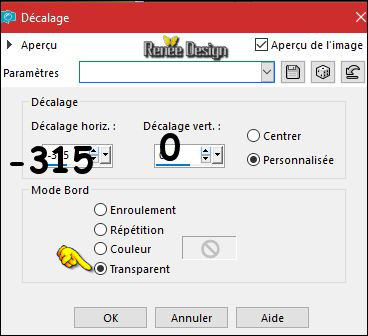
Effects- Image Effects- Offset with these settings:
7.
Layers-Properties-Set the Blend Mode to "Overlay "
8.
Layers- Duplicate
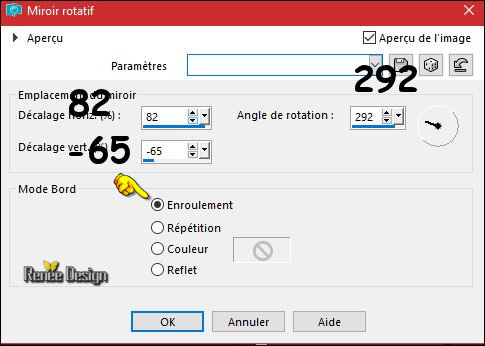
9.
Effects – Reflection Effects-
Rotating Mirror
10.
Layers- Duplicate
11.
Image – Flip (CTRL+I)
12.
Layers- Merge- Merge- Down
13.
Layers-Properties-Set the Blend Mode to "Hard Light "
-
Color Palette:Set your Foreground color to #ffffff
14.
Layers- New Raster Layer
15.
Selections –load/save selection –load selection from disc and select my selection: ‘’Steampunk_41_1’’
16.
Activate Flood Fill Tool  –and fill the selection with the the foreground color #ffffff (click 3 times ) –and fill the selection with the the foreground color #ffffff (click 3 times )
Selections- Deselect All
17. Effects- 3 D Effects- Drop Shadow with these settings: 8/8/100/10 black
18.
Effects – Plugins – Graphic plus – Cross
Shadow use the settings below
19.
Layers-Properties-Set the Blend Mode to " Hard Light " -Set the Opacity of this layer to
61%
20.
Open the tube ‘’Steampunk_41_roue’’
-
Edit - Copy- Activate your work -Edit - Paste as a new layer.
- Do not move, it is in the right place
21.
Selections All-Selections Float-Selections Defloat
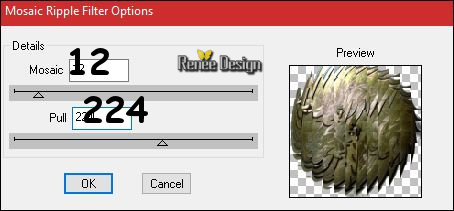
22.
Effects –Plugins – DSB Flux- Mosaic
Ripple
Selections- Deselect All
23.
Effects- Edge Effects- Enhance More
24.
Layers-Properties-Set the Blend Mode to "Soft Light "
25.
Image -Resize to 68 % All Layers not checked
26.
Open your tube ‘’
Renee_tube_steampunk_41_Porte’’
-
Edit - Copy- Activate your work -Edit - Paste as a new layer.
27.
Effects- Image Effects- Offset with these settings:H = - 241 and V =
0
28.
Layers- Arrange- Move Down
-
Activate the bottom of the layers palette = Raster 1
29.
Activate Selection Tool -Custom Selection (S) -Rectangle with these settings

30.
Selections- Promote Selection to Layer
Selections- Deselect All
31. Adjust- Blur- Gaussian Blur: Radius: 35
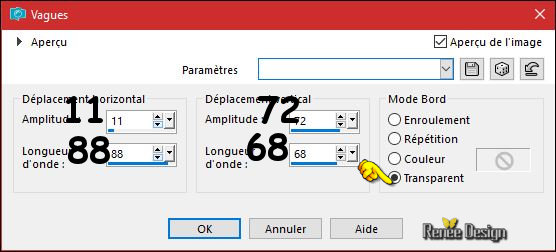
32.
Effects – Distortion Effects-Wave use the settings below
33.
Layers- Duplicate
34. Image Mirror (CTRL+B) -Image Flip (CTRL+I)
35.
Adjust-Sharpness-Sharpen More
36. Effects
– Plugins – Tramage – Two the lines /using the default settings 80/54/48/9
Your work and Layer Palette look like this now-You should have this result
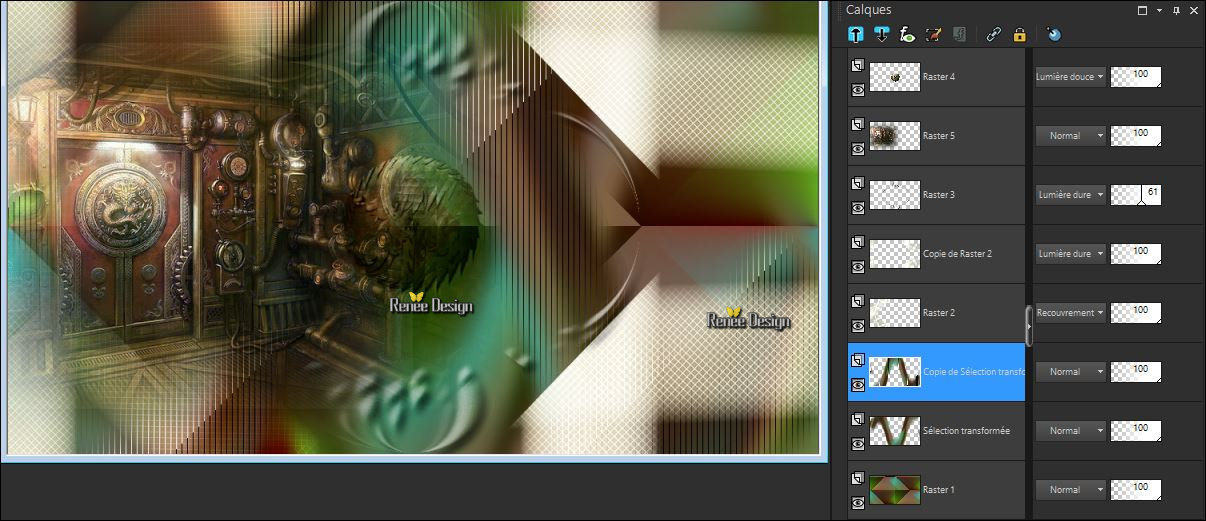
- To replace the top of the layer- palette
37. Layers- New Raster Layer
38.
Selections –load/save selection –load selection from disc and select my selection: ‘’Steampunk_41_2’’
39.
Activate Flood Fill Tool and fill the selection with the the foreground color #ffffff
Selections- Deselect All
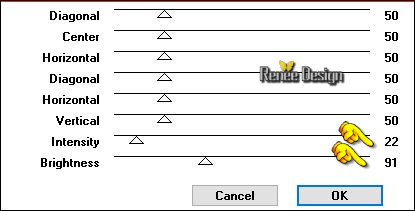
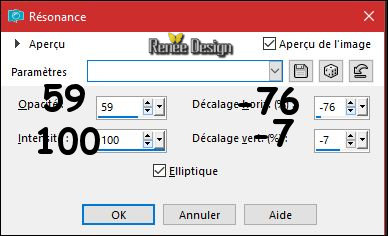
40.Effects- Reflection Effects -Feedback use the settings below
41.
Effects- Edge Effects- Enhance More
42.
Layers- Duplicate
43.
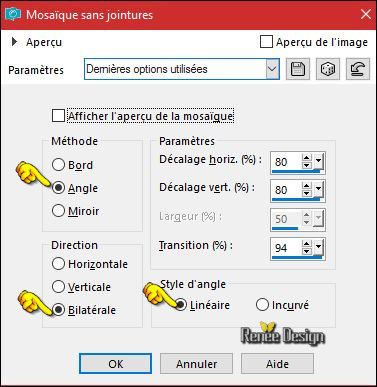
Effects- Image Effects- Seamless tiling use the settings below
44.
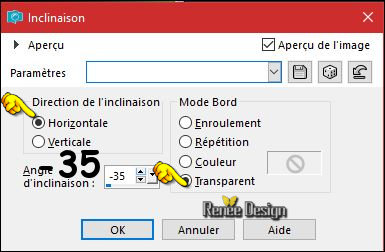
Effects- Geometric Effects-Skew use the settings below
45.
Selections –load/save selection –load selection from disc and select my selection: ‘’Steampunk_41_3’’
DELETE
Selections- Deselect All
46.
Open your tube ‘’
Renee_tube_Steampunk_loupe.pspimage’’
-
Image -Resize to 78%
-
Edit - Copy- Activate your work -Edit - Paste as a new layer.
-
Move Tool (M) move the tube on the bottom right side
Activate the bottom of the layer palette = raster 1
You can find this font and all special fonts on this site
https://fr.fonts.net/Velvenda-Cooler.font.download
47.
Activate Text Tool –Font ‘Velvenda cooler’’ / Line style ‘’Point’’=diamonds

48.
Write your Text
‘’STEAMPUNK_41 ‘’
49.
Click on ‘’Text Cutter ‘’
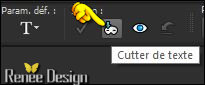
50.
The text will be placed as a new Image
51.
Effects –Plugins - Eyecandy 5 Impact – Glass-Settings/User settings and choose my-Preset
‘’clear''
52. Image
-Resize to 78%
- To replace the top of the layer palette
- Edit - Copy- Activate your work -Edit - Paste as a new layer.
- Move to your own taste
53.Effects- 3 D Effects- Drop Shadow with these settings: 3/3/52/12 black
54.Image - Add borders-Symmetric checked 1 Pixel black
55.Image - Add borders-Symmetric checked 65 Pixels #ffffff
56.Open your tube ‘’Steampunk_41_cadre ‘’
- Edit - Copy- Activate your work -Edit - Paste as a new layer. Do not move !!
57. Image - Add borders-Symmetric checked 1 Pixel black
58.Image - Add borders-Symmetric checked 10 Pixels #ffffff
59. Image -
Redimensionner a 1005 Pixels width.
Save as JPG
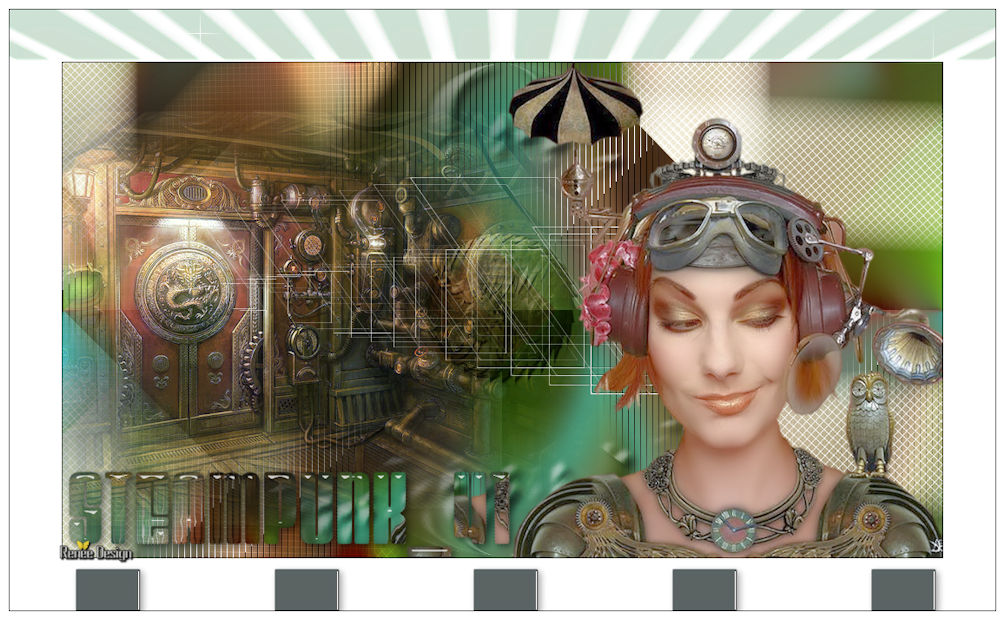
I hope you enjoyed this lesson
Renée
This lesson was written by Renée 25/05/2017
Edited and Update
2017
*
Any resemblance with an existing lesson is a coincidence
* Do not forget to thank the people who work with us and for us I have appointed the tubeurs and translators
Thanks Renée
*
| 
 Translations


 If a plugin supplied appears with this icon it must necessarily be imported into Unlimited *

 All rights reserved