|
Let's start the lesson.

-
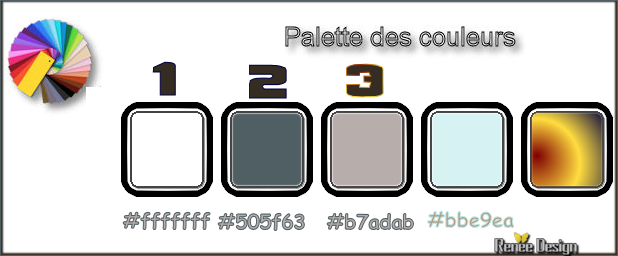
Preparation- Color Palette: Set your foreground color to #ffffff
/Set your background color to #505f63
1.
Open the Image ‘’Fond_steampunk_43- Window - Duplicate (or shift+D) - Close the original and proceed on the copy -Promote Background Layer =Raster 1
2.
Layers- Duplicate
3.
Effects – Plugins - or in Unlimited – VM Extravaganza –
Transmission 126/0/40
4.
Effects –Plugins- Unlimited - &<Background Designers IV> -
@Smoke 128/128/217
5.
Effects –Plugins - Unlimited - &<Bkg Kaleidoscope> - Flip
SidesRsf
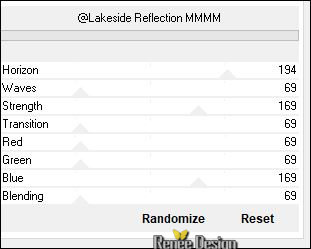
6. Effects –Plugins - Unlimited - &<Background Designers
IV> -@Lakeside Reflection MMMM

7.
Layers-Properties-Set the Blend Mode to" Screen "
8.
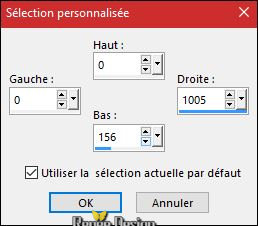
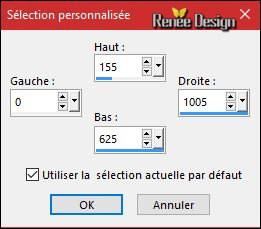
Activate Selection Tool -Custom Selection (S) -Rectangle with these settings 

9.
Selections- Promote Selections to Layer
10. Effects –Plugins- Unlimited - Alf's Power Grads -Abs Linear Grads..using the default settings
Selections- Deselect All
11.
Layers-Properties-Set the Blend Mode to" Overlay "
- In the Layer-Palette: activate the layer underneath =(Copy of Raster 1)
12.
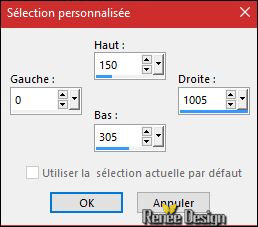
Activate Selection Tool -Custom Selection (S) -Rectangle with these settings

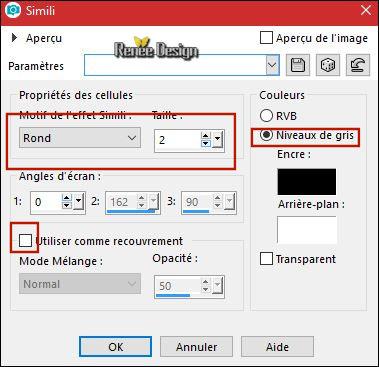
13. Effects
– Artistic Effects – Halftone use the settings below

14. Effects –3D Effects- Drop Shadow using the default settings
- Repeat: Effects –3D Effects-Drop Shadow negative H - 10 and V
-10
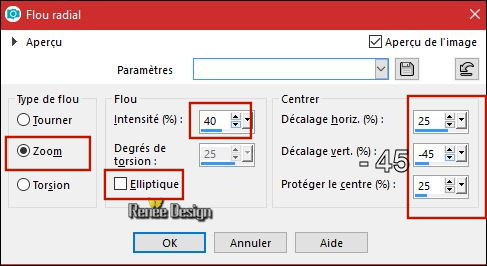
Selections- Deselect All
- Activate the bottom of the layers palette = Raster 1
15.
Activate Selection Tool -Custom Selection (S) -Rectangle with these settings

16.
Effects –Plugins – EyeCandy 5 Impact – Brushed
Metal-tab settings /User settings and choose my /Preset ‘’ STpunk_43 _BMetal.f1s’’
17. Effects-Edge Effects- Enhance More
Selections- Deselect All
- To replace the top of the layers palette
18. Layers- New Raster Layer
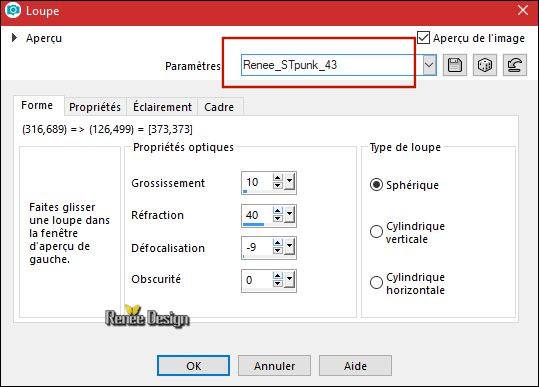
19. Effects- Artistic Effects- Magnifying Lens and select my preset (put into your preset folder of psp )
‘’Renee_STpunk_43.PspScript’’

20. Effects- Image Effects- Offset with these settings H = 283 and V = 55
21.
Selections- Select All
-
Selections Float
-
Selections- Defloat
22.
Selections – Modify – Contract with 10 Pixels
23. Layers- New Raster Layer
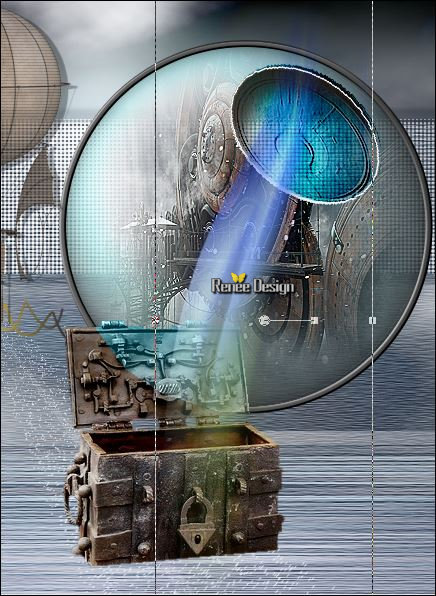
24. Open the tube ‘’Renee_TUBES_Stpunk_43_Image 1’’
- Edit-Copy
- Edit Paste into Selection
25. Effects- Edge Effects- Enhance
26.
Selections –load/save selection –load selection from disc and select my selection: ‘’ Steampunk_43_1
(this selection will cancel the previous one
)
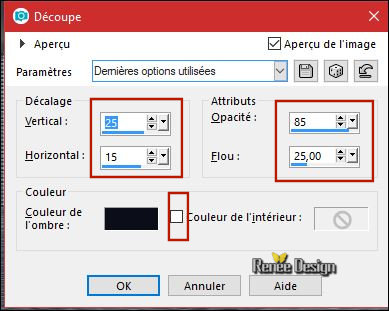
27. Effects
–3D Effects – Cutout use the settings below

28.
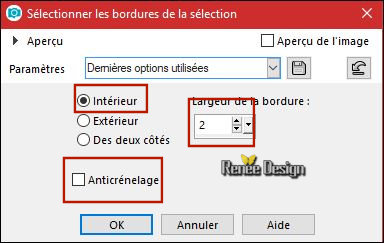
Selections – Modify - Select Selection Border use the settings below

29. Activate the Flood Fill Tool and fill the selection with the foreground color #ffffff
Selections- Deselect All
30. Open the tube ‘’ Renee_TUBES_Stpunk_43_Image 2.pspimage’’
- Edit - Copy- Activate your work -Edit - Paste as a new layer
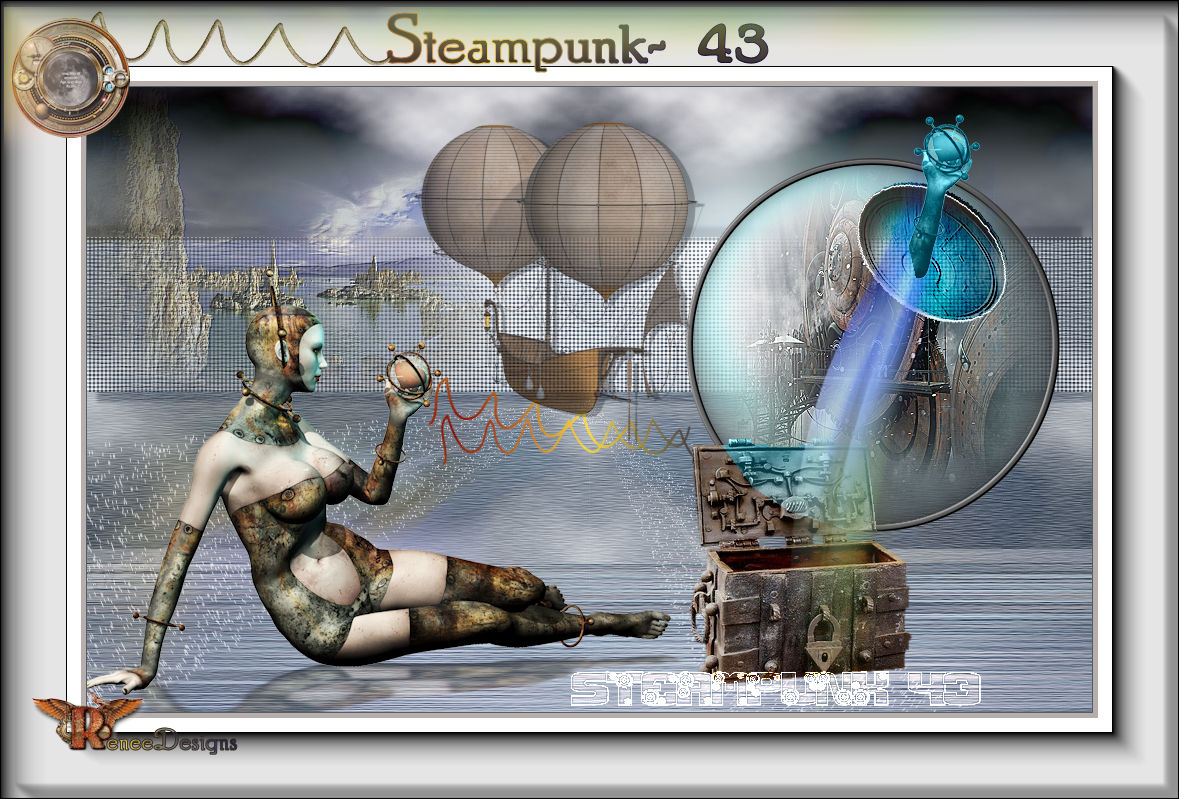
(Move Tool (M) move it the right place as shown in the example below )
31.
Layers-Properties-Set the Blend Mode to" Burn "
32. Layers- Arrange-Move Down
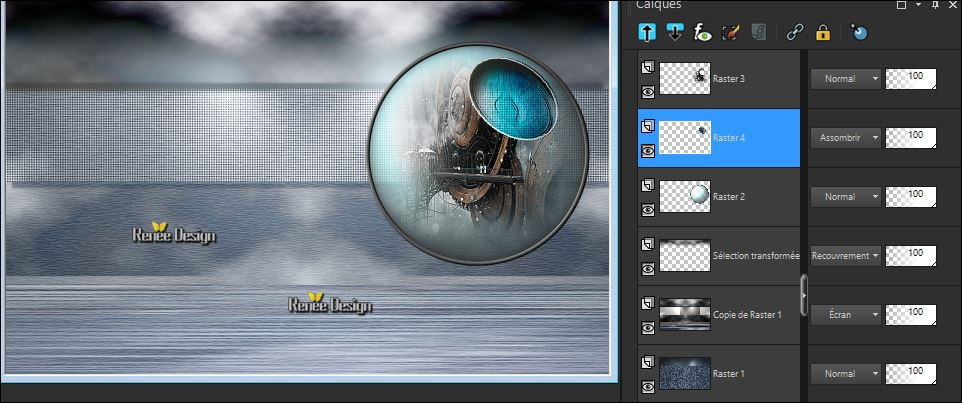
- Your work and Layer Palette look like this now-You should have this result

- To replace the top of the layers palette
33. Open the tube ‘’ Renee_TUBES_Stpunk_43_Image 3.pspimage
- Edit - Copy- Activate your work -Edit - Paste as a new layer
- Move tool / place your tube on the bottom left side of your image
34. Set the Opacity of this layer to 73%
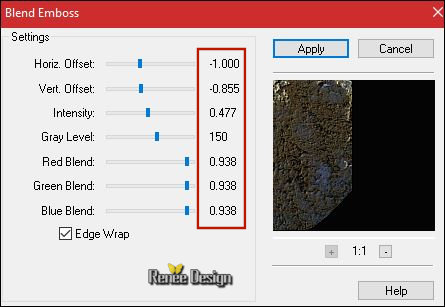
35. Effects
–Plugins – FM Tile Tools – Blend Emboss

36. Layers- Duplicate
37. Image - Mirror - Mirror vertical ( Image - Flip in older versions of PSP)
38. Adjust- Blur- Radial Blur use the settings below

39. Effects
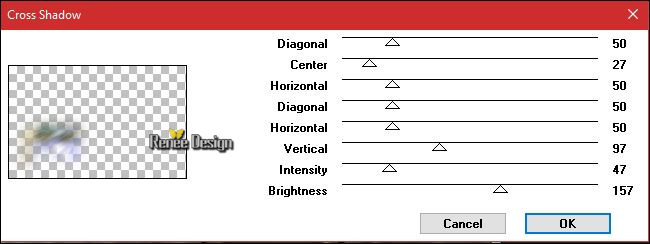
–Plugins – Graphic Plus – Cross Shadow use the settings below

- Preparation - Color Palette:
- Set your foreground color to #505f63
- Set your background color to #b7adab
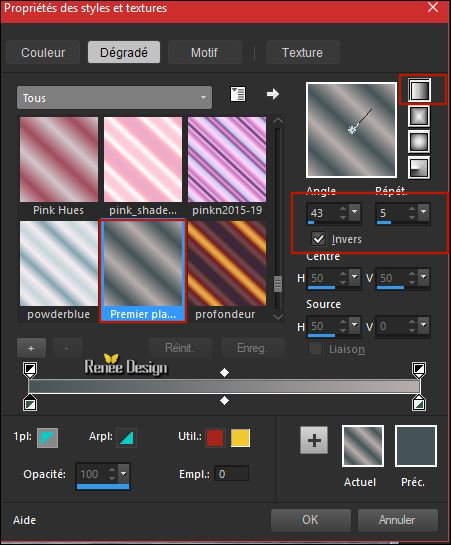
-Properties Foreground; Set your Foregroundcolor to foreground-background linear gradient configured like this

40. Layers- New Raster Layer
41.
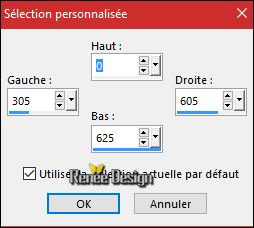
Activate Selection Tool -Custom Selection (S) -Rectangle with these settings

42. Activate the Flood Fill Tool  /Change the opacity of the color to 60% /Change the opacity of the color to 60%
- Fill the selection with the gradient
43.
Selections - Modify - Contract with 5 pixels
DELETE

Selections- Deselect All
44. Effects –Plugins- Unlimited – Toadies -Blast
'em!... 20/211
45. Effects
- Edge Effects- Enhance More
46. Effects
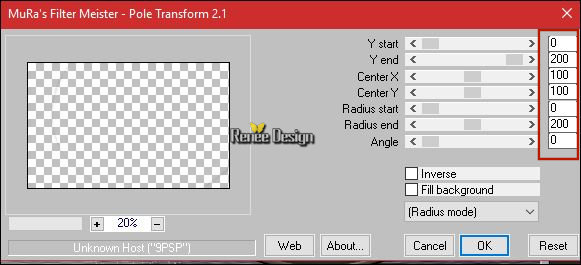
– Plugins – Mura’s Filter Meister – Pole
Transform

47.
Layers-Properties-Set the Blend Mode to" Screen "
48. Layers- New Raster Layer
49.
Selections –load/save selection –load selection from disc and select my selection: ‘’ Steampunk_43_2’’
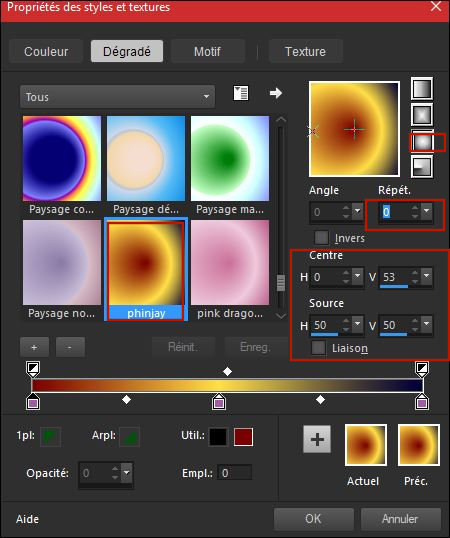
- Color Palette: Set your Foregroundcolor to gradient and select ‘’phinjay’’
/Prepare a sunburst gradient configured like this

50. Activate the Flood Fill Tool  / Change the opacity of the color to 100% - and fill the selection with the gradient / Change the opacity of the color to 100% - and fill the selection with the gradient
Selections- Deselect All
51. Open the tube ‘’ ‘’ Renee_TUBES_Stpunk_43_Image 5.pspimage’’
- Edit - Copy- Activate your work -Edit - Paste as a new layer
- Activate Move Tool (M) move it the right place at the top of your image
52. Effects
– 3D Effects – Drop Shadow with these settings 3/7/38/1 black
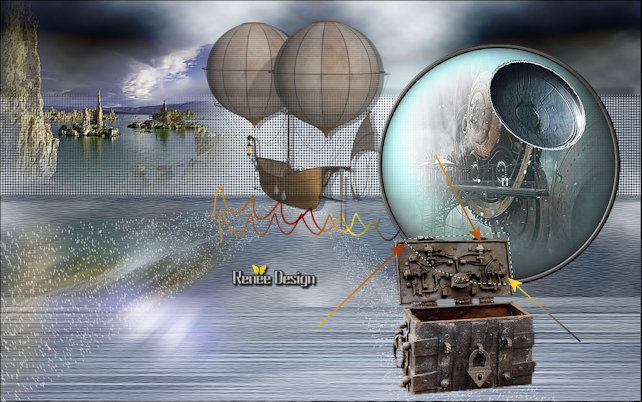
53. Open the tube ‘’ Renee_TUBES_Stpunk_43_Image 4.pspimage’’
- Edit - Copy- Activate your work -Edit - Paste as a new layer
- Move Tool / place your tube to the bottom right side of your image
54. Activate the Freehand Selection Tool "Lasso" Point to Point with these settings

- Draw like this / take the part covered by the circle(
reduce the opacity of the layer to follow the shape, but after this adjustment, restore the layer opacity)

55. Effects
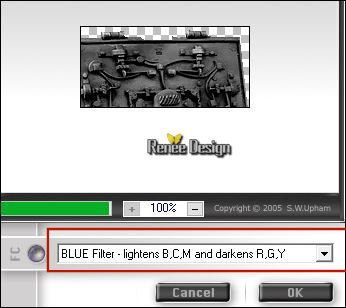
- Plugins – Fotomatic- BW-Plus

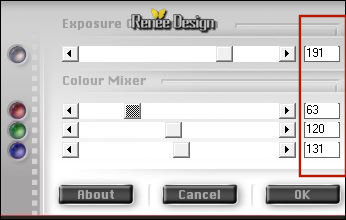
56. Effets
- Modules Externes – Fotomatic- Sky grad use the settings below

Selections- Deselect All
57. Open the tube ‘’ Renee_TUBES_Stpunk_43_Image 6.pspimage’’
- Edit - Copy- Activate your work -Edit - Paste as a new layer
- Move Tool (M) move it the right place as shown in the example below

58. Open the tube ‘’ Renee_TUBESteampunk_43.pspimage’’
- Edit - Copy- Activate your work -Edit - Paste as a new layer
- Move Tool /Move to the bottom left side of your image
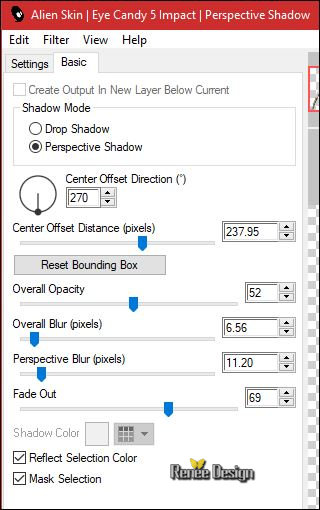
59. Effects
– Plugins – EyeCandy 5 Impact – Perspective
Shadow use the settings below

60 .
Activate the Freehand Selection Tool "Lasso" with the same settings
-
Select with the lasso the left arm of the woman tube( see finished image )
61. Edit - Copy- Activate your work -Edit - Paste as a new layer (on the sphere)
Selections- Deselect All
- Move the tube in the right place (on the sphere)
62. Repeat: Effects- Plugins - Fotomatic - BW-Plus and Sky grad (as point
55 and 56)
 
63. Text Tool -Font ‘’GCRANK.TTF’’ - (Included into the zipfile) and Write " Steampunk 43"
- Move Tool /Move to the bottom right side of your image
64.
Layers-Properties-Set the Blend Mode to" Dodge "
65. Image - Add borders-Symmetric checked 1 Pixel color 2
66. Image - Add borders-Symmetric checked 5 Pixels color 3
67. Image - Add borders-Symmetric checked 35 Pixels color 1
68. Image - Add borders-Symmetric checked 1 Pixel color 3
69. Image - Add borders-Symmetric checked 45 Pixels color 1
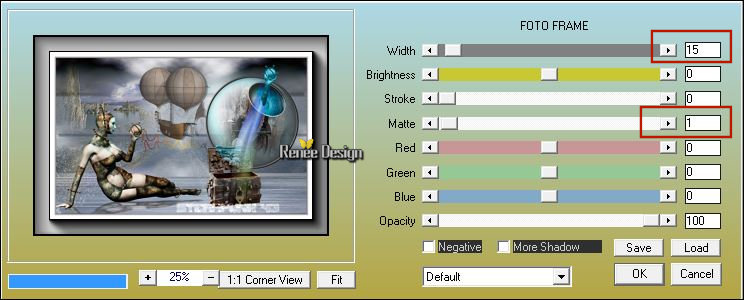
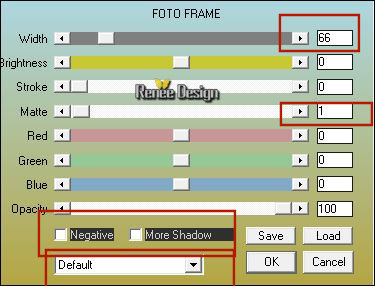
70. Effects
–Plugins – AAA Frame – Foto frame use the settings below

71. Repeat: Effects –Plugins – AAA Frame – Foto frame use the settings below

72 . Open the tube "titre": Edit - Copy- Activate your work -Edit - Paste as a new layer and move.
Layers- Merge- Merge All.Save as JPG
Information about this text (point 72)
- I took Font "PuritanSwash-Bold " for writing the title
- Effect on the title is Plugins
EyeCandy 7 / Backlight –Preset Backlight –Faint (this is a paid filter)
I hope you enjoyed this lesson
Renée
This lesson was written by Renée 2017
Edited and Update
2017
*
Any resemblance with an existing lesson is a coincidence
* Do not forget to thank the people who work with us and for us I have appointed the tubeurs and translators
Thanks
*
| 
 Translations


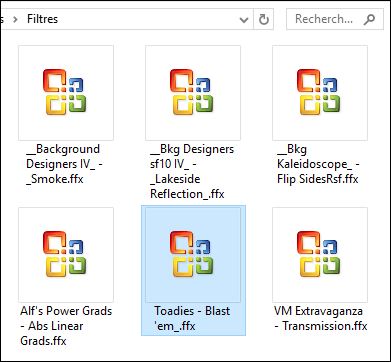


 If a plugin supplied appears with this icon it must necessarily be imported into Unlimited *
