|
Let's start the lesson.
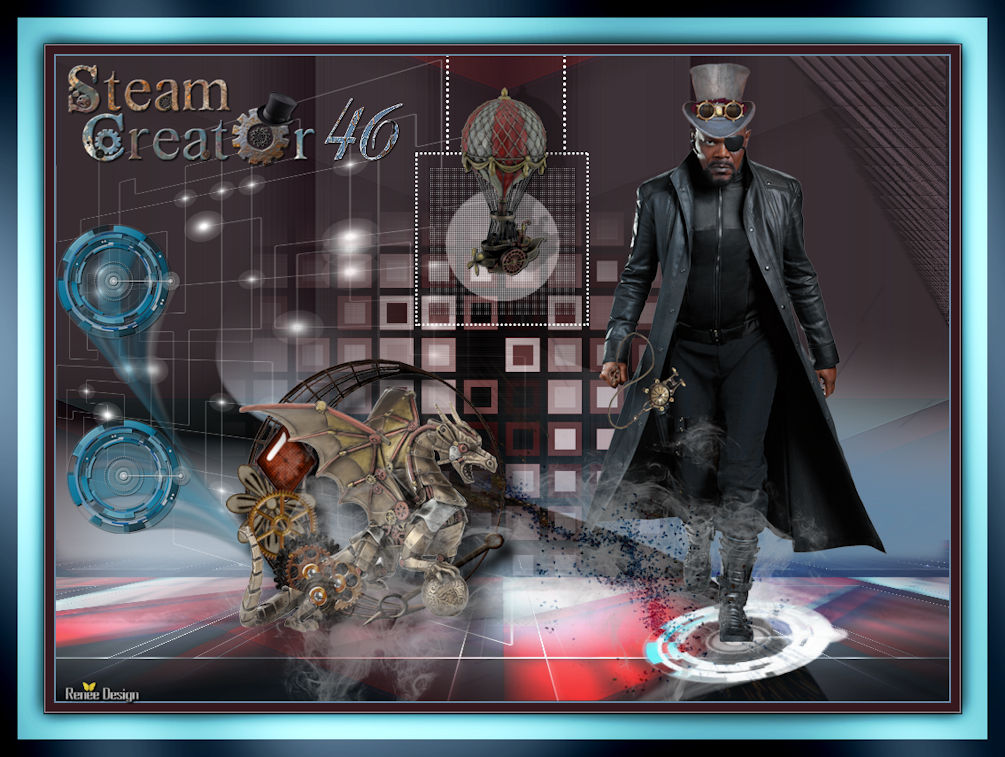
Steampunk_46
-Preparation-
Material Properties:
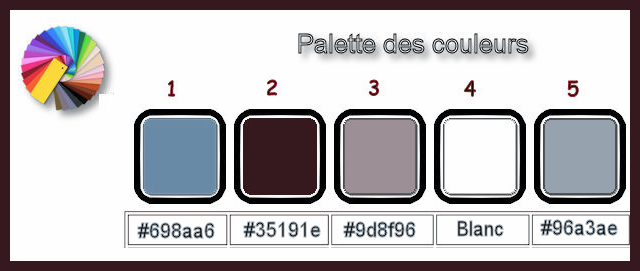
Set your foreground color to color # 698aa6= No 1-Set your background color to color #35191e= No 2
1.
Open the backgroundimage ‘’Fond_Steampunk_46 ‘’- Window - Duplicate (or shift+D) - Close the original and proceed on the copy -Promote Background Layer =Raster 1
2.
Layers- Duplicate
3.
Effects –Plugins- Unlimited 2.0- &<Bkg Designer sf10 I>-Cruncher
: 255/255
4.
Effects – Edge Effects -Enhance
5.
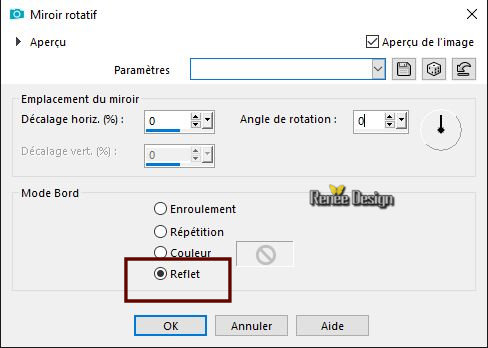
Effects – Reflection Effects- Rotating Mirror use the settings below
6.
Layers- New Raster Layer
7.
Selections –load/save selection –load selection from disc and select my selection: ‘’Steampunk_46_1’’
8.
Activate Flood Fill Tool
 -
Flood Fill the selection with the foreground color =No1 -
Flood Fill the selection with the foreground color =No1
Selections -Deselect All
9.
Adjust- Blur- Gaussian Blur: Radius 45
10.
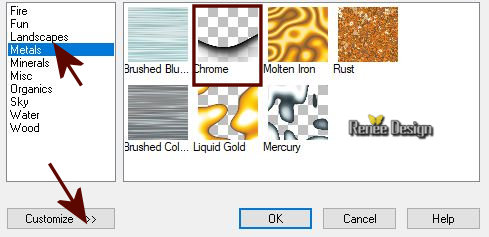
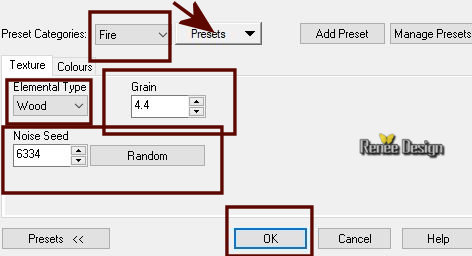
Effects –Plugins – XE Xtras – Elemental- Metals/Chrome
>>Customize
– Reset and use the settings below
( Do you have problems with this- image effet-Xtras elemental.pspimag is into the zipfile and paste as a new layer on your working area and then remove raster 2
Move tool / place your tube on the bottom of your image)
- Activate the bottom of the Layerpalette = Raster 1
11.
Layers- Arrange- Bring to Top
12.
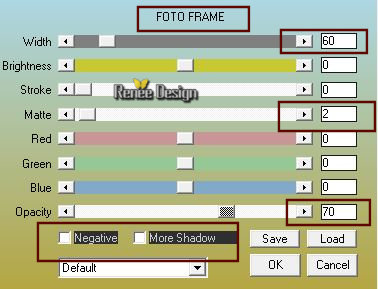
Effects – Plugins - AAA Frame – Foto Frame use the settings below
13.
Effects –Plugins -Unlimited 2.0 ICNETFILTERS - Tile & Mirror-XY
Offset 50% (positive)
14.
Repeat – Effects – Plugins - AAA Frame – Foto Frame with the same settings
15.
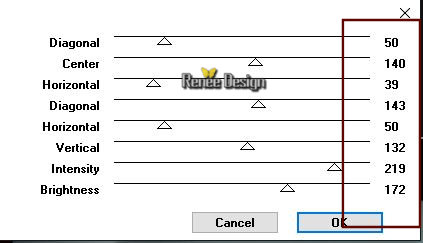
Effects -Plugins – Graphic plus – Cross Shadow with these settings
16.
Effects – Image Effects- Seamless Tiling –Side by side
17.
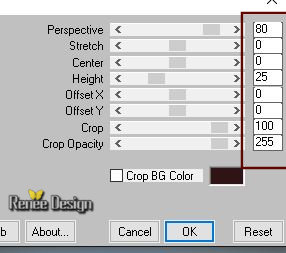
Effects –Plugins – Mura’s Meister – Perspective
Tilling
18.
Layers-Properties-Set the Blend Mode to "Overlay" – Lower the Opacity of the layer to 61%.
19.
Selections –load/save selection –load selection from disc and select my selection: ‘’Steampunk_46_2’’
DELETE
 3 times
Selections- Deselect All
20.
Open the tube ‘’Renee_Steampunl_46_image1’’
-
Edit - Copy- Activate your work -Edit - Paste as a new layer (do not move it is in the right place )
21.
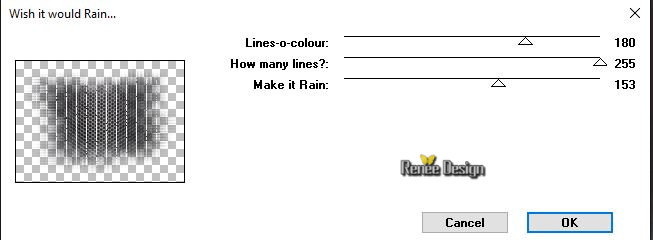
Effects –Plugins – Two Moon - Wish it would
Rain...
22.
Effects- Plugins – Medhi- Weaver
23.
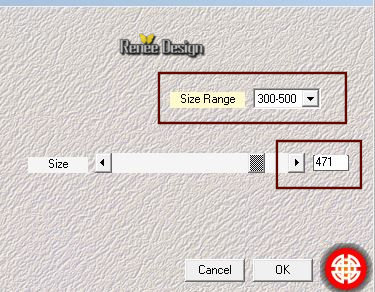
Effects – Plugins – Lotis – Mosaic Toolkits Plus
v2 / Styles = Squares rings

24.
Image-Resize to 66 % Resize all layers not checked
25.
Effects-Plugins – Nick Color Effex pro 3.0 –
Colorize –Color #4d0807

26.
Open the tube’’ST_46_image-coin’’
-
Edit - Copy- Activate your work -Edit - Paste as a new layer-
Activate your Move Tool (M) place it in the top right corner (see finished image)
27.
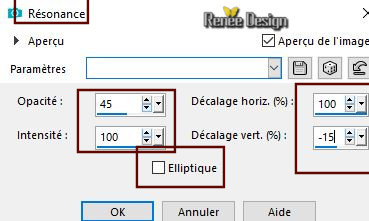
Effects – Reflection Effects -Feedback use the settings below
28.
Layers-Properties-Set the Blend Mode to "Overlay"
29.
Effects – 3D Effects –Drop Shadow with these settings: 4/1/65/5 color black
30.
Open the tube ‘’
ST_46_image-lumieres-cadres.pspimage’’
-
Edit - Copy- Activate your work -Edit - Paste as a new layer
31.
Effects- Image Effects- Offset with these settings: H = -238 and V = 29
32.
Open the tube ‘’ST_46_image- 2 cercles.pspimage’’
-
Edit - Copy- Activate your work -Edit - Paste as a new layer
33.
Objects – Align-Left ( Do you have problems with this) Effects- Image Effects- Offset with these settings: H = -
427 and V = 0)
34.
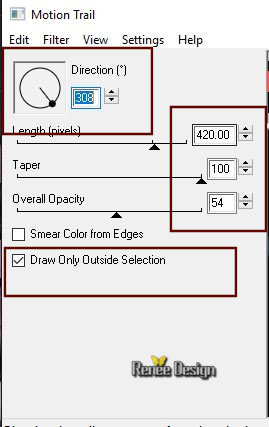
Effects – Plugins – Eyecandy 4000- Motion Trail
you get this message.JPG) Click Ok -and the window opens and you can use the filter with these settings
Click Ok -and the window opens and you can use the filter with these settings
35.
Open the tube ‘’ Renee_TUBES_Steampunk 46 .pspimage’(do not close)
- Active the layer ‘’cercle’’ of the tube
-
Edit - Copy- Activate your work -Edit - Paste as a new layer
(
do not close we need it soon)
36.
Effects- Image Effects- Offset with these settings: H = 275 and V = - 299
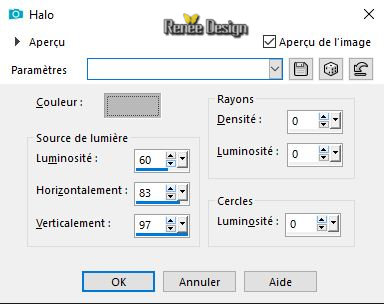
37.Effects- Illumination Effects- Sunburst use the settings below -Color #d7d7d7
38.
Selection Tool (S)-Selection Type Rectangle - Draw like this as shown in the example below
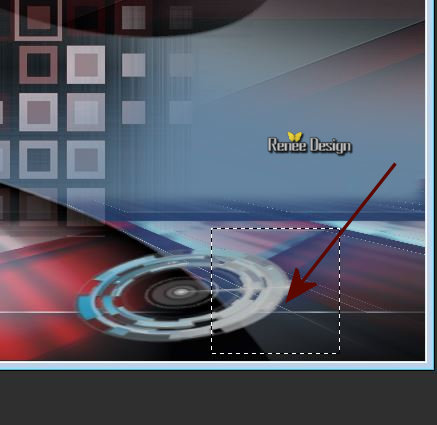
39.
Selections- Promote selection to Layer
Selections- Deselect All
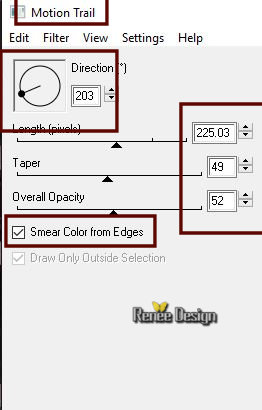
40.
Effects – Plugins - Eye Cany 4000- Motion Trail use the settings below
41.
Layers-Properties-Set the Blend Mode to " Screen "– Lower the Opacity of the layer to 77%
42.
Effects- Plugins -Unlimited 2.0 –ICNETFILTERS - Convolution
Filters – Engraver 219/205/51
43.
Activate again the tube '‘
Renee_TUBES_Steampunk 46 .pspimage’’
- Activate the layer " character" of the tube
44.
Image - Resize to 75 %
-
Editer Edit - Copy- Activate your work -Edit - Paste as a new layer
-place it in the center of the circle see finished image (bottom right side)
45.
Open the tube ‘’ Renee_TUBES_Cercle_ST-46.pspimage’’
-
Edit - Copy- Activate your work -Edit - Paste as a new layer
and move
46.
Layers- New Raster Layer
47.
Selections –load/save selection –load selection from disc and select my selection: ‘’Steampunk_46_3’’
48.
Set your foregroud color to #ffffff-Activate Flood Fill Tool
-
Opacity 65% –Flood Fill the selection with #ffffff
Selections- Deselect All
(Reset the settings to 100%)
49.
Layers-Properties-Set the Blend Mode to "Overlay "
50.
Layers- Arrange-Move 3 times down ( underneath the cercle )
- To replace the top of the layer-palette
51.
Open the tube ‘’ texte_ST46.pspimage’-Edit - Copy- Activate your work -Edit - Paste as a new layer
and move to the top left ’
52.
Open the tube ‘’ ST_46_image- cadre.pspimage’’
-
Edit - Copy- Activate your work -Edit - Paste as a new layer
-Move it in the middle against the edge (see finished image )
53.
Open the tube ‘’ ST_46_image-Montgolfiere.pspimage’’
-
Edit - Copy- Activate your work -Edit - Paste as a new layer
and move (middle of the frame)
54.
Layers- New Raster Layer
55.
Selections –load/save selection –load selection from disc and select my selection: ‘’Steampunk_46_4’’
56.
Flood Fill Tool
Match Mode- None- Blendmode Softlight- Opacity 50

–Flood Fill the selection with #ffffff
(Reset the settings of the paint pot )
Selections- Deselect All
57.
Open the tube ‘’ST_46_image- eclat_or.pspimage’’-Edit - Copy- Activate your work -Edit - Paste as a new layer
-
and move to the bottom right side
58.
Layers-Properties-Set the Blend Mode to " Difference "– Lower the Opacity of the layer to 51%
59.
Image - Add borders-Symmetric checked 2 Pixels -Color #698aa6=No 1
60.
Image - Add borders-Symmetric checked 10 Pixels- Color #35191e= No 2
61.
Image - Add borders-Symmetric checked 1 Pixels -Color #9d8f96= No 3
62.
Selections – Select All
63. Image - Add borders-Symmetric checked 50 Pixels -Color #96a3ae = No 5
64.
Selections- Invert
65.
Effects –Plugins or Unlimited – Graphic plus
Cross Shadow all settings 50 but Brightness : 128
66.
Selections- Invert
67.
Effects- 3 D Effects- Drop Shadow with these settings: 0/0/60/30 color black
68.
Selections- Invert
69.
Selections- Promote selection to Layer
Selections- Deselect All
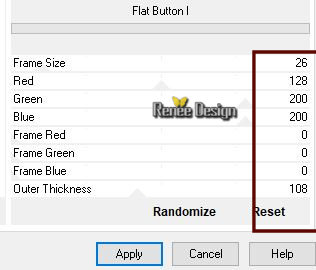
70.
Effects –Plugins- Unlimited 2.0 – Harry’s Button Tolls- Flat
Button I
71.
Layers-Properties-Set the Blend Mode to " Overlay "
72.
Layers-Merge- Merge All
73.
Image Resize to 1005 pixels width.
Save as JPG
I hope you enjoyed this lesson
Renée
This lesson was written by Renée 2018
Edited and Update
2018
*
Any resemblance with an existing lesson is a coincidence
* Do not forget to thank the people who work with us and for us I have appointed the tubeurs and translators
Thanks
*
|

 Translations


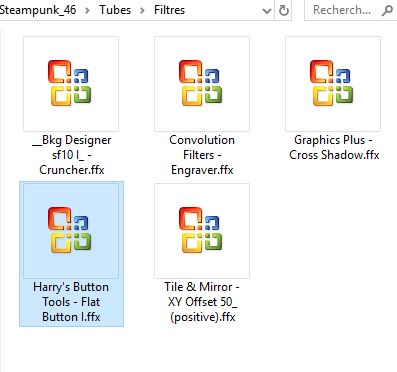


 If a plugin supplied appears with this icon it must necessarily be imported into Unlimited *