|
Let's start the lesson
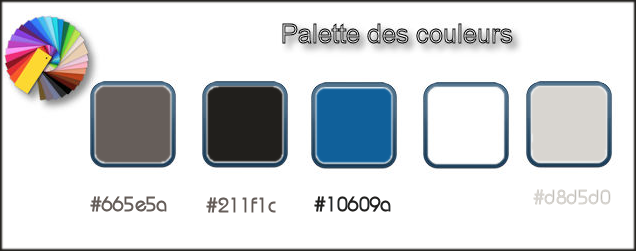
-Color Palette- Set your foreground color to #665e5a - Set your background color to #211f1c
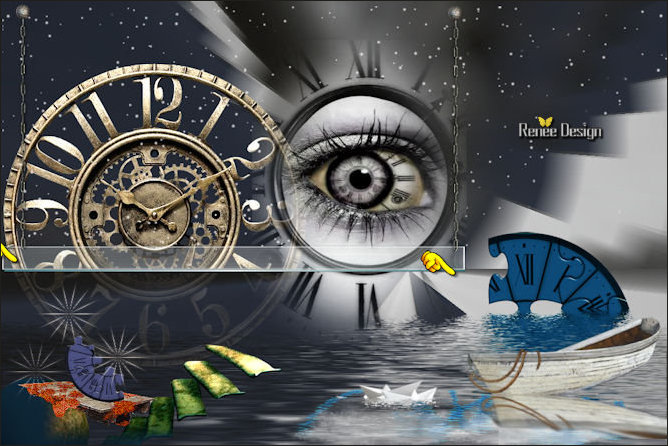
1. Open Image ‘’ Renee_Fond_Story_of_time’’- Window - Duplicate (or shift+D) - Close the original and proceed on the copy -Promote Background Layer = Raster 1
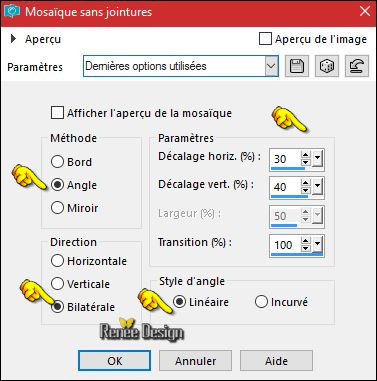
2. Effects- Image Effects- Seamless Tiling with these settings
3.
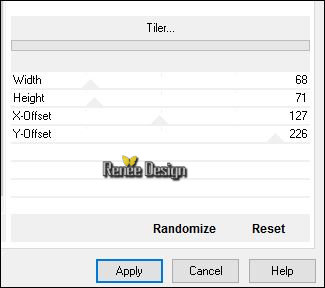
Effects –Plugins-Unlimited - &<Bkg Kaleidoscope>-
Tiler…
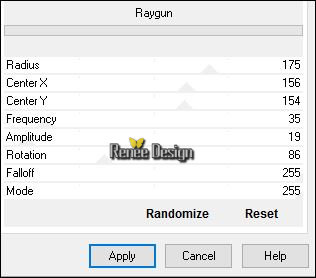
4.
Effects –Plugins-Unlimited - VM Stylize- Raygun
5.
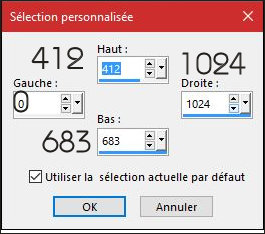
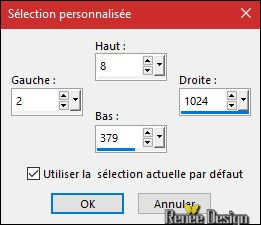
Activate Selection Tool -Custom Selection (S) -Rectangle with these settings
6.
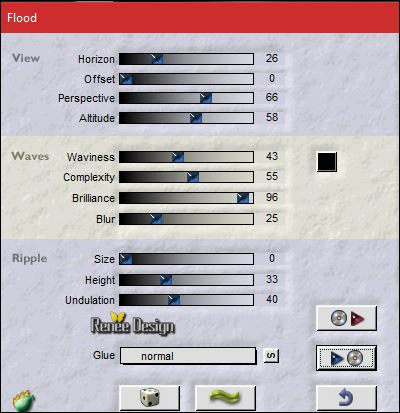
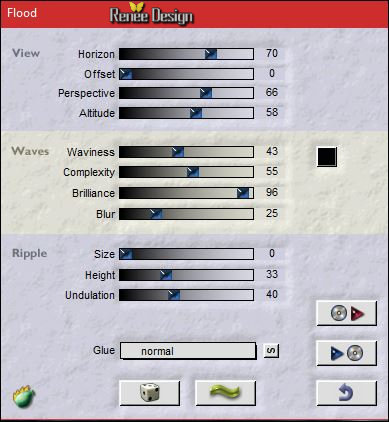
Effects – Plugins– Flaming Pear Flood- Click on the Red Arrow and load my preset: ‘’
Renee_story_time-Flood settings.q8r’’
7.
Selections- Invert
8.
Selections- Promote selection to Layer
9.
Effects –Plugins -Unlimited - VM Stylize- Zoom Blur
30/14
- Keep Selected
- In the Layer-Palette- activate the layer underneath = Raster 1
10.
Adjust- Blur- Gaussian Blur: Radius 100
Selections- Deselect All
-
Activate the top layer in the layer palette
11.
Open the tube ‘’
Renee_tube_Story_of_time_image1’’
-Edit - Copy- Activate your working area, Edit - Paste as a new layer
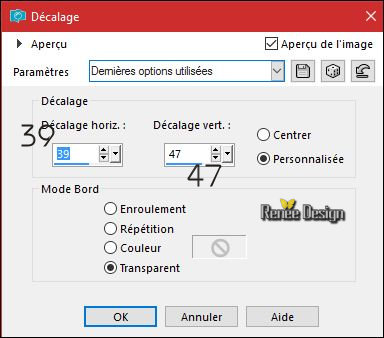
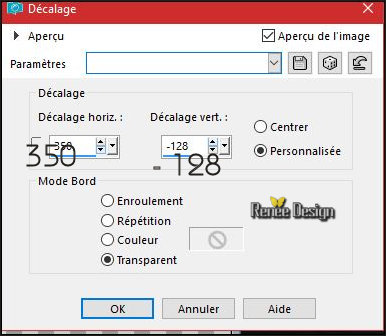
12.Effects- Image Effects- Offset with these settings:
13.
Open the tube ‘’ Renee_Story_Time_Divers”
Do not close we need it later for the rest of the work
- Activate the layer "Raster 1"of the tube
Edit - Copy- Activate your work -Edit - Paste as a new layer
14. Effects- Image Effects- Offset with these settings: H = - 277 and V = 88
/transparent
- Back on tube ‘’ Renee_Story_Time_Divers”
15. Activate the layer "Raster 2" of the tube
- Edit - Copy- Activate your work -Edit - Paste as a new layer
- Move it in the right place (see finished image )
16.
Layers-Properties-Set the Blend Mode to " Lighten " -Set the Opacity of this layer to 16%
- You may minimize your working area for a moment, but do not close, we will need it again soon
17. Back on tube ‘’ Renee_Story_Time_Divers”
- Activate the layer "Raster 3" of the tube
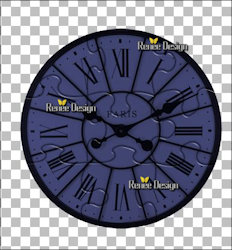
- Edit - Copy- Edit- Paste As a New Image !!!!!!!
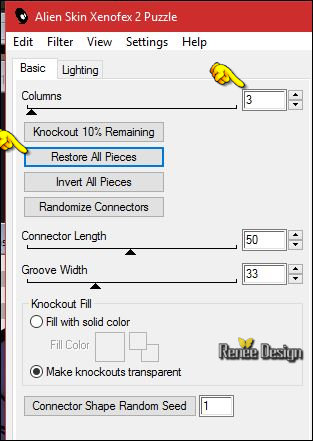
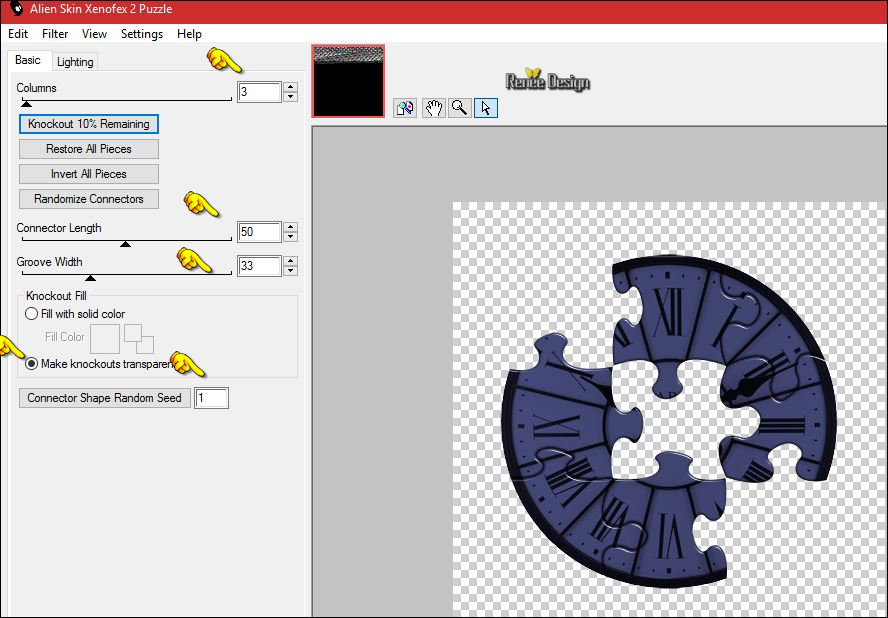
18. Effects
–Plugins – Alien skin Xenofex2- Puzzle use settings below
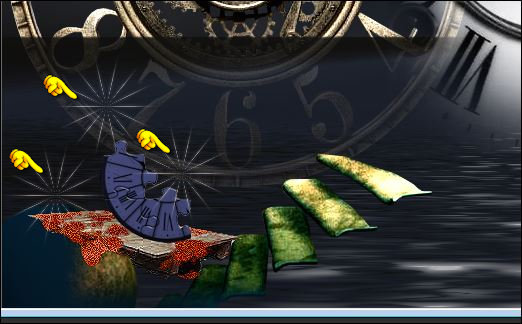
 You have this result» You have this result»
-On this tube
19.
Effects –Plugins – Alien skin Xenofex2-
Puzzle
- Click tree times « Knockout 10% Remaining ‘’
- To have this result
Or if your result is different you can use the attached tube» effet-puzzle’’ -->>Activate the select part of the tube and paste as a new layer on your working image/ Continue with step 21
20.
Activate the Freehand Selection Tool "Lasso" with these settings

Select with the lasso the right part of the tube
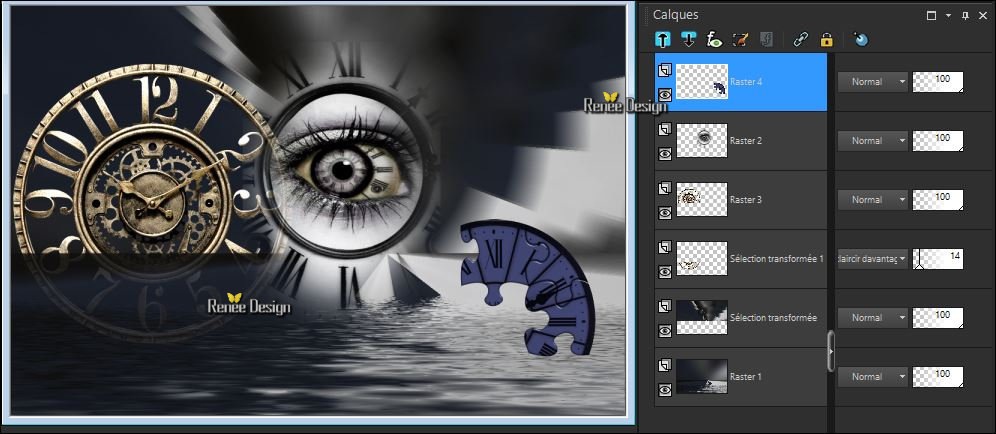
21. Edit - Copy-
Activate your minimized image -Edit - Paste as a new layer
22. Effects- Image Effects- Offset with these settings:
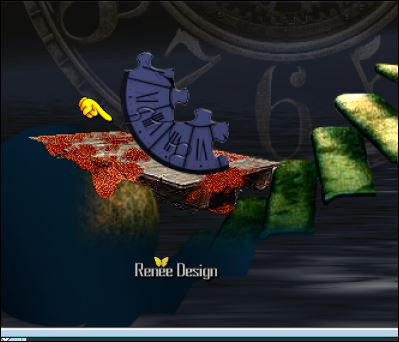
- You are there in your work/ Layer palette look like this now
23. Effects
– Plugins – Flaming Pear - Flood using the same settings
(The setting Horizon of the filter depends on where the tube is placed)
- Keyboard Keys  >>Schift + G =Gamma Correction >>Schift + G =Gamma Correction
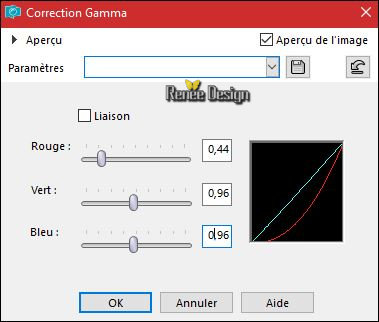
24.
Gamma Corection with these settings ( if you use other colors, you need to adjust the settings)
-
Back on tube ‘’ Renee_Story_Time_Divers”
25. Activate the layer "Raster 4" of the tube
- Edit - Copy- Activate your work -Edit - Paste as a new layer
- Move tool / place your tube on the bottom left side of your image
- Open the tube ‘’effet_puzzle’’
26.
Use the Freehand Selection Tool "Lasso" to select the left half of the tube

- Edit - Copy- Activate your work -Edit - Paste as a new layer
-
Image Resize to 40% all layers not checked
- Move as shown in the example below-You should have this result
27. Layers- New Raster Layer
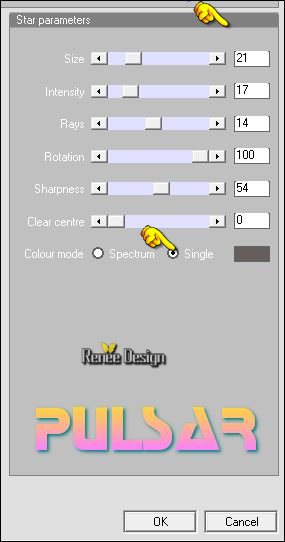
28. Effects
–Plugins - Xero Graphic – Pulsar
29. Effects –3D Effects – Drop Shadow with these settings: 1/1/100/1 black
30.
Layers-Properties-Set the Blend Mode to " Screen "
31. Layers- Duplicate twice - Move as shown in the example below-You should have this result
32. Layers- Merge- Merge Down and repeat ( 1 single layer for 3 stars )
33. Effects- Edge Effect- Enhance
34.
Open the tube ‘’
’Renee_tube_Story_of_time_image3.pspimage’’
- Edit - Copy- Activate your work -Edit - Paste as a new layer
- Move it in the right place
- Color Palette- Set your foreground color to
#10609a
35. Layers- New Raster Layer
36.
Selections –load/save selection –load selection from disc and select my selection: ‘’ Story_of_time1’’
37. Activate Flood Fill Tool and fill the selection with the foreground color #10609a
38. Effects- Edge Effect- Enhance More
Selections- Deselect All
- Color Palette- Set your foreground color to #ffffff
39. Layers- New Raster Layer
40.
Selections –load/save selection –load selection from disc and select my selection: ‘’ Story_of_time2’’
41. Activate Flood Fill Tool and fill the selection with the foreground color #ffffff
Selections- Deselect All
42.
Layers-Properties-Set the Blend Mode to " Hard Light "
43. Back on tube ‘’
Renee_Story_Time_Divers .pspimage’’
-Activate the layers "Raster 5"and "Raster 6" of the tube
- Edit - Copy- Activate your work -Edit - Paste as a new layer
-
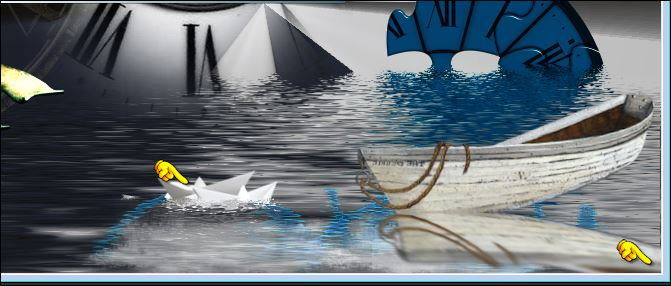
Move as shown in the example below-You should have this result
44. Layers- Merge- Merge Visible
45.
Layers- New Raster Layer
46.
Activate Selection Tool -Custom Selection (S) -Rectangle with these settings
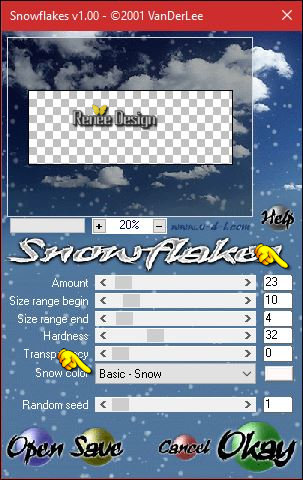
47.
Effects -Plugins – Vanderlee DDL Adrenaline-
Snowflakes
48. Eraser Tool – Size 10 max.
Remove the excess snow- order to obtain this effect as shown in the example below
49. Activate Brush Tool and choose the brush: ‘’ BrushTip_Brushx 13007’’- Size 20
max
50. Layers- New Raster Layer
Stamp your brush by using your foreground color #ffffff (see example)
51. Layers- New Raster Layer
52. Activate the Brush image ’’ Renee_Story_of_time_pinceau’’ in your Psp
- File- Export Custom Brush
- Give it a name
- Activate Brush Tool and choose the brush: ’’ Renee_Story_of_time_pinceau’’ with these settings

Stamp your brush at the top right side by using your foreground color #ffffff (see example)
53.
Layers-Properties-Set the Blend Mode to " Soft Light "
54. Open the tube
‘’wilma_tube_21’’ activate the layer "raster 5 "of the tube
- Edit - Copy- Activate your work -Edit - Paste as a new layer
-
Move it in the right place
55. Image - Add borders-Symmetric checked:1 pixel #665e5a
56. Image - Add borders-Symmetric checked:45 Pixels #d8d5d0
57. Image - Add borders-Symmetric checked:1 pixel #211f1c
58.
Edit- Copy !!
59.
Open the tube ‘’story_of_time_cadre ‘’
60. With the Magic Wand select the transparent part
61. Edit- Paste into selection
62. Effects
–Plugins – AAA Frame Foto Frame

-
Selections- Deselect All
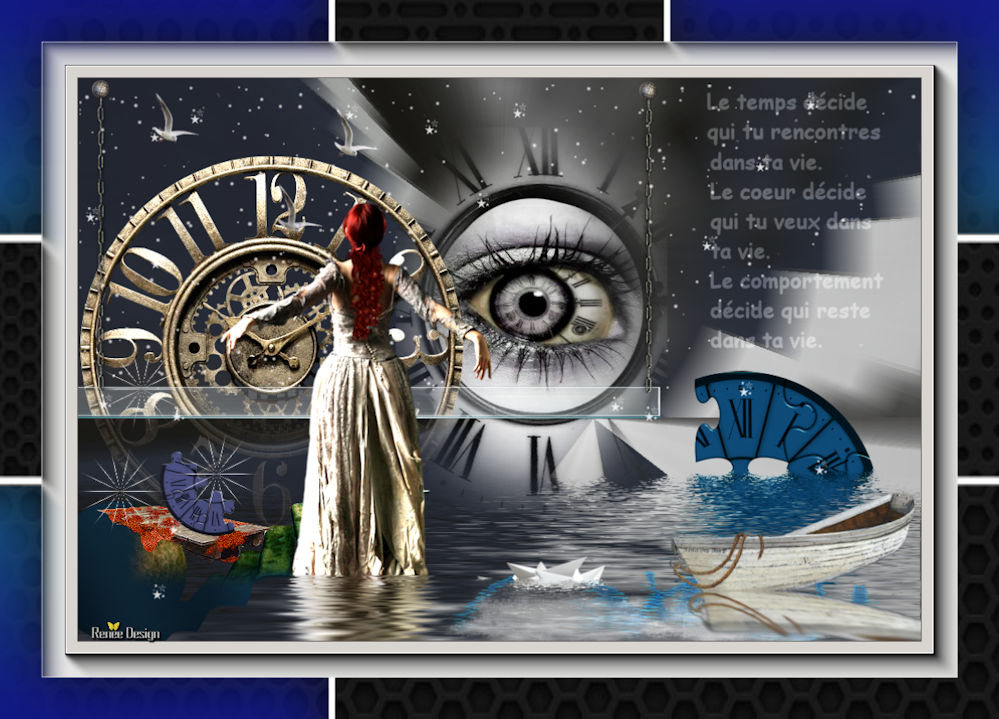
63. Image Resize to 999 pixels width.
Save as JPG
I hope you enjoyed this lesson
Renée
This lesson was written by
Renée 22/12/2016
Edited and Update
2017
*
Any resemblance with an existing lesson is a coincidence
* Do not forget to thank the people who work with us and for us I have appointed the tubeurs and translators
Thanks Renée *
*
| 

 Translations


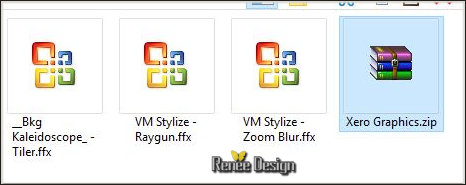


 If a plugin supplied appears with this icon it must necessarily be imported into Unlimited *

 All rights reserved