|
Let's start the lesson.
-
Preparation - Color Palette: Set your Foreground color to #ffffff -Set your Background color to #000000
First Part
1.
Open the Image ‘’ Fond_studio’’- Window - Duplicate (or shift+D) - Close the original and proceed on the copy -Promote Background Layer = Raster 1
2.
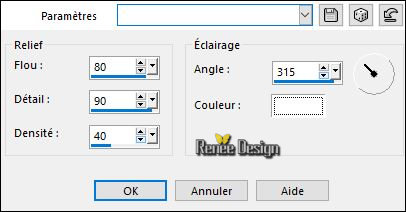
Effects – Artistic Effects- Enamel use the settings below
3.
Effects – Plugins – Graphic plus / Cross
Shadow

4.
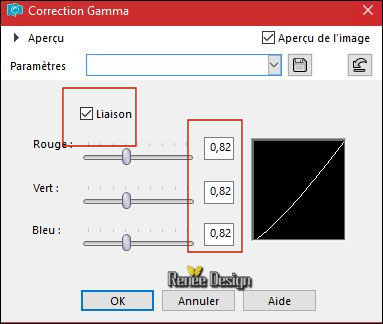
Gamma Correction use the settings below- (Shift + G on your Keyboard)
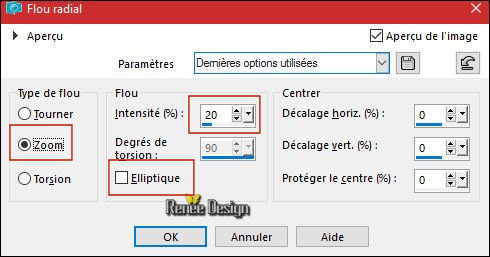
5.Adjust- Blur- Radial Blur with these settings
6.
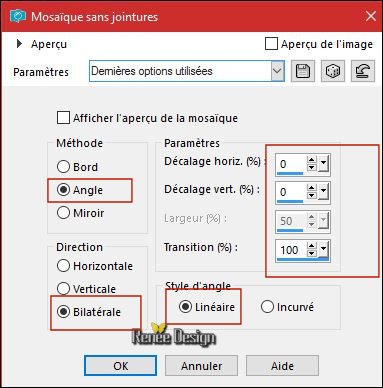
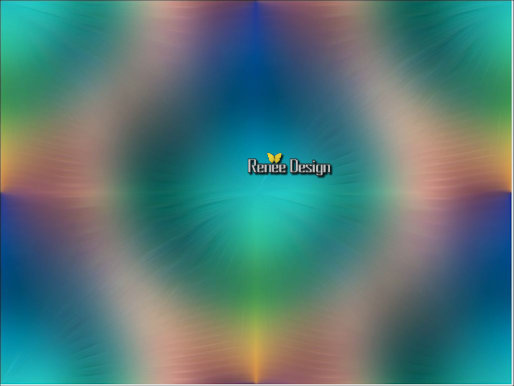
Effects –Image Effects- Seamless tiling use the settings below
The Result
7.
Effects- Edge Effects- Enhance More
8.
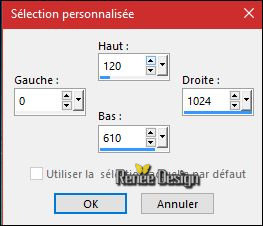
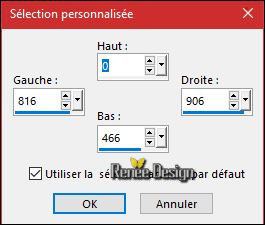
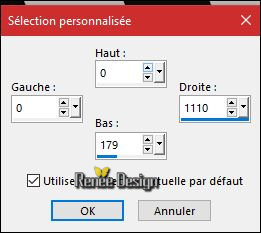
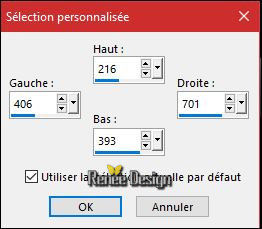
Activate Selection Tool -Custom Selection (S) -Rectangle with these settings
9.
Selection-Promote selection to Layer
Selections -Deselect All
10.
Effects- 3 D Effects- Drop Shadow with these settings: 5/0/100/28 black
11.
Effects – PLugins – AP [Dots]
DotFlow use the settings below

12.
Open your tube ‘’Tubes_pour_Studio ‘’ ( Do not close we need it later for the rest of the work)
-
Activate the layerActiver le calque ‘’visage’’of the tube
-
Edit - Copy- Activate your work -Edit - Paste as a new layer
-
Do not move, it is in the right place
-
Back on tube ''Tubes_pour_Studio ''
13.
Activate the layer ‘’Clip_fin’’of the tube
-
Edit - Copy- Activate your work -Edit - Paste as a new layer
14.
Effects – Image Effects – Offset with these settings: H = 358
and V = - 188
15.
Effects- 3 D Effects- Drop Shadow with these settings: – 22/ 40 / 40 /50 color white
16.
Layers- New Raster Layer
17.
Activate Selection Tool -Custom Selection (S) -Rectangle with these settings
18.
Activate Flood Fill Tool  –
Change the opacity of the color at 40% – Fill the selection with the foreground color #ffffff –
Change the opacity of the color at 40% – Fill the selection with the foreground color #ffffff
Selections-Deselect All
19.
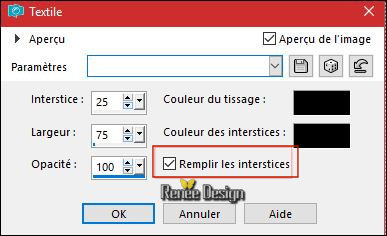
Effects – Texture Effects /Weave /Color black
20.
Image - Add borders-Symmetric checked 5 pixels #ffffff
You may minimize your working area for a moment, but do not close, we will need it again soon( Fond_studio)
-
Back on tube ‘’Tubes_pour_Studio ‘’
21.
Activate the layer ‘’Pellicule’’of the tube
-
Edit - Copy- Activate your work -Edit - Paste as a New Image !!!!!!
22.
Activate your Magic Wand with these settings

-
Click in the center of the tube
23.
Now activate the Image from step 20 (Fond studio )
-
Edit - Copy- Activate your work -Edit - Paste into Selection
Selections-Deselect All
The Result
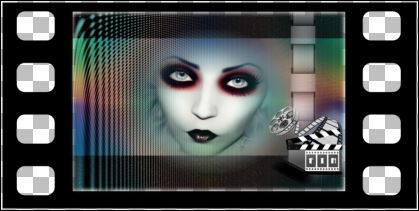
-
Save the Image as PNG (In case of closing your psp)
Rename : ‘’Ma pellicule’’ minimize your working area for a moment -we will need it again soon
-
Back on your Image and activate it >>Fond studio
24.
Image Resize to 225 pixels width
-
Save the Image as PNG
Rename ‘’Mon travail ‘’
minimize your working area for a moment, we will need it again soon
-
Leave aside for now these 2 creations.
The Second Part
25.
Open the Image ‘’ Fond_studio_2’’- Window - Duplicate (or shift+D) - Close the original and proceed on the copy -Promote Background Layer = Raster 1
26.
Activate Selection Tool -Custom Selection (S) -Rectangle with these settings
27.
Layers- New Raster Layer
28.
Activate Flood Fill Tool
/Change the opacity of the color at 100% – Fill the selection with the background color #000000
Selections-Deselect All
29.
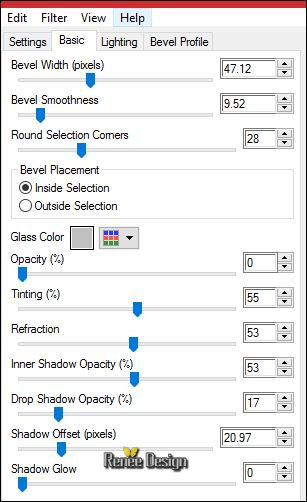
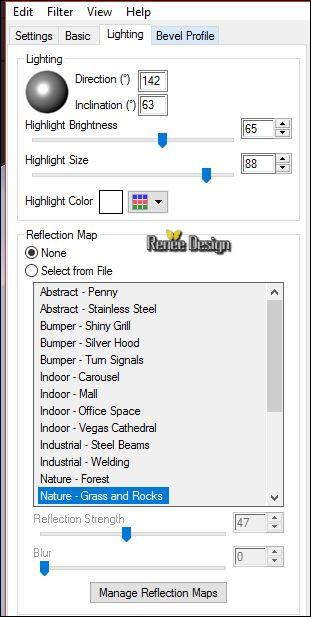
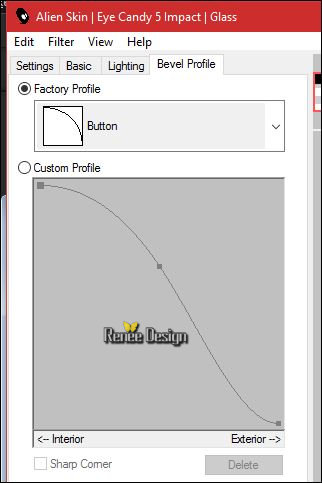
Effects – Plugins – EyeCandy 5 Impact Glass-Settings/User settings and choose my Preset
‘’Studio_renee_Glass’’Or manual settings as shown in the example below
30. Effects
– Plugins – EyeCandy 5 – Perspective
shadow use the settings below

31. Layers- New Raster Layer
32.
Selections –load/save selection –load selection from disc and select my selection: ‘’ Renee_Studio_1’’
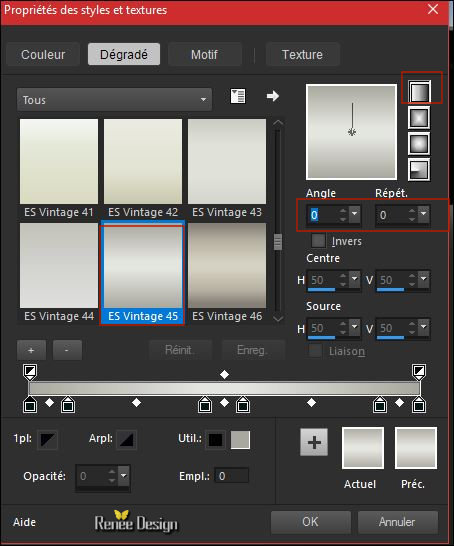
33. Properties Foreground - Set your foreground material into gradient and select –‘’ES_Vintage 45’’ linear
gradient with these settings
34. Activate Flood Fill Tool and fill the selection with the gradient
Selections-Deselect All
35. Layers- New Raster Layer
36.
Selections –load/save selection –load selection from disc and select my selection: ‘’ Renee_Studio_2’’
37. Activate Flood Fill Tool – Fill the selection with the foreground color #ffffff
Selections-Deselect All
38.
Effects – Plugins– EyeCandy 5 – Glass /Preset Clear
- Activate the bottom layer =Raster 1
39. Open your tube ‘’ Renee_tube _Studio_Image 1’’
- Edit - Copy- Activate your work -Edit - Paste as a new layer
40. Effects
– Image Effects –Offset with these settings: H = 0 and V = -
63
41. Activate the minimize tube ‘’Ma _pellicule’’
- Edit - Copy- Activate your work -Edit - Paste as a new layer (do not move !)
42. Image Resize to 60 % Resize all layer not checked
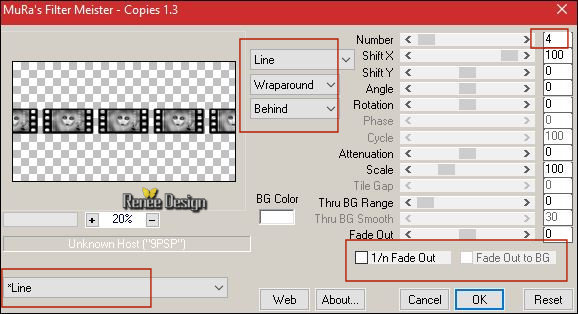
43. Effects
– Plugins –Mura’s Meister – Copies with these settings
- On this Layer
44.
Activate Selection Tool -Custom Selection (S) -Rectangle with these settings
45.
Selections - Invert
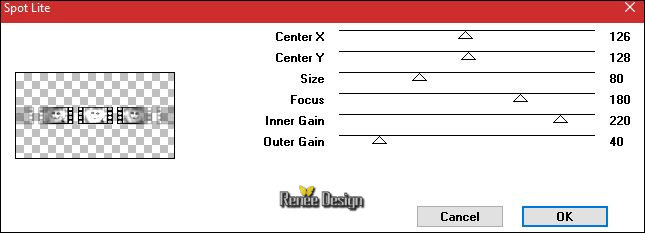
46. Effe ts
- Plugins – Graphic plus Spot lite
Selections-Deselect All
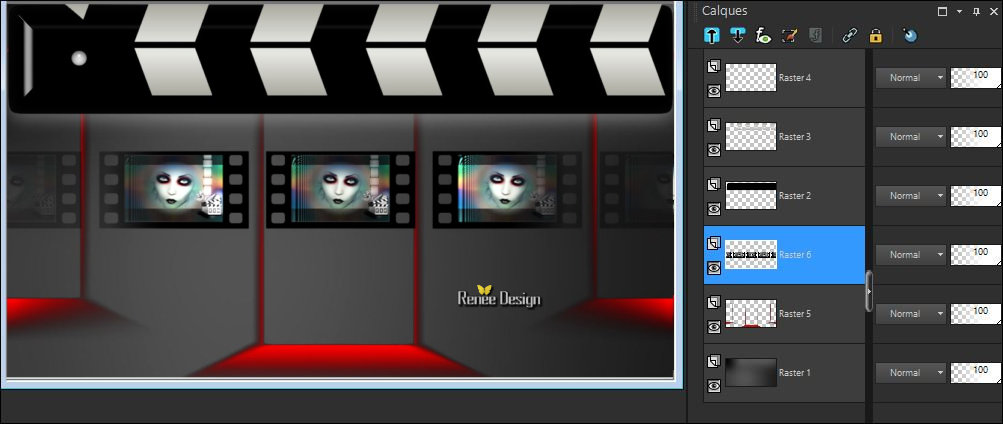
- Your work and Layer Palette look like this now
47. Activate the minimize tube ‘’Mon_travail’’
- Edit - Copy- Activate your work -Edit - Paste as a new layer
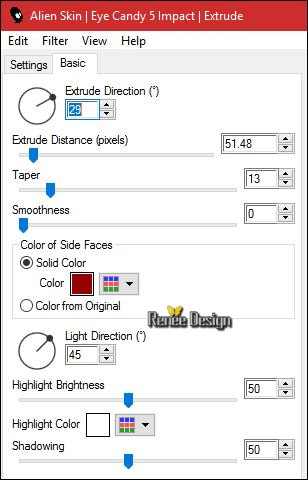
48. Effects
– Plugins –EyeCandy 5 Impact- Extrude use the settings below / color
#950203
49. Effects- Image Effects- Offset with these settings: H = - 14 and V = - 197
50. Open your tube ‘’ Renee_tube_Studio_effets2’’
- Edit - Copy- Activate your work -Edit - Paste as a new layer
51. Effects- Image Effects- Offset with these settings: H = - 314 and V =
-191
52.
Layers-Duplicate
53. Image - Mirror - Mirror Horizontal ( Image - Mirror in previous PSP Versions)
54. Layers- Merge- Merge Down
55. Layers-Duplicate
56.
Effects –Plugins - Eyecandy 5 – Impact Black Light use the settings below /
Color: I chose white
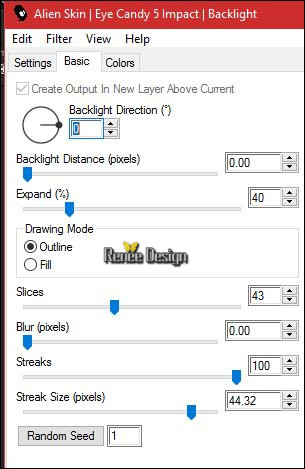
-Layers-Properties-Set the Blend Mode to " Screen " -Set the Opacity of this layer to 67%
57. Back on tube ‘’ ’Tubes_pour_Studio’’
- Activate the layer ‘’cinema’’ of this tube
- Edit - Copy- Activate your work -Edit - Paste as a new layer
-Activate Move Tool (M) move it the right place at the top of your image
58. Image - Add borders-Symmetric checked 2 Pixels black
59. Image - Add borders-Symmetric checked 50 Pixels #ffffff
60. Back on tube ‘’ ’Tubes_pour_Studio’’
- Activate the layers ‘’Spot and Siege ‘’of the tube
- Edit - Copy- Activate your work -Edit - Paste as a new layer
-Give her a nice place
61. Activate Text Tool –Font ‘’cinema St ‘’ Size 48 -Write your text "Studio Pellicule"
62. Effects- 3 D Effects- Drop Shadow with these settings: 0/0/100/1 black
63. Image - Add borders-Symmetric checked 1 pixel black
64. Image Resize to 999 Pixels Width.
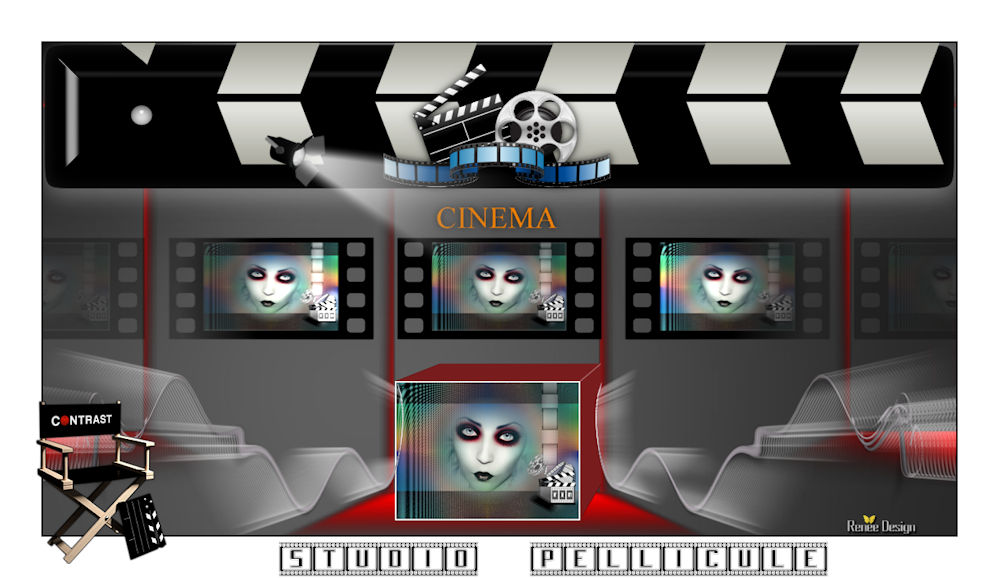
Save as JPG

I hope you enjoyed this lesson
Renée
This lesson was written by Renée 17/06/2017
Edited and Update
2017
*
Any resemblance with an existing lesson is a coincidence
* Do not forget to thank the people who work with us and for us I have appointed the tubeurs and translators
Thanks
Renée
*
| 
 Translations


 If a plugin supplied appears with this icon it must necessarily be imported into Unlimited *

 All rights reserved