|
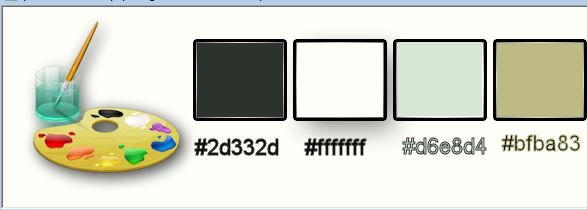
Let's start the lesson.Open the Color-Palette
The
purpose –Le but
1.
Let's start the lesson. ‘’fond_purpose’’/ Window - Duplicate (or shift+D) - Close the original and proceed on the copy -Promote Background Layer =Raster 1
2.Layers- Duplicate
3.
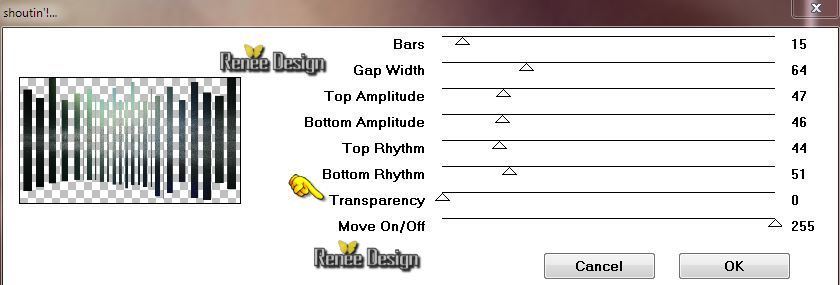
Effects- Plugins – VM Extravanga –
Shoutin’ !. with these settings as shown in the example below
4.
Effects - 3D Effects - Drop shadow with these settings: 10/10/50/42 Black
5.
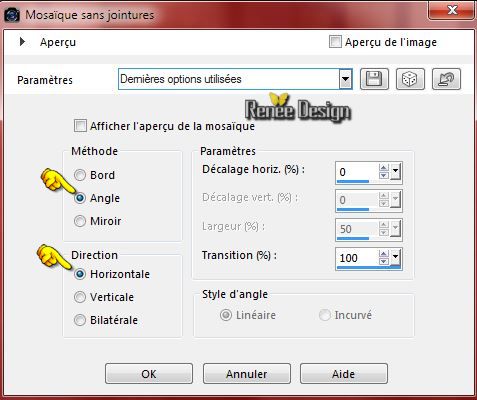
Effects - Image effects - Seamless tiling with these settings
6.
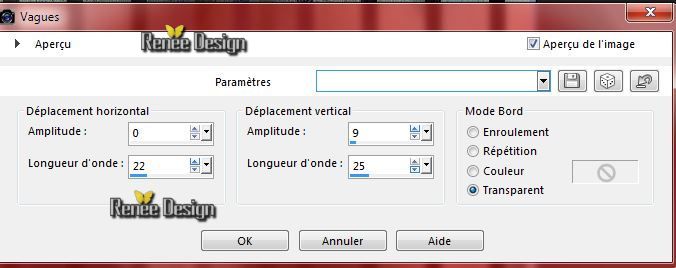
Effects-Distortion Effects- Wave with these settings
-
Activate the layer underneath=Raster 1
7.
Adjust-Blur-Gaussian Blur- Radius: 20%
Activate the top layer of the layer-palette (Copy of raster
1)
8.
Effects- Geometric Effects-Perspective Vertical -Color black
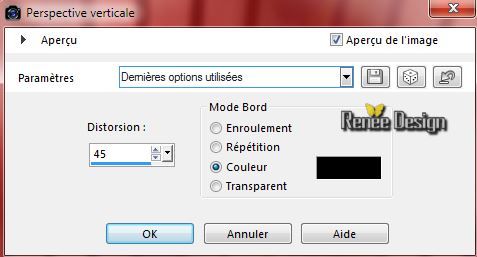
9. Selections - load/save selection - load selection from disk and select my file:« Purpose_1 »
–Press the Delete button on your key board

-
Selections- Deselect All
-Material Properties: Foregroundcolor on: #d6e8d4- Backgroundcolor on #2d332d
10.
Layers- New raster layer
11. Effects- Plugins –
Unlimited 2.0- VM Instant art – Vernissage
Attention: Copy the settings carefully. Look closely to the print screen and make sure that the effect of your plugin is exactely the same. This is really very important for the rest of the lesson
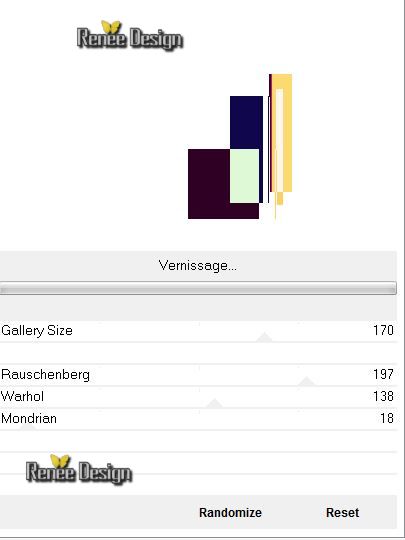
12.
Selections - load/save selection - load selection from disk and select my file: ‘’ purpose_2’’
- Press the Delete button on your key board 
-
Selections- Deselect All
13. Image-Flip
14. Effects- Distortion Effects- Polar Coordinates -Polar to Rectangular
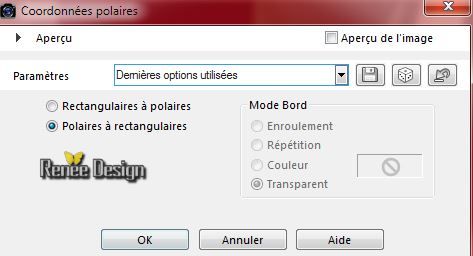
15. Layers- Duplicate
16. Image -
Miroir
- Layers- Merge- Merge Down
17. .Effects - Image effects - Seamless tiling with these settings
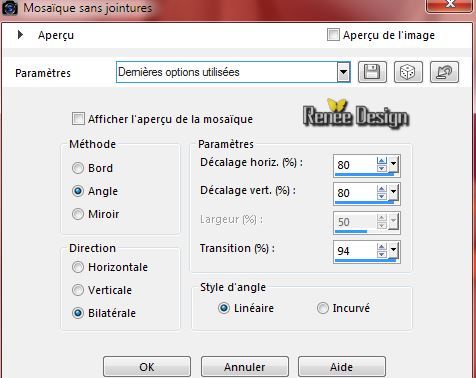
18. Double click on this layer and set the Blendmode to Overlay
19. Effects- User Defined Filter– Emboss 3 using the default settings
20. Activate the tube ‘’ purpose_image_1.pspimage’’
- Edit - Copy -Edit - Paste as new layer on your working area . Do not move it is in the right place
21. Effects- Plugins- Mura’s Meister –Perpective
Tilling
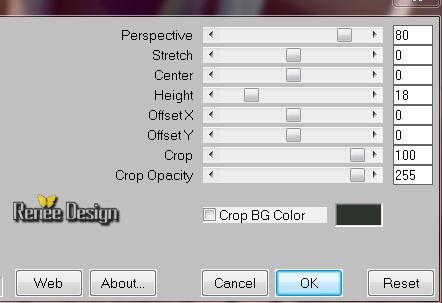
22. Layers- Duplicate
23 Effects- Image Effects- Offset with these settings H = 0 and V = - 45 Transparent
24. Layers- Merge- Merge Down
25. Effects- User Defined Filter- Brighten Grave (Preset is included into the zipfile) using the default settings
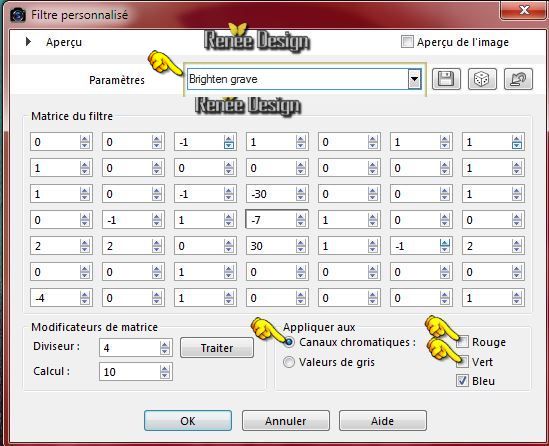
26. Activate
image ‘’ purpose_image_2.pspimage’’
- Edit/ Copy-Edit - Paste as new layer on your working area
Do not move it is in the right place
27. Layers-New raster layer
- Material Properties:Foregroundcolor on white-Background color on
#d6e8d4
28.
Selections - load/save selection - load selection from disk and select my file:
‘’purpose_3 »
29. Pot of Paint: Change the opacity of the color at 60% –Activate Flood Fill Tool and fill the selection with the Foregroundcolor
30.
Selections- Modify-Contract with 4 pixels
31. Layers- New raster layer
32. Pot of Paint: Change the opacity of the color at 60%- Activate Flood Fill Tool and fill the selection with the Backgroundcolor
33. Effects- Plugins –AP01 – Lines Silverling with these settings
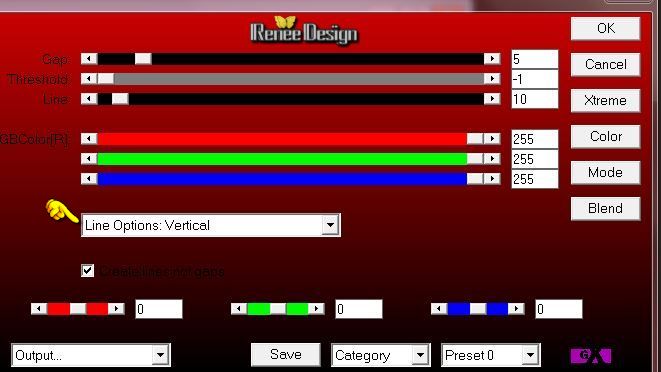
34. Effects-Edge Effects- Enhance More
Selections- Deselect All
35. Layers- Merge- Merge Down
36.
Effects- Plugins – Medhi Weaver with these settings
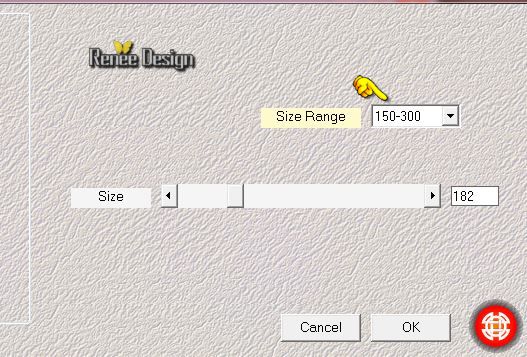
37.
Effects- Plugins - Unlimited 2.0 - VM Texture – Cross
Weave
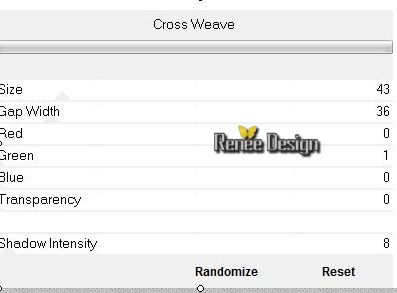
38.
Double click on this layer and set the Blendmode to Luminance Legacy/ Set the layer opacity of this layer to
42%
39.
Activate the tube ‘’Purpose_elements de
decoration.pspimage''
-
activate this layer of the tube ’ the
purpose_ampoule’’on this tube
-
Edit/ Copy-Edit - Paste as new layer on your working area
-.
With the move tool, move it to the bottom left side
40.
Double click on this layer and set the Blendmode to Luminance
41.
On the same tube "Purpose_elements de
decoration.pspimage''
-
activate this layer of the tube’’ the
purpose_nuage_interrogation’’
-
Edit/ Copy-Edit - Paste as new layer on your working area
-
With your move tool place above the lamp
42.
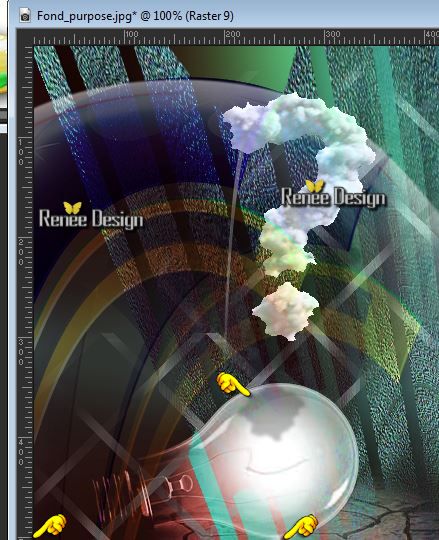
Effects - 3D Effects - Drop shadow with these settings
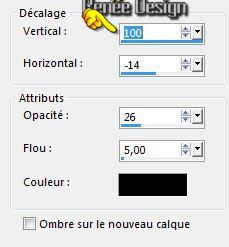
The shadow comes on the lamp as shown in the example below
- Activate the tube
‘’Purpose_elements de decoration.pspimage’’
put it aside for now
43.
Layers- New raster layer
44. Selections - load/save selection - load selection from disk and select my file:
‘’
Purpose_4 »
45.
Pot of Paint: Change the opacity of the color at 100% –Activate Flood Fill Tool and fill the selection with white ( click 2 ore 3 times into selection)
Selections- Deselect All
46.
Double click on this layer and set the Blendmode to Screen
-Activate the tube ‘’Purpose_elements de
decoration.pspimage
-
activate this layer of the tube’’the
purpose_lampe"
-
Edit/copy- Edit/ paste as new layer on your working area .With your move tool place it in the right place like this
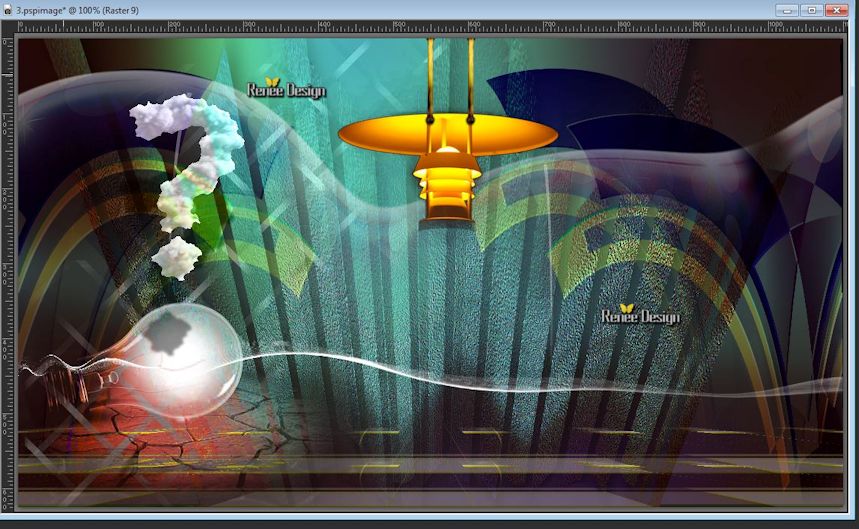
47.
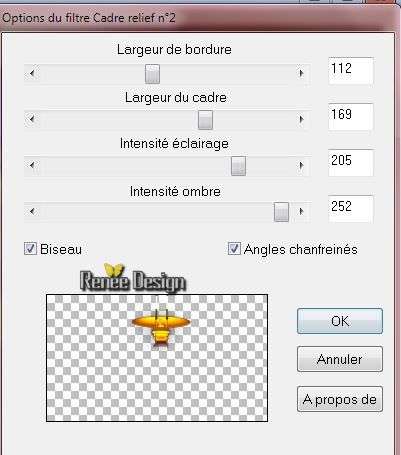
Effects- Plugins – Bordur Mania (nvr)- Cadre Relief no
2 (put the filter in your filter folder and it works.
)
48.
Activate the tube ‘’ Renee_tube_Purpose_refuse.pspimage’’/ activate this layer of the tube: Purpose_refuse_2’’
-
Edit/ Copy-Edit - Paste as new layer on your working area
49.
Effects- Image Effects- Offset with these settings
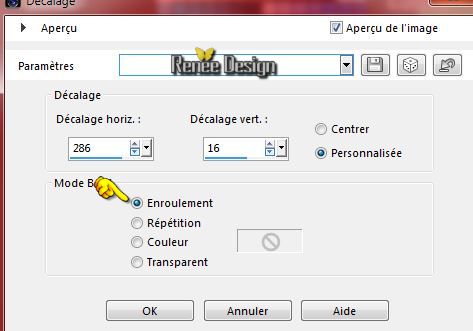
50.
Layers-Arrange-Move Down
-
Activate the top of the layer-Palette
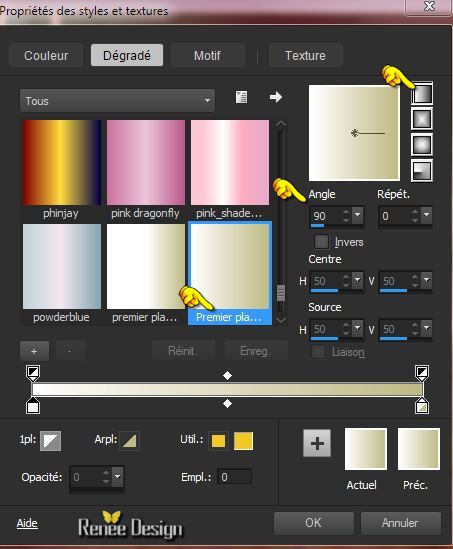
- Material Properties:Put the foregroundcolor on white and the backgroundcolor on
#bfba83
-Prepare a linear gradient configured like this
51.
Layers- New raster layer
52.
Selections - load/save selection - load selection from disk and select my file:‘’Purpose_5’’
53.
Pot of Paint: Change the opacity of the color at 40%
-
Activate Flood Fill Tool and fill the selection with the gradient
54.
Effects-Edge Effects-Find Horizontal
Selections- Deselect All
55.
Set the layer opacity of this layer to 71%
56.
Layers- Duplicate
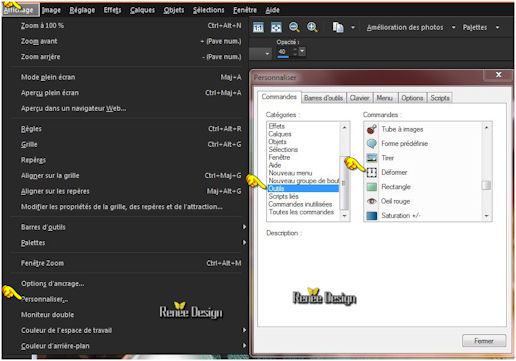
57. Activate Raster Deform Tool (D)/ Is Raster Deform Tool not listed ?
- View -Customize-Commands-All Commands select 'Deform" on the right side .
With the mouse button pressed drag it between the other tools in your psp
58.
-Activate Raster Deform Tool: click on the-Preset
« Preset_RasterDeform_Purpose_1 an OK (Preset into the zip file) 
59.
Layers- Duplicate /Image- Flip and move as shown in the example below
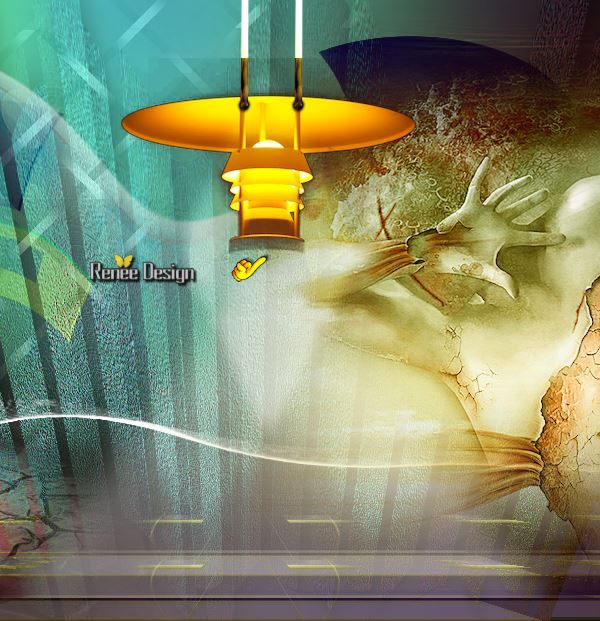
-
Layers- Merge- Merge- Visible
61. Layers- New raster layer
61.
Selections-Custom Selection with these settings
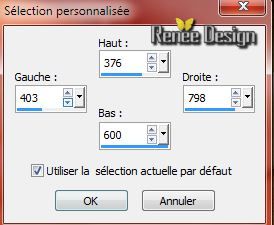
62.
Pot of Paint: Change the opacity of the color at 60 %
-
Activate Flood Fill Tool and fill the selection with the gradient
63.
Effet – Unlimited 2.0 - Penta Com –Dot and Cross using the default setting
72/10/2
Selections- Deselect All
64.
Effects- Plugins – VM Extravanga – Transmission 6/0/40
65.
Effects- Distortion Effects-Lens Distortion with these settings as shown in the example below
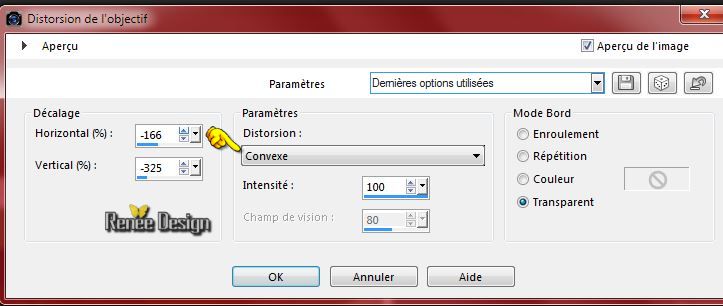
66.
Effects- Plugins - EyeCandy 5 – Impact –Perspective
shadow-tab Settings/User settings - choose my preset ‘’ purpose-shadow’’
67. Effects - 3D Effects - Drop shadow with these settings 3/3/25/5 Black
68. Layers- New raster layer
69.
Selections - load/save selection - load selection from disk and select my file: ‘’ Purpose_6’’
70. Pot of Paint: Change the opacity of the color at 100%- Activate Flood Fill Tool and fill the selection with the gradient
Selections- Deselect All
71. Double click on this layer and set the Blendmode to Overlay
72. Effects- Reflection Effects- Feedback with these settings as shown in the example below
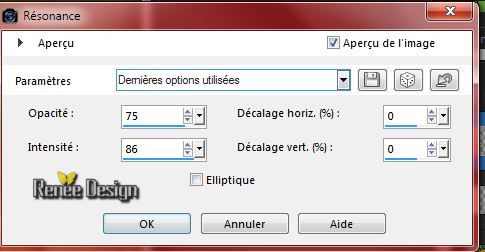
73. Open the tube ‘’purpose_texte ‘’in your PSP dans
- File-export-custom brush, give the brush a name: ''purpose_texte''
74. Select Brush Tool and choose the brush:''purpose_texte'' with these settings

75. Layers- New raster layer
- Place the brush with the foregroundcolor white on the bottom edge of your work
76. Effects - 3D Effects - Drop shadow with the same settings
77. Layers- Duplicate
78. Effects- Distortion Effects-Lens Distortion with these settings as shown in the example below
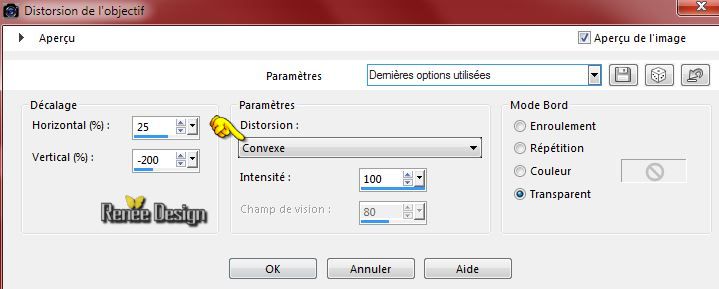
-Activate your Move Tool (M) place it in the top right corner
79. Image - Add borders-Symmetric checked:1 pixel Black
80. Image - Add borders-Symmetric checked:3 pixels White
81. Image - Add borders-Symmetric checked:1 pixel Black
82. Image - Add borders-Symmetric checked:40 pixels #bfba83
83. Activate Magic Wand and click in the border of 40 pixels
84. Effects- Plugins – Dragon Fly – Sinedots with these settings as shown in the example below
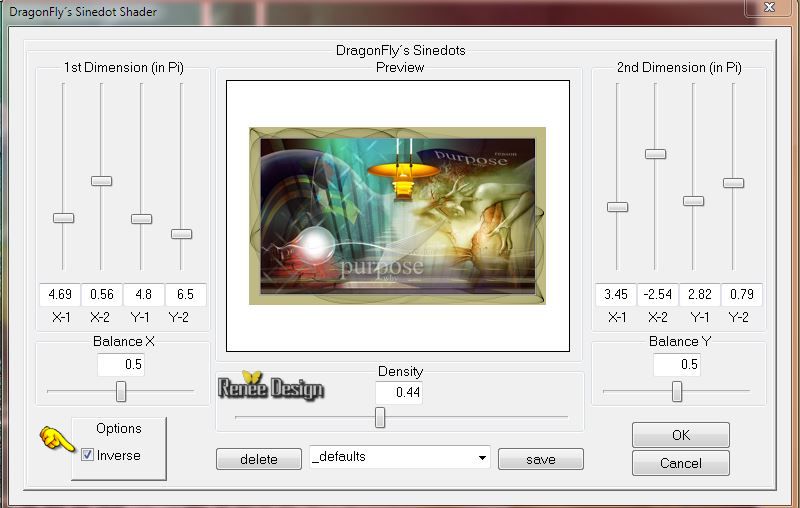
Selections- Deselect All
85. Image - Add borders-Symmetric checked:2 pixels White
86. Image
Resize with 995 pixels Width
-Save as JPG
I hope you enjoyed this lesson
Renée
This lesson was written by Renée 12/02/2015
Placing
2015
*
Any resemblance with an existing lesson is merely a coincidence *
* Don't forget to thank the people who work for us and with us. I named the tubeurs - Testers and the translators.
Thanks Renée.
*
|