|
Let's start the lesson.
1. File-Open a new transparent image in the size: 995 x 645 pixels pixels
2. Color Palette-set the foreground color to color ##270305
Flood Fill Tool - Fill the layer with the foreground color #270305
3.
Layers- New Raster Layer
Preparation
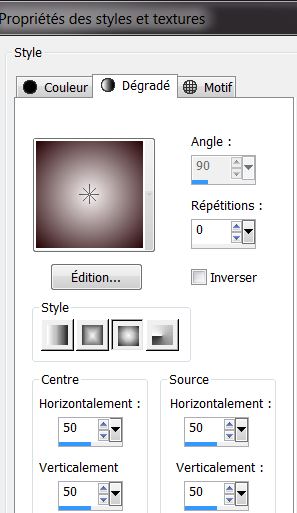
4. -Material Properties: Set your foreground color to color #f8f3f4 – Set your background color to color #270305
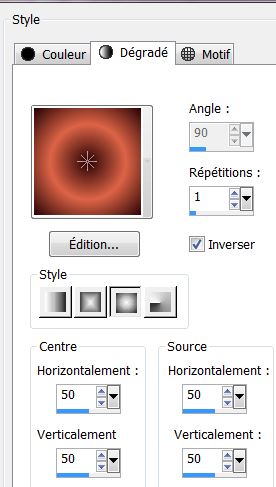
Set your Foreground color to foreground-background "Radial" gradient configured like this
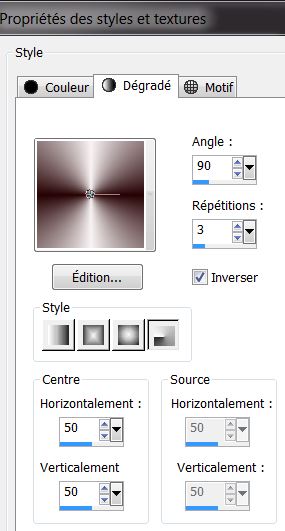
5.
Flood Fill Tool - Fill the layer with the gradient
6. Adjust-Blur- Gaussian Blur-Radius 25
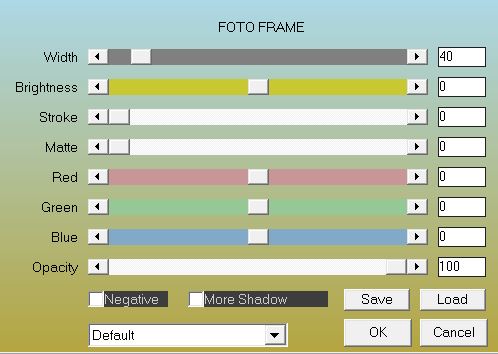
7. Effects
- Plugins
- AAA Frame - Foto Frame use the settings below
8. Effects
- Plugins -[I.C.NET Software]- Filters in
Unlimited 2.0 - / Tile and Mirror/ XY Offset 50
(positive)
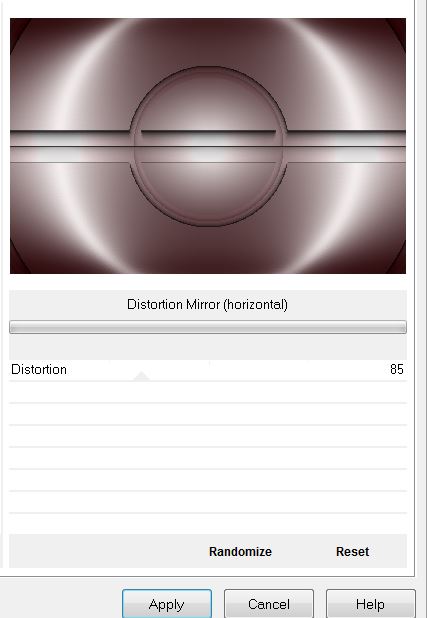
9. Effects
- Plugins -[I.C.NET Software]- Filters in
Unlimited 2.0 -/ Tile and Mirror/ Distortion Mirror(
horizontal)
10.
Layers- Duplicate
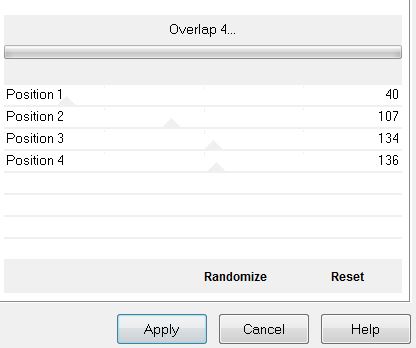
11.
Effects - Plugins - Filters Unlimited 2.0 – Andrew's Filters 22/Overlap 4 use the settings below
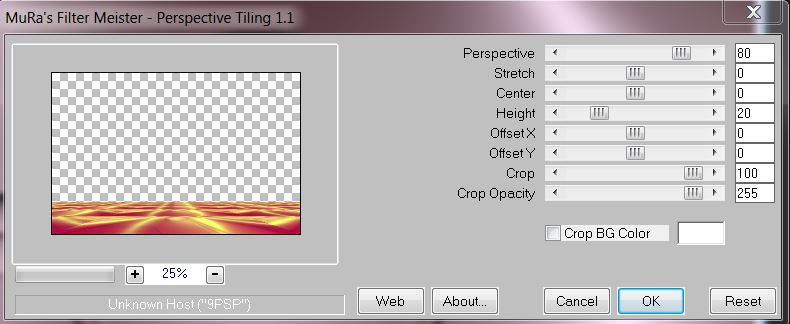
12. Effects
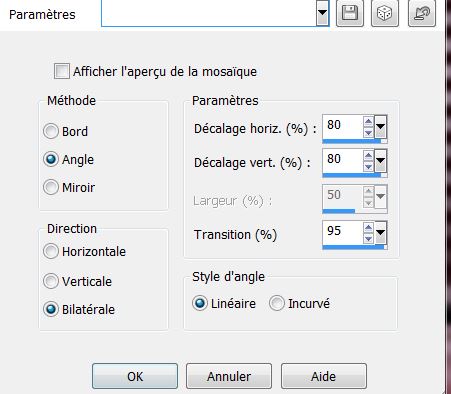
-Plugins - Mura's Meister - Perspective Tiling use the settings below
13.
Layers-Properties-Set the Blend Mode to " Luminance -Legacy "
14.Open the Tube
'''souris'' - Edit - Copy- Activate your work -Edit - Paste as a new layer
15.
Selections –load/save selection –load selection from disc and select my selection: ''desir_cafe_1''
16.
Place the mouse tube in the center
17. Selections-
Invert
Delete
Selections- Select None
18. Layers-Properties-Set the Blend Mode to " Luminance -Legacy "- Reduce the Opacity of this layer to 79%
19.
Layers- New Raster Layer
20.
Color Palette- Change your Foreground color to foreground-background " Sunburst" gradient configured like this
21.
Flood Fill Tools - Fill the layer with the sunburst gradient
22. Effects
– Distortion Effects– Pixelate use the settings below (
symmetric non checked)

23.
Effects- User Defined Filter/ Emboss 3 / using the default settings
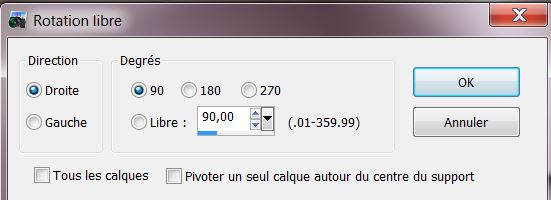
24. Image
-
Free Rotate- Degrees 90 -Direction Right
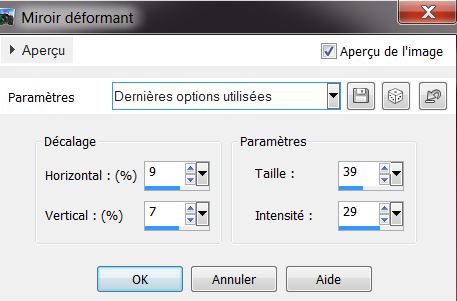
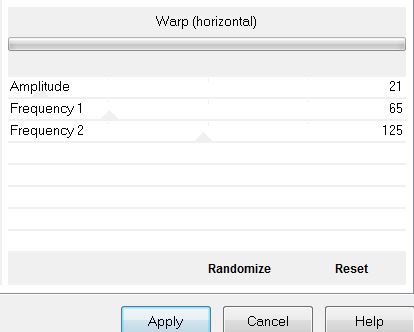
25. Effects- Distortion Effects/ Warp use the settings below/do this effect twice
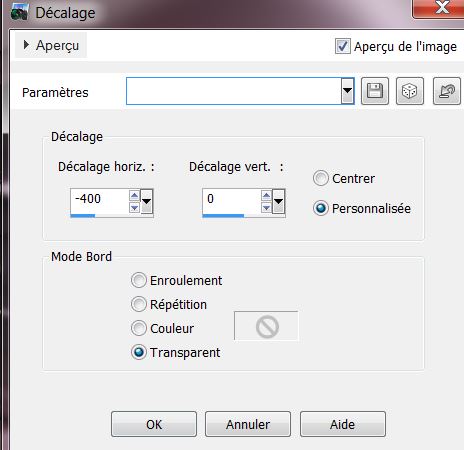
26. Effects
–Image Effects- Offset use the settings below
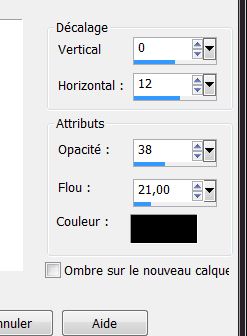
27.
Effects- 3D- Effects- Drop Shadow use the settings below/ Color Black
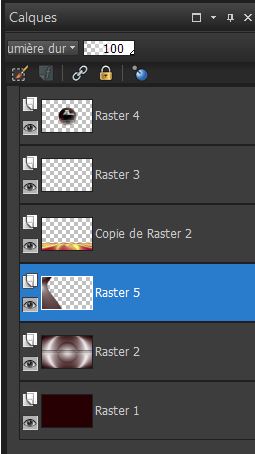
28.
Layers-Properties-Set the Blend Mode to " Hard Light "
29.
Layers- Arrange - Move 3 times down (under Copy of Raster 2)
30. Activate the top of the layer palette
31.
Layers- New Raster Layer
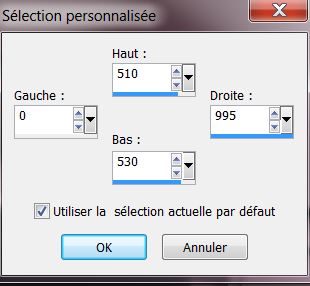
32.
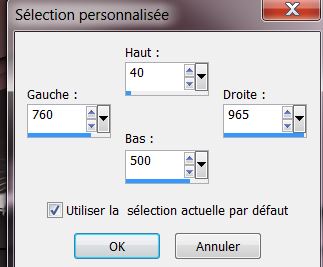
Activate Selection Tool -Custom Selection (S) -Rectangle with these settings
33.
Flood Fill Tool - Fill the selection with the "sunburs " gradient
34.
Effects - Plugins- Alien Skin EyeCandy 5 -
Impact
-Glass -Tab-Settings-User Settings and select my file - Preset ''clear with
reflection''
35.
Selections- Select None
36. Effects
- Distortion Effects - Warp use the settings below
37.
Layers- Duplicate
38. Effects
- Image Effects-Offset use the settings below
39.
Layers- Duplicate
39
a .Image - Mirror - Mirror Horizontal (Image - Mirror in older versions of PSP)
40.
Layers - Merge -Merge Down and repeat once
41.
Layers-Properties-Set the Blend Mode to " Burn "
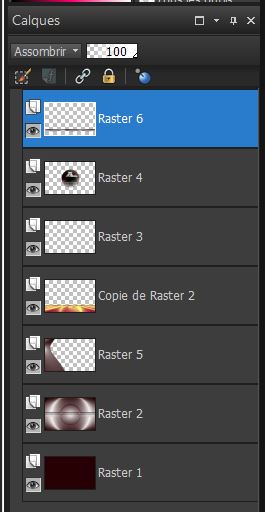
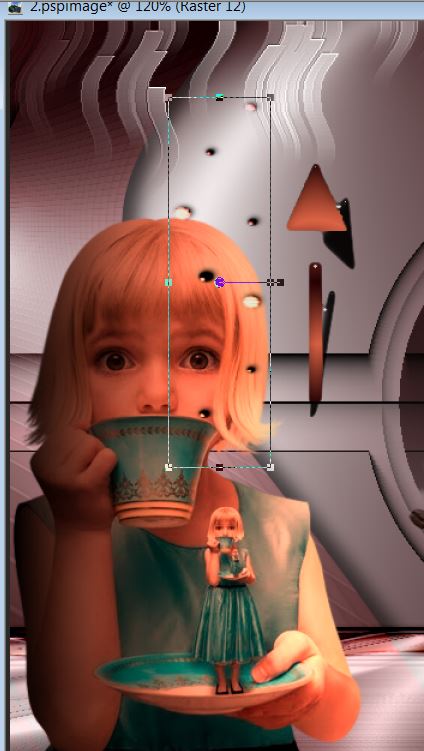
Your work and Layer Palette look like this now-You should have this result
42. Activate the top of the layer palette
43.
Layers- New Raster Layer
44.
Activate Selection Tool -Custom Selection (S) -Rectangle with these settings
45. Flood Fill Tool -Fill the selection with the sunburst gradient
46.
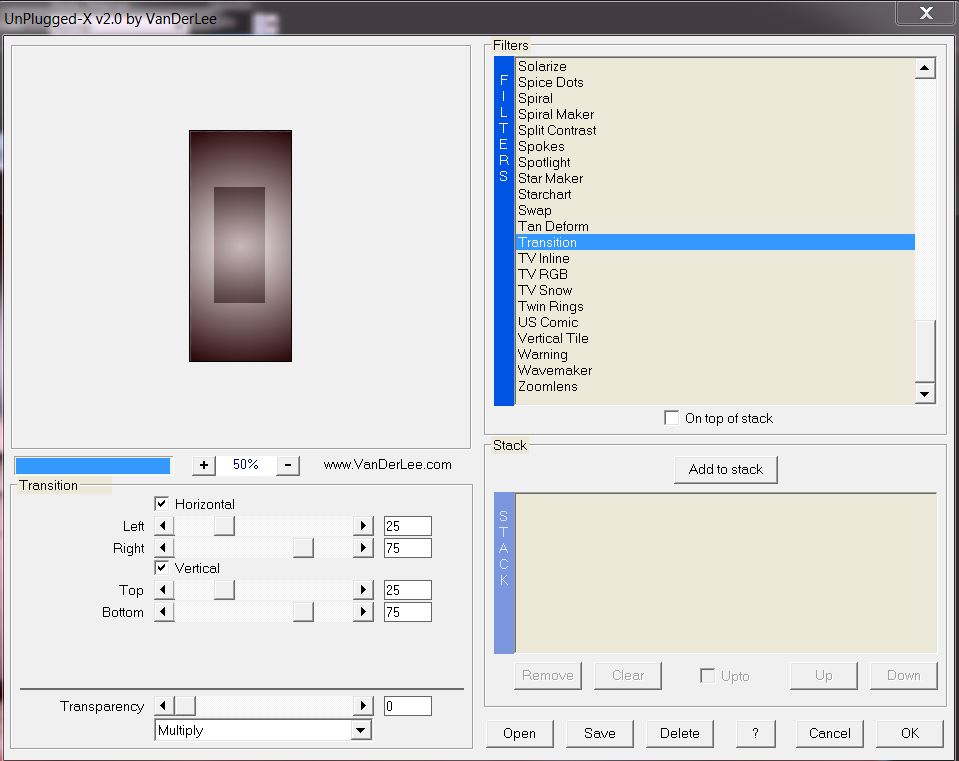
Effects - Plugins
- Vanderlee Unplugged X/ Transition use the settings below-Transparency-Multiply
Selections- Select None
47. Effects -
Edge Effects - Enhance
48.
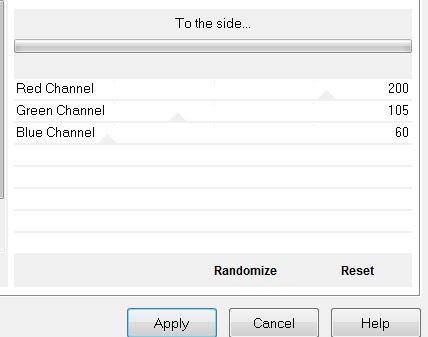
Effects - Plugins - Filters in Unlimited 2.0 – Visual Manipulation- Transmission
70/25/0
49.
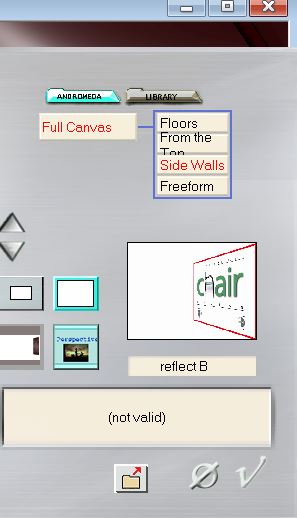
Effects - Plugins - Andromeda -Perspective with these settings
50.
Effects - Plugins - Alien Skin EyeCandy 5 -
Impact - Extrude-Tab-Settings-User Settings and select my file -Preset ''cafe_desir_extrude''
51. Effects
– Image Effects - Seamless Tiling use the settings below
52. Layers- Duplicate
53. Effects
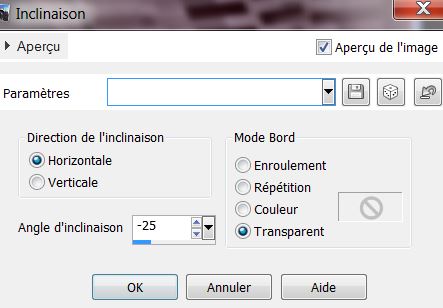
– Geometric Effects- Skew use the settings below
54.
Layers-Properties-Change the Blend Mode to " Soft Light "
55- Open the Tube ''cafe_cafe'' -Edit - Copy- Activate your work -Edit - Paste as a new layer /Move it in the right place( see finished image)
56. Effects
- 3D- Effects- Drop Shadow with these settings: 0/15/42/18 Color Black
57.
Open the Tube ''Alies-1CH502-girl-26052013'' - Edit - Copy- Activate your work -Edit - Paste as a new layer
/Move it in the right place( see finished image)
58.
Effects - Plugins - Filters in Unlimited 2.0 - Lumières Ambiances use the settings below
59.
Layers- New Raster Layer
60.
Selections –load/save selection –load selection from disc and select my selection: ''desir_cafe_2''
61. Flood Fill Tool - Fill the selection with the sunburst gradient
62. Effects
– Edge Effects- Enhance
Selections- Select None
63. Effects - Plugins - Filters in Unlimited 2.0 – Distorsion Filters / Warp (horizontal)use the settings below
64.
Layers- New Raster Layer
65.
Color Palette/ Set your foreground color to color
#dd6446 -Set your background color to color #270305
66.
Set your Foreground color to foreground-background " Sunburst" gradient configured like this
67.
Selections –load/save selection –load selection from disc and select my selection: ''desir_cafe_3''
68. Flood Fill Tool -Fill the selection with the gradient
Selections- Select None
69.
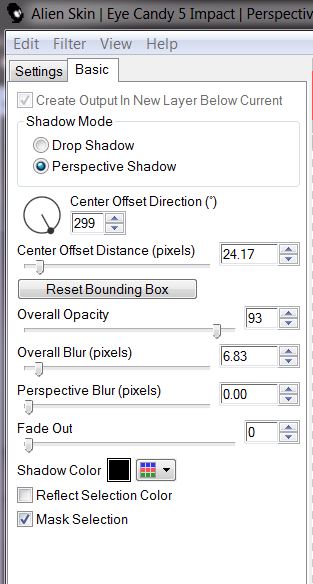
Effects - Plugins- Alien Skin EyeCandy 5 -
Impact /Perspective shadow/ Preset =
Drop shadow hight
Basic: use the settings below
70.Effects
- Plugins - Alien Skin EyeCandy 5 - Impact - Glass /Clear No Drop Shadow
71.
Layers- Duplicate
72.Open the Tube ''cafe_bulles ''
- Edit - Copy- Activate your work -Edit - Paste as a new layer tube/Move the tube as shown in the example below
73.
Open the Tube ''cafe_pastilles'' - Edit - Copy- Activate your work -Edit - Paste as a new layer- Move the tube as shown in the example below
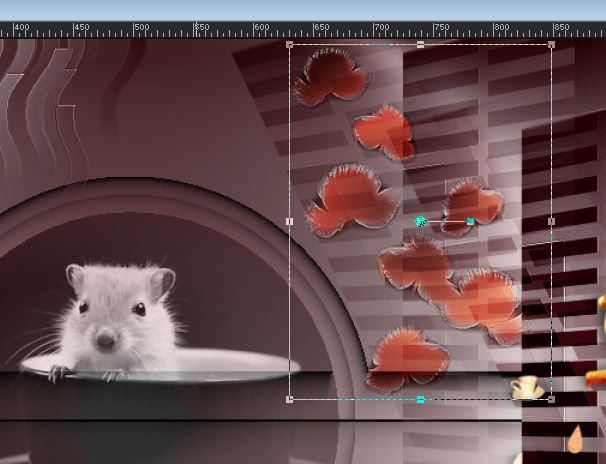
74. Layer-Palette: Set the Blend Mode to" Hard Light" -Reduce the Opacity of this layer to 81%
75.
Layers- Merge- Merge Visible
76. Image - Add borders-Symmetric checked: 2 Pixels-Color #270305
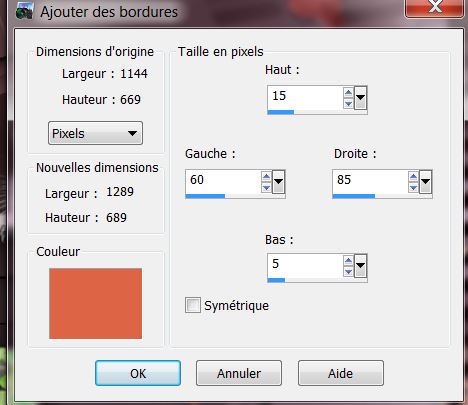
77. Image - Add borders-Symmetric NOT checked use the settings below -Color #DD6546
78.
Activate the Magic Wand-Select the border
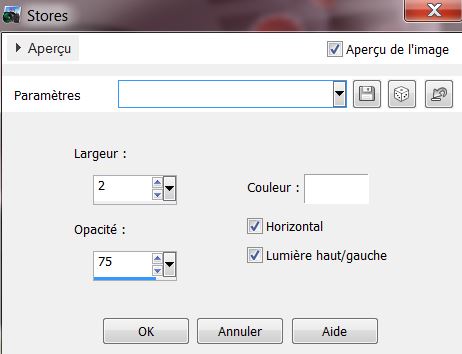
79. Effects
– Texture Effects- Blinds use the settings below /Color white
80.
Selections /Invert
81.Effects
- Plugins - Alien Skin EyeCandy 5 - Impact /Perspective shadow/Preset
: Drop shadow blury
82.
Selections- Select None
83.
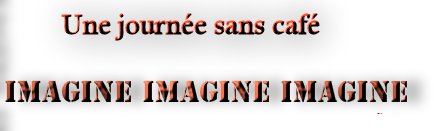
Open the Tube ''imagine_texte'' -Edit - Copy- Activate your work -Edit - Paste as a new layer-
Place according to your taste
84.
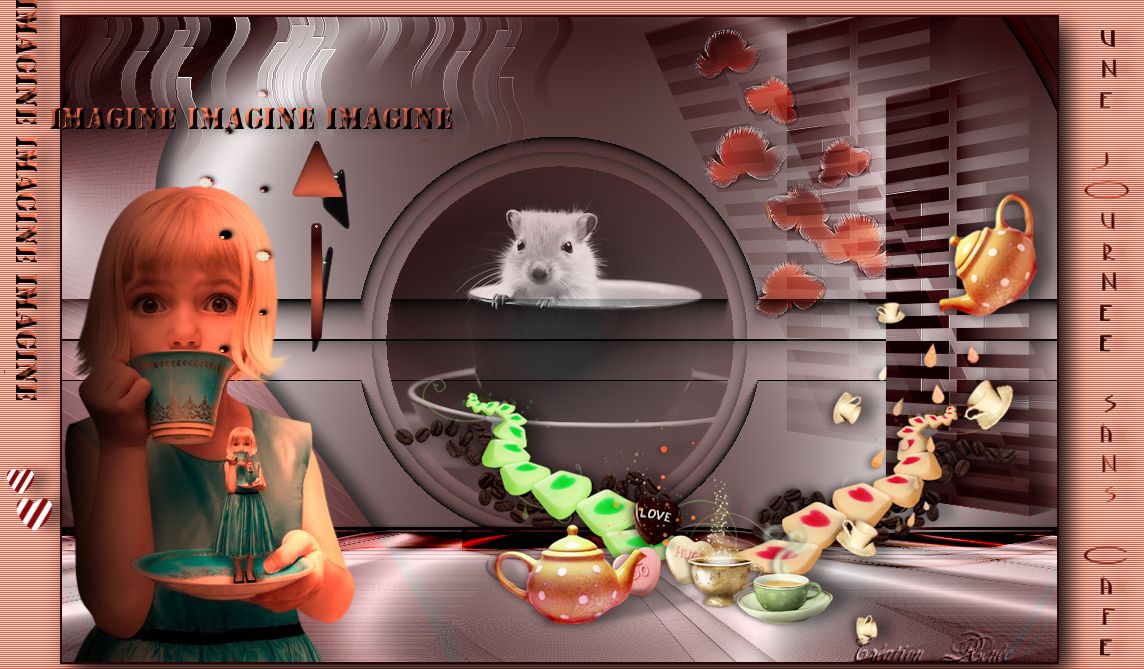
Text Tool- with font of your choice -Renée chose the font ''cafenfill''/Write the text on the right
or take my text and paste it in place
That's it - Thank you / I hope you enjoyed this lesson
This lesson was written by Renée
15/06/2013
|
 Transaltions