|
The artist images used in these tubes
 are by
Jonas Peterson, who is creating a series of images entitled: Youth is being wasted by the young.
He uses an AI (artificial intelligence) program called Midjourney.
You can find this software -here

Let's start the lesson
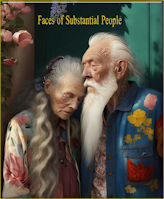
Visages de personnes substantielles / Faces of
Substantial People
You find tubes
Here
-
Preparation
-Material Properties:
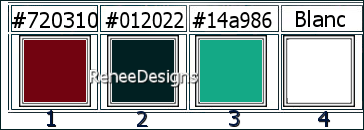
Set your Foreground color to color #720310=color 1 – Set your Background color to color #012022=color2

-
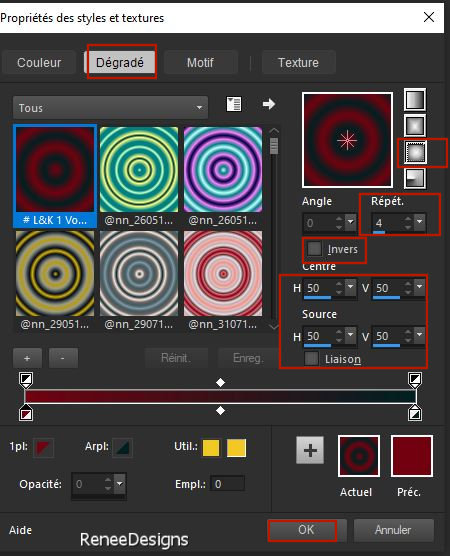
Properties Foreground- Prepare a Foreground/Background sunburst Gradient configured like this
1.
File: Open a transparent image in this size:1050 x 650 Pixels
2. Flood Fill Tool
 –
Fill the layer with the gradient –
Fill the layer with the gradient
3.
Adjust- Blur-Gaussian Blur-Radius 30%
4.
Open the Tube ‘’Visages-substantiels- Image 1’’ -Edit - Copy- Activate your work -Edit - Paste as a new layer
(You can colorize the tube with the color changer (F)
5.
Effects – Plugins– L & K’s – Paris using the default settings
6.
Effects-Edge Effects – Enhance More (repeat a second time)
- In the Layer Palette- activate Raster 1
7.
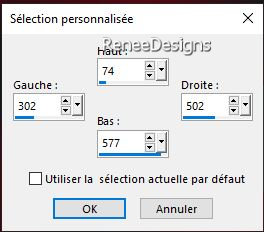
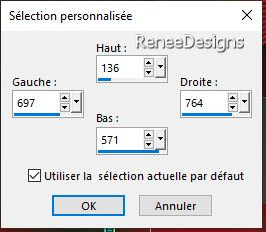
Activate Selection Tool -Custom Selection (S) -Rectangle with the same settings
8.
Selections- Promote Selection to Layer
9.
Layers- Arrange- Bring to Top
10.
Effects – Texture Effects – Fur use the settings below
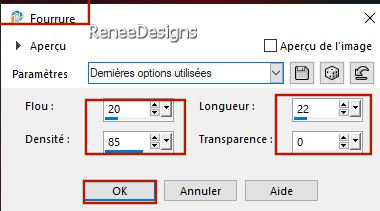
11.
Effects – Edge Effects – Enhance

12.Effects – 3D-Effects – Drop Shadow with these settings: 1/1/65/5 Color Black
-
Properties Background- Set the Background color to color #ffffff=4
13.
Effects - Plugins - Filters in Unlimited 2.0 - It@lian
Editors Effect - Effetto Fantasma with these settings: 15/15
14.
Effects – Edge Effects– Enhance
15.Layers-Properties-Set the B lend Mode to " Hard Light " - Reduce the Opacity of this layer to 73%
16. Effects- Image Effects- Seamless Tiling use the settings below
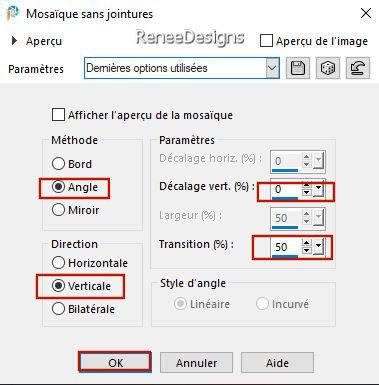
- Activate the bottom of the Layer-Palette=Raster 1
17.
Layers– Duplicate
18.
Effects - Plugins - Filters in Unlimited 2.0 -
Andrew's Filters 2 - DownHill Too..use the settings below.
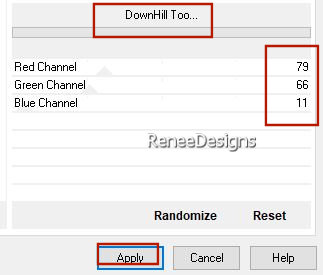
19.
Layers-Properties - Reduce the Opacity of this layer to 42 %
20.
Effects -Plugins - AP[Lines] Lines –
Silverlining use the settings below
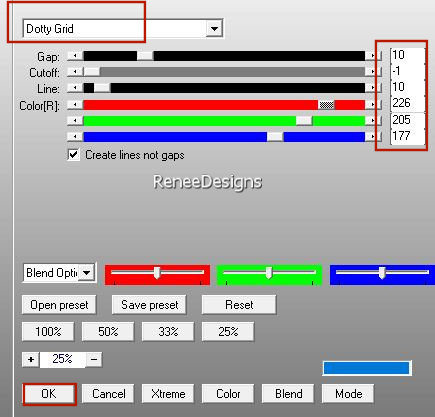
- Activate the bottom of the Layer-Palette=Raster 1
21.
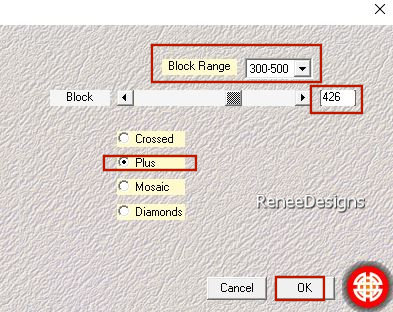
Effects –Plugins – Medhi – Sorting Tiles use the settings below
22.
Effects – Edge Effects– Enhance More
23.
Effects - Plugins - Filters in Unlimited 2.0 - &<Bkg
Kaleidoscope> - 4 QFlip UpperL
- Activate Copy of Raster 1 in the layers palette
24.
Selections –load/save selection –load selection from disc and select my selection: ‘Visages
substantiels-1’’
25.
Selections- Promote Selection to Layer
26.
Effects – 3D-Effects – Drop Shadow with these settings: 0/0/ 65/40 Color Black

27.
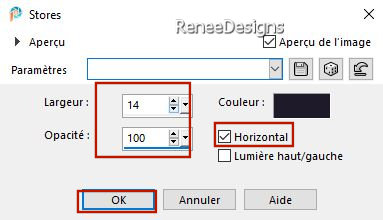
Effects – Texture Effects –Blinds - use the settings below -Color Black
28.
Layers- Duplicate
29.
Effects – Geometric Effects – Circle– Transparent
30.
Objects – Align– Top
31.
Layers- Arrange- Bring to Top
32.
Layers- Duplicate
33.
Image - Resize -55%
34.Pick Tool: (K) on your keyboard -Enter these parameters on the toolbar
 366/ 0
Press ( M ) to close the Pick Tool
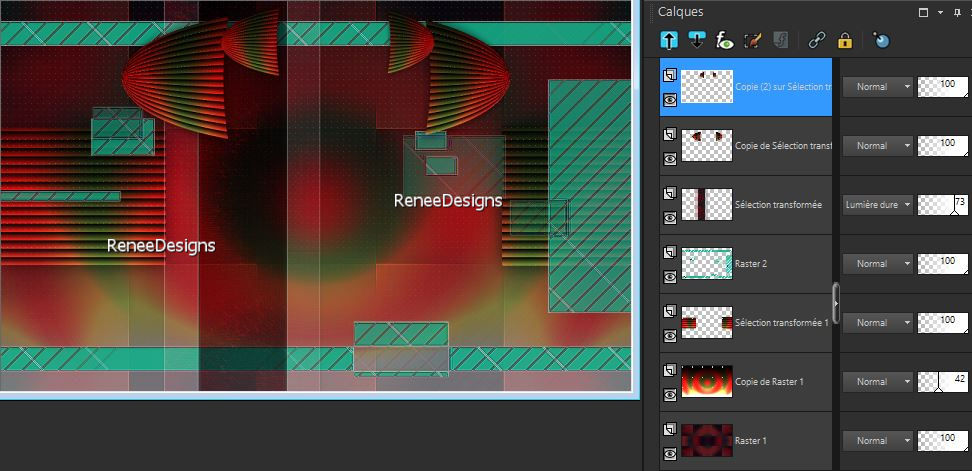
Your work and Layer Palette look like this now-You should have this result
-
Material Properties:
Set your Foreground color to color #720310=color 1 – Set your Background color to color #14a986=color 3
35.
Layers- New Raster Layer
36.
Selections –load/save selection –load selection from disc and select my selection: ‘Visages
substantiels-2’’
37.
Flood Fill Tool
 -
Fill the selection with the Background color #14a986=color 3 -
Fill the selection with the Background color #14a986=color 3
DO NOT DESELECT
38.
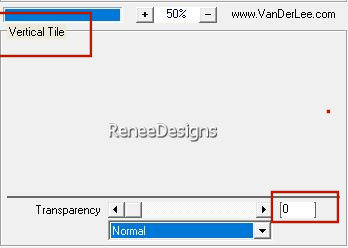
Effects – Plugins – Vanderlee – Unplugged X –
Vertical Tile use the settings below
39.
Effects – Edge Effects- Enhance More (repeat a second time)
40.
Activate Selection Tool -Custom Selection (S) -Rectangle with the same settings


41.
Effects – 3D-Effects – Drop Shadow with these settings: 10/10/50/28 Color Black
42.
Layers- New Raster Layer
43.
Selections –load/save selection –load selection from disc and select my selection: ‘Visages
substantiels-3’’
44.
Flood Fill Tool
 –Fill the selection
with the Foreground color #720310=color 1 –Fill the selection
with the Foreground color #720310=color 1
45.
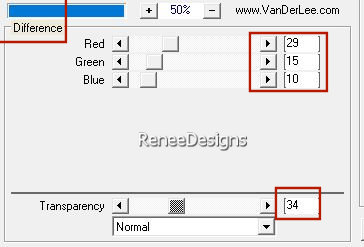
Effects – Plugins – Vanderlee – Unplugged X-
Difference use the settings below
46.
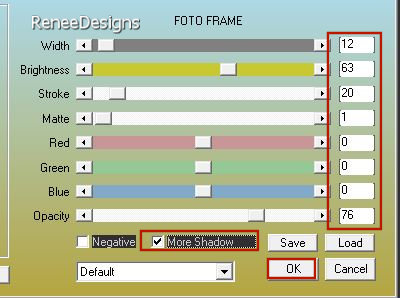
Effects- Plugins - AAA Frame – Foto Frame use the settings below

47.
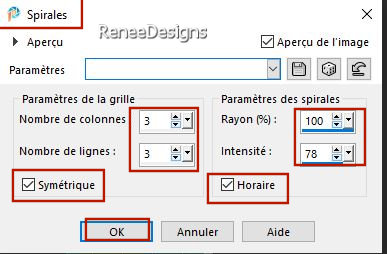
Effects - Distortion Effects - Circulues with these settings
48.
Effects – 3D-Effects – Drop Shadow with these settings:
- 3/ -3 /50 /45 Color Black
-Layers-Properties- Set the Blend Mode to " Overlay "
- Activate Copy of Raster 1 in the layers palette
49.
Layers- New Raster Layer
-
Properties Foreground-Set the Foreground color to color # ffffff=4
50.
Flood Fill Tool (F)  –
Lower the Opacity to 50% on the Toolbar –
Fill the layer with the Foreground color #ffffff=4 –
Lower the Opacity to 50% on the Toolbar –
Fill the layer with the Foreground color #ffffff=4
51.
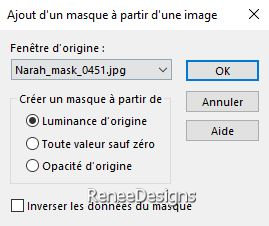
Layers- New Mask Layer- From Image and select Mask
‘’Narah_mask_0451’’
-
Layers- Merge Merge Group
52.
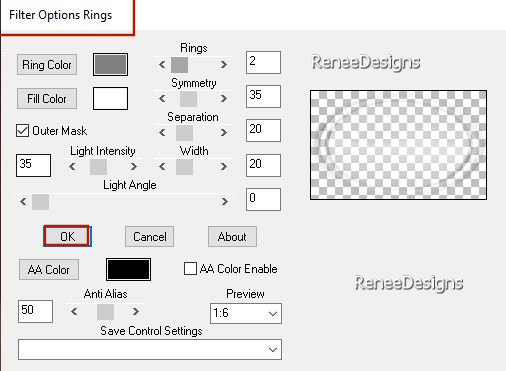
Effects – Plugins – Bordermania – Rings use the settings below
53.
Layers- Duplicate
54.
Layers-Properties-Set the Blend Mode to "Overlay "
- To replace the top of the layer-palette
55.
Edit- Copy Special-Copy Merged
56.
Edit- Paste as a new layer
57.
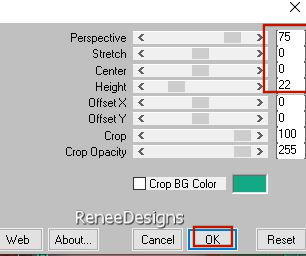
Effects – Plugins– Mura’s Meister – Perspective
Tiling use the settings below
58.
Effects –Reflection Effects– Rotating Mirror using the default settings
59.
Selections –load/save selection –load selection from disc and select my selection: ‘Visages
substantiels-4’’
 3 times

60.
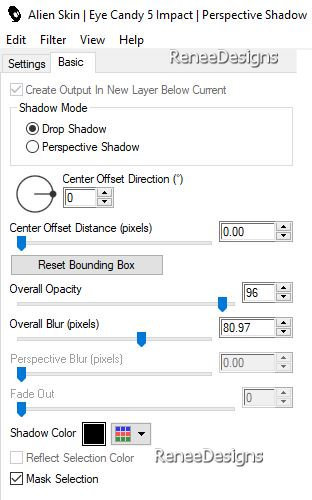
Effects - Plugins - Alien Skin EyeCandy 5 -
Impact – Perspective Shadow use the settings below
61.
Open the Tube ‘’Renee-TUBES- Faces-of-Substantial-People-9’’
- Activate the layer ‘’tuto’’ of the Tube
-
Edit - Copy- Activate your work -Edit - Paste as a new layer
-
Pick Tool: (K) on your keyboard -Enter these parameters on the toolbar
 383/210 383/210
62.
Effects - Plugins - Alien Skin EyeCandy 5 -
Impact – Perspective Shadow /Same settings - Just replace the Black color with the #14a986= color 3
63.
Layers- New Raster Layer
64.
Selections –load/save selection –load selection from disc and select my selection: ‘Visages
substantiels-5’’
65.
Properties Foreground-Set the Foreground color to color # 012022=2
Flood Fill Tool  – Opacity 100% – Fill the selection with the Foreground color # 012022=2 – Opacity 100% – Fill the selection with the Foreground color # 012022=2
66.
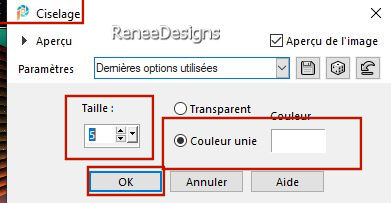
Effects – 3D Effects– Chisel-Size 5 –Color white

67.
Open the Tube ‘’Bonus-tubes’’ Select 2 tubes of your choice and paste them as a new layer
-
Resize your tube if necessary
-
Reduce the opacity of the tube on the left side to 55% (or to taste).
68.
Open the Tube ‘’
Visages-substantiels- Image 2.’’ (Text) Edit - Copy- Activate your work -Edit - Paste as a new layer
–
Place the text of your choice or take a look at the example of Renée
69.
Layers-Properties-Set the Blend Mode to "Screen" - Reduce the Opacity of this layer to 57%
70.
Image - Add borders-Symmetric checked: 1 Pixel Color #720310=1
Image - Add borders-Symmetric checked: 35 Pixels Color #ffffff=4
Image - Add borders-Symmetric checked: 1 Pixel Color #14a986=3
Image - Add borders-Symmetric checked: 10 Pixels Color #ffffff=4
Image - Add borders-Symmetric checked: 1 Pixel Color #012022=2
71.
Image - Resize by 1005 Pixels width
72.
Paste the author's watermark on your work and your own watermark
-
Layers- Merge- Merge All (flatten)
Save as JPG
I hope you enjoyed this lesson
Renée
This lesson was written by Renée 11/02 2023
Edited and Update
in 2023
*
Any resemblance with an existing lesson is a coincidence * Do not forget to thank the people who work with us and for us
-I have appointed the tubeurs and translators
Thanks
|


 Translations


