|
Let's start the lesson.
-
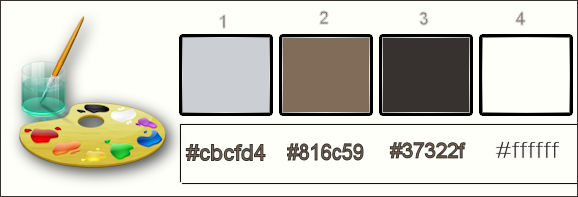
Color-palette:Set your foreground color to color #ffffff- Set your background color to color #cbcfd4
1.
File - New - Open a new transparent image 1005 x 635 pixels
-
Activate Flood Fill Tool and fill the layer with the backgroundcolor #cbcfd4
2.
Activate the tube ‘’ Hiding behind my wings - misted tube of A
PSP Devil’’.pspimage
- Edit/ Copy-Edit - Paste as new layer on your working image .Do not move it is in the right place!
3. Effects- Image Effects- Seamless Tiling with the default settings
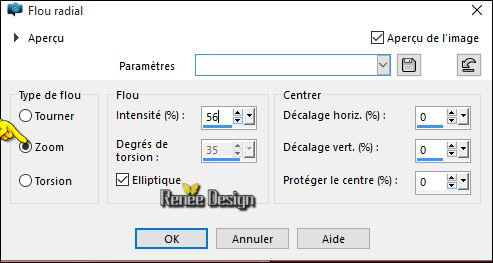
4. Adjust- Blur- Radial Blur use settings below
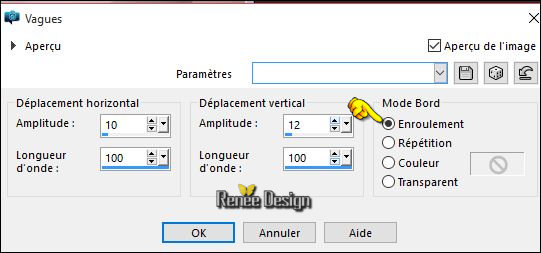
5.Effects- Distortion Effects- Wave use settings below
6. Effects –3D Effects- Drop Shadow with these settings: 0/0/100/1 black
7. Layers- Merge- Merge Down
8. Layers- Duplicate
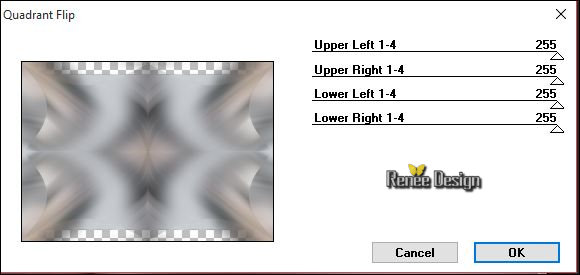
9. Effects- Plugins – Mirror Rave Quadrant Flip use settings below
10.
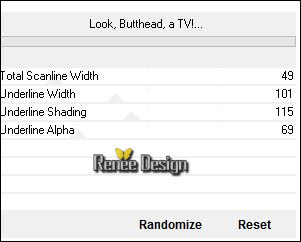
Effects –Plugins- Unlimited – Toadies - Look, Butthead, a
TV!..use settings below
11. Effects- Edge Effects- Enhance -More
12. Effects- Plugins – Simple – Pizza Slice Mirror
13. Effects- Plugins – Simple – Center Tile
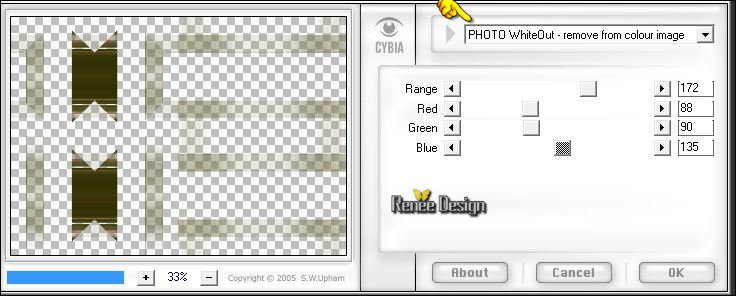
14. Effects
–Plugins– Cybia- Alpha works
(you must have exactly this result / as shown in the printscreen below-So
problem is it effect in png in file)
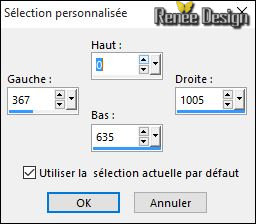
15.
Activate Selection Tool -Custom Selection (S) Rectangle- with these settings
16.
Selections- Promote selection to Layer
17. Effects
–Plugins – Mura’s Meister – Perspective
Tilling use settings below

Keep Selected
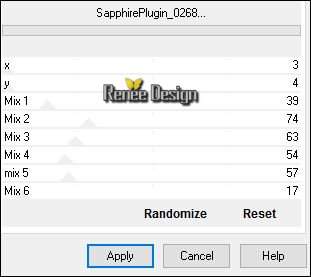
18.
Effects –Plugins- Unlimited - Sapphire Filters 03-
SapphirePlugin_0268..use settings below
-Activate the layer underneath =(Copy of Raster 1)
19.
Effects –Plugins- Unlimited - Sapphire Filters 03-
SapphirePlugin_0222..use settings below

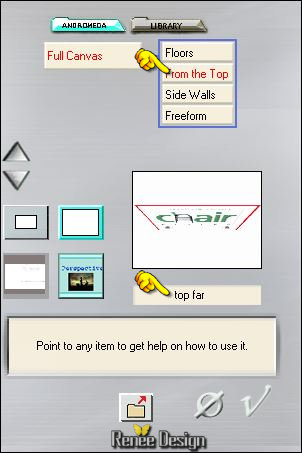
20.
Effects –Plugins - Andromeda Perspective – From
the Top
21. Edit-Cut !! Edit Paste as a new Layer
Selections- Deselect All
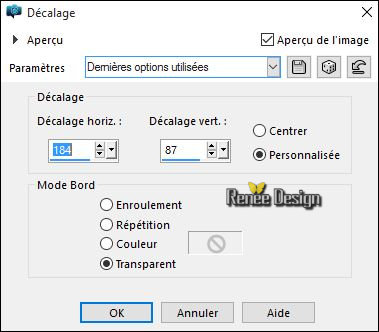
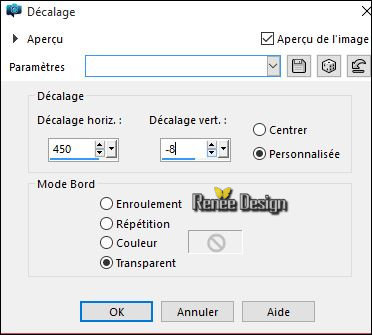
22. Effects- Image Effects- Offset use settings below
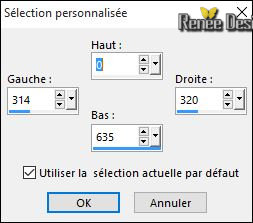
 23.
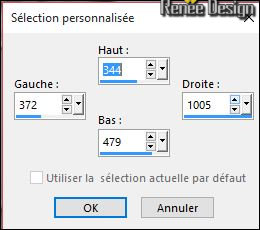
Activate Selection Tool -Custom Selection (S) Rectangle- with these settings 23.
Activate Selection Tool -Custom Selection (S) Rectangle- with these settings
24. Edit-Cut !! Edit Paste as a new Layer
Selections- Deselect All
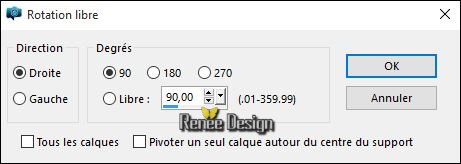
25. Image
Free Rotate
26. Image
- Mirror
27. Effects- Image Effects- Offset use settings below
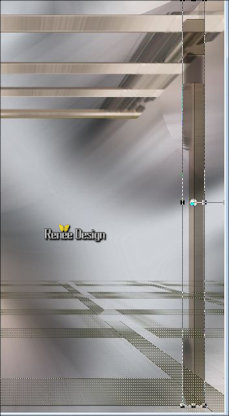
- You should have this result as shown in the print screen below

- Layer palette – Make Copy of Raster 1 active
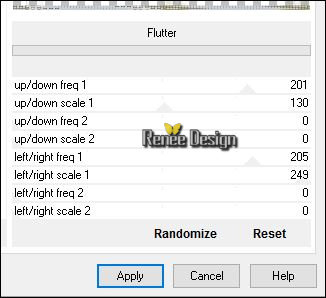
28. Effects
–Plugins- Unlimited – Ecosse- Flutter use settings below
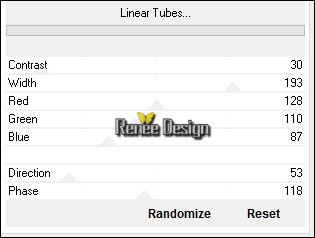
29.
Effects –Plugins- Unlimited - Alf's Power Grads -Linear
Tubes..use settings below
30.
Effects- Geometric Effects - Spherize with these settings
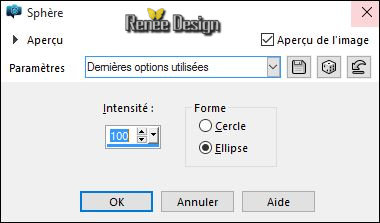
- Repeat-Effects- Geometric Effects - Spherize
- Layer palette – Make Raster 2 active
31. Effects- Plugins –Alien skin EyeCandy5 Impact extrude –tab Settings/User settings choose my preset:
‘volatum_extrude’’
- Se placer
sur le raster 3
32. Effects- Plugins –Alien skin EyeCandy5 Impact extrude –tab Settings/User settings choose my preset:‘volatum_extrude’’
33. Image
Mirror
34. Activate your Pick Tool (K) and move as shown in the example below
35. In the Layer- Palette- Double click on this Layer and set the Blend Mode to "Multiplikation " -Set the layer opacity of this layer to 75%
-Layer palette – Make Copy of Raster 1 active
36. Layers- New Raster Layer
37.
Selections –load/save selection –load selection from disc and choose: ‘’ Volatum_1’’
38. Activate Flood Fill Tool and fill the selection with the backgroundcolor
Selections- Deselect All
39. Effects
– Plugins–EyeCandy 5 impact – Extrude –tab Settings/User settings choose my preset:
« volatum_extrude2 »
40. In the Layer- Palette- Double click on this layer and set the Blend Mode to "Soft Light "
- Se
replacer en haut de la palette des calques
41. Activer
le tube ‘Volatum _renee_birds ‘’
- -Edit/ Copy-Edit - Paste as new layer on your working image
-
Placer
42.
Calque – Ajouter un nouveau calque
43.
Activate Selection Tool -Custom Selection (S) Rectangle- with these settings
44. Activate Flood Fill Tool and fill the selection with the backgroundcolor #cbcfd4
Selections- Deselect All
45. Effects
–Plugins– EyeCandy 5 Impact – Motion Trail –tab Settings/User settings choose my preset ‘’ Volatum_motion_trail’’
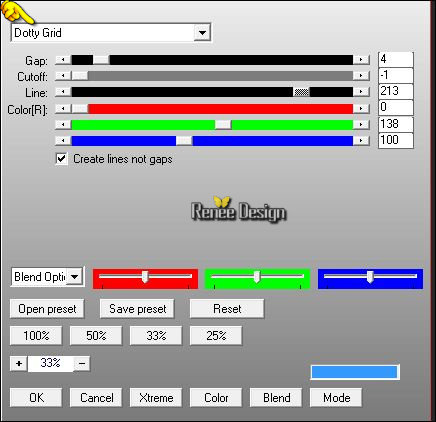
46. Effects- Plugins – AP [Line] Silverling use settings below
47. In the Layer- Palette- Double click on this layer and set the Blend Mode to "Soft Light " – Set the layer opacity of this layer to 79%
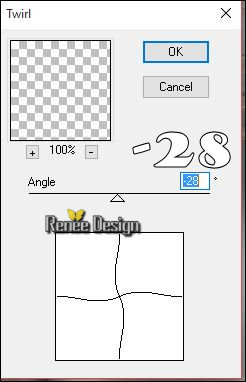
48. Effects
–Plugins–Distord- Twirl use settings below
49. Layers- New Raster Layer
50. Activate Flood Fill Tool and fill the layer with the backgroundcolor
51. Layers- New Mask Layer From Image and select mask
‘’Masque_Volatum.jpg’’

- Layers- Merge- Merge Group
52. Layers- New Raster Layer
53.
Selections –load/save selection –load selection from disc and choose: ‘’
Volatum_1’’
54. Activate the tube « Renee_tube_project »
- Edit/copy- Edit/ paste into selection
Selections- Deselect All
55. Layers- Arrange- Move Down
-
Set the layer opacity of this layer to 77%
-Activate the top of the layer palette
56. Activate the tube ‘’ Renee_tube_Volatum_plancher’’
- Edit/ Copy-Edit - Paste as new layer on your working image
- Activate Move Tool (M) move to the bottom right corner
-Leave Opacity to 51%
57. Activate the tube ‘’ Renee_tube_volatum’’
- Image Resize to 80%
- Edit/ Copy-Edit - Paste as new layer on your working image
- Activate your Pick Tool (K) and move as shown in the example below
58. Activate Free hand Selection Tool =Lasso– Mode =point to point-Select this part as shown in the example below( take a wider selection for a good result)
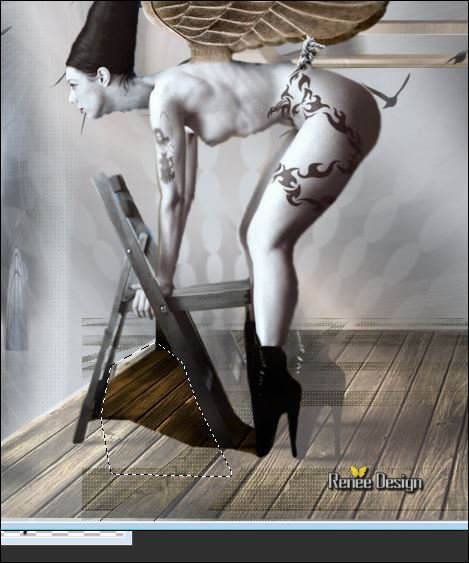
59. Effects- Plugins – Graphic plus - Cross
shadow use settings below
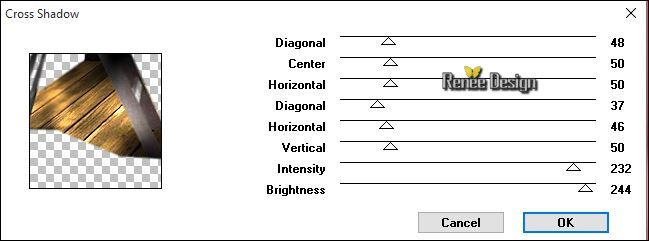
Selections- Deselect All
60. Activate the tube ‘’ Volatum_soleil’’
- Edit/ Copy-Edit - Paste as new layer on your working image
- Activate Move Tool (M) move to the bottom left corner (see finished image)
61. In the Layer- Palette- Double click on this Layer and set the Blend Mode to "Overlay " -Set the layer opacity of this layer to 93%
62. Activate the tube ‘’ Volatum_corbeau’’
- Image
Mirror
- Edit/ Copy-Edit - Paste as new layer on your working image
- Place to your taste
- Color-palette:Set your foreground color to color #cbcfd4 - Set your background color to color
#816c59
63. Layers- New Raster Layer
64.
Activate Selection Tool -Custom Selection (S) Rectangle- with these settings
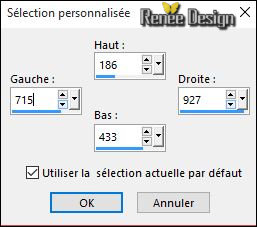
65. Activate Flood Fill Tool and fill the selection with the backgroundcolor #816c59
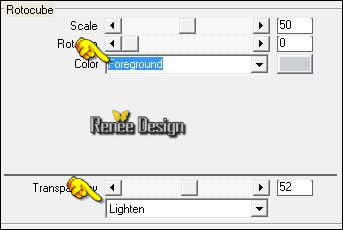
66. Effects- Plugins -Vanderlee –Unplugged
X – Rotocube use settings below -foregroundcolor #cbcfd4
Selections- Deselect All
67. Activate Magic Wand and select the center of the square
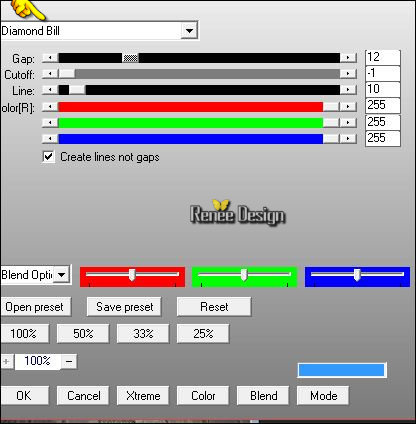
68. Effects- Plugins – AP[LineSilverling] use settings below
Selections- Deselect All
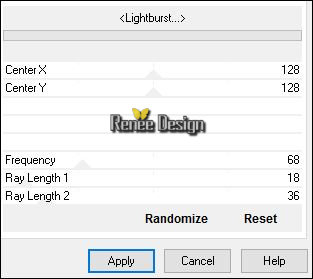
69.
Effects –Plugins- Unlimited - &<Bkg Designers sf10
IV>-<Lightburst...use settings below
70. In the Layer- Palette- Double click and set the Blend Mode to "Hard Light "
71. Effects
–Plugins- Unlimited -It@lian Editors Effect - Effetto Fantasma with these settings 0/62
72. Effects- Edge Effects- Enhance
73. Activate the tube ‘’Renee_tube_Volatum_charnières’’
- Edit/ Copy-Edit - Paste as new layer on your working image - With your move tool place it to the right side
(place at/on the door)
74. Activate the tube Renee_tube_Volatum_bouton’’
- Edit/ Copy-Edit - Paste as new layer on your working image
- With your move tool place it to the right side (place at/on the door)
75. Activate the tube Renee_tube_Volatum_affiche’’
- Edit/ Copy-Edit - Paste as new layer on your working image
- With your move tool place it to the right side (place at/on the door)
76. In the Layer- Palette- Double click and set the Blend Mode to "Hard Light"- Set the layer opacity of this layer to 83%
77. Activate the tube ‘’ tube_volatum_DECO.png »
- Edit/ Copy-Edit - Paste as new layer on your working image
- With your move tool place it to the bottom right side
78. In the Layer- Palette- Double click and set the Blend Mode to "Luminance-Legacy "- Set the layer opacity of this layer to 83%
79.
Activate the tube ‘’
Renee_Volatum_crows_in_flight’’
- Choose a part of the birds (I chose the first)
- Edit/ Copy-Edit - Paste as new layer on your working image .
80. Image
–Negative Image
81.
Set the layer opacity of this layer between 57 and 62%
- With your move tool place it to the bottom right side (see finished image)
82. Image - Add borders-Symmetric checked: 1 pixel color number 3
83. Image - Add borders-Symmetric checked: 15 pixels color number 1
84. Image - Add borders-Symmetric checked: 1 pixel color number 3
85. Image - Add borders-Symmetric checked: 45 pixels color number 4
86. Image - Add borders-Symmetric checked: 1 pixel color number 3
87. Image - Add borders-Symmetric checked: 10 pixel color number 1
88. Activate the tube ‘’Deco_barres_Volatum ‘’
- Edit/ Copy-Edit - Paste as new layer on your working image .Do not move it is in the right place!
89. Open the tube ‘’texte’’ - Edit/ Copy-Edit - Paste as new layer on your working image -With your Move Tool (M) move to the bottom-Ore write your own text
90. Layers- Merge -Merge All
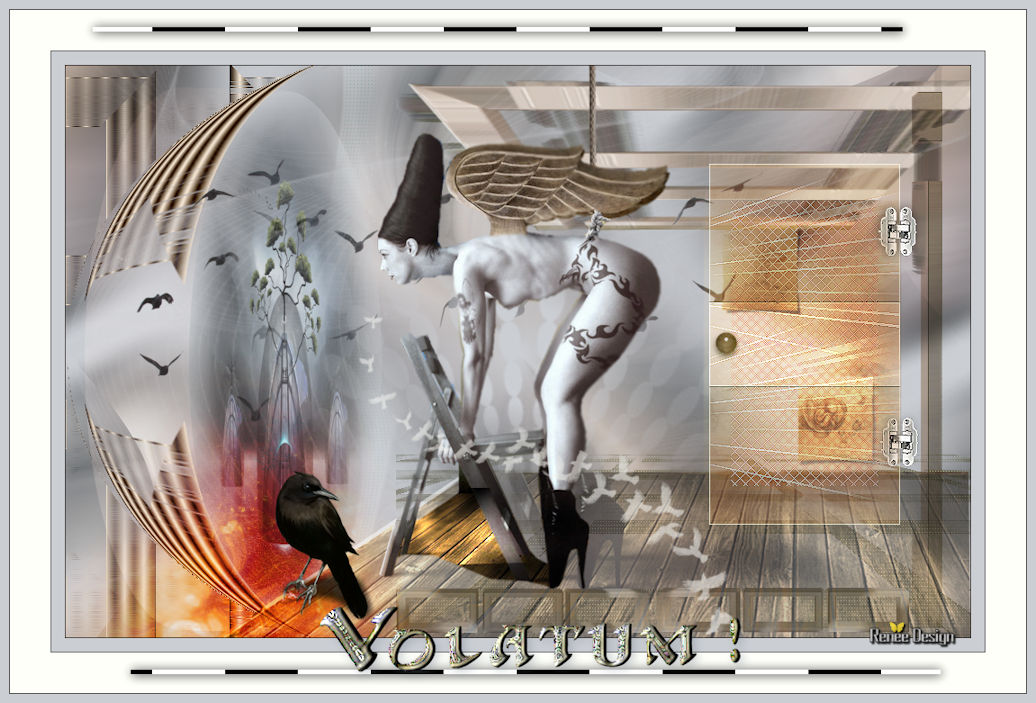
91. Image Resize to 90%
Save as JPEG
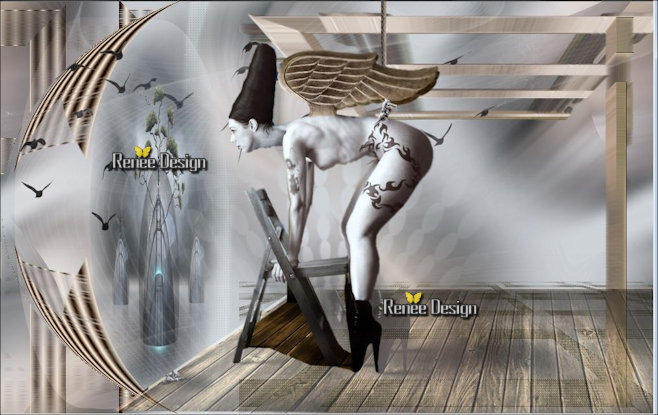
I hope you enjoyed this lesson
Renée
This lesson was written by Renée 05/03/2016
Edited and Update
2016
*
Any resemblance with an existing lesson is a coincidence
* Do not forget to thank the people who work with us and for us I have appointed the tubeurs and translators
Thanks Renée
| 
 Translations


 When you see this logo the filter is imported in Unlimited

 All rights reserved