|
Let's start the lesson.
Woori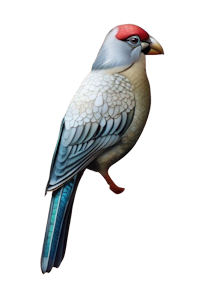 Surreal Baroque Surreal Baroque

1. Open the background image ‘’Fond-Woori ‘’
-Promote Background Layer = Raster 1
2. Effects - Image Effects- Seamless Tiling – Side by Side
3. Effects - Plugins- Filters in Unlimited 2.0 - Penta.com – VTR - Use the defaults
4. Effects - Plugins – FMTile Tools – Saturation Emboss- Use the defaults
5. Layers– Duplicate
6. Effects - Plugins - Filters in Unlimited 2. – Toadies – Ommadawn - Use the defaults
7. Effects – Plugins– Andromeda – Perspective- Floors – front
view
If you have a problem with this filter, for installation see HERE
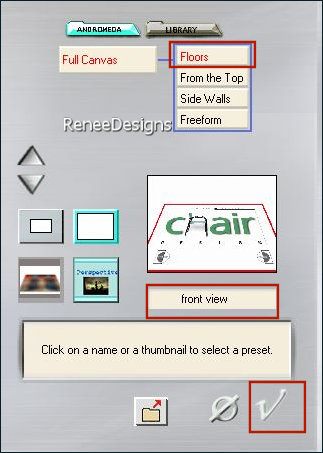
8. Activate the <Pick Tool (K) –
Select my file ‘’woori’’
(Place the preset in the PSP Presets folder.) Ok and effect is realized
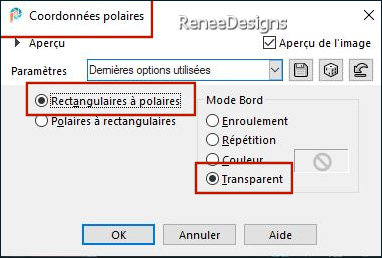
9. Effects–Distortion Effects– Polar Coordinates– Rectangular to Polar-Transparent checked
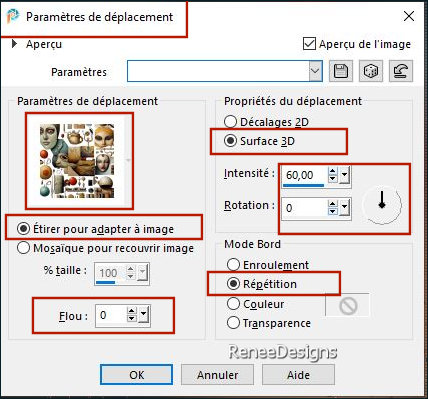
The picture’’ Image-Woori’’ -Put it in the displacement folder on your PSP.
10. Effects – Distortion Effects – Displacement Map-Settings-Stretch map to fit image-3D surface/Repeat checked
11. Reduce the opacity of this layer to 42.
12. Layers- Merge-Merge Down
13. Adjust – Skin Smoothing – Amount = 50
- Material Properties: Set the foreground color to color 1 - Set the background color to color 2
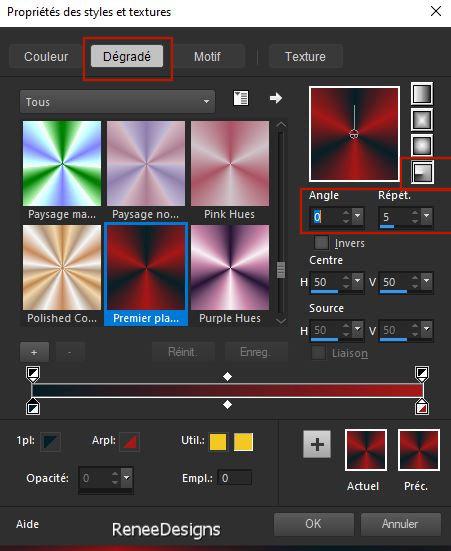
- Replace your foreground color with a radial foreground/background gradient configured like this.
14. Layers-New Raster Layer
15. Activate Flood Fill Tool
 –
Flood fill the layer with the gradient –
Flood fill the layer with the gradient
16. Adjust- Blur-Gaussian Blur-Radius 43
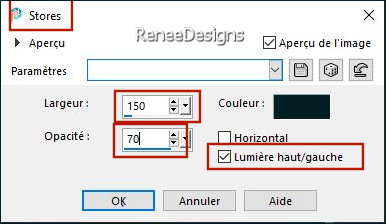
17. Effects – Texture Effects– Blinds/ Foreground color
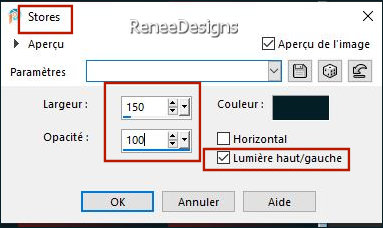
- Repeat - Effects – Texture Effects– Blinds/ Foreground color
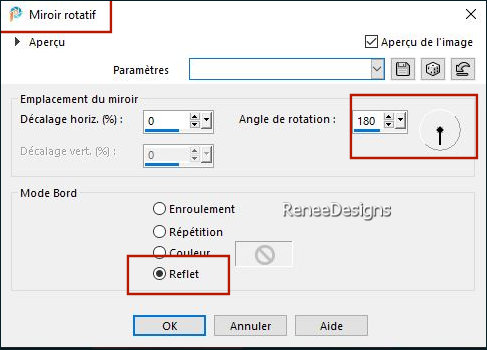
18. Effects – Reflection Effects – Rotating Mirror use the settings below
19. Layers-Properties-Set the Blend Mode to Dodge
20. Layers- New Raster Layer
21. Selections –load/save selection –load selection from disc and select my selection: ‘’Woori-1’’
22. Activate Flood Fill Tool
 –Flood fill the selection with the gradient –Flood fill the selection with the gradient
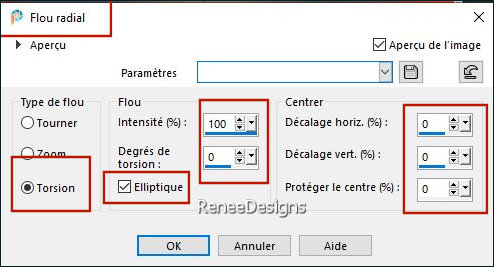
23. Adjust-Blur-Radial Blur use the settings below
24. Effects - Plugins- AP[Lines] Lines – Silverlining use the settings below
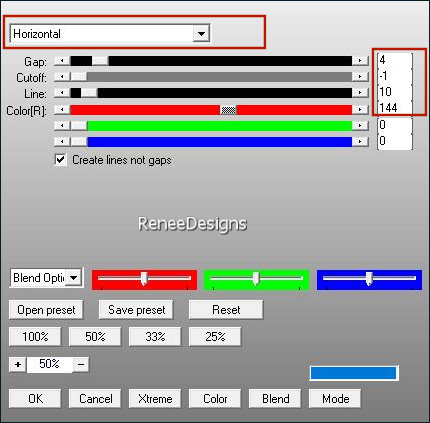
Properties Background- Change the color of the background to white
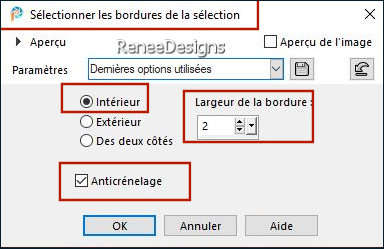
25. Selections - Modify - Select Selection Borders-Inside-Border width 2-Anti-alias checked
26. Layers-New Raster Layer
27. Activate Flood Fill Tool
 –
Flood fill selection with color white –
Flood fill selection with color white
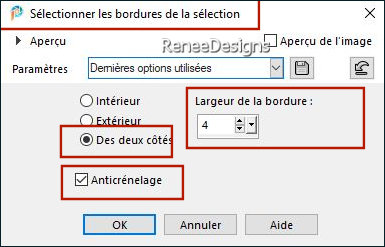
28. Selections - Modify - Select Selection Borders-Both sides -Border width 4-Anti-alias checked
29. Layers-New Raster Layer
30. Activate Flood Fill Tool
 –
Flood fill selection with color white –
Flood fill selection with color white
31. Effects – 3D-Effects–Inner Bevel use the settings below
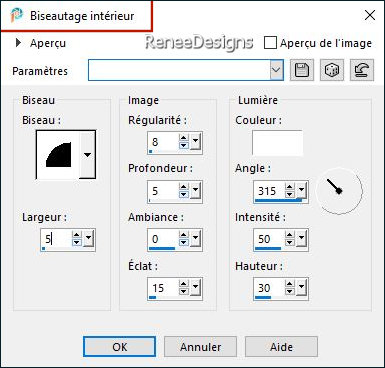

32. Layers - Arrange- Move down
- Activate the top of the layer palette
33. Layers - Merge down 2 times
- Keep white in the background
34. Effects - Plugins - Filters in Unlimited 2.0 - &<Bkg Kaleidoscope> -
Cake Mix : 108/169
35. Effects – Plugins – Transparency – Eliminate white
36. Effects – Plugins – Mura’s Meister – Perspective Tiling use the settings below
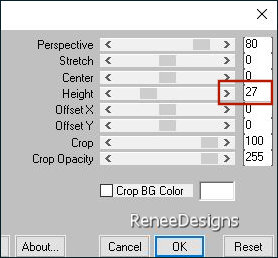
37. Selections –load/save selection –load selection from disc and select my selection: ‘’Woori-2’’
38. Effects -Plugins
– AAA Frames – Frame Works with these settings
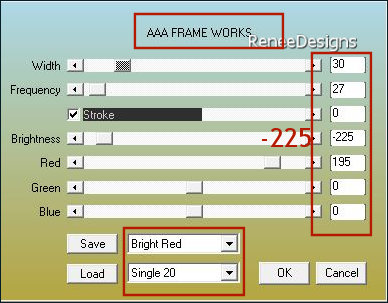
39. Selections – Invert


40. Layers-New Raster Layer
41. Selections –load/save selection –load selection from disc and select my selection: ‘’Woori-3’’
42. Activate Flood Fill Tool
 -
Flood fill the selection with color white -
Flood fill the selection with color white

43. Adjust- Blur-Gaussian Blur-Radius 10
44. Layers – Duplicate
45. Effects – Texture Effects – Mosaic- Glass use the settings below
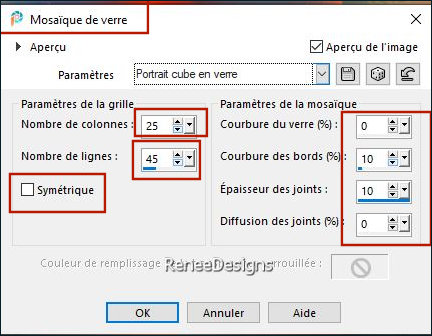
46. Effects – Edge Effects – Enhance
47. Effects – Plugins – Mura’s Meister – Perspective Tiling with the same settings
48. Layers-Properties-Set the Blend Mode to Screen
49. Activate Selection Tool -Custom Selection (S) -Rectangle with these settings

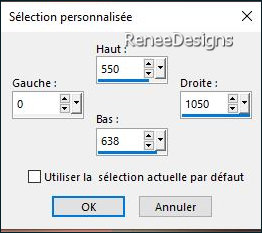


- Always in foreground color no 1 and white background
- Replace your foreground color with a rectangular foreground/background gradient configured like this
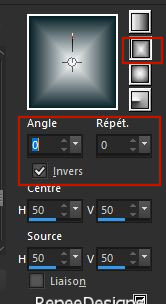
50. Layers-New Raster Layer
51. Selections –load/save selection –load selection from disc and select my selection: ‘’Woori-4’’
52. Activate Flood Fill Tool -
Opacity at 50 - Flood fill the selection with the gradient -
Opacity at 50 - Flood fill the selection with the gradient
53. Effects – Plugins – Medhi – Sorting Tiles use the settings below
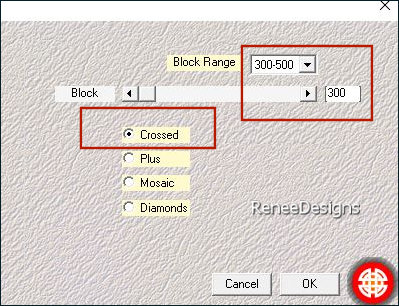
54. Effects –Plugins – Medhi – Sorting Tiles –Same settings but check Plus
55. Effects –Edge Effects– Enhance
56. Effects -Plugins- Filters in Unlimited 2.0- &<Bkg Designer sf10
I> - Cruncher : 6/17
57. Effects –Edge Effects– Enhance
58.
Effects – Reflection Effects – Rotating Mirror use the settings below
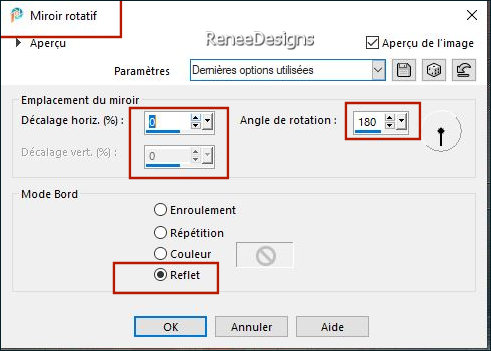

59. Effects - 3D- Effects- Drop Shadow with these settings: 0/0/80/55 Color black
60.
Layers-Properties-Set the Blend Mode to Luminance Legacy
-Stay on this layer
61. Selections –load/save selection –load selection from disc and select my selection: ‘’Woori-5’’
62. Effects- Plugins
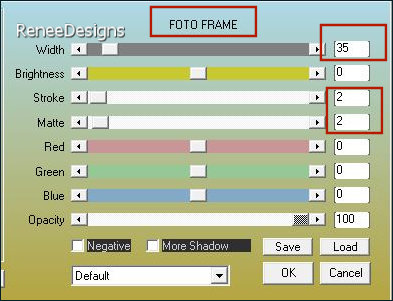
– AAA Frames – Foto Frame use the settings below
63. Layers-New Raster Layer
64.Activate
‘’Renee-TUBES-Woori-image
8.’’- Edit - Copy - Activate your work - Edit - Paste into selection
65.Effects - 3D- Effects- Drop Shadow with the same settings

66. Layers-Arrange-Move Down
67. Effects – Plugins – FM Tile Tools – Blend Emboss -Use the defaults
-Material Properties: Set the foreground color to color 1 - Set the background color to color 2
–Replace your foreground color with a radial foreground/background gradient configured like this.

68. Layers- New Raster Layer
69. Selections –load/save selection –load selection from disc and select my selection: ‘’Woori-6’’
70.
Activate Flood Fill Tool -
Opacity 100% –Flood fill selection with the gradient
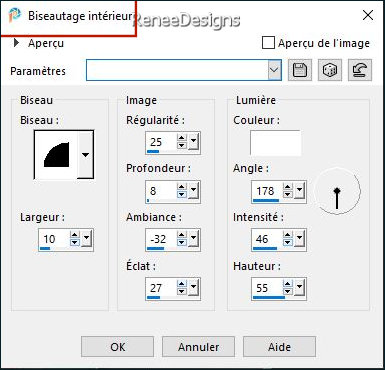
71. Effects – 3D-Effects –
Inner Bevel use the settings below

72. Objects – Align -
Top
73. Layers - Duplicate
74.Image - Mirror - Mirror vertical ( Image - Flip in older versions of PSP)
75. Layers-Merge-Merge Down
76. Layers - Duplicate
77. Image - Mirror - Mirror Horizontal (Image - Mirror in older versions of PSP)
78. Layers-Merge-Merge Down
79. Effects –Geometric Effects–
Circle-Transparent checked
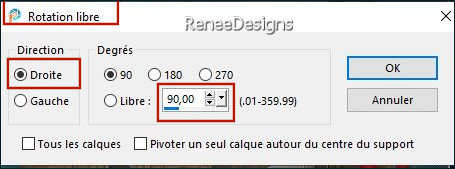
80.
Image - Free Rotate-Direction Right-Degrees 90
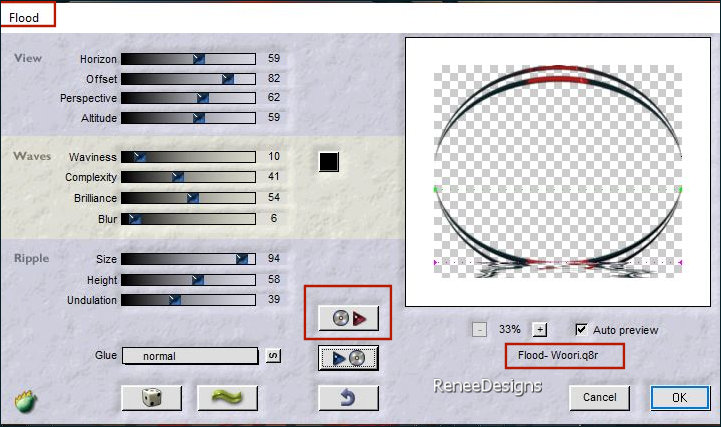
81. Effects - Plugins – Flaming Pear- Flood -Click on the red triangle and find my Preset : Flood-Worri’’
82. Objects – Align – Top
83. Layers– Arrange–Move Down-
Move above Raster 1
- Activate the top of the layer palette
84. Open ‘’ Woori
–Texte’’ Paste as new layer - Move to top (see finished image)
85.We will decorate- Take tube of your choice or from the spare material folder - Or open ‘’Woori –My choice of tubes’’Paste as new layer and move
86. Image - Add Borders-Symmetric checked: 1 pixel – Color No 1
Image - Add Borders-Symmetric checked: 10 pixels - White
Image - Add Borders-Symmetric checked: 1 pixel – Color No 2
Image - Add Borders-Symmetric checked: 20 pixels - White
Image - Add Borders-Symmetric checked: 1 pixel – Color No 2
Image - Add Borders-Symmetric checked: 45 pixels - White
87. Activate the Magic Wand - Select the 20 pixel border
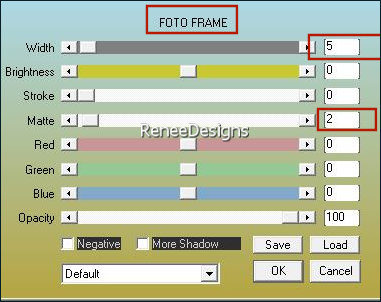
88. Effects – Plugins– AAA Frame – Foto Frame use the settings below

89.Image - Resize to 1005 pixels width
90.
Activate ‘’Woori-deco-cadre’’-Paste a new layer -Do not move
91. Add the author's watermark to your work and your own watermark.
92. Layers-Merge-Merge All (flatten)Resize all layers checked.
Save as PG
I appreciate your attention and engagement with this lesson.
Renée
Renée wrote this lesson on
27/09/2024
I have edited and updated it.
in 2024
*
*
Any resemblance to an existing lesson is purely coincidental.
Do not forget to thank the people who work with us and for us.
I have appointed the tubeurs and translators
Thanks .
|


