|
New
Translations here
Aw ........... Make a wish
**************
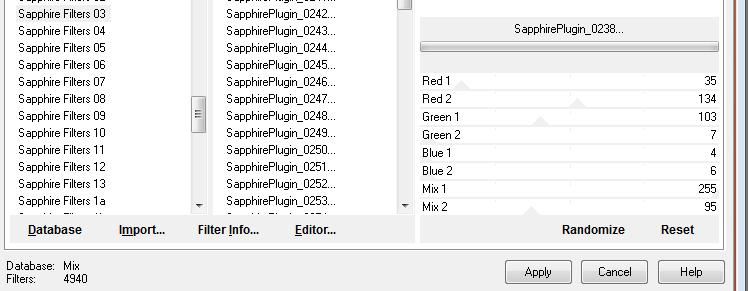
- Let's start the lesson. 1. Open a new transparent image of : 985 x 625 pixels 2. Material of the foreground: foregroundcolor : #f0761e -Material of the background:backgroundcolor : #b52311 3.Prepare a Linear Gradient with these settings: Angle: = 41 and Repeat =1 Invert not checked 4. Activate Flood Fill Tool and fill the layer with the gradient 5. Layers- Duplicate 6. Effects-Plugins -Unimited2.0 -Sapphire Filters 03/ SapphirePlugin_0238...
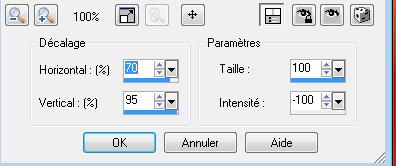
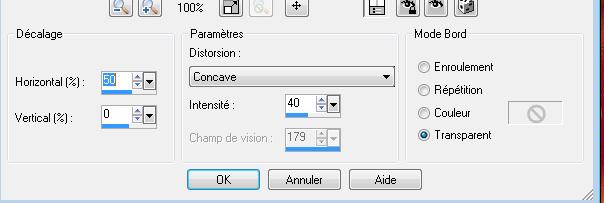
7. Effects- Edge Effects- Enhance 8. Effects-Distortion Effects- Warp with thse settings
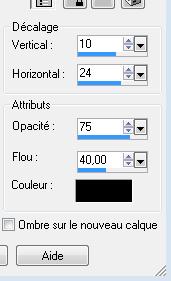
9. Layers - New raster layer /Selections - load/save selection - load selection from disk and choose my selection:'' @_renee_faire_un_voeux'' 10. Open the tube ''art florwers'' Edit/copy-Edit paste into selection 11. Selections- Deselect All 12.Effects - 3D Effects - Drop shadow with these settings
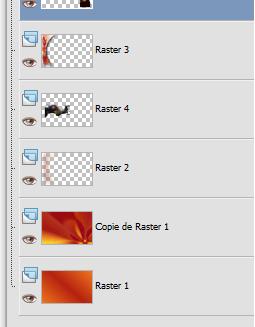
13. Layers - New raster layer /Selections - load/save selection - load selection from disk and choose my selection'' @_renee-faire-un_voeux2'' 14. Open the tube ''art flowers'' Edit/copy-Edit paste into selection 15. Selections- Deselect All 16. Effects - 3D Effects - Drop shadow with the same settings 17. Open the tube : choupie33''17c9c763.png''/ Image Resize 50% Image Resize 80%/ Edit/copy-Edit paste as a new layer on your working area and move 18.Layers- Arrange-Move Down under rasterlayer 3
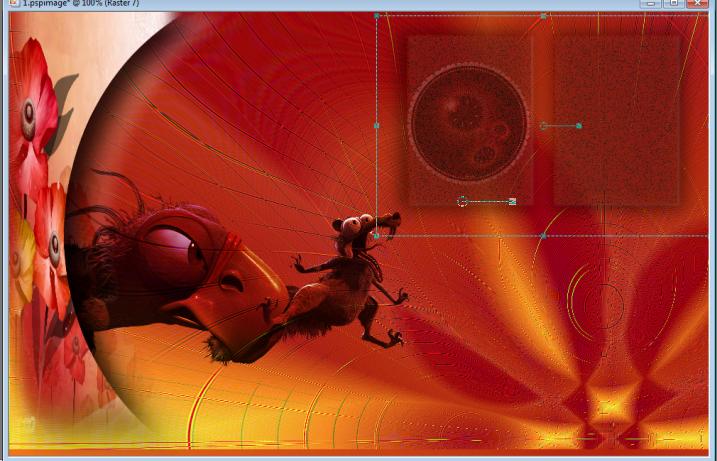
19. In the Layerpalette, set Blend Mode to Hard Light - and set the layer opacity of this layer to 93% 20. Open the tube ''renee-faire-un-voeux-roue/Edit/copy-Edit paste as a new layer on your working area 21. Effects-Image Effects- Offset: H=155 and V =155 transparent 22. In the Layerpalette, set Blend Mode to Multiply - and set the layer opacity of this layer to 95% 23. Open the tube ''renee-faire-un-voeux-2cadres''- Edit/copy-Edit paste as a new layer on your working area and move like this
24. In the Layerpalette, set Blend Mode to Hard Light
25. Open the tube ''@nn_141107_strange_258_woman''/Edit/copy-Edit paste as a new layer on your working area/Image Mirror /
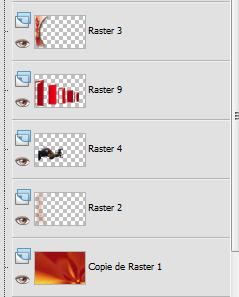
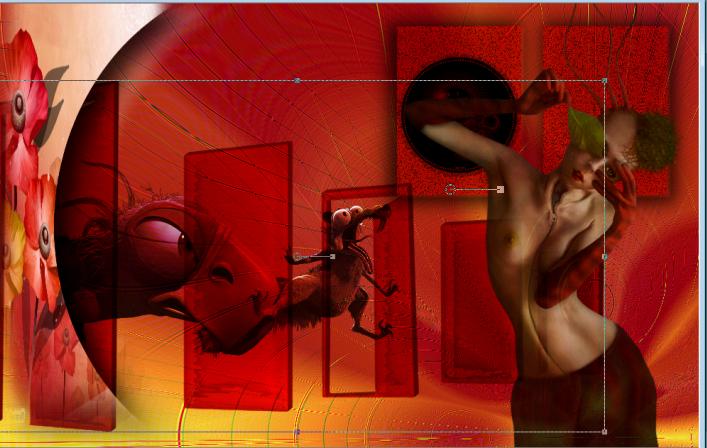
26.Open the tube ''renee-faire-un-voeux-les portes '' Edit/copy-Edit paste as a new layer on your working area /Layers- Arrange-Move Down comes upper rasterlayer 4
-With your move tool move to the left like this/ Your work look like this now
- Layerpalette: Close the bottom layer - Activate the top of the layer-Palette /Layers-Merge-Merge Visible - On this layer /Effects- Distortion Effects- Lens Distortion-Pincushion-Transparent
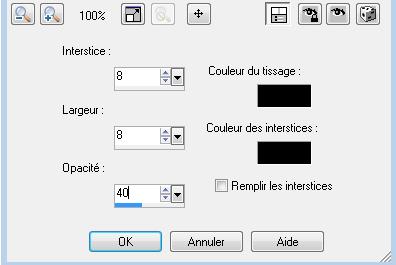
27. Effects- Plugins - EyeCandy 5 perspective shadow -tab Settings/User Settings and choose my preset ''renee-faire-un-voeux'' 28. Layerpalette: Open the bottom layer - Stay on this layer 29. Effects- Texture Effects- Weave with these settings
30. Activate the merged layer 31. Layers - New raster layer 32. Selections - load/save selection - load selection from disk and choose my selection ''renee-faire-un-voeux3'' 33. Material of the foreground: foregroundcolor to color white 34. Pot of Paint Opacity 50 % like this
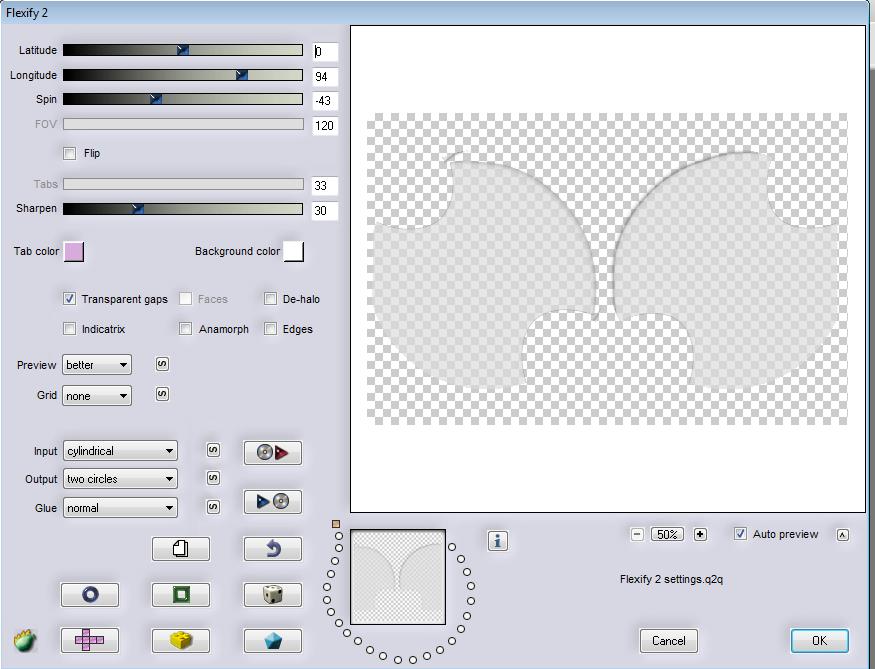
35. Activate Flood Fill Tool and fill the selection with color white -**Pot of Paint Opacity 100% ** 36. Effects- Plugins Flaming Pear flexify2 with these settings
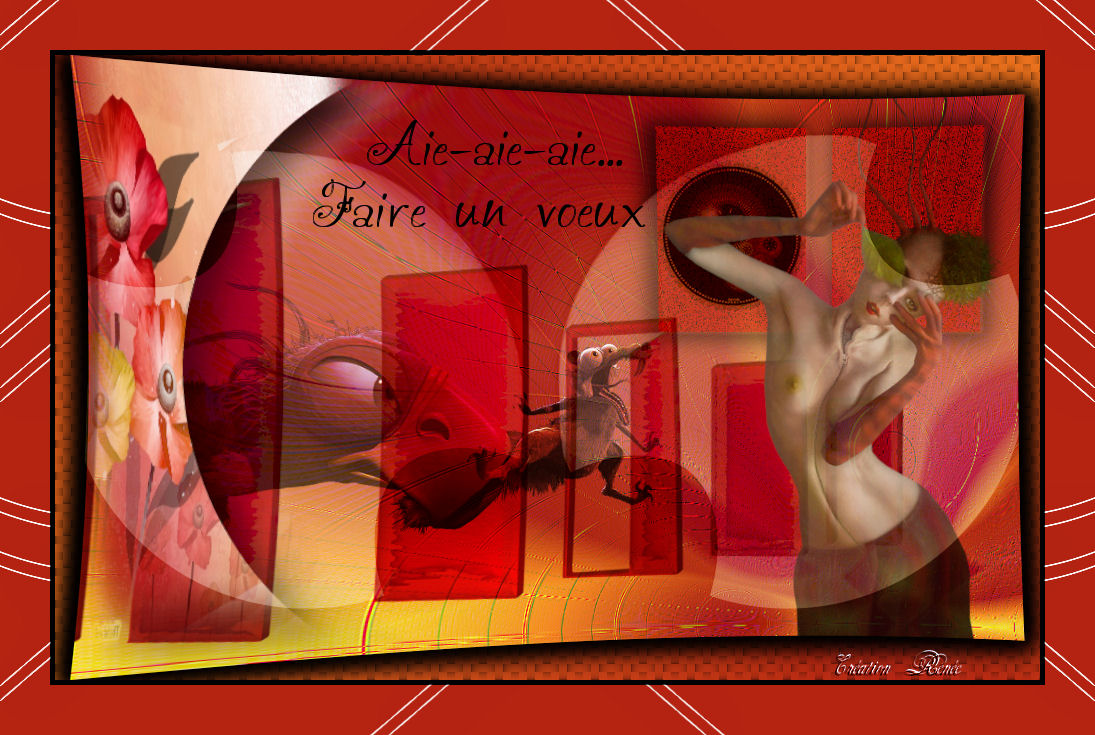
37. Selections- Deselect All 38. In the Layerpalette, set Blend Mode to Soft Light 39. Layers- Duplicate 40. Layers-Merge-Merge Visible 41. Image - Add borders-Symmetric checked: 5 pixels color black 42. Image - Add borders-Symmetric checked: 50 pixels color #b52311 43. Magic Wand / click with your magic wand in the border of 50 pixels 44. Layers- New raster layer 45. Open the tube ''renee-faire-un-voeux-lignes'' Edit/copy-Edit paste into selection /Selections- Deselect All 46 Activate Text Tool-Write your text ore take mine Save as JPG
I am part of Tutorial Writers Inc. My tutorials are regularly recorded. ReneeGraphisme_All rights reserved
*
|
 Translations