|
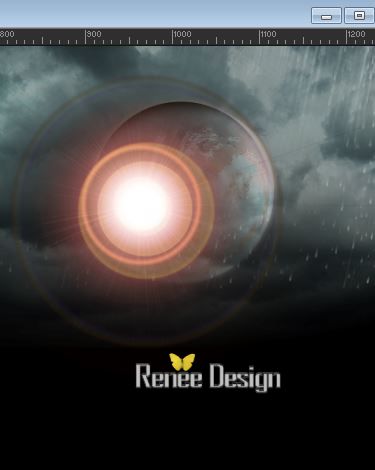
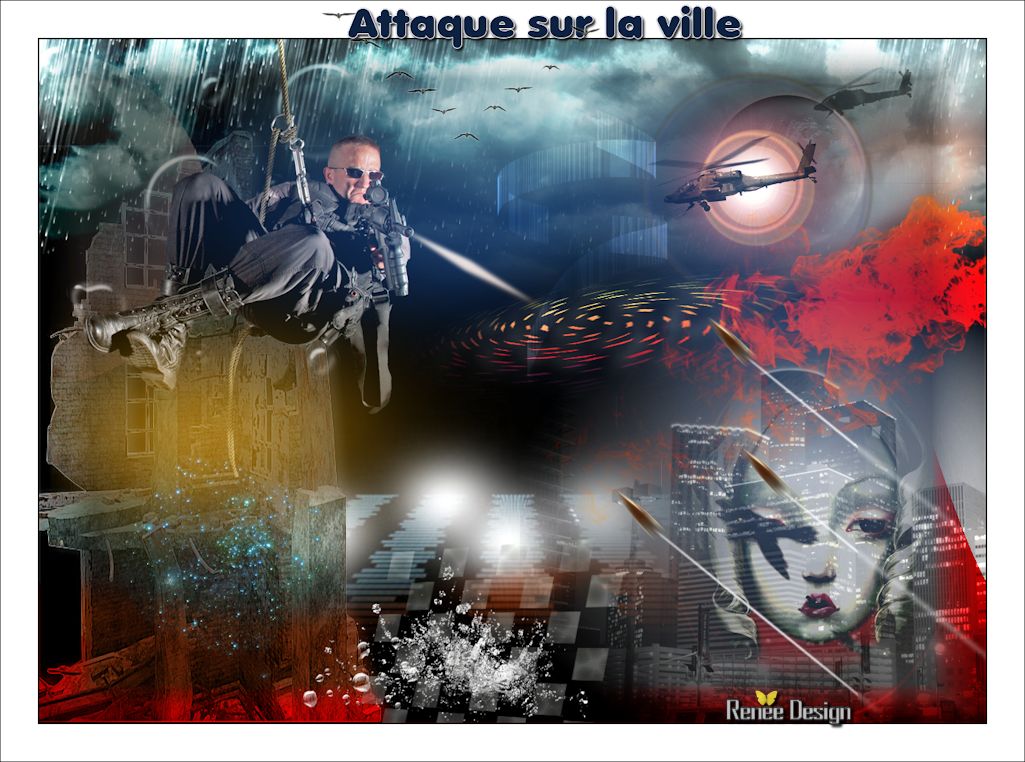
Attack on the city
with this tutorial we will learn how to create a great image effect with using just a minimum amount of filters
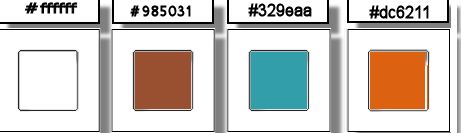
These are the colors I used for this lesson
Let's start the lesson.
Open your color palette in PSP
1. Open the Image ''fond_attaque_sur_la_ville"/ Promote Backgroundlayer = raster 1
2. Activate the tube ''attaque_sur_ville_ruines''/
Edit - Copy-Edit - Paste as new layer on your working area and move to the left
- Opacity of the layer down to 85%
- Effects - 3D Effects - Drop shadow :1/10/25/20 color #c0c0c0
- Effects-Edge Effects- Enhance More
3. Layers - New Raster layer
4.Selections - load/save selection - load selection from disk and choose my selection: ''attaque_ville_1''
- Material Properties: Foreground color white
-Flood fill tool opacity 80%
-
Activate Flood fill tool and fill the selection with color white
5. Layers - New Raster layer
6.Selections - load/save selection - load selection from disk and choose my selection: ''attaque_ville_2''
-Flood fill tool opacity
100% /Activate Flood fill tool and fill the selection with color white
(click 3 times in the selection )
- Layers - New Raster layer
- Layer Palette -Double click on this Layer and set the Blend Mode to "Screen" and lower the opacity down to 89%
- Effects - 3D Effects - Drop shadow : -24/0/32/36 color white
7. Layers - New Raster layer
8.Selections - load/save selection - load selection from disk and choose my selection: ''attaque_ville_3''
Material Properties:Background color into color:#985031. Activate Flood fill tool and fill the selection with the background color:#985031
- Flood fill tool opacity: 80% /
Activate Flood fill tool and fill the selection with the background color
- Layers - New Raster layer
- Layer Palette -Double click on this Layer and set the Blend Mode to "Color legacy" and lower the opacity down to 85%
9. Activate the tube ''attaque_ville_nuage''/
Edit - Copy -Edit - Paste as new layer on your working area
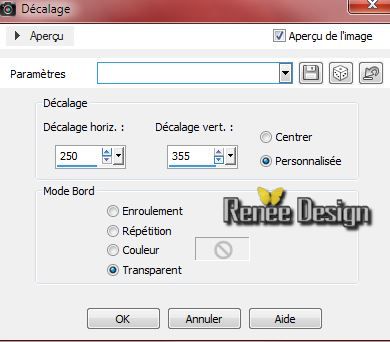
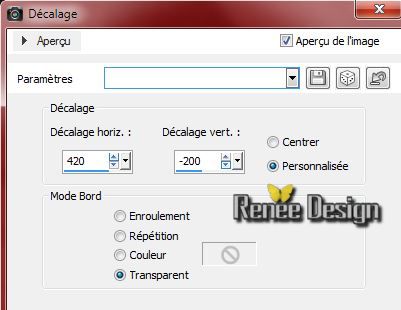
10 . Effects- Image Effects-Offset use settings below
11. Layers-Duplicate
/Image Mirror
-Layer Palette -Double click on this Layer and set the Blend Mode to "Hard Licht " and lower the opacity down to 77%
12. Layers - New Raster layer /Directly : Blend Mode to "Soft Light"
13. Aktivate your Airbrush with these settings
 - -

Material of the Foreground: foreground color:#6f8786
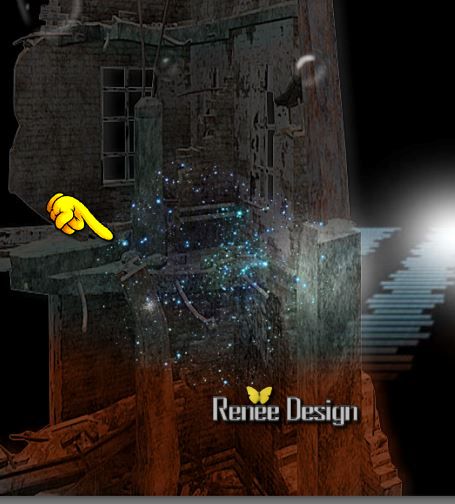
14. Apply as follows with the foreground color

15. Activate the tube "attaque_ville_brillance''/
Edit - Copy -Edit - Paste as new layer on your working area and move
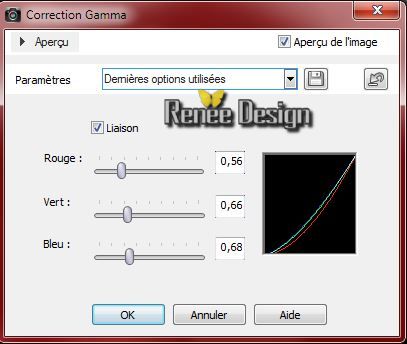
For gamma correction tap keyboard / Shift + G
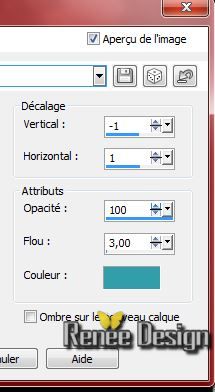
16. Effects - Gamma Correction use settings below
17. Effects - 3D Effects - Drop shadow :Color #329eaa
18. Layers - New Raster layer
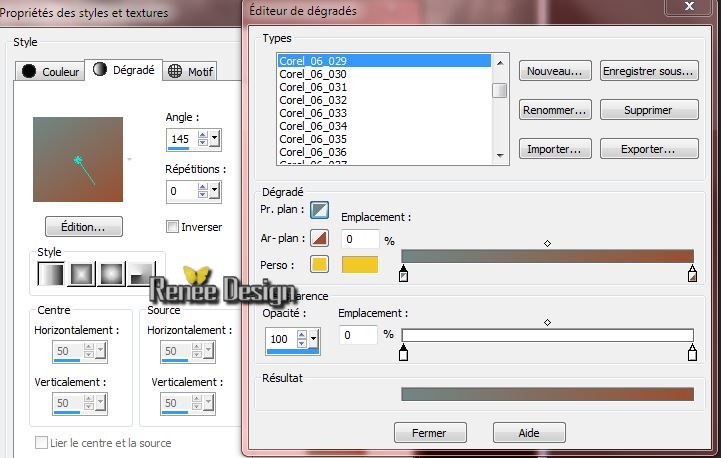
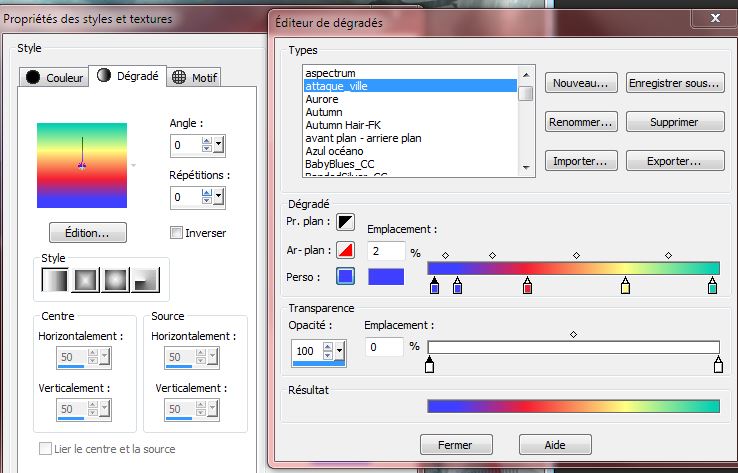
Material Properties: Foreground color: #995031 Background color:#329eaa
- Prepare a Linear Gradient as configured like this.
Or take this gradient''Corel_06_029'' /configured like this. ( linear)
19.Selections - load/save selection - load selection from disk and choose my selection: ''attaque_ville_4''
-Flood fill tool opacity: 58% -
Activate Flood Fill Tool and fill the selection with the gradient
- Selections- Deselect All
20. Layers - New Raster layer
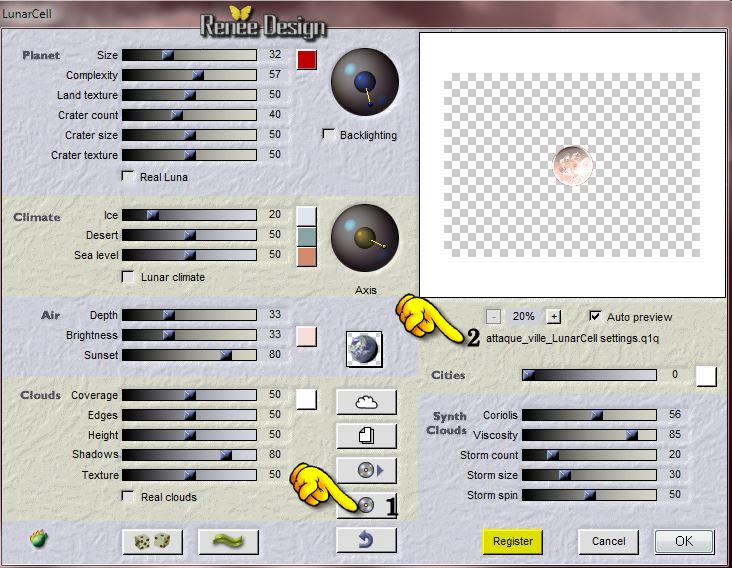
21. Effects-Plugins - Flaming Pear - Lunar cell /select my file-
preset ''attaque_ville_LunarCell settings''
1 in the zip file
2 click on number 1 and find your preset
Problems with the filter? Take the image from the folder-Edit-Copy-Edit paste as a new layer
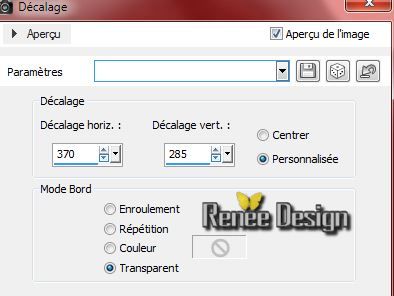
22. Effects- Image Effects-Offset use settings below
- Layer Palette :Double click on this Layer and set the Blend Mode to "Overlay"
23. Activate the tube ''attaque_sur_ville_polaire.pspimage''//Edit - Copy -Edit - Paste as new layer on your working area and move as shown
24.Effects-Plugins EyeCandy 5_Imapct _Perpsective Shadow-tab Settings/User settings - choose my preset"attaque_ville_persp_shadow"
25.
Activate the tube ''attaque_ville_buildings.pspimage''/Edit - Copy -Edit - Paste as new layer on your working area
26. Effects- Image Effects-Offset use settings below
27.
Activate the tube ''filette_aux_oiseaux''/ -
Edit - Copy -Edit - Paste as new layer on your working area and move on building image
-
Opacity of the layer down to 53%
28.
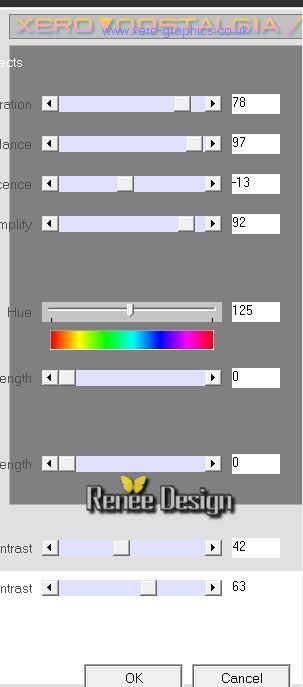
Effects- Plugins -Xero XL -Nostalgia
29.
Layers - New Raster layer
30.Selections - load/save selection - load selection from disk and choose my selection: ''attaque_ville_5"/
-Flood fill tool opacity :80% -Activate Flood fill tool and fill the selection with color:
#dc6211(click 1 time in the selection)
-
Layer Palette :Double click on this Layer and set the Blend Mode to "Hard Light"
Layers - New Raster layer
31.
Layers-Duplicate
-
Layer Palette :Double click on this Layer and set the Blend Mode to "Screen " Opacity of the layer down to 71%
-
Layers- Merge-Merge Down - Layer Palette :Double click on this Layer and set the Blend Mode to "Hard Light" Opacity of the layer down to 73%
32.
Activate the tube ''attaque_ville_soldat''/Edit/copy-Edit paste as a new layer. With your move tool place it in the right place
33.
Layers - New Raster layer
34.Selections - load/save selection - load selection from disk and choose my selection:
''attaque_ville_6"/Activate Flood fill tool and fill the selection with color white
35. Effects-Plugins - EyeCandy 5-Impact -Black light -tab Settings/User settings - choose my preset ''attaque_ville_black_light''
Layers - New Raster layer
Move the tube-effect soldier in front of the gun (see complete)
36.
Activate the tube ''attaque_ville_hélicopteres" /Edit - Paste as new layer on your working area and move
-The big helicopter/Layer Palette :Double click on this Layer and set the Blend Mode to "Hard Light"
-The small helicopter/ Set the Blend Mode to "Overlay" and the opacity down to 59% and place
37.
Layers - New Raster layer
-Activate Flood fill tool and fill the layer with color white
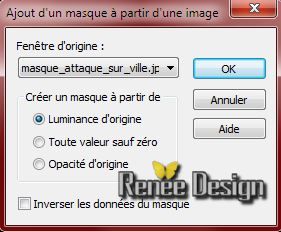
38.
Layers-New Mask Layer From Image and choose Mask "masque_attaque_sur_ville''
-
Layers- Merge -Merge Group
-
Layer Palette :Double click on this Layer and set the Blend Mode to "Overlay"
39.
Effects-Plugins - L and K's -Dimitri /225
- Change the background color into color:
#b50301
40.
Activate the tube ''attaque_sur_ville_effet_couleur.pspimage''/Edit/copy-Edit paste as a new layer. With your move tool place it in the right place
-
Layer Palette :Double click on this Layer and set the Blend Mode to "Screen"
*******************************************
For those who are interested
– I will show you how to obtain this effect
Select the areas you want to fill with colors – in this case we fill the selected areas with the colors blue and yellow
To make the shades: Selections – Modify – feather
If you know how to handle the airbrush, you can create your shades with this tool using two or more colors from your choice
Paste the “light effect” for this tutorial attaque_sur_villepspimage.pspimage'' on your working area as a new layer
By using the mask 2020 you can make the result as soft as you want it to be
This is an easy way to become a nice color effect without using a filter
***************************************
-
We continue with the lesson
-
Properties foreground: foreground to the gradient ''attaque_ville.pspgradient"
Prepare a linear gradient configured like this
41.
Layers - New Raster layer
42.Selections - load/save selection - load selection from disk and choose my selection: ''attaque_ville_7"/Activate Flood fill tool and fill the selection with the gradient (zoom) /Click 2 times in the selection
Layers - New Raster layer
43.Activate Deform tool: select my preset in the list:''Preset_RasterDeform_attaque_ville_deformation"

No Deform tool in your list?:
1.
View-Customize
2.
View - Adjust - tools - click and drag it between your other tools)

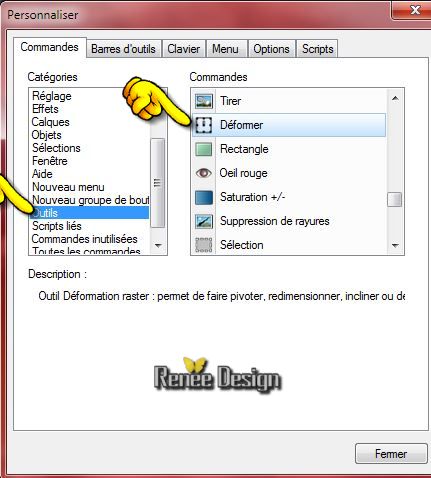
Click on the move tool ( letter M) to get rid of the Deform tool
44.
Effects - 3D Effects - Drop shadow :1/ -18/ 90/28 color white
45.
Layers - New Raster layer
46.Selections - load/save selection - load selection from disk and choose my selection: ''attaque_ville_8"
-Flood fill tool opacity 80% Activate Flood fill tool and fill the selection with color white (click 10-12 times in the selection)
Layers - New Raster layer
-
Layer Palette :Double click on this Layer and set the Blend Mode to "Overlay"
47.
Activate the tube ''attaque_ville_grille_eau''/
Edit - Copy -Edit - Paste as new layer on your working area and move (see complete)
48.
Activate Preset Shape: draw three arrows with the basic arrow
Does this not work
-Activate the tube "attaque_ville_fleche.pspimage"/ and
activate the tube /3fleche.Edit - Copy -Edit - Paste as new layer and move
-
Activate on the same tube ''tete'' /Edit - Copy -Edit - Paste as new layer on your working area and move.Layers Duplicate twice and place
-
Layers-Merge-Merge 3 times down
49.
Activate Selection Tool (S) Rectangel (S) select a part like this

50.
Adjust-Blur-Gaussian Blur: Radius 3
Layers - New Raster layer
51.
Image - add borders-Symmetric checked 2 pixels color black
52.
Image - add borders-Symmetric checked 50 pixels color white
53.
Image - add borders-Symmetric checked 1 pixel color black
54.
Activate the tube ''vol_oiseau''Edit - Copy - Edit - Paste as new layer and move.
55.
Activate the tube ''titre'' /O Edit - Copy - Edit - Paste as new layer and move. Or write your own text
56. Layers - Merge -Merge all layers
57.
Image Resize 1025 pixels Width
I hope you enjoyed this lesson
Renée
Created the19/07/2014
Created the
07/2014
*
Any resemblance with an existing lesson is merely a coincidence *
* Don't forget to thank the people who work for us and with us. I named the tubeurs - Testers and the translators.
Thanks Renée.
|
 Translations


 All rights reserved