|
Lets begin
1.
Open your Image ''au_fond_du_bain'' Promote to Background layer. (raster 1)
2. Layers - New raster layer /Flood Fill Tool: fill the layer with color:
#2b1a2c
3. Layers-New Mask Layer-From Image and choose mask ''Narah_mask_0183'' 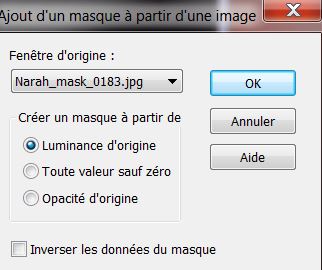
4. Layers-Merge-Merge Group
- Activate your Pick Tool (K) and push down to
450
pixels
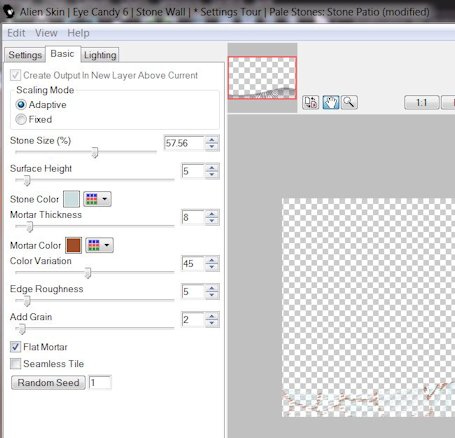
5. Effects -Plugins Alien
Skin/EyeCandy6/texture/stone wall/Setting Tour/renee-Pale
Stones-StonePation_aufond_bain''
6. Magic Wand with this setting

7. With the magic wand click into the transparent part
8. Selections -Modify-
Contract 20 pixels
9. Layers - New Raster Layer
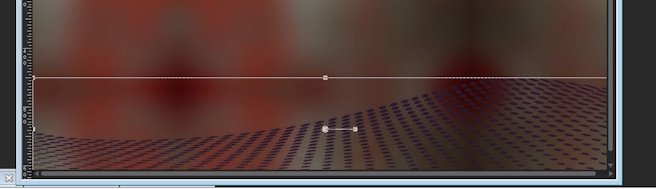
10. Material Properties: Foregroundcolor gradient: ''bleu_outre-mer'' /
Prepare a linear gradient configured like this

11. Flood Fill Tool: Fill the selection with the gradient
12. Effects -Plugins VM Experimentale
/Magnetic detection - default
13. Selections -Modify-
Contract 40 pixels
14. Selections- Promote Selection to Layer
15. Selections- Select none
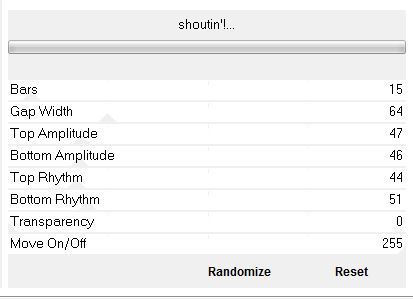
16. Effects -Plugins VM Extravanga-
Shouting
17. Effects- Edge Effects -Enhance More
18. Layers - New raster layer
19. Selections - load/save selection - load selection from disk and choose ''renee_au_fond_du_bain_1''
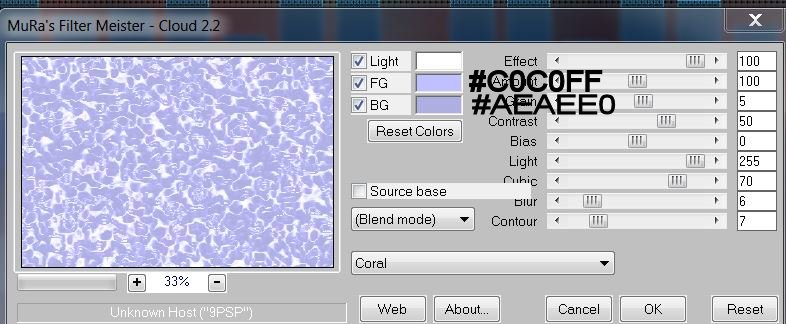
20. Material Properties: Foregroundcolor to color: #cbdddf .Backgroundcolor to :#6092d2
21. Effects-Plugins Mura's Meister –
Clouds
22. Selections -
Select none
23. Layers - New raster layer
24. Selections - load/save selection - load selection from disk and choose ''renee_au_fond_du_bain_2''
25. Flood Fill Tool: fill the layer with:
#cbdddf
26. Selections -
select none
27. Layers - New raster layer
28. Selections - load/save selection - load selection from disk and choose ''renee_au_fond_du_bain_3''
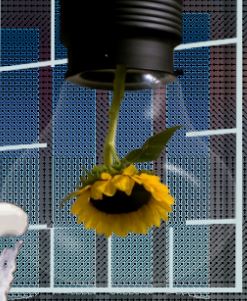
29. Open the tube
''Alies12FP59-sunflower in lightbulb 270122013 '' Edit/copy-Edit past into the selection
30. Selections -
select none
- Activate the layer underneath
(that of the window) Eraser Tool: Erase the white lines inside away (with your lasso select the inner white lines away)
31. Delete / Selections -
Select none
32. Aktivate the top of the layers-palette
33. Open the tube
''renee_au_fond_du_bain_baignoire-d'apres image de JA'' Edit/copy-Edit paste as a new layer
34. Open the tube
''renee_au_fond_du_bain_pieds'' Edit/copy-Edit paste as a new layer
35. Layers-Arrange -Move Down
36. Aktivate the top of the layers-palette - Layers-Merge-Merge Down (feet and bath are merged)
37. Open the tube
''renee_au_fond_du_bain_mousse'' Edit/copy-Edit paste as a new layer
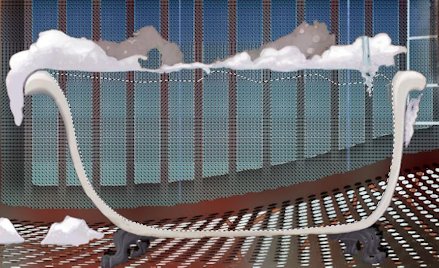
38. Layers - New Raster Layer
39. Selections - load/save selection - load selection from disk and choose ''renee_au_fond_du_bain_4'' (it is inside of the bath that corresponds to the selection renee_au_fond_du_bain_4'') Perhaps you should bathtub a little bit move to the right selection to come see example below
40.Material Properties: Foregroundcolor gradient: ''bleu_outre-mer'' /
Prepare a linear gradient configured like this
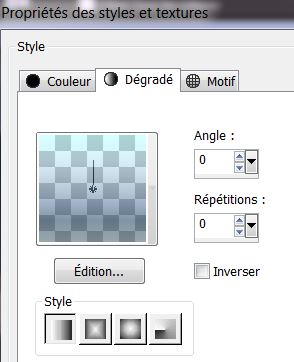
41. Flood Fill Tool:Fill the selection with the gradient / Selections - Select none
- Stay on this layer
42. Selections - load/save selection - load selection from disk and choose ''renee_au_fond_du_bain_5''
43. Selection-Promote to Layer
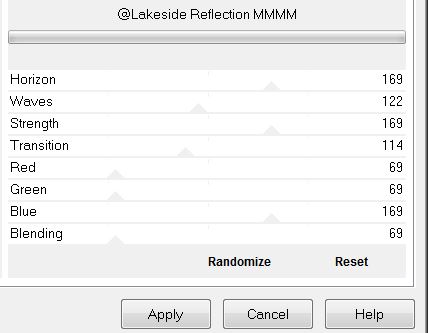
44. Effects- Plugins Unlimited
2.0 / &< Background Designers IV- @ Lakeside
Reflection MMM
45. Effet - Unlimited 2.0
/ Effects -&< Background Designers IV-@ Random
Smelter
46. Selections -
Select none
47. Layers-Merge-Merge Down
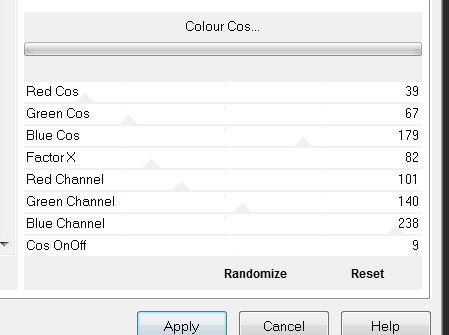
48. Effects - Plugins Unlimited
2.0 Lumière Ambiance – Colour Cos
49. Open the tube ''perle ''
Edit/copy-Edit paste as a new layer
50. Open the tube ''renee_fond_bain_bulles 1 and 2'' Edit/copy-Edit paste as a new layer
51.Open the tube ''poisson ''
Image Mirror/Edit/copy-Edit paste as a new layer
- Blend Mode to "Hard Light"
and lower the opacity to 81%
52. Open the tube ''renee_fond_bain_robinet"Edit/copy-Edit paste as a new layer
53. Open the tube''renee_tortue et masque"Edit/copy-Edit paste as a new layer
54. Open the tube
''renee_fond_bain_tuba'' Edit/copy-Edit paste as a new layer
55. Open the tube
''personnage_yvonne_Flipse13''Edit/copy-Edit paste as a new layer -Image
Mirror
56. Layers-Merge-Merge-Visible
57. Open the tube
''renee_fond_bain_cadre et texte'' Edit/copy-Edit paste as a new layer
58. Image - add borders symmetric 5 pixels - color #263966
59. Image - add borders symmetric 30 pixels -white
60. Image - add borders symmetric 5 pixels - color #263966
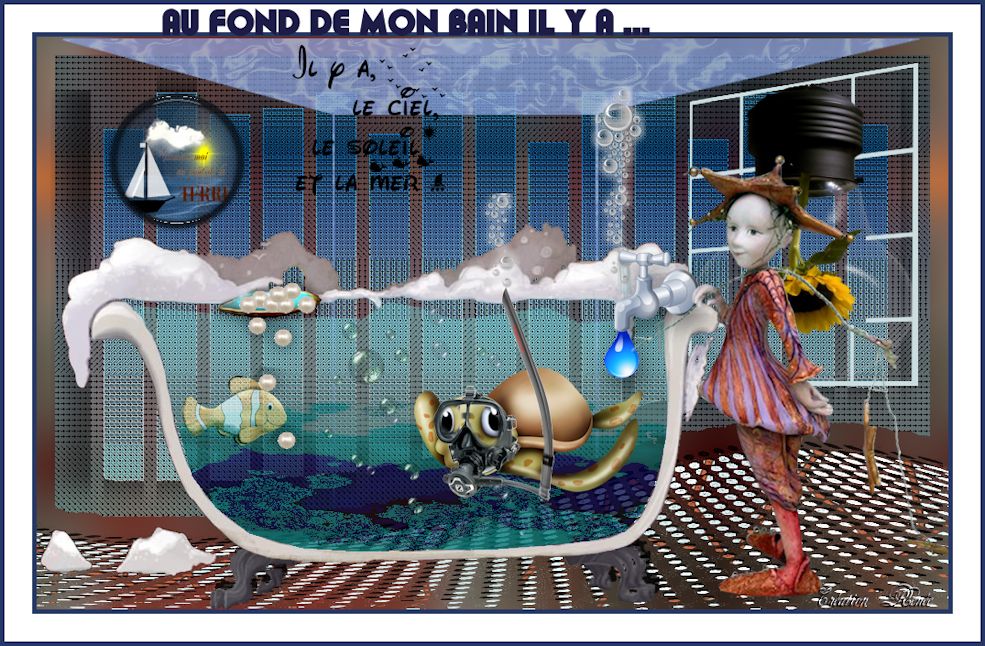
61. Write your - text -Deep in my bath
NB / :I have put the bubbles into the bath
I hope you enjoyed this lesson
This lesson was written by Renée
introduction
the
1 April 2013
Any resemblance with an existing lesson is merely a coincidence
*
Don't forget to thank the people who work for us and with us. I named the tubeurs - Testers and the translators.
Thanks Renée
* |  Au fond de mon bain....il y
a
Au fond de mon bain....il y
a

 Translations