|
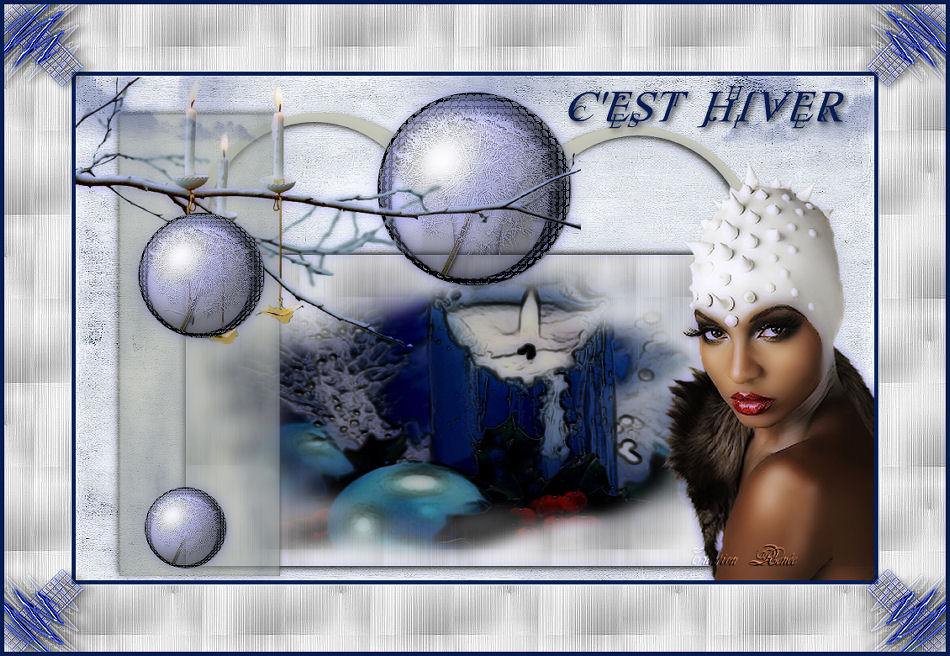
C'est Hiver
New
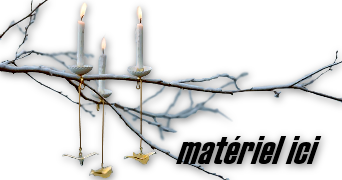
Translations here
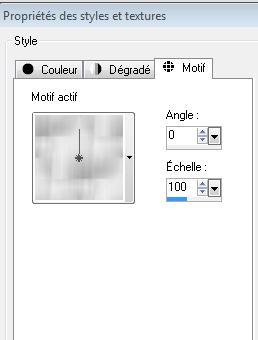
1. Activate the file "fond 1" /Promote Background Layer = raster 1'' -you need 3 colors to choose into the colors of your tube 2. Material Properties: Foreground color to color : #c4b2a4 . Background color to color: #99948f and black in reserve 3. Layers - New raster Layer 4. Selections - load/save selection - load selection from disk and choose « poser eau » /Flood Fill Tool :Fill the selection with the foreground color 5. Selections - Deselect all 6. Effects- 3D Effects - Drop Shadow 3/3/80/10 black 7.Layers-Duplicate-Image-Mirror 8. Layers - New raster Layer 9. Selections - load/save selection - load selection from disk and choose "@renee un hiver "/Flood Fill Tool :Fill the selection with the background color 10.Open "texture hiver" in your psp.Material Properties:Style -Pattern- configured like this
11.Flood Fill Tool :Fill the selection with the pattern -Keep Selection 12. Effects- 3D Effects - Drop Shadow 3/3/80/10 black /Repeat: Effects- 3D Effects - Drop Shadow negativ-3-3/80/10 black 13. Layers - New raster Layer 14. Aktivate the tube « Devilsinde_586-2009'' ( aktivate tube bougie)« Edit/copy-Edit paste into selection 15. Selections - Deselect all 16. Effects - Artistic Effects-Hot Wax Coating 17. Layers - New raster Layer /Selections - load/save selection - load selection from disk and choose" @renee hiver 2" -Material Properties: Foreground color to color : #c4b2a4 . Background color to color: #041d52 18. Effects-Plugins Mura's meister /cloud
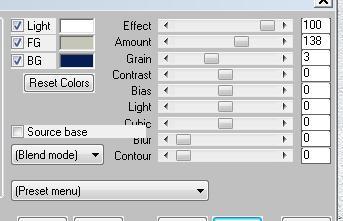
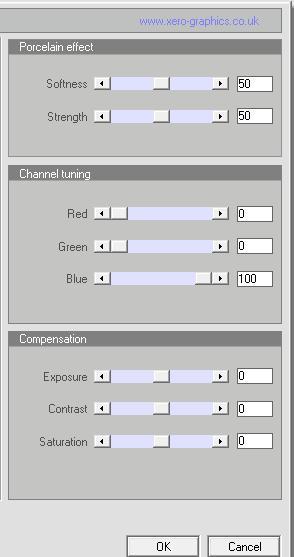
19.Effects-Plugins Eye candy 5/ Impact - Glass -preset « renee un hiver « Lower the opacity down to 65% 20. Selections - Deselect all -Effects- 3D Effects - Drop Shadow 3/3/80/10 black /Repeat: Effects- 3D Effects - Drop Shadow negativ-3-3/80/10 black 21.Aktivate the tube« fleur hiver 2 »Edit/copy Edit - Paste as new layer on your working area 22. Effects - Image Effects -Offset: H=0 and V =165 23. Layers-Duplicate /Image Resize 65% (Resize all the layers NOT checked) and place -Layers-Duplicate/Image Resize 65% /and place -Aktivate the top of the Layers palette 24. Aktivate the tube« mou 3 candles « /Image-Resize 80% / Edit/copy Edit - Paste as new layer on your working area Layers-Arrange-2x move down -look at the final result to compare your work 25.Aktivate the tube ''nuage ''Edit/copy Edit - Paste as new layer on your working area and place 26.Aktivate the tube « femme 128 »Edit/copy Edit - Paste as new layer on your working area and place 27. Layers - Merge - Merge all layers (flatten) 28. Effects-Plugins Xero xl /porcelaine
29.Text Tool: Font "Jean Splice" write your own text, or take mine .Edit/copy Edit - Paste as new layer on your working area 30 Image - Add Borders - Symmetric 5 pixels- Color #041d52 31.Image - Add Borders - Symmetric 80 pixels -FG-Color 32.With the magic wand -select the border of 80 pixels 33.Layers - New raster Layer. Flood Fill Tool :Fill the selection with the pattern 34.Effects - Edge Effects-Enhance 35. Selections - Deselect all 36.Aktivate the tube "cadre hiver" Edit/copy Edit - Paste as new layer on your working area 37.Image - Add Borders - Symmetric 5 pixels -#041d52 -For those who want to make an animation.There is an animation file in the folder. File-open and choose the file you just saved. File-save as...... give a name .
* I hope you enjoyed this lesson Renée This lesson was written by Renée the 28 November 2011 Created the 7/12/2011 *
Any resemblance with an existing lesson is merely a coincidence * Don't forget to thank the people who work for us and with us. I named the tubeurs - Testers and the translators. Thanks Renée *
I am part of Tutorial Writers Inc. My tutorials are regularly recorded
*
|
 Translations


 Let's begin .