|
New
Translations here
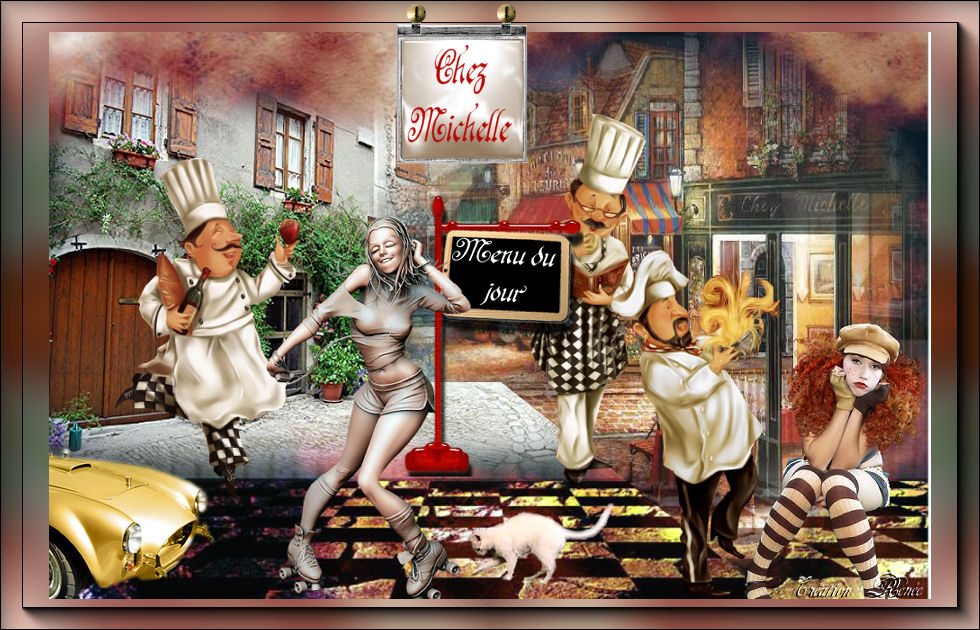
Chez Michelle
Let's start 1. Open the background image "Font " Window - Duplicate (or shift+D) - Close the original and proceed on the copy -Promote Background Layer =Raster 1 2. Open the tube « anna-br-chatiollon -en dios »/ Edit/ Copy-Edit - Paste as new layer on your working image -With the Move Tool, move it to the left (see finished image) 3. Layers- New Raster Layer 4. Selections –load/save selection –load selection from disc and select my selection: " @renee restochezmichelle" Open the tube '' chez michelle '' -Edit/ Copy-Edit - Paste into selection 5. Open the tubes chef1 and chef2 and chef 3 -Edit/ Copy-Edit - Paste as new layer on your working image and move 6. Open the tube ''panneau'' Edit/ Copy-Edit - Paste as new layer on your working image 7. Open the tube'' voiture '' Edit/ Copy-Edit - Paste as new layer on your working image and move 8. Open the tube '' Jhanna 310 ''/ Image Resize to 75%/ Edit/ Copy-Edit - Paste as new layer on your working image and move 9. Open the tube ''859 ''/ Image Resize to 75% and repeat 2x Edit/ Copy-Edit - Paste as new layer on your working image and move 10. Open the tube ''chat ''Edit/ Copy-Edit - Paste as new layer on your working image and move 11. Layers- Merge- Merge Visible 12. Layers- Duplicate 13. Image Resize to 90% all layers not checked 14. To replace the bottom of the layers palette /Adjust- Blur- Gaussian Blur: Radius 25 15. Effects- Plugins -Simple /top left mirorr -Stay on this layer
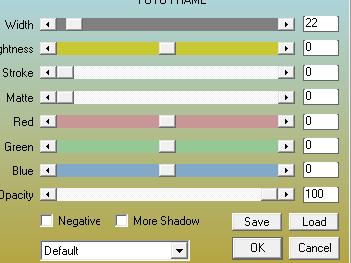
16. Effects- Plugins -AAA Frame - Foto frame use settings below
17. Open the tube ''affiche ''/ Edit/ Copy-Edit - Paste as new layer on your working image-and move 18. Oper the tube '' rivet ''/ Edit/ Copy-Edit - Paste as new layer on your working image- With the Move Tool, move it in the right place (see finished image) 19. Layers Merge - Merge All -Save as JPG
I am part of Tutorial Writers Inc. My tutorials are regularly recordedt ReneeGraphisme_All rights reserved
*
|
 Translations