|
Let's start the lesson
.
Open the color palette in PSP
1.Material Properties: Foreground color to color: #e5e5ab Background color to color:#6b5f51
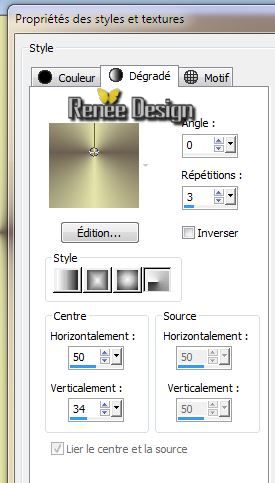
2.
Prepare a Radial Gradient as configured like this.
3.
File - New - New Transparent Image:1025 x 635
pixels
4.
Flood Fill Tool: Fill the layer with the radial gradient
5.
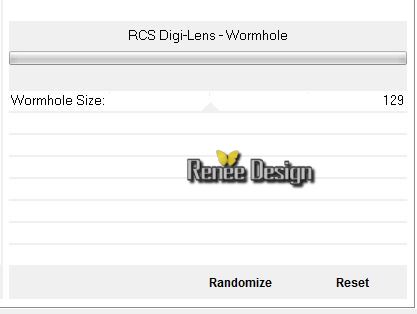
Effects-Plugins Unlimited 2.0 - RCS Filter Pack 1.0/RCS Digi-Lens-
Womhole
6.
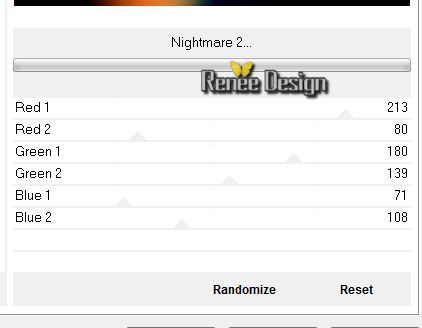
Effects-Plugins Unlimited 20 - Andrew's Filters 11/ Nighmare
2
7.Layers-Duplicate
8.
Effects-Plugins Unlimited 2.0 -Alf's Power Toys- Split
Distorsion / 111
9. Layers-Maske- Load/Save Mask -Load Mask From Disk and choose:
''20/20''
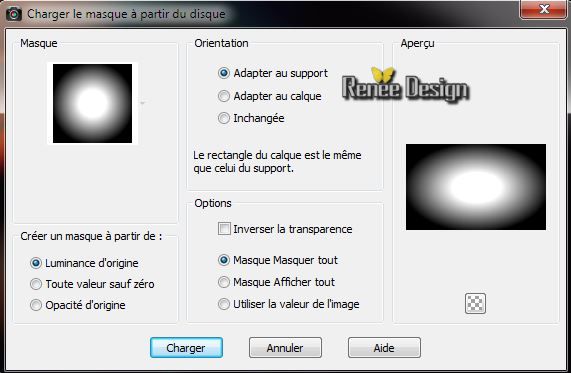
- Layers- Merge -Merge Group
10. Effects-Edge Effects-Enhance More
11. Layers-New raster layer
12.
Selections - load/save selection- load selection from disk and select my file ''conte_macabre_1"
/Flood Fill Tool: fill the selection with color white
Selections - Deselect all
13. Layers-New raster layer
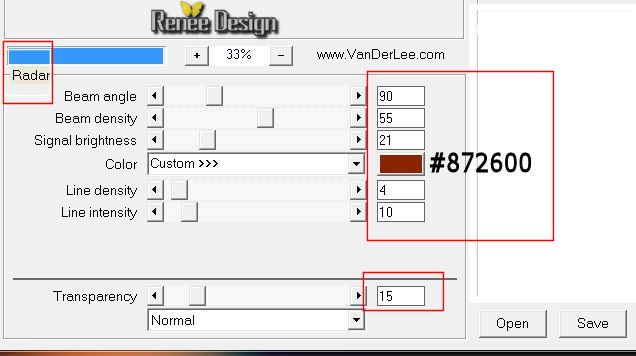
14. Effects-Plugins-Vanderlee unplugged X /Radar
15. Effects-Plugins-Transparency - Eliminate Black
16. Layers-New raster layer
17.
Selections - load/save selection- load selection from disk and select my file:
''conte_macabre_2''
18. Material of the Foreground: FG-Color: #e5e5ab /Flood Fill Tool: fill the selection with the FG-Color
-
Selections - Deselect all
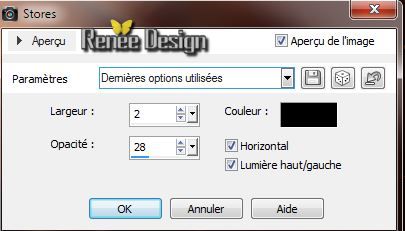
19. Effects-Textureffects-Blinds
20. Effects-Edge- Effects-Enhance
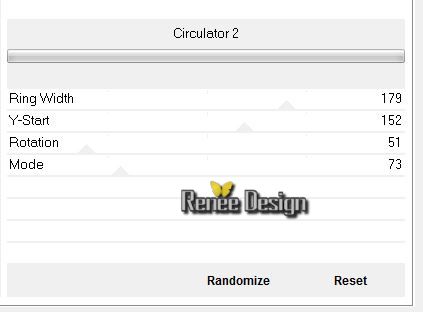
21. Effects-Plugins Unlimited Factory Gallery B - Circulator 2
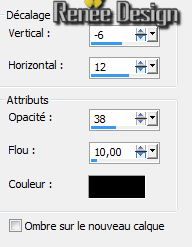
22. Effects - 3D Effects - Drop shadow: 0/0/50/50 White
23. Layers-New raster layer /Flood Fill Tool: fill the layer with color white
24. Layers-Maske- Load/Save Mask -Load Mask From Disk and choose: ''
Narah_mask_0333.jpg''
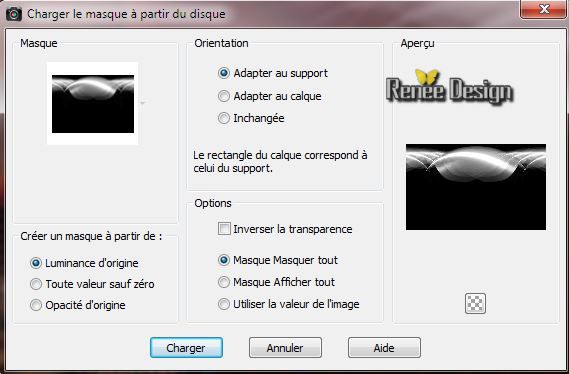
-Layers- Merge -Merge Group
25.
Reduce the opacity of this layer to :57 %
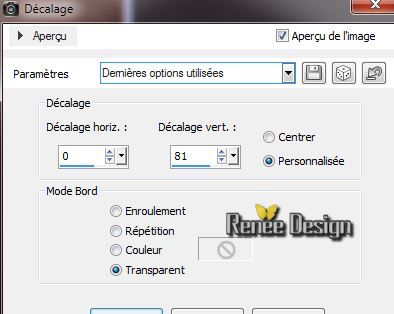
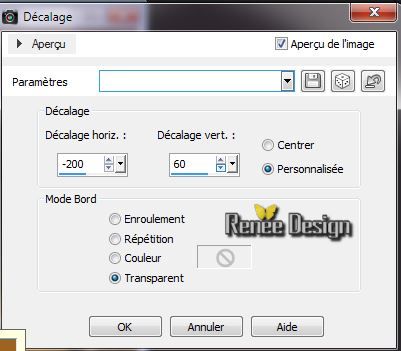
26. Effects - Images Effects - Offset with these settings
25. Activate the tube ''conte_macabre_labyrinthe.pspimage''/ Edit-copy- Edit - paste as new layer on your working area
26.Effects - Images Effects - Offset with these settings
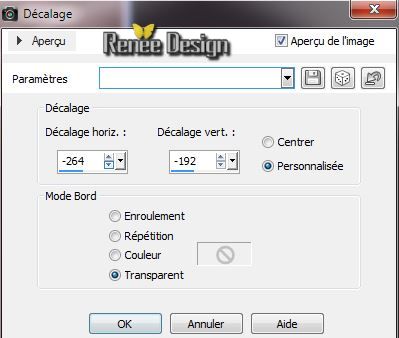
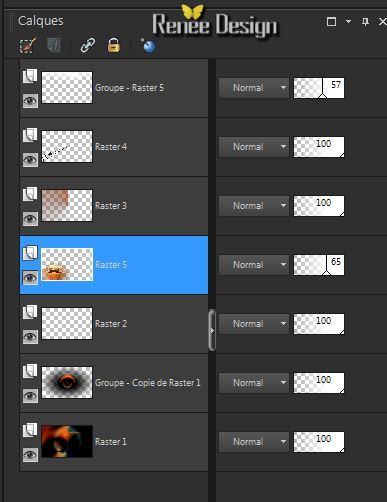
27. Layers-Arrange-Move Down and repeat (move under Raster 2) - Opacity of this layer to :65%
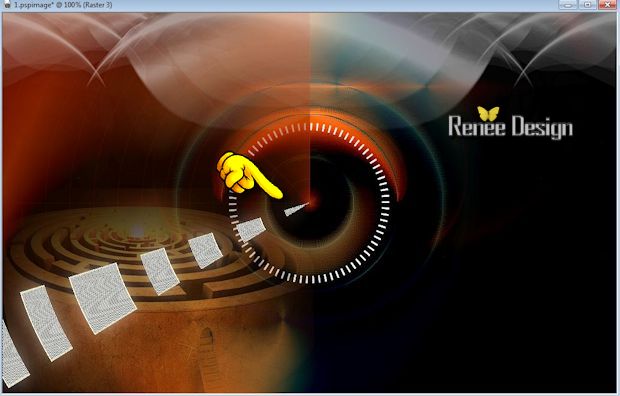
Your work look like this now
28. Activate the bottom of the layer-Palette (Raster 1)
29.
Activate Selection Tool - Custom selection with these settings
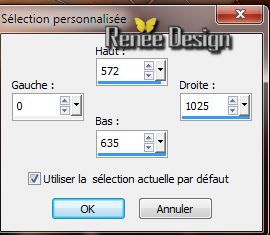
30.
Selections - Promote selection to layer
31.
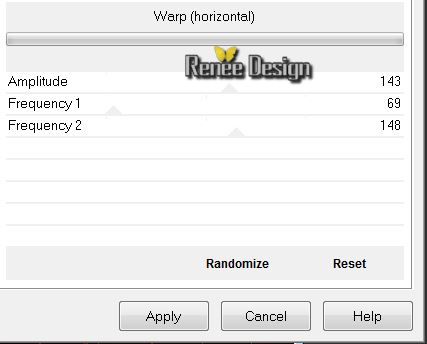
Effects-Plugins Unlimited - Distorsion Filters / Warp
(Horizontal)
Selections - Deselect all
32. Layers-Duplicate /Image Mirror. Reduce the opacity of this layer to :46%
33. Layers-Merge-Merge-Down
34. Effects-Edge Effects-Enhance More
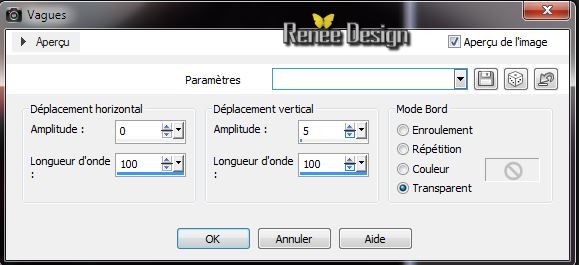
35.
Effects-Distortion Effects-Wave with these settings
Activate the top of the layers-Palette
36. Activate the tube ''conte_macabre_la_marche''/ Edit-copy- Edit - paste as new layer on your working area
Place like this
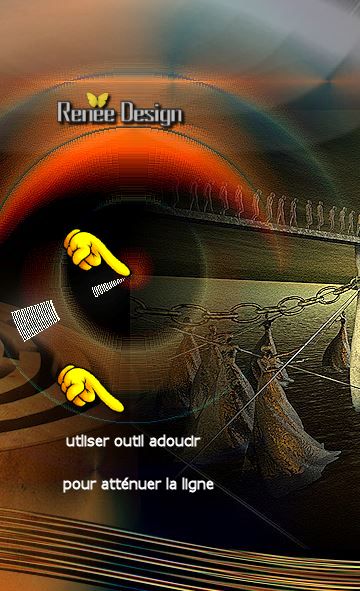
37. Activate your Brush Tool "Soften" with these settings. To soften the vertical lines. Go with your brush gently along the edges as shown on the screen(it serves to soften the edges of picture and soften lines)

38.
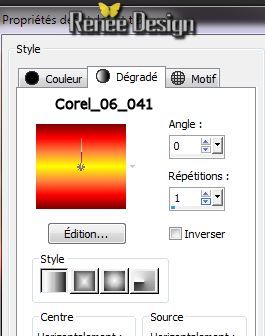
Material of the foreground - select my file in the list: Corel_06_041 Prepare a linear gradient configured like this.
39. Layers-New raster layer
40.
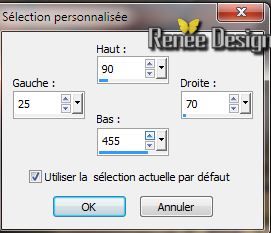
Activate Selection Tool - Custom selection with these settings
41. Activate Flood Fill Tool and fill selection with the gradient
Selections - Deselect all
42. Effects-Plugins- L and K's /Jeffrey / 115
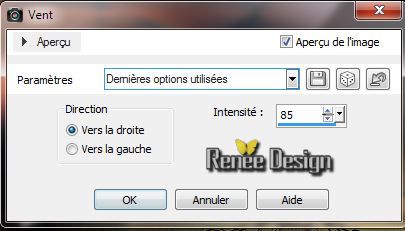
43.Effects-Distortion Effects-Wind/ From right 85
44.
Effects-PluginsFM Tile Tools / Blend Emboss
default
45. Effects-Geometric Effects-Circle/Transparent
46. Effects - Images Effects - Offset with these settings
47. Layers-Duplicate /Image Mirror/Layers-Merge-Merge Down
48. Layers-Arrange-Move Down
49. Effects-Plugins- EyeCandy 5 Impact /Perspective
shadow-tab Settings/User Settings and choose my preset''conte_macabre_shadow''
50. Activate the tube ''The-iron balls-misted-tube-by-devil''/ Image
Resize 80 % Edit-copy- Edit - paste as new layer on your working area. With your move tool move to the left
51 . Layers-Arrange-3x Move Down (under Group -Raster 4)/
Layer Palette: change your Blend Mode to "Lighten"
- Layer Palette: activate raster 3 (effects vanderlee/Radar) Layers-Duplicate
-Image Mirror - Layers-Merge-Merge Down
This is the result
52. Layers-Merge-Merge Visible
53. Activate the tube ''conte_macabre_cercles.pspimage'' /Edit-copy- Edit - paste as new layer on your working area and move to the left
54.
Activate the bottom of the layer-Palette
55.
Selections - load/save selection- load selection from disk and select my file: ''conte_macabre_3''/Selections-Promote selection to layer
Selections - Deselect all
56. Effects-Plugins- Alien skin -Xenofex2-
Constellation

57.Layer Palette: change your Blend Mode to "Screen". Opacity down to: 67%
Activate the top of the layer-Palette
58. Activate the tube ''conte_macabre_bille''/ Edit-copy- Edit - paste as new layer on your working area . With your move tool move to the left
59.Effects - 3D Effects - Drop shadow/Black
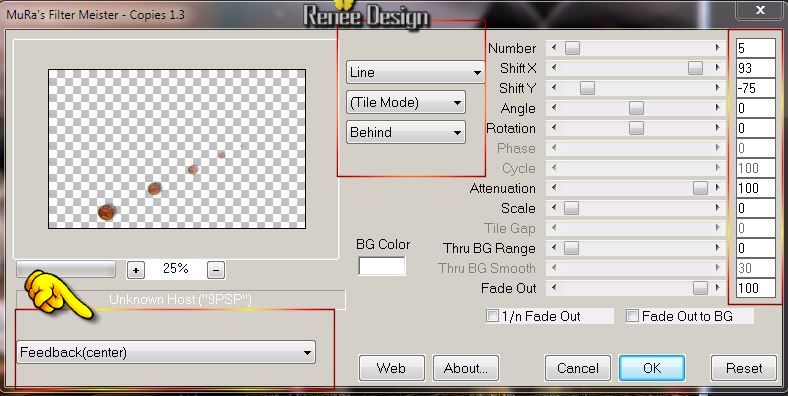
60. Effects-Plugins- Mura's Meister - Copies
61. Effects-Plugins-FM Tile Tools- Saturation Emboss
default
Layer Palette: change your Blend Mode to "Hard Light"
62. Image - add borders: 1 pixel Black
63. Image - add borders: 20 pixels White
64. Image - add borders: 1 pixels Black
65. Image - add borders: 50 pixels White
66. Image - add borders: 1 pixel Black
67.Activate Text Tool: Font -''SaloonExt'' /write your own text .Ore: Activate tube " text" .Edit/copy -Edit/paste as a new layer and move to the left
68. Layers-Duplicate -Image Mirror
69. Layers-Merge-All ( Flatten)
Resize the image if you like
I hope you enjoyed this lesson
Renée
This lesson was written by Renée the 09/06/2014
Created
06/2014
*
Any resemblance with an existing lesson is merely a coincidence
*
* Don't forget to thank the people who work for us and with us. I named the tubeurs - Testers and the translators.
Thanks Renée. | 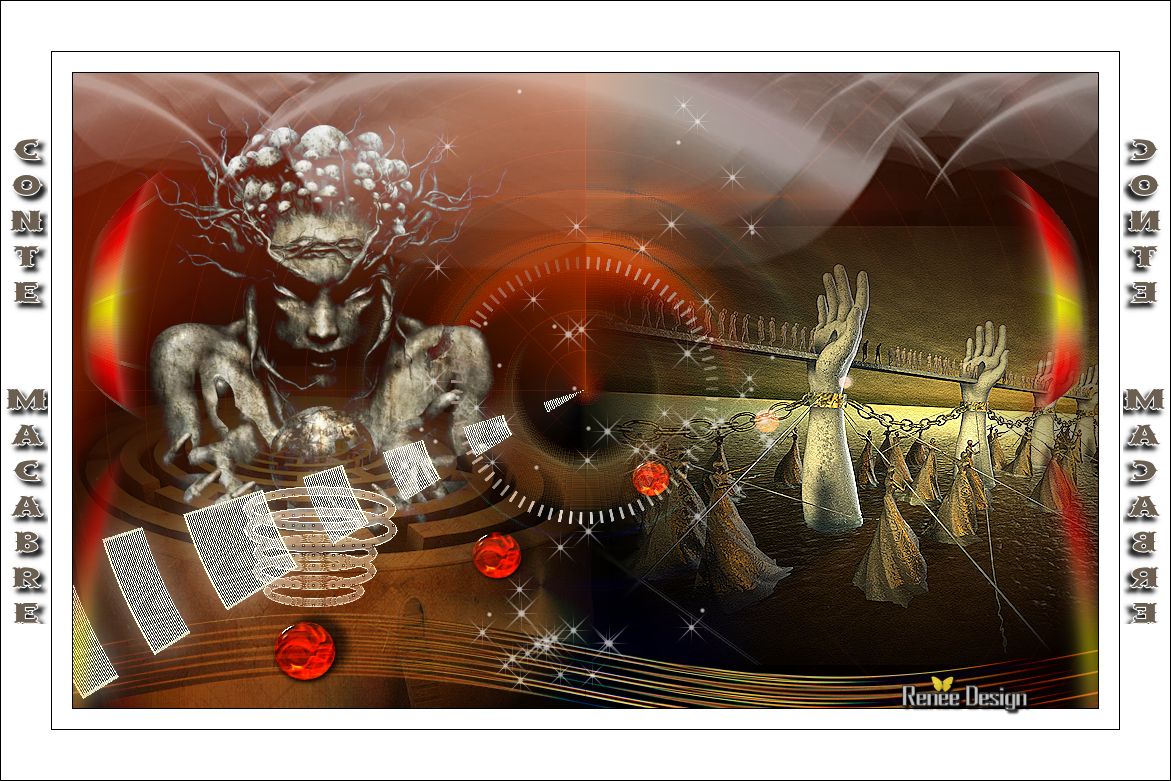
 Translations