|
New
Let's start the lesson. 1. Open the Background Image ''fond base'' Window Duplicate -Promote Background Layer =Raster 1'' 2. Effects- Plugins - L and K's / les zitah
3.Repeat: Effects-Plugins L and K's - Zitah with these settings
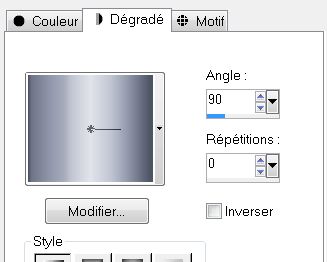
4. Material Properties: Foreground color to color #f2e5c2 Background color to this color: #c0c0c0 5. Prepare a radial gradient configured like this.
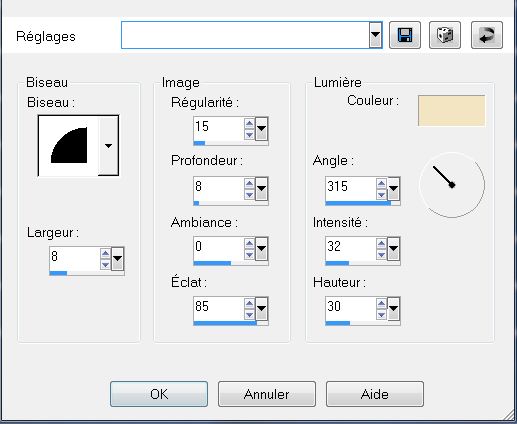
6. Layer- New raster layer 7. Selections - load/save selection - load selection from disk and choose my selection: ''renee_crazy_alice'' / Activate Flood Fill Tool and fill the selection with the gradient 8. Effects- 3D Effects-Outer Bevel with these settings-FG-Color
9. Effects- Plugins -Eyecandy 5/chrome 10. Selections- Deselect All 11. Layers- Duplicate 12. Effects- Plugins - Lokas - Chrome with these settings (you find it in Lokas software 3 D shadow)
13. Layers- Merge- Merge Down 14. Effects- Plugins -Eye Candy 3.1 /perspective Shadow with these settings
15. Effects- Distortion Effects- Warp with these settings
16. Activate the tube ''crazy alice'' Image- Resize with 75% 17. Edit/copy-Edit paste as a new layer on your working area /With your move tool move to the left
18. Activate your Eraser Tool-erase this part see example (reduce the opacity of the girl to 35% you can see it better)
19. Layers- Arrange- Move Down- Opacity of the girl to 100%
20. Layer- New raster layer 21. Selections - load/save selection - load selection from disk and choose my selection: ''renee_crazy alice_1'' 22. Activate the tube ''globeplanet'' Edit/copy-Edit-paste into selection 23. Effects- Plugins -Eyecandy5 / Glass -tab Settings/User settings choose my preset-''renee_crazy alice_glass'' 24. Repeat this filter with the same settings 25. Selections- Deselect All 26. Activate the tube "lapin ''you share the time'' Edit/copy-Edit paste as a new layer on your working area and move 27.Effects- Plugins -EyeCandy 3. 1 /Perspective Shadow with these settings
28. Layer- New raster layer 29. Selections - load/save selection - load selection from disk and choose my selection: ''renee_crazy alice _2'' 30. Material of the foreground: change material of the foreground into gradient select ''mcq Blue metal '' with these settings - Background color is white 31. Activate Flood Fill Tool and fill the selection with the gradient
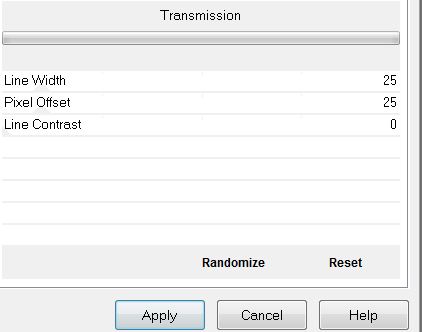
- Keep Selected -Background color is white 32. Effects- Plugins -Unlimited 2.0 - Visual manipulation /Transmission
***If you do not have this filter choose plugins- VM Extravanga Activate Flood Fill Tool and fill the selection with the background color white/Layers- Duplicate /Activate Flood Fill Tool and fill the selection with the gradient -Effects- Plugins -/VM Extravanga 3/25/40/Layers- Merge- Merge Down 33. Selections- Deselect All 34. Put the opacity of this layer to 97% 35. Effects- Plugins -EyeCandy5 Impact- Tab- Settings- Preset / drop shadow blury 36. Layers- New raster layer 37. Selections - load/save selection - load selection from disk and choose my selection:''renee_crazy alice_3 '' 38. Activate the tube ''rideaux'' Edit/copy-Edit-paste into selection 39. Layers- Duplicate 2 times to enhance the effect of the tube / Layers- Merge- Merge 2 x Down 40. Selections- Deselect All 41. Effects- Plugins - Eyecandy 5 - Perpective shadow Tab- Settings -preset -drop shadow blury -In the basic-color white with these settings
42. This is what you've got:
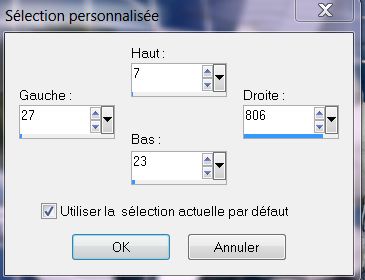
43. Activate the tube ''renee_crazy alice_attache ''Edit/copy-Edit paste as a new layer on your working area and move 44. Layer- New raster layer 45. Activate Selection Tool (S) - Custom Selection with these settings
46. Activate Flood Fill Tool and fill the selection with the linear gradient (mcq Blue metal )
47. Effects- Texture Effects-Weave with these settings
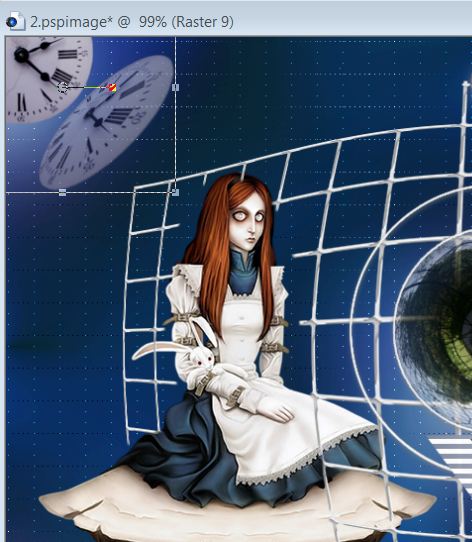
48. Selections- Deselect All 49. Effects- Plugins -Flaming Pear- flexify2 with these settings
50. Place in the middle see example 51. Activate the tube ''crazy_alice_horloge ''Edit/copy-Edit paste as a new layer on your working area and move
52. Layers- Merge- Merge Visible 53. Image- Canvas Size use settings below
54. Layer- New raster layer 55. Activate Flood Fill Tool and fill the layer with the gradient with these settings
56. Layers- Arrange- Move Down 57. Activate the top of the Layer Palette 58. Calque ajouter un nouveau calque 59. Selections - load/save selection - load selection from disk and choose my selection:''renee_crazy alice_4'' / Activate Flood Fill Tool and fill the selection with the gradient 60. Selections- Deselect All 61. Effects- Plugins Eyecandy 5 /perspective Tab- Settings -Drop shadow blury /attention: In the basic color black 62. Activate the merged layer 63. Effects- Plugins -Eyecandy 5 /perspective /Drop shadow blury 64. Layers- Merge- Merge All 65. Image - Add borders-Symmetric checked:2 pixels #102a4c 66. Image - Add borders-Symmetric checked:25 pixels color white 67. Activate the tube "text "/Edit/copy-Edit paste as a new layer on your working area / Ore write your own text 68. Image - Add borders-Symmetric checked:15 pixels #102a4c 69. Activate Magic Wand and click in the white border of 25 pixels 70. Effects- Plugins -AP01[Innovations] lines Silverling use settings below
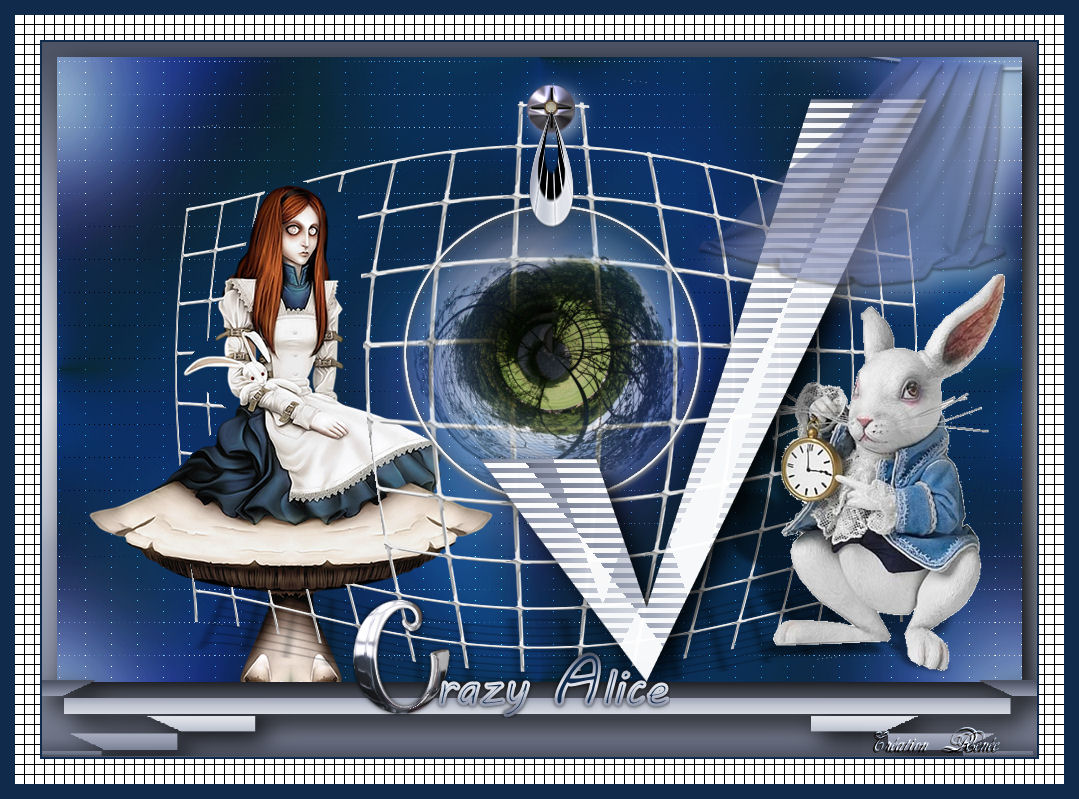
71. Keep Selected-Repeat : Effects- Plugins - AP lines but choose: >Line Options :Horizontal/ with the same settings 72. Selections-Deselect All Save as JPG
I hope you enjoyed this lesson Renée This lesson was written by Renée Placing 16/01/2013 *
Any resemblance with an existing lesson is merely a coincidence * * Don't forget to thank the people who work for us and with us. I named the tubeurs - Testers and the translators. Thanks Renée. 2014 reçu de TWInc I am part of Tutorial Writers Inc. My tutorials are regularly recorded. ReneeGraphisme_All rights reserved *
|
 Translations