|
Let's start the lesson
1. Material Properties: Foreground color to color:
#b2d17e Background color to color: #829754
- Prepare a linear gradient configured like this.Angle = 0 Repeats: 3 /Invert not checked
2. File - New - New Transparent Image: 950
x 550 pixels - Flood Fill Tool: Fill the layer with the gradient
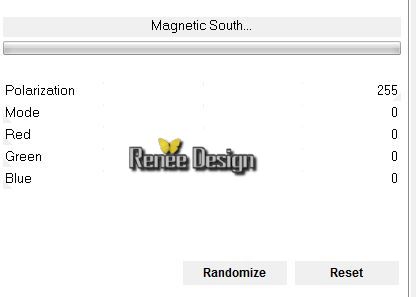
3. Effects-PluginsUnlimited 2.0 -
Filters Factory Gallery Q / Magnetic South
4. Layers- Duplicate
5. Effects-Plugins Unlimited 2.0 /
Factory Gallery F/ Guess What ?

6.
Effects - 3D Effects - Drop shadow: 0/0/70/30 Black
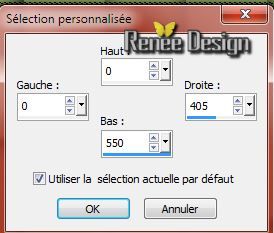
7.
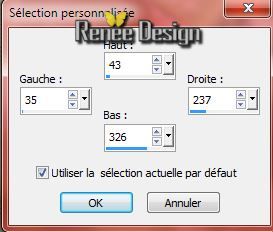
Selections- Custom selection with these settings
8.
.Selections - Promote selection to layer
9.
Effects-Geometric Effects-Circle/Transparent transparent
Selections-Deselect All
-Layer-Palette: activate layer underneath (Copy of Raster 1)
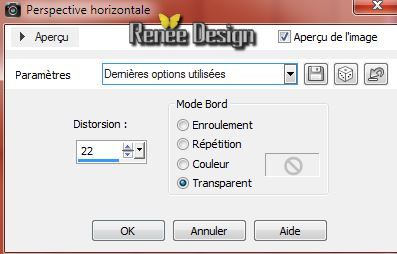
10.
Effects-Geometric Effects-Perspective-Horizontal/Transparent
11.
Selections-Custom selection with these settings
/
Delete
Selections-Deselect All
The result
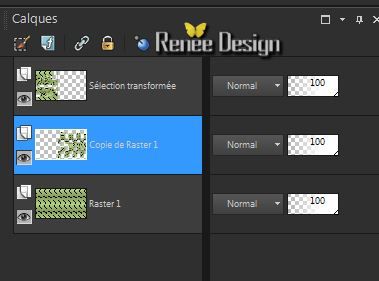
Activate the top of the layer-Palette (Promoted selection)
12.
Effects - 3D Effects - Drop shadow: 4/4/70/36 Black
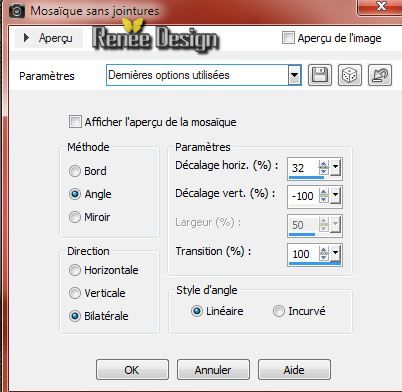
13.
Effects - Image effects - Seamless tiling:

14.
Material Properties: Prepare a sunburst gradient configured like this
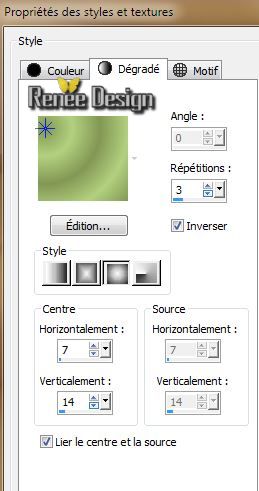
15.
Layers-New raster layer /Flood Fill Tool: Fill the layer with the gradient
16.
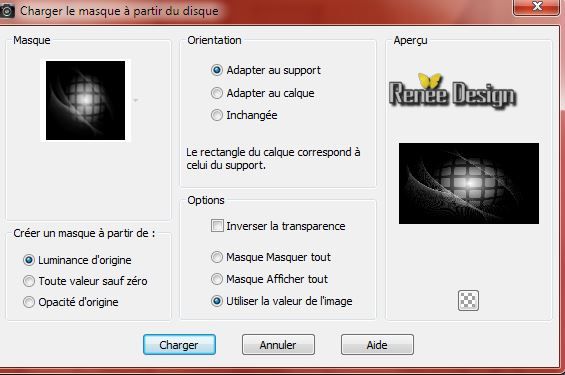
Layers-Maske- Load/Save Mask -Load Mask From Disk and choose:
''mask_17.jpg''
Layers- Merge Merge Group
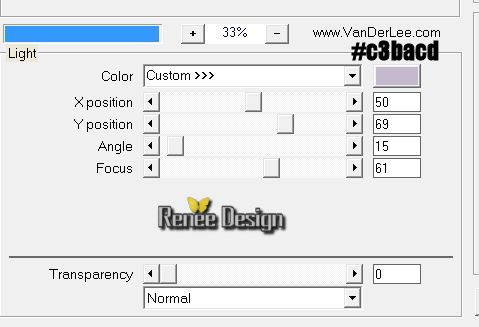
15. Effects-Plugins - Vanderlee Unplugged X - Light
16.
Layers- Duplicate
17.
Effects - Image effects - Seamless tiling:
18.Layers-Palette: change your Blend Mode to "Luminance"
19.
Close the top two layers in the Layers palette-Activate an open layer in the layer palette/Layers-Merge-Merge Visible
Your work look like this now
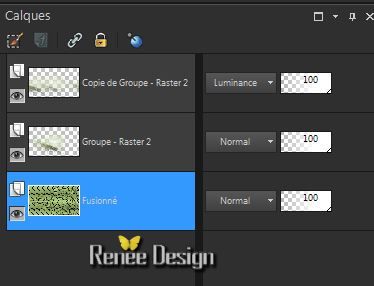
Activate the top of the layer-Palette (Copy Group-Raster 2
)
If it does not work with this filter (Png Tube "Effects Redfield"included in the zipfile) /Edit-Copy-Edit Paste as a new layer.Delete the top of the layer-palette (Copy Group raster 2)Proceed to step 21
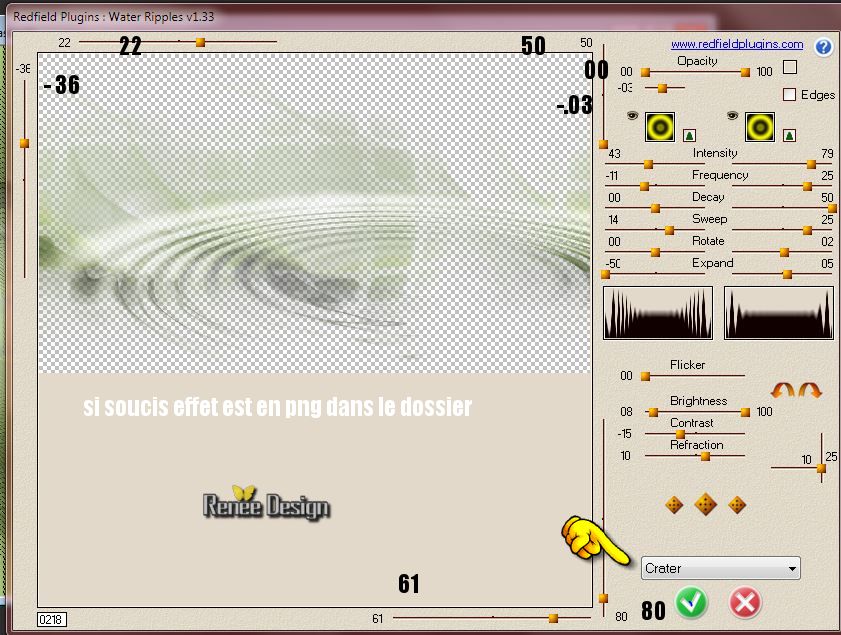
20.
Effects-Plugins- Redfield - Watter Ripples
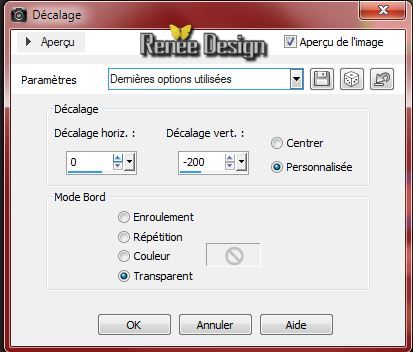
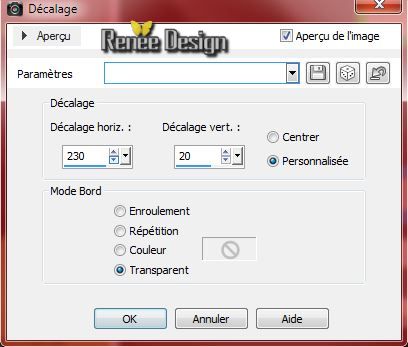
21.
Effects - Images Effects - Offset
22.Activate the tube ''femme prise dans un
filet-art.Wieslaw Walkusk.png''/Delete the watermark
Image
Resize 85 %-Edit - Copy -Edit - Paste as a new layer
21.
Effects - Images Effects - Offset
22.
Layers-Maske- Load/Save Mask -Load Mask From Disk and choose:''gradientedworisch''

23.
Layers- Merge Merge Group
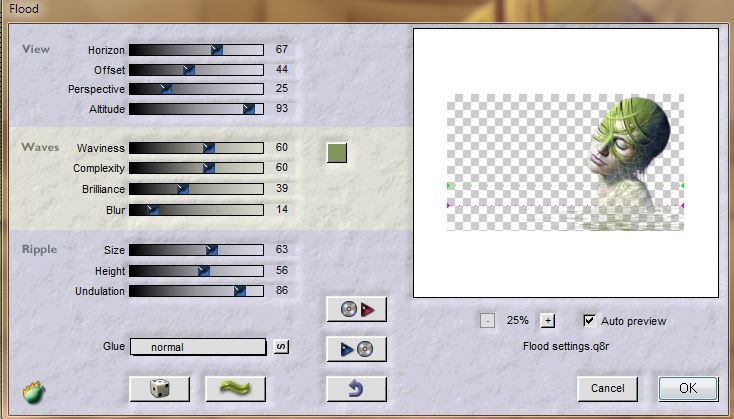
24.
Effects-Plugins - Flaming Pear /Flood/ BG-Color
25.
Layers-New raster layer
26.
Selections - load/save selection- load selection from disk and select my file: "ds_un_filet_1"
27.
Pot of Paint opacity: 60% -Flood Fill Tool: fill the selection with the FG-Color
28.
Selections - Modify - Contract with 10 pixels
DELETE
29.
Selections- Deselect All
30.
Effects- Plugins Unlimited 2.0 / Toadies - Plan
Mosaic Blur

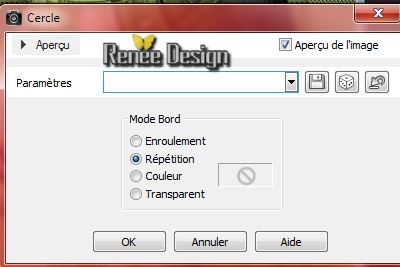
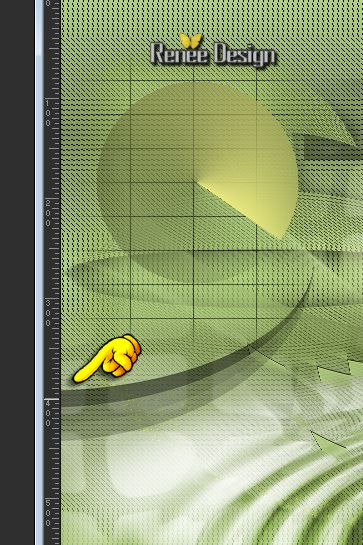
31. Effects-Geometric Effects-Circle/Edge Mode/Repeats
32.
Activate the tube ''comme_filet_pointe"" Edit - Copy -Edit - Paste as a new layer.With your move tool place it to the left see screen
32.
Layers-New raster layer
33.
Selections- Custom selection with these settings
34.
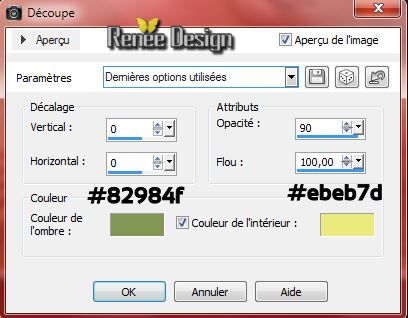
Effects-3D Effects-Cutout withe these settings
35.
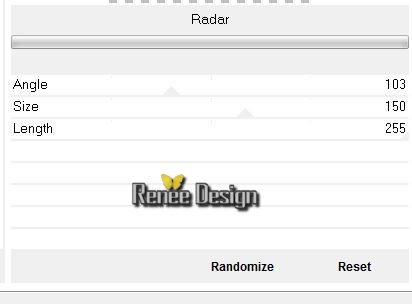
Effects-Plugins Unlimited - Special Effect 1- Radar
36.Layers-New raster layer
37.
Pot of Paint opacity: 50% /Flood Fill Tool: fill the selection with the FG-Color
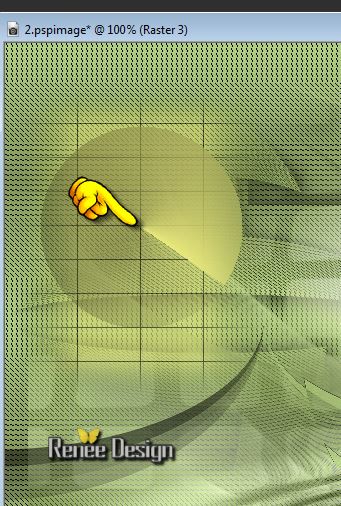
Selections-Deselect All
38.Effects-Plugins Unlimited 2.0 - Toadies - Onmadawn / default
17/16/234/17
39.
Layers-Arrange-Move Down /Move to a good place like this
40.
Activate the tube '' StarLightDesigns_CU_elements (20).pspimage''/
Edit/copy-Edit paste as a new layer . With your move tool move to the left
41.Layers-Palette: change your Blend Mode to "Luminance-Legacy"
42.
Activate the tube'' dans_un_filet_feuille.pspimage''/Edit/copy-Edit paste as a new layer . With your move tool move to the left
43.
Layers-Merge-Merge Visible
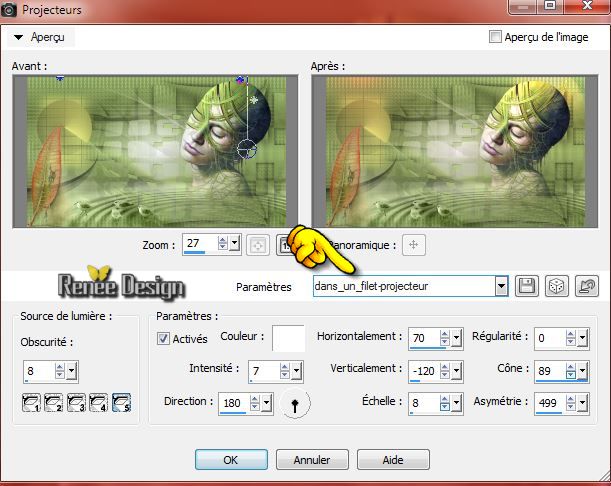
44.
Effects-Illumination Effects-Lights-Settings- ''
Preset_Lights_dans_un_filet-projecteur''
(included in the zipfile)
The Manual settings /See the example below
45.
Image - Add Borders - Symmetric checked 2 pixels Black
46.
Image - Add Borders - Symmetric checked 30 pixels BG-Color
47.
Image - Add Borders - Symmetric checked 1 pixels Black
48.
Image - Add Borders - Symmetric checked 25 pixels White
49.
Image - Add Borders - Symmetric checked 1 pixels Black
50.With your magic wand select the border of:
20 pixels
51.Effects-Plugins AAA Frame - Foto Frame
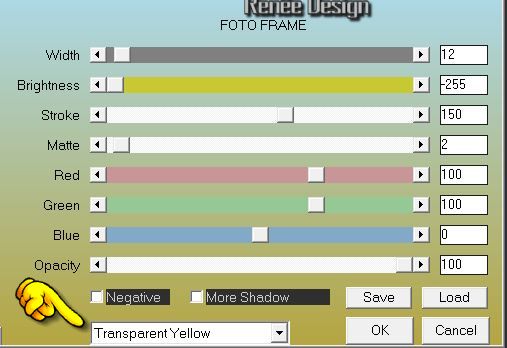
Selections-Deselect All
52.
Open the Tube Text-Edit-Copy-Edit Paste as a new layer and place. Or write your own text
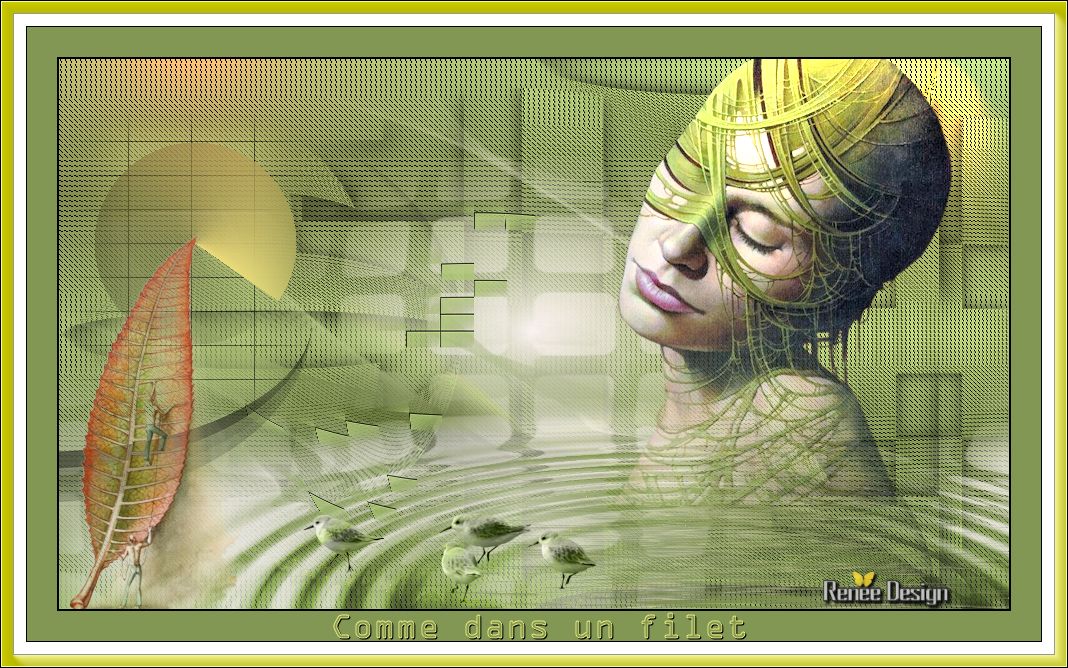
53.
Layers - Merge - Merge all layers (flatten)
I hope you enjoyed this lesson
Renée
This lesson was written by Renée the
13/06/2014
Created 06/2014
le 13/06/2014
*
Any resemblance with an existing lesson is merely a coincidence
*
* Don't forget to thank the people who work for us and with us. I named the tubeurs - Testers and the translators.
Thanks Renée. |
 Translations