|
New
Translations here
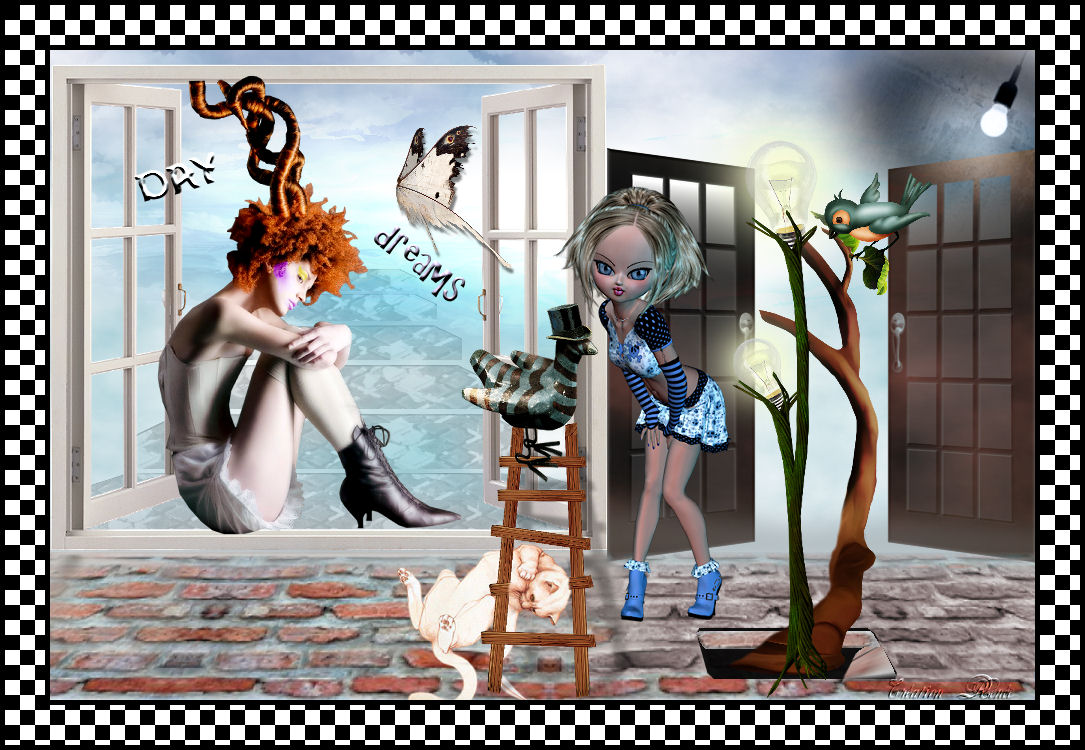
Days Dreams
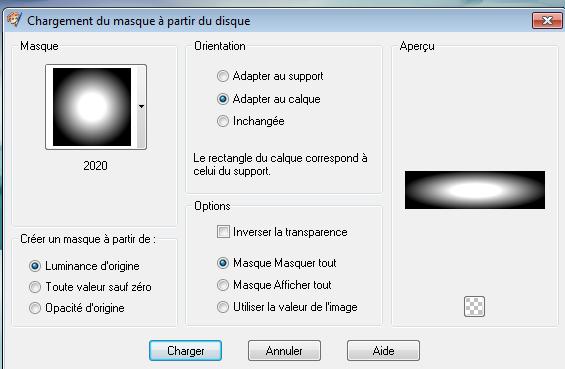
Let's start the lesson. 1. Open a transparent image of 985 x 650 pixels Set your foreground color to #b4bfc3 Set your background color to #ffffff 2. Selections-Select All Open the backgroundimage ''fond de départ'' /Edit/ Copy-Edit - Paste into selection //Selections- Deselect All 3. Adjust-Sharpness-Sharpen 4. Layers-New raster layer 5. Selections - Load/save selections - Load selection from disk and select my file: ''@ renee-daydream-selection'' 6. Activate the tube ''renee-daydream-image1'' Edit/ Copy-Edit - Paste into selection 7. Layers- Layers-load/save Maske Load Mask from Disk and select Mask: 2020
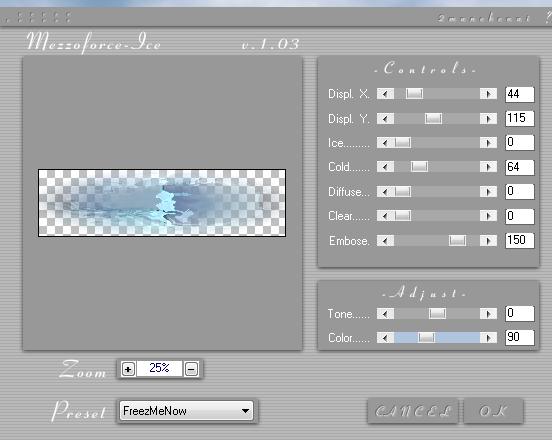
8. Layers- Merge- Merge- Group 9. Effects-Plugins - Mezzo force /Ice e1.03 with these settings (This filter works only with the older versions of PSP)
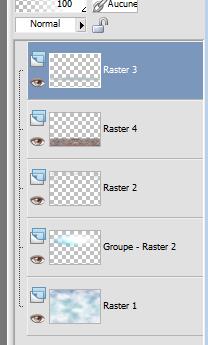
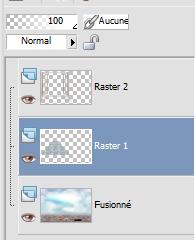
10. Selections- Deselect All If you have any problems with it the next step (Image Brush "Nuages" is included into the zipfile) and paste as a new layer on your working area-Continue with step 11 - Layers- New raster layer -Open the Brush 'nuages'' in your PSP File- Export Custom Brush (Give it a name) 'nuages'' Size 500 / -Stamp your brush in the right side by using your foreground color /Layers-Duplicate-Image Mirror -/Layers-Merge Merge Down *************************** Resume here if you used the tube 11. Selections - Load/save selections - Load selection from disk and select my file: ''@ renee-daydream-selection 1''/Hit the Delete Key of your Keyboard 12. Double click on this layer and set the Blendmode to Hard Light 13. Activate the tube ''renee-daydream-image2 (the bricks) / Edit/ Copy-Edit - Paste as new layer on your working area -Activate the Move Tool-move to the bottom 14. Layers- New raster layer 15. Selections - Load/save selections - Load selection from disk and select my file: ''@ renee-daydream-selection2'' 16. Flood Fill Tool: Fill the selection with the foreground color #b4bfc3 17. Selections- Deselect All 18. Adjust-Blur-Gaussian Blur;Radius 12 19. Selections- Deselect All - Layer palette look like this now
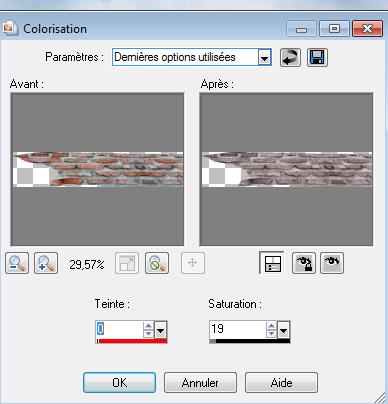
20. Layer palette – Make raster 4 active /(the stones ) 21. Selections - Load/save selections - Load selection from disk and select my file: '@ renee-daydream-selection3'' 22. Adjust – Hue and Saturation /Colorize with these settings and ok
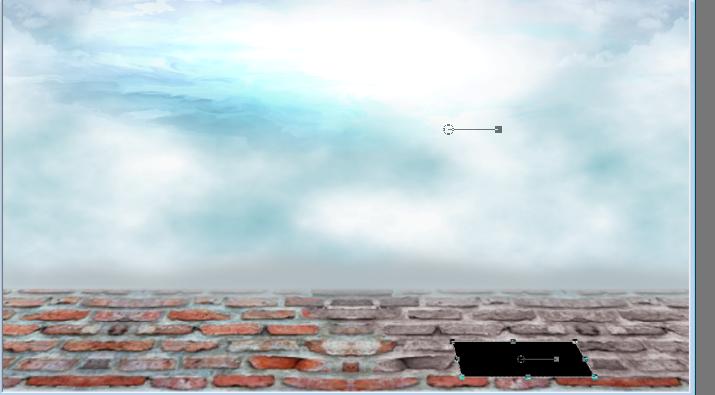
23. Selections- Deselect All - Activate the top of the layer palette 24. Layers-New raster layer - Selection Tool -Rectangle – Draw a selection as shown below and change the form with the Pic Tool (K) - Mode perspective, it is shown below too. //Flood Fill Tool: Fill the selection with black
- Layer palette – Make raster 4 active - Freehand Selection Tool – Selection type Freehand – select a row of stone (see example below)
- Edit – Copy-Edit – Paste as new layer - Layer – Arrange – Bring to top - Place the copied part as shown on the example below and adapt it to your own work. make it look as if there is a whole in the ground -Pic Tool (K) – Mode Perspective – place a piece from the path at the right (see example below)
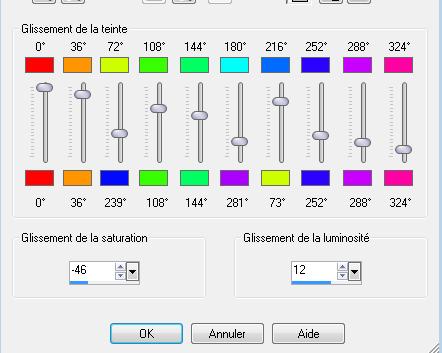
Layers – Merge down - On this merged layer - Adjust – Hue and Saturation – Hue map with these settings
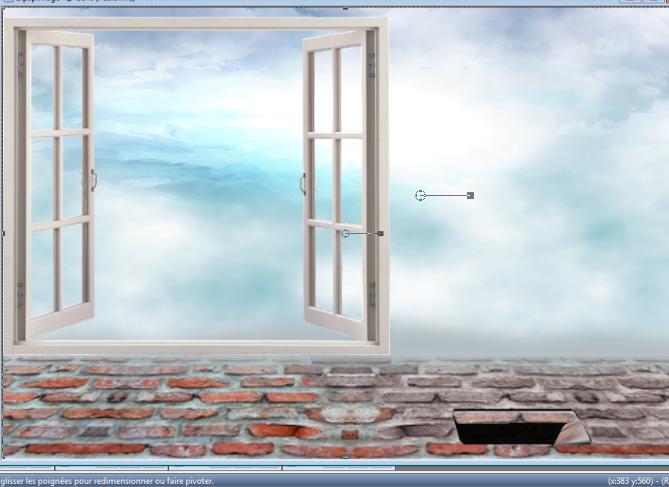
25. Layers- Merge- Merge Visible 26. Activate the tube ''renee-daydream-fenêtre'' Image Resize with 90% //Edit/copy-Edit paste as a new layer on your working area and move as shown below
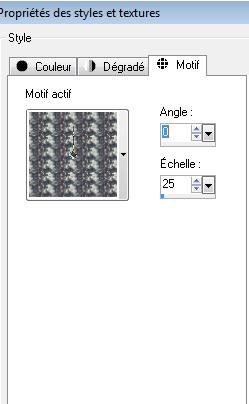
27. Effects-Plugins - EyeCandy 5 Impact - perspective shadow / tab Settings/User settings choose my preset:''renee -daydream-shadow'' 28. Layers-New raster layer 29. Selections - Load/save selections - Load selection from disk and select my file: '' @ renee-daydream-selection4'' -Flood Fill Tool: Fill the selection with the foreground color 30. Layers-New raster layer 31. Open the Pattern : ''diamonds4600'' in your psp/ Properties Foreground: Set the foreground to pattern with these settings
32. Activate Flood Fill Tool and fill the selection with the foreground pattern /Double click on this layer and set the Blendmode to Soft Light 33. Selections- Deselect All 34. Layers- Merge- Merge Down 35. Layers-Arrange-Move down under Raster 2 ( the window ) as shown below
36. Double click on this layer and set the Blendmode to Luminance and set the layer opacity of this layer to 68% 37. Activate the tube ''121_silvana_vanesa_orsi_enero_26_2009'' - Image Resize twice with 75% /Image Mirror/ Edit/copy-Edit paste as a new layer on your working area 38. Activate the tube '''Renee-daydream-echelle" /Edit/copy-Edit paste as a new layer on your working area and move 39. Activate the tube ''renee-daydream-arbre and arbre ampoule/ Edit/copy-Edit paste as a new layer on your working area and move '' - (make it look as if there is a whole in the ground) 40. Activate the tube ''renee-daydream-papillon /Edit/copy-Edit paste as a new layer on your working area and move - Effects - 3D Effects - Drop shadow with these settings 5/2/50/3 black 41. Activate the tube ''mtfp_464_Angel_of_August-@_ MichaelParkes'' - activate layer tube mtpf_tubes2 of this tube /Edit/copy-Edit paste as a new layer on your working area and move 42. Eraser tool: erase a piece from the step of the stairs for the head of the cat 43. Activate the tube ''renee -daydream-lampe '' /Edit/copy-Edit paste as a new layer on your working area and move to the upper right corner / Double click on this layer and set the Blendmode to Luminance Legacy 44. Activate the tube ''renee-daydream-porte-blanche'' /Edit/copy-Edit paste as a new layer on your working area and move to the right side Layers-Arrange-Move Down( under the trees ) 45. Double click on this layer and set the Blendmode to Exclusion 46. Activate the tube ''oiseau au chapeau'' /Edit/copy-Edit paste as a new layer on your working area and move 47. Activate the tube ''fillette en bleu '' /Edit/copy-Edit paste as a new layer on your working area and move 48. Activate the tube ''oiseau arbre '' /Edit/copy-Edit paste as a new layer on your working area and move 49. Open the tube Text / Edit/copy-Edit paste as a new layer on your working area and move 50. Image - Add borders-Symmetric checked: 5 pixels black 51. Image - Add borders-Symmetric checked: 40 pixels white 52. Image - Add borders-Symmetric checked: 5 pixels black 53. With the Magic Wand select the white border of 40 pixels 54. Effects-Plugins -L and K's /Pia 15 Selections Deselect All Save as JPG I hope you enjoyed this lesson Renée This lesson was written by Renée Placing 2011 *
Any resemblance with an existing lesson is merely a coincidence * * Don't forget to thank the people who work for us and with us. I named the tubeurs - Testers and the translators. Thanks Renée.
*-*-*-*
I am part of Tutorial Writers Inc.
My tutorials are regularly recorded
ReneeGraphisme_All rights reserved *
|
 Translations


