|
- Let's begin
1. Open a New Transparent image of 985 x
625 pixels
2. Material Properties: Forgroundcolor :#f4f2f2 and the backgroundcolor #951d2c
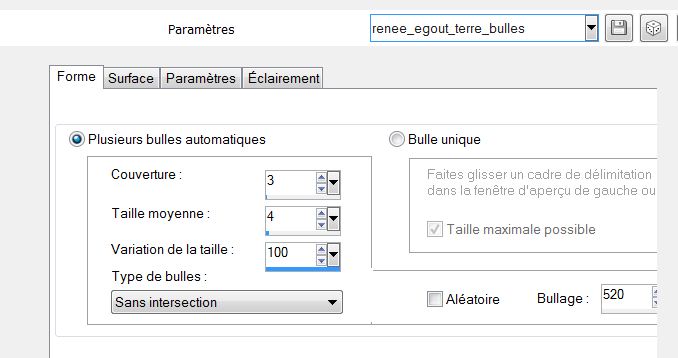
3.
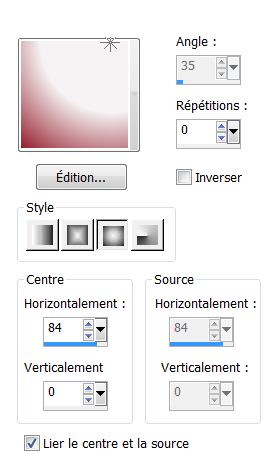
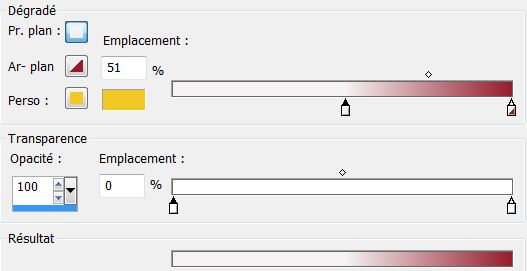
Prepare a sunburst gradient configured like this (or Foregroundcolor / backgroundcolor corel corel15)
4. Flood Fill Tool: Fill the layer with the gradient.
5. Layer-Duplicate
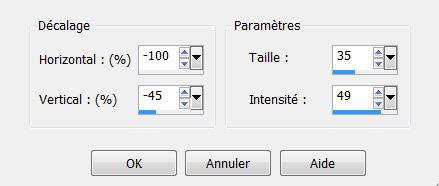
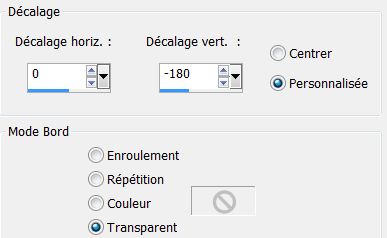
6. Effects - Image Effects
-Offset

7. Effects-3D Effects-Drop Shadow:5/5/85/22 en noir
8. Layer-Duplicate
9. Effects- Image Effects-
Offset
10. Layers-Merge-Merge Visible
11. Effects - Distortion- Effects-Warp
12. Effects- Nick Color Effex
Pro.3 -Colorize - Method1 color #E58711

13. Layers-New Raster Layer.
14. Selections - load/save selection - load selection from disk and choose ''renee_egout_a_terre''
15. Flood Fill Tool:Fill the selection with your foregroundcolor
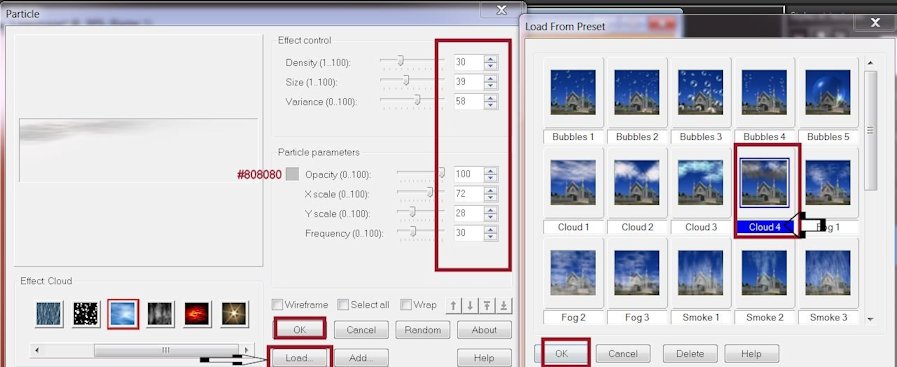
16. Effects -Plugins Ulead Particle
*choisir Cloud/ color: #808080/clic sur Load and search your image
17. Selection - Select none
18. Put the blendmode to "Overlay"
19. Open the tube
''renee_egouts_a_terre_sol" Edit/copy-Edit past as a new layer
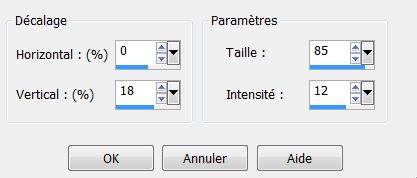
20. Effects - Image-Effects-
Offset
21. Layers-New Raster Layer.
22. Selections - load/save selection - load selection from disk and choose ''renee_egout_a_terre_1''
23. Start with your colors
in your color palette
24. Effects -Plugins Mura's Meister /
Clouds/ click on Reset for beautiful results

25. Selections-select none
26. Put the blendmode to "Overlay"
27. Effects-Distortion Effects - Wind –
100 left
28. Effects - Distortion Effects - Warp
29. Open the tube
''renee_egout_a_nuage'' Edit/ copy- Edit/ paste as new layer and place above right
30. Layers-New raster layer
31. Selections –load/save selection –load selection from disc and choose: '''renee_egout_a_terre_2''
32. Flood Fill Tool: Fill the selection with :#ffffff
33. Selections - Select none
34. Effects- Edge Effects-
Enhance / Put the blendmode to "Hard Light"
35. Layers-Duplicate
63. Effects - Distortion Effects - Twirl 720 degrees
64. Effects- 3 D Effects-Drop Shadow:
5/5/85/32 black
65. Open the tube
''2316-luzcristina'' Edit/ copy- Edit/ paste as new layer and place
66. Put the blendmode to "Hard Light "
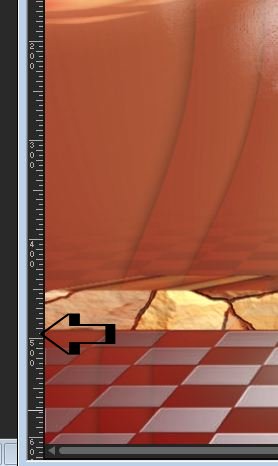
67. Open the tube
''renee_egout_a_terre_mur'' Edit/ copy- Edit/ paste as new layer and place see example below (500 pixels)
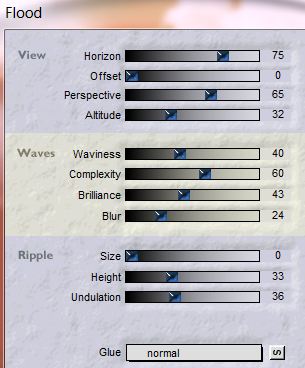
68. Effects -Plugins Flaming Pear
-Flood
69. Layers-New Raster Layer.
70. Selections –load/save selection –load selection from disc and choose:
'''renee_egout_a_terre_3''
71.Foregroundcolor to color white: Flood Fill Tool be configured like this/ - Opacity to 30 %

72. Flood Fill Tool: Fill the selection with color white
73. Selections - Select none
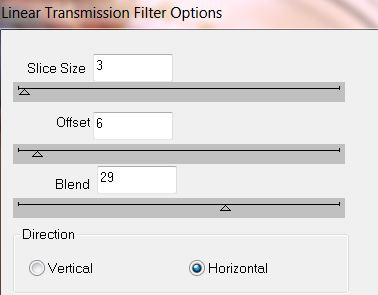
74. Effects -Plugins DBS Flux –
Lineair transmission
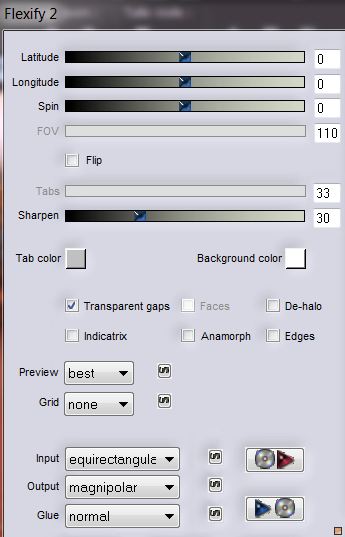
75. Effects -Plugins Flaming Pear
-Flexify2
76. Open the tube
''13_03-2013Surealiste_tubeparmimi4528'' Aktivate the tube layer with the head and lid/Edit/ copy- Edit/ paste as new layer
- And place
77. Layers-Arrange-Move Down
78. Aktivate the top of the Layers palette
79. Open the tube
''Yoka-MISTED-Steampunkeye2-051212'' Image-Resize 2x
50% Edit/ copy- Edit/ paste as new layer and place
80. Open the tube
''13_03-2013Surealiste_tubeparmimi4528'' Activate your tube layer with the bank.Edit/ copy- Edit/ paste as new layer and place
- Lower the opacity to
79%
81. Open the tube ''Anq42M
''Aktivate the Freehand selection Tool :select these parts
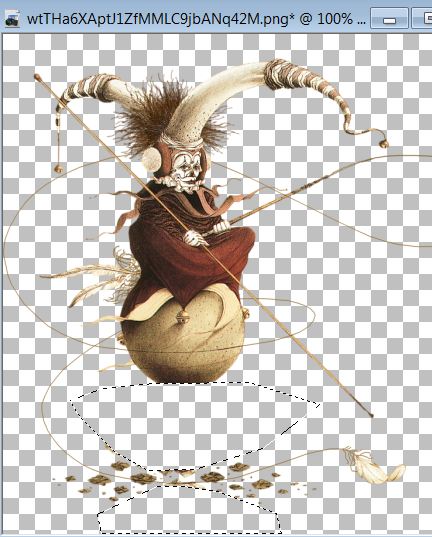
82. Delete –
Selections-Select none
83. Edit /copy/Edit paste as a new layer
- Place the tube on the couch
*Lower the Opacity to 50%
-Aktivate the Freehand selection Tool: Select this part
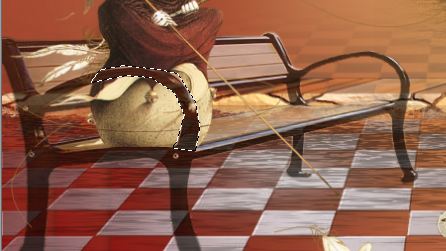
84. Delete
- Opacity back on
100 %(Only for this action from your tube)
85. Layers-New Raster Layer.
86. Aktivate your Pen Tool – foregroundcolor to : #8d1d18- Width 4 Draw a line from the eye to the lid with the head
Line style =Line style is the short doddet line 4

87. Open the tube ''bulle''
Edit /copy/Edit paste as a new layer and place
88. Layers- New raster layer
89. Effects -Artistic-effects :Balls and Bubbles
/choose my ''preset_balls_and_bublle_renee_egout_bulle''
and place your preset in your presets folder.
These are the settings
89. Blend Mode of this layer :
luminance and lower the opacity to 79%
90. Effects -3D Effects- Drop Shadow:1/5/89/22 black
91. Layers-Merge -Merge visible
92.Image - add borders symmetric
5 pixels color #312620
93.Image - add borders symmetric 50 pixels color #e1cca8
94. With your magic wand select the border with 50 pixels
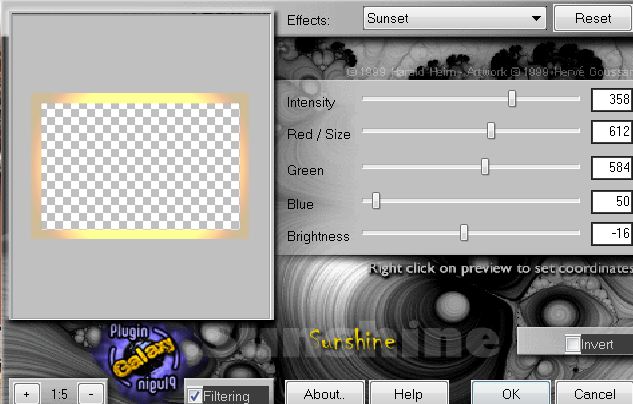
95. Effects -Plungin Galaxy-
Sunshine
96. Selections-Invert
97.Effects- 3 D Effects -Drop Shadow:
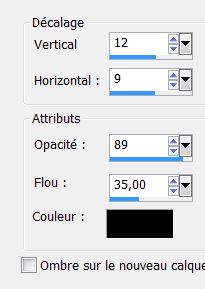
98. Repeat: Effects- 3 D Effects -Drop Shadow: -12/-9
99. Selections-select none
100. Open the tube "titre" Edit/ copy- Edit/ paste as new layer and place
101 Image - add borders symmetric
3 pixels black
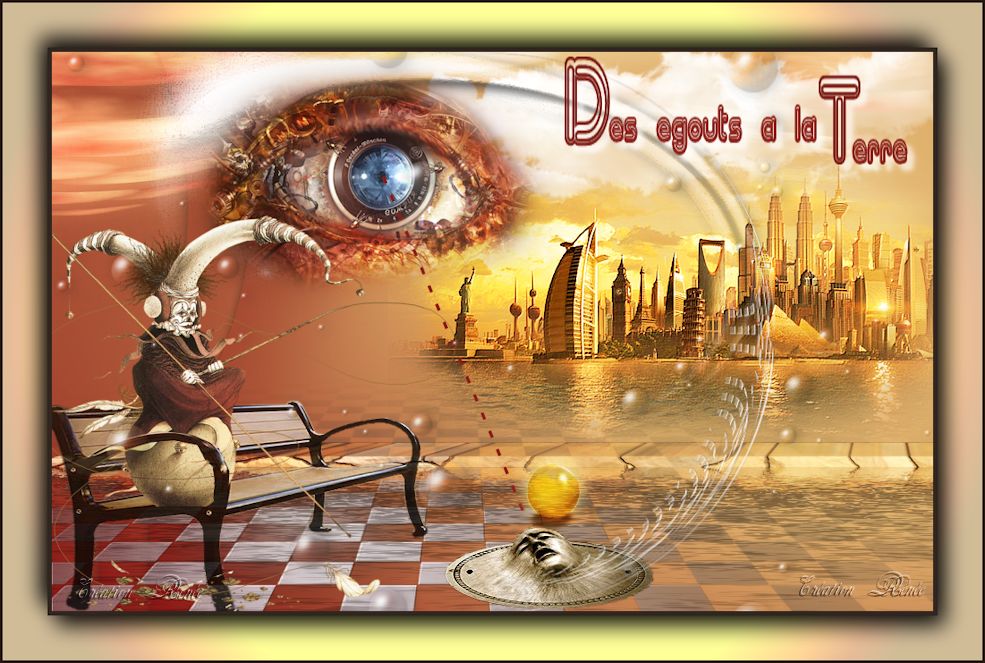
- Image-Resize to 985 pixels width
- This is finished. Thank you
Renée
This lesson was written by Renée the 10/07/2013
Created the
18/08/2013
*
Any resemblance with an existing lesson is merely a coincidence
*
Don't forget to thank the people who work for us and with us. I named the tubeurs - Testers and the translators.
Thanks Renée
* |  Des égouts a la
terre
Des égouts a la
terre

 Transalations