|
New
Translations here
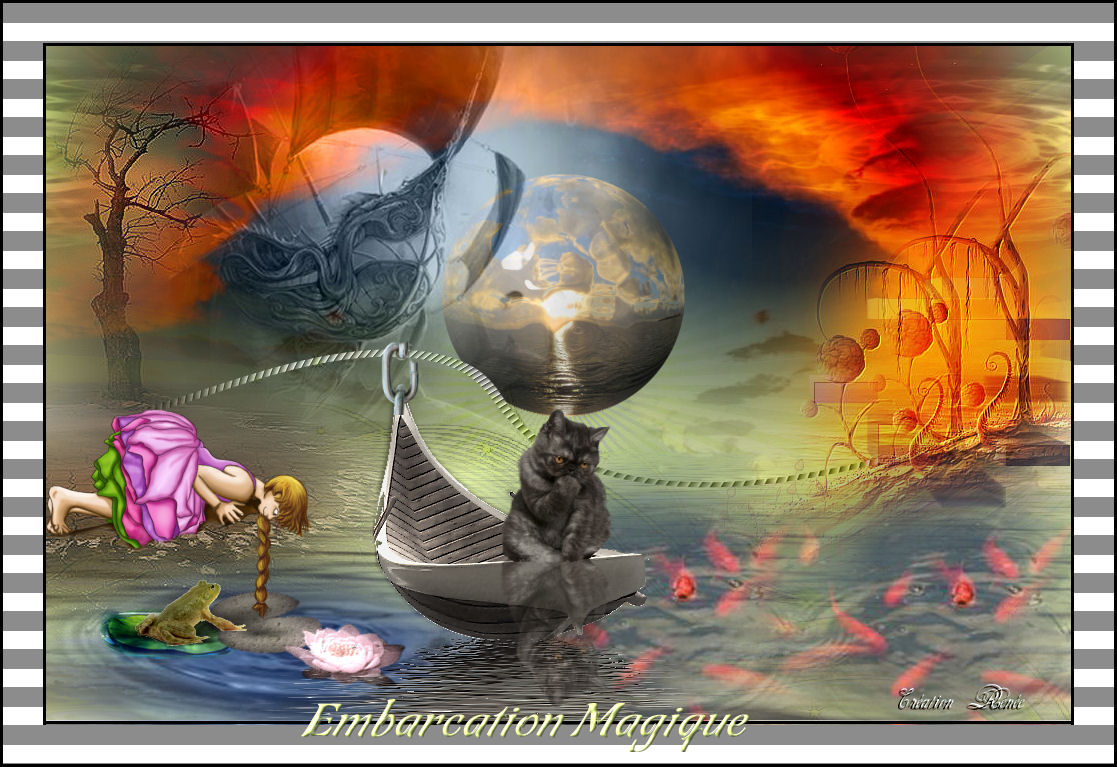
Embarcation Magique
Let's start the lesson.
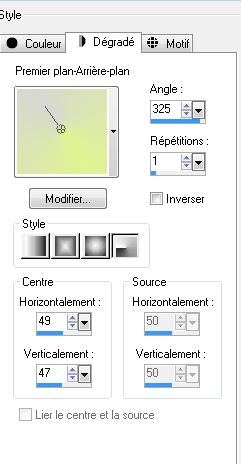
2. Material Properties: Foreground color tor #d7d7d2 -Background color to #dff492 -Prepare a radial gradient configured like this.
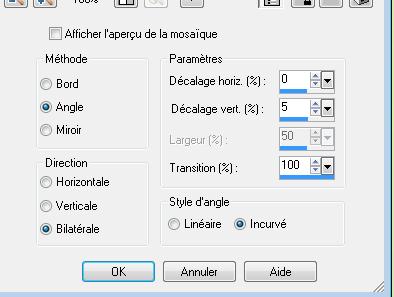
3. Activate Flood Fill Tool and fill the layer with the gradient 4. Effects-Image Effects-Seamless Tiling use settings below
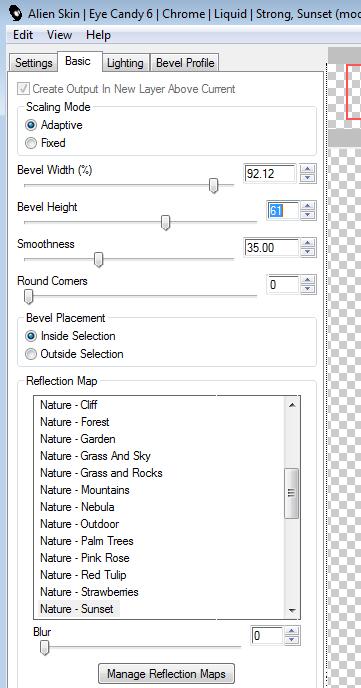
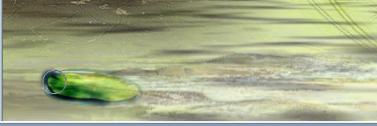
5. Effects-Plugins - VM Extravanga /Ray Transmission 47/149/5 6. Open the tube ''radi_paisage_0112'' Edit - Copy -Edit - Paste as new layer on your working area - Move to the left 7. Layer Duplicate – Image Mirror 8. Layers- Merge- Merge Down 9. Open the tube ''manuedesignS_welcometothecountrysideroad_element(2) ''Edit - Copy -Edit - Paste as new layer on your working area -Do not move it is in the right place 10. Effects- Plugins-Unlimied- Factory Gallery T /Tripolis / Tile size 113 others 0 - Double click on this layer and set the Blendmode to Overlay 11. Open the image de ''la sphère''/activate the Selection Tool-Circle-(S) draw a selection on your sphere /Edit/Copy-Edit Paste as a new Image !! Do you have problems with this- PNG image is into the zipfile Image Resize with 50% and paste as a new layer on your working area and move 12. Effects- Plugins - EyeCandy 6/chrome/liquid strong sunsed use settings below
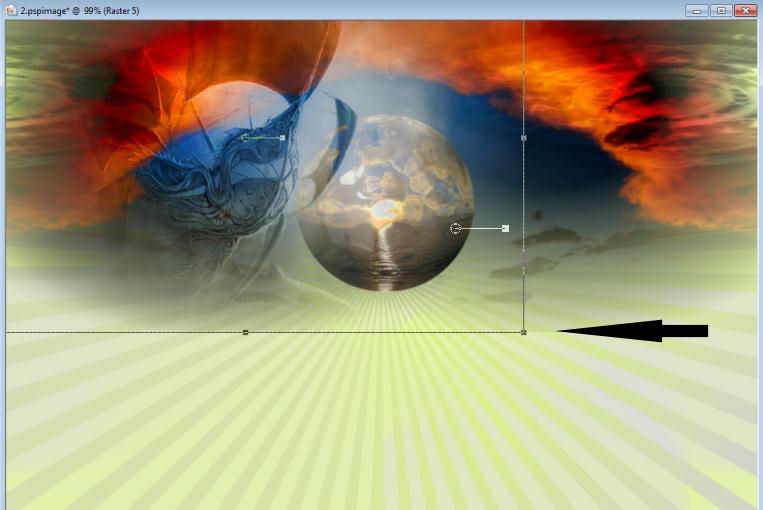
- Set the layer opacity of this layer to 71% 13. Open the tube ''renee-embarcation-magique -image 1'' / Layers- Load/Save mask-Load Mask from Disk and select: '' mask 20/20''-Layers- Merge- Merge Group Edit - Copy -Edit - Paste as new layer on your working area and move to the left side see screen
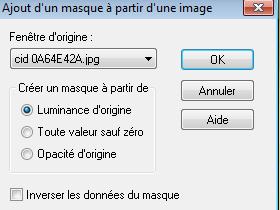
- Even match with the line of the previous layer -see the arrow - Double click on this layer and set the Blendmode to "Luminance Legacy " and set the layer opacity of this layer to 75% 15. Layers- New raster layer /Flood Fill Tool: fill the layer with the background color 16. Layers- New Mask layer from Image and choose Mask:/''Cid 0A64E42A.jpg''
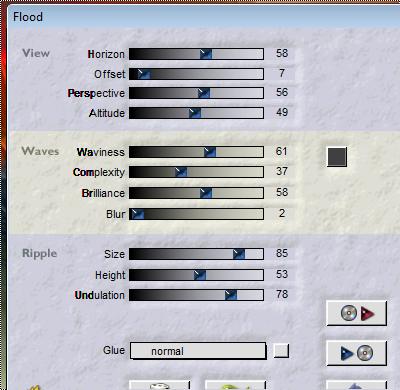
- Layers- Merge- Merge Group 17. Effects- Edge Effects- Enhance - Double click on this layer and set the Blendmode to Multiply 18. Activate the bottom of the layer-palette 19. Effects- Plugins - Flaming pear- flood with these settings-Color #404040
20. Open the tube ''renee-embarcation-magique-image 2 '' Edit-Copy–Edit - Paste as new layer on your working area-With your move tool move to the bottom 21. Layers- New raster layer '' The brush is custom made >>Activate Brush:‘''tech-brush-6''’ in your PSP File- Export Custom Brush (Give it a name) 22. Activate Brush Tool and select my file:''tech-brush-6'' déjà " use settings below
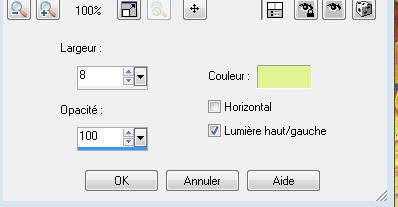
- Stamp your brush in the right side by using your foreground color -(against the edge of the water and horizon line) 23. Effects- Plugins- Unlimited - Filter Factory K - magic 16 24. Effects- Plugins -Toadies / Plain mosaic reset ok !!!attention it is not mosaic blur 25. Effects- Plugins - Eyecandy5 -Impact /extrude- tab Settings/User settings choose my preset: ''renee-embarcation-magique-extrude'' Do you have problems with this filter -"Toadies Plain Mosaic" pspimage is into the zipfile and paste as a new layer on your working area 26. Open the tube ''angeldesig_arbre_fantaisy1'' Edit - Copy -Edit - Paste as new layer on your working area and move to the right side/Double click on this layer and set the Blendmode to Hard Light 27. Effects- Plugins -FM Tile tools - blend emboss using the default setting 28. Layers- Duplicate / and move 29. Layers- New raster layer 30. Selections - load/save selection- load selection from disk and select my file ''renee-embarcation-magique-selection1'' - Flood Fill Tool: fill the selection with this color #485a6a- Selections- Deselect All 31. Effects- Texture Effects- Blinds with these settings and the background color
33. Effects- Distortion Effects- Twirl to 85 34. Open the tube ''angeldesign_arbre1 '' Edit - Copy -Edit - Paste as new layer on your working area - Move to the left 35. Effects- Edge Effects- Enhance well placed to coincide with your hose - Double click on this layer and set the Blendmode to luminance 36. Open the tube ''renee-embarcation-magique-image3 ''select a lily pad /or take mine - Edit - Copy -Edit - Paste as new layer on your working area and move to the bottom left side 37. Activate Airbrush - FG-Color: #435464- Place the brush as in screen below (click 2 ore 3 times )
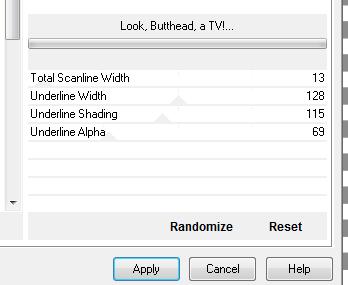
38. Open the tube ''renee nenuphar2 ''Edit - Copy -Edit - Paste as new layer on your working area and move to the bottom left side Stay on top of the layer palette 39. Open the tube ''renee-embarcation-magique-rond eau ''Edit - Copy -Edit - Paste as new layer on your working area and move Layers- Arrange- Move 2x Down (under the water lilies) 40. Open the tube de la'' grenouille ''/Image Resize with 45%-Edit - Copy -Edit - Paste as new layer on your working area and move 41. Effects-Plugins -Eyecandy 5- perspective Tab- Settings- preset ''wide perspective shadow in back'' - Stay on top of the layer palette 42. Open the tube ''renee-embarcation-magique-poissons rouges '' Edit - Copy -Edit - Paste as new layer on your working area and move to the bottom right side - Set the layer opacity of this layer to 87% 43. Open the tube and select a ( boat)"barque "/you can colorize -I have used:Effects-Plugins -Nick color Effex 3.0- Try to match the color of your boat 44. Effects- Plugins - Flaming Pear- flood with the same settings-Horizon depends where the tube is placed 45. Open the tube ''chat '' Edit - Copy -Edit - Paste as new layer on your working area /placed on the side of the boat/Activate the Eraser tool and erase the part is too much 46. Layers- Duplicate/Image Flip /Set the layer opacity of this layer to 53% to create a shadow Layers- Merge- Merge Down 47. Open the tube ''T45 butterfly '' select the girl Edit - Copy -Edit - Paste as new layer on your working aera and move tot the left side 48. Open the tube ''chaine'' -select a ring '' Edit - Copy -Edit - Paste as new layer on your working aera and move -resize and adjust for the ring that holds the boat - Adjust-Brightness and Contrast--Brightness /Contrast: 0/25 49. Ist all in place?? - Layers- Merge- Merge Visible 50. Image - Add borders-Symmetric checked: 3 pixels black 51. Image - Add borders-Symmetric checked: 50 pixels white 52. Image - Add borders-Symmetric checked: 3 pixels black - With the magic wand -select the white border of 50 pixels 53. Effects- Plugins - Toadies - look Buuthlead a TV!
54. Selections- Deselect All Save as JPG I hope you enjoyed this lesson Renée This lesson was written by Renée 20/08/2012 Placing 27/08/2012 * Any resemblance with an existing lesson is merely a coincidence * * Don't forget to thank the people who work for us and with us. I named the tubeurs - Testers and the translators. Thanks Renée. * I am part of Tutorial Writers Inc. My tutorials are regularly recorded. ReneeGraphisme_All rights reserved
*
|
 Translations