|
Let's start the lesson.
1. Open the Image
''fond _esperance''/ Window - Duplicate (or shift+D) - Close the original and proceed on the copy -Promote Background Layer =Raster 1
2. Layers-New raster layer
3. Color Palette-Set the FG-Color to color #000000=Black
Selections –load/save selection –load selection from disc and choose: ''esperance_1''
Activate Flood Fill Tool and fill the selection with the foreground color #000000=Black
Selections- Deselect All
-
Preparation
- Material Properties: Set your foreground color to color #418017 – Set your background color to color #ffffff
4. Effects -Plugins- Unlimited2.0 -
&<BKg DEsigner sf10 I> Cruncher 20/20
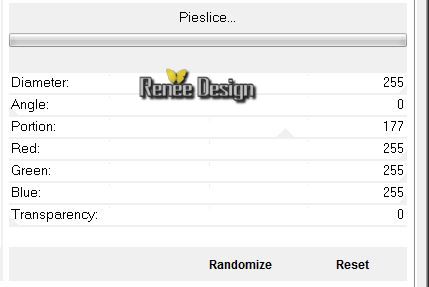
5. Effects -Plugins- Unlimited2.0-
Unplugged Shapes / Pieslice use the settings below
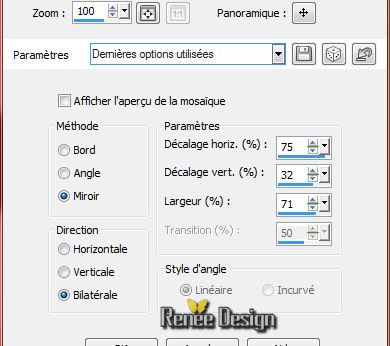
6. Effects- Image Effects- Seamless Tiling with these settings
7. Effects- Plugins-Unlimited -
ICNET Filters -Tile and Mirror /Mirror and scaled
8. Effects -Plugins- Unlimited -
ICNET Filters/ Color Filters - Blue Sky: 159/128
9. Effects -Plugins-Unlimited 2.0 -
&<BKg Kaleidoscope> 4 QFlip UpperR
-
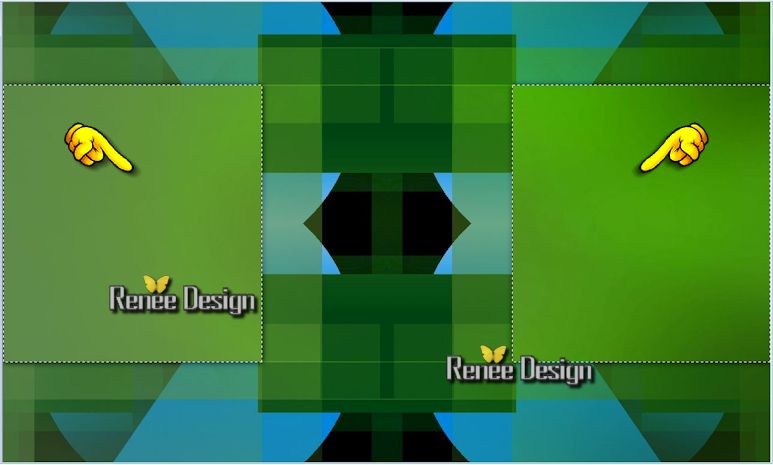
Activate your Magic wand -Add shift-RGB Value- Select the 2 squares
Activate the bottom of the Layer Palette =Raster1
10.
Effects - 3 D Effects-Drop Shadow with these settings: 1/1/100/15 color black
11.
Selections- Promote selection to layer
12.
Selections - Modify - Contract with 25 pixels
13.
Effects - 3 D Effects-Drop Shadow with these settings: 1/1/100/15 color black
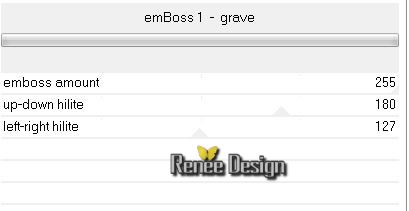
14.
Effects -Plugins -UNLIMITED 2.0 - Kang 4 /emBoss 1- grave use the settings below
15.
Effects - Edge Effects - Enhance More
16.
Selections- Modify - Contract with 25 pixels
17.
Effects - 3 D Effects-Drop Shadow with these settings: 1/1/100/15 color black
18.
Effects -Plugins -Simple - Center Tile
Selections- Deselect All
Activate the Top of the Layer Palette
19.
Layers- New Raster Layer /Activate Flood Fill Tool and fill the layer with the background color #ffffff
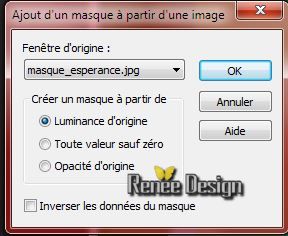
20.Layers- New Mask layer -From Image and choose Mask: ''masque_esperance''
-
Layers- Merge-Merge Group
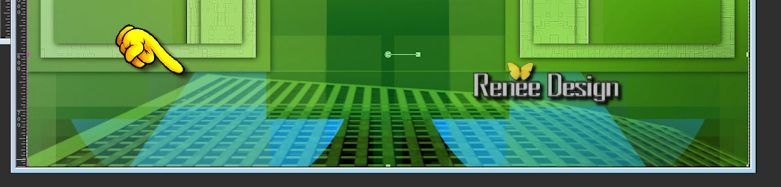
21.
Activate the Pick Tool/Deformation tool (K) Mode Scale- Go down as shown in the example below
22.
Layers-Properties-Set the Blend Mode to " Screen "
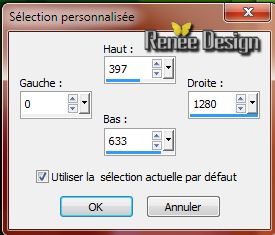
23.
Activate Selection Tool -Custom Selection (S) -Rectangle with these settings
-
DELETE

-
Selections- Deselect All
-
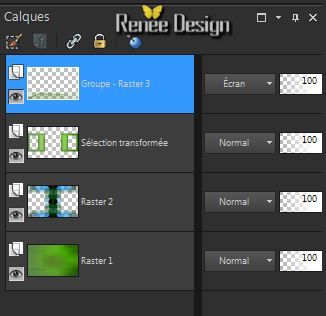
Your Layer Palette look like this now:
-Activate the promoted selection layer (the second layer from the top)
24.
Layers-Duplicate- Layers- Arrange-Move Down
25.
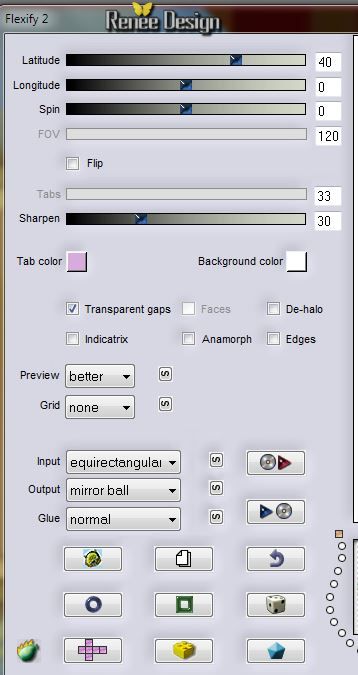
Effects - Plugins- Flaming pear - Flexify2 use the settings below
-Layers-Properties-Change the Blend Mode to " Difference "
26.
Selections –load/save selection –load selection from disc and choose: ''esperance_2'' /Delete
Selections- Deselect All
- In the Layer Palette- Activate Raster 2
27.
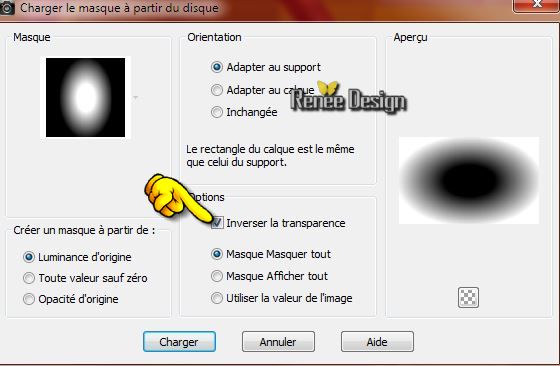
Layers- Load/Save Mask-Load Mask- From Disk and select Mask ''20/20''
-
Layers- Merge-Merge Group
28.
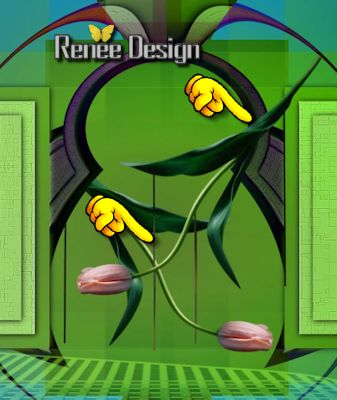
Open the tube ''Alies 1-2FP034-tulip-21062014.pspimage''-Edit - Copy- Activate your work -Edit - Paste as a new layer and move
29.
Selections –load/save selection –load selection from disc and choose: ''esperance_3''
Selections- Invert-Delete
Selections- Deselect All
30.
Open the tube ''Alies 1-2FP034-tulip-21062014.pspimage''
-Edit - Copy- Activate your work -Edit - Paste as a new layer
Image - Mirror - Mirror Horizontal (Image - Mirror in older versions of PSP)
Place it well, be careful to match the lines
31.
Layers- Merge- Merge Down
32.
Layers-New raster layer
33.
Selections –load/save selection –load selection from disc and choose: ''esperance_4''
-
Open the tube "Alies 1VR709-woman-face-17102013.pspimage"
-Edit - Copy- Activate your work -Edit - Paste Into Selection
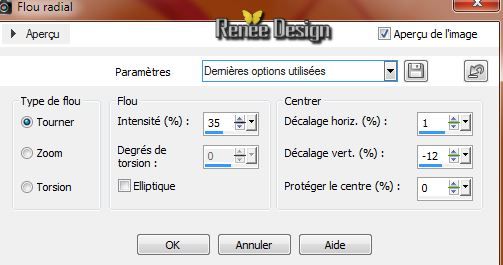
34.
Adjust- Blur- Radial Blur use the settings below
35. Effects -Plugins-Unlimited2.0 /
Filter Factory Gallery E / Zebra Fan with these settings :240/ 255
36.
Selections-Modify-Select Selection Borders with these settings
-Activate Flood Fill Tool and fill the selection with the background color #ffffff
Selections- Deselect All
37.
Layers- Duplicate - Image - Mirror - Mirror Horizontal (Image - Mirror in older versions of PSP)
38.
Open the tube ''Alies 1CP871-lovers-05022014.pspimage''
/Image -Resize 85%
-Edit - Copy- Activate your work -Edit - Paste as a new layer and move the tube in the right place( see finished image)
39.
Effects - 3 D Effects-Drop Shadow with these settings: -4/12/58/22 color black
40.
Open the tube ''purple_serenity_tubed_by_thafs''
/Image Resize 65% /Edit - Paste as a new layer and move the tube in the right place( see finished image)
41.
Layers-Properties-Change the Blend Mode to " Luminance-Legacy " –Lower the Opacity to 67%
42.
Layers- Merge- Merge Visible
43.
Layers-New raster layer
44.
Selections –load/save selection –load selection from disc and choose: ''esperance_5''
- Activate Flood Fill Tool and fill the selection with the background color #ffffff
Selections- Deselect All
45.
Layers-Properties-Change the Blend Mode to " Soft Light "
46.
Layers-New raster layer
47.
Selections –load/save selection –load selection from disc and choose: ''esperance_6"
48.Flood Fill Tool-Opacity 55 %
Click once with the color foreground color /click once with the color background color/click once with the color foreground color
49.
Layers-Properties-Change the Blend Mode to " Overlay" –Lower the Opacity to 69%
Selections- Deselect All
50.
Layers- Merge- Merge All
51.
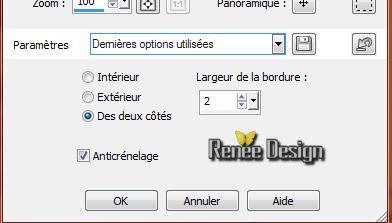
Image - Add borders-Symmetric checked:1 Pixel BG-Color
52.
Image - Add borders-Symmetric checked: 50 Pixels FG-Color
53.
Image - Add borders-Symmetric checked:1 Pixel BG-Color
54.
Image - Add borders-Symmetric checked:10 Pixels FG-Color
55. Open the tube Text/titre/Paste as a new layer
Move the text in the right place ( see finished image)
- Layers-Properties-Change the Blend Mode to " Screen"
56.
Image Resize 1025 Pixels width
57.
Open the tube ''cadre_esperance " Edit - Copy- Activate your work -Edit - Paste as a new layer
58.
Layers- Merge- Merge All
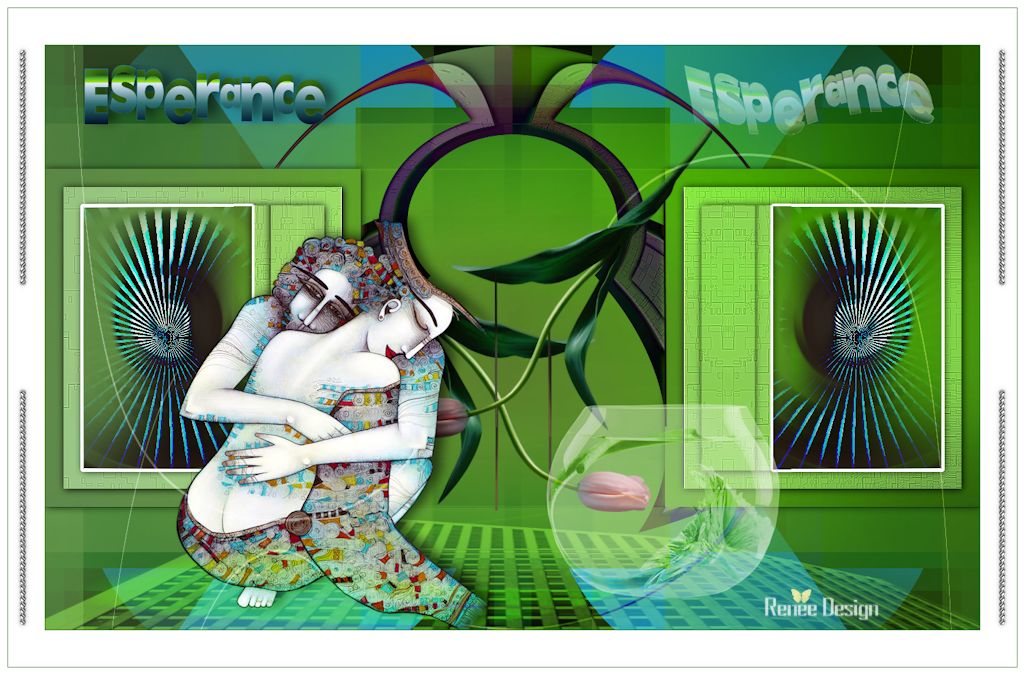
Save as JPG
I hope you enjoyed this lesson
Renée
This lesson was written by Renée 25/07/2014
Edited and Update
08/2014
*
Any resemblance with an existing lesson is a coincidence
* Do not forget to thank the people who work with us and for us
I have appointed the tubeurs and translators
Thanks Renée *
*
|
 Translations


 When you see this logo the filter is imported in Unlimited

 All rights reserved