|
- Let's start the lesson.
Material Properties: FG-Color to color: - #53657d- BG-Color to color : #babfd2
1. Open the Background image: ''fond_ete_bleu''/Promote Background to Layer= Raster 1
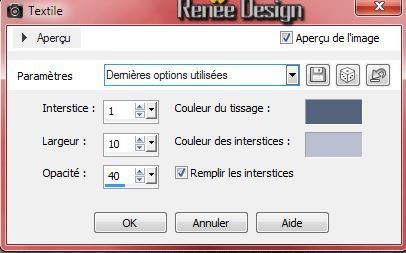
2. Effects- Textur Effects-Weave use settings below
color: #53657d and color
#babfd2
3. Layers- Duplicate
-Material Properties; FG-Color to color: #505050. BG-Color to color : #babfd2
4.
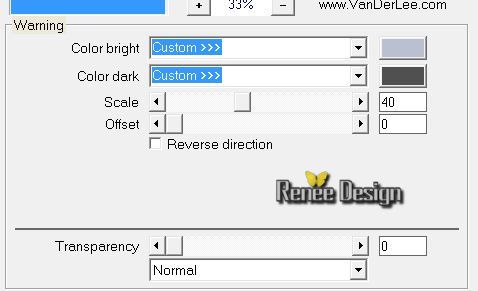
Effects- Plugins - Vanderlee Unplugged x -
Warning
color #babfd2 and color
#505050
5. Effects- Plugins - Unlimited 2.0 -
&<Bkg Kaleidoscope/ xTile Maker 1.0 setting at 104
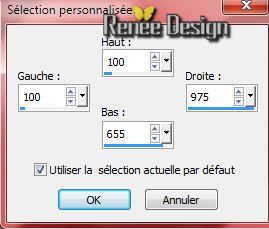
6. Selection Tool ( S ) Custom selection use settings below
7. Effects - 3D Effects - Drop shadow with these settings: 2/1/100/12 color black
8. Selections- Promote selection to layer
Selections- Deselect All
9.Effects- Plugins - Simple - Top left mirror
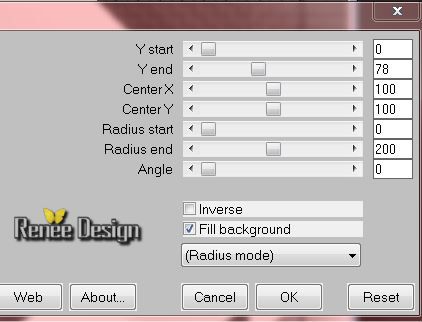
10.Effects- Plugins - Mura's Meister - Pole Transform use settings below
11.
Effects - 3D Effects - Drop shadow with the same settings
Layer-Palette: activate layer underneath ( Copy Raster 1)
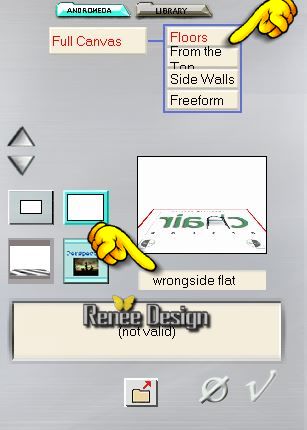
12.Effects- Plugins - Andromeda -Perspective-Floors-
wrongside Flat
13.
Effects - 3D Effects - Drop shadow with these settings: 0/0/
100/36 color black
-
Layers- Arrange- Bring to Top
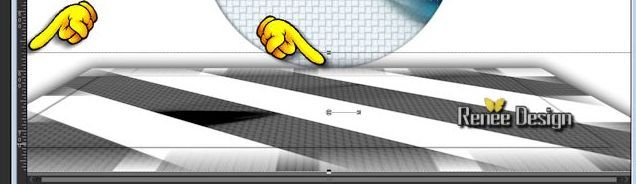
14.
Activate your Pick Tool-(K) - Down to 580 pixels high
-
Click the M key on your keyboard
- Layer-Palette: activate layer underneath (Promoted selection to layer )
-
Material Properties: FG-Color to color:
#1a8ca7 -BG-Color to color : #83c3cf
15.
Activate Magic Wand and click in the in 2 parts white- Mode RGB
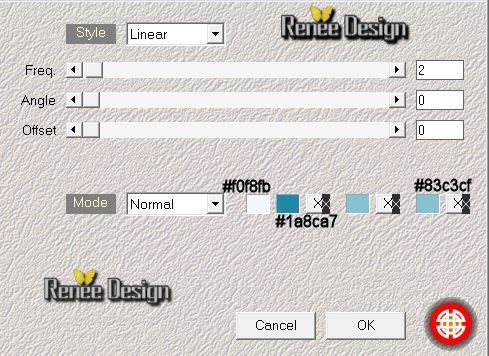
16.Effects- Plugins - Medhi Wavy Lab 1 .2/ Style
Linear use settings below
17.
Adjust- Sharpness - Sharpen More
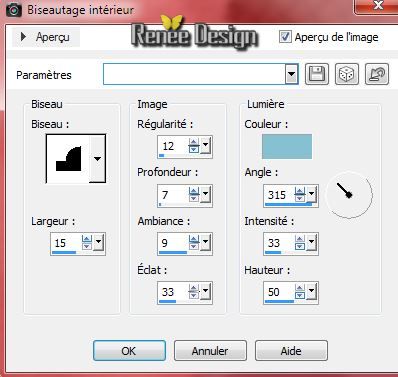
18 .
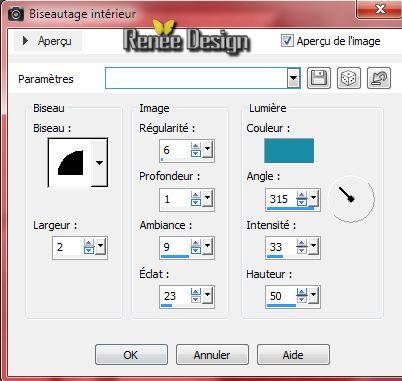
Effects- 3D Effects- Inner Bevel use settings below- background color
Selections- Deselect All
- Activate the top of the layer-Palette
19.
Activate the tube '' ete_bleu_image_1''/ Edit - Copy -Edit - Paste as new layer on your working area
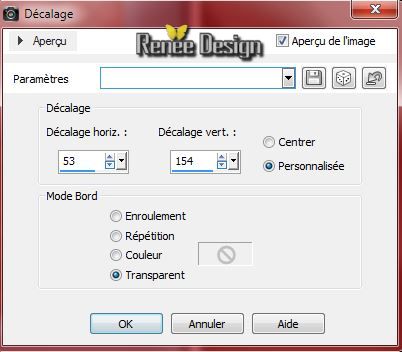
20.
Effects- Image Effects-Offset use settings below
21.
Layers- New raster layer
-
Material Properties;Set your Backgroundcolor to color #f2fafc
22.
Selections - load/save selection - load selection from disk and choose my selection "ete_bleu_1" /Activate Flood fill tool and fill the selection with the BG-Color
Selections- Deselect All
23.
Activate the tube ''ete_bleu_image_2'' / Edit - Copy -Edit - Paste as new layer on your working area
calque
24.
Effects- Image Effects-Offset use settings below
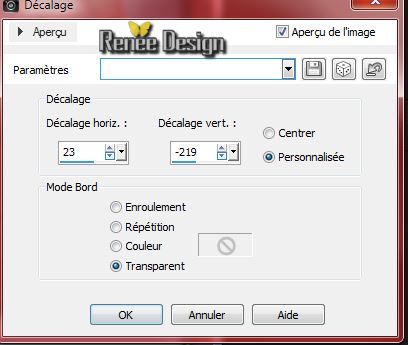
-
Layers- Duplicate for a strengthening effect (not obligatory)
25.
Layers- New raster layer
26.
Selections - load/save selection - load selection from disk and choose my selection "ete_bleu_2"/ Activate Flood fill tool and fill the selection with the FG-Color #1a8ca7
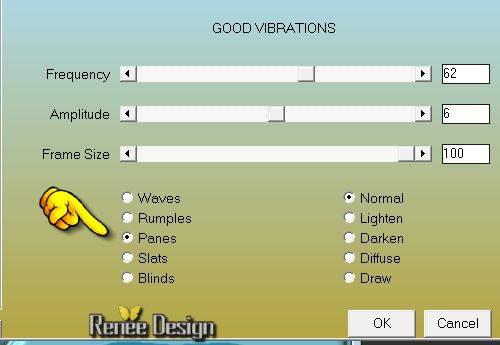
27.Effects- Plugins - AAA Filters - Good vibrations
Selections- Deselect All
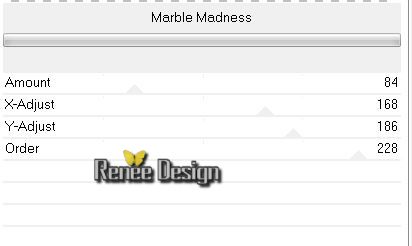
28.Effects- Plugins - VM Stylize- Marble
Madness
29.Effects- Plugins - EyeCandy 5 Impact - Glass
tab Settings-Preset /Aqua No
drop shadow
30.
Image Resize 18% Resize all the layers not checked.(do not move it is in the right place)
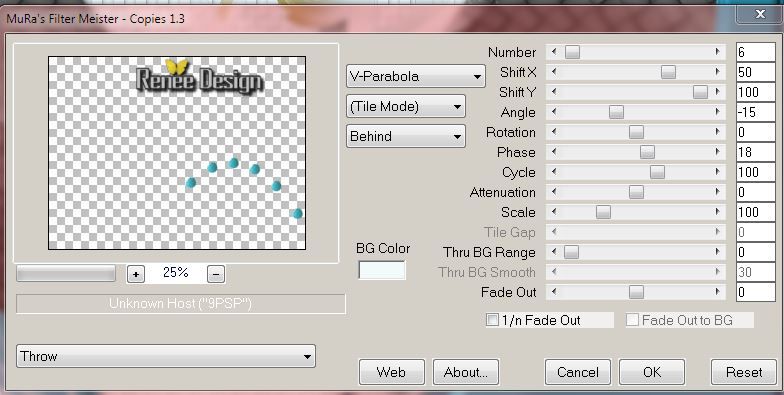
31.Effects- Plugins - Mura's Meister - Copies use settings below
32.Effects- 3D Effects- Inner Bevel use settings below/ FG-Color #1a8ca7
33.
Activate the tube '' JHanna_684©YvonneFlipse.pspimage''/Image-Resize 65% /-Edit-Copy -Edit Paste as a new layer on your working area and place
34.
Activate the tube ''ete_bleu_2 textes"" /-Edit-Copy -Edit Paste as a new layer on your working area and place
35.
Layers -Merge- Merge Down and repeat ( two layers with the text)
36.
Effects - 3D Effects - Drop shadow with these settings: 1/1/65/18 color black
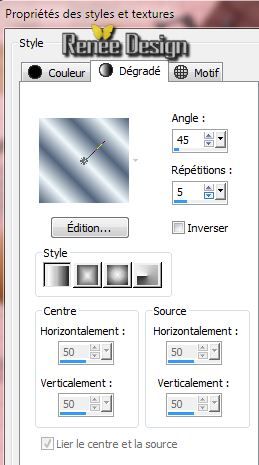
37.Material Properties: FG-Color to color #53657d BG-Color to color #f2fafc
-
Prepare a linear gradient configured like this.
38.
Layers- New raster layer
39.
Selections - load/save selection - load selection from disk and choose my selection ''ete_bleu3''/
Activate Flood fill tool and fill the selection with the gradient
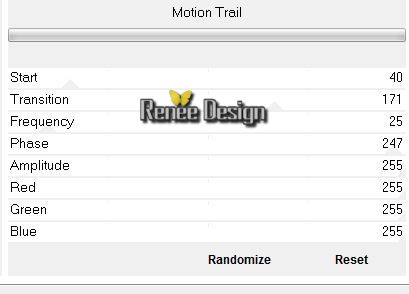
40. Effects- Plugins - Unlimited 2.0
- VM Stylize - Motion trail
41.
Effects - 3D Effects - Drop shadow with these settings: 3/3/55/6 color black
-
repeat :
Effects - 3D Effects - Drop shadow with these settings: negative -3/-3
Selections- Deselect All
42.
Image- Free Rotate 90 ° right
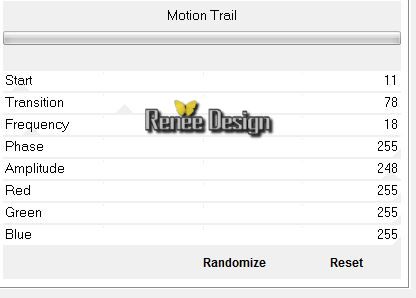
43. Effects-Plugins - Unlimited2.0 -
VM Stylize -Motion trail use settigs below
44.
Image- Free Rotate 90° left
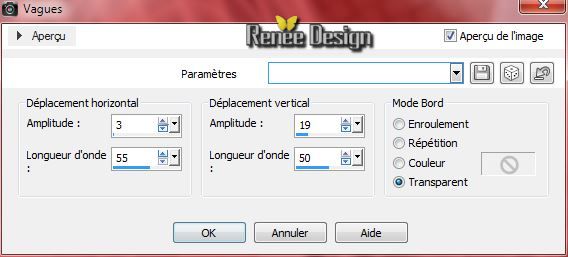
45.Effects- Distortion Effects- Wave use settings below
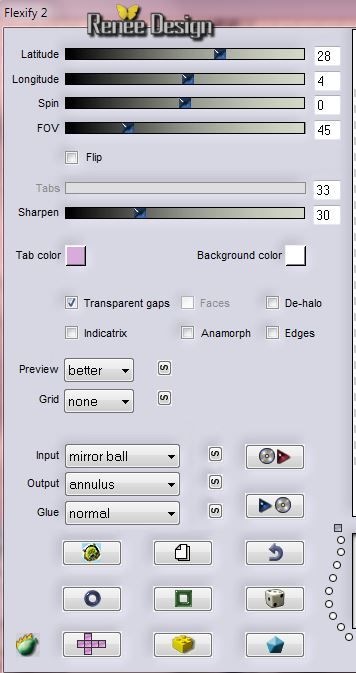
46.Effects- Plugins -Flaming Pear - Flexify2
47.
Image Resize 70 % Resize all the layers not checked.
48.
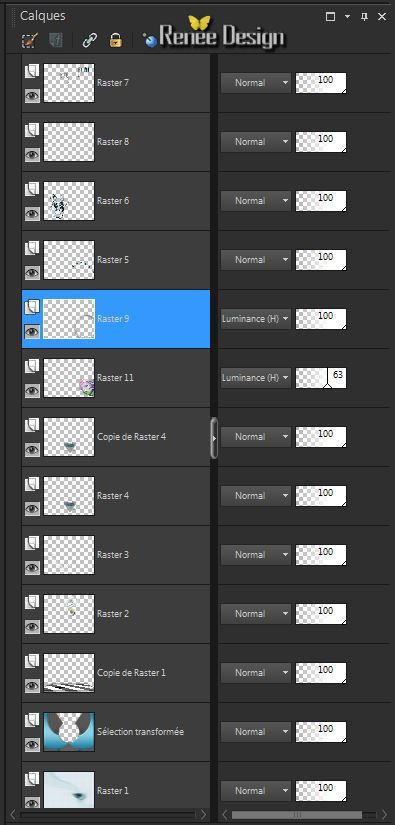
Layers- Arrange- Move down under Raster 5( effects Muras meister copies)
-
Layer Palette -double click on this Layer and set the Blend Mode to " Luminance Legacy "
49.
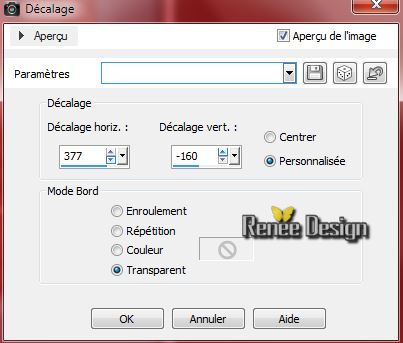
Effects- Image Effects-Offset use settings below
-
Stay on this layer
50.
Activate the tube "aster_tube_woman_50''/Image Resize 70%/Edit- Copy-Edit- Paste as a new layer on your working area
-
-With your move tool move it in the bottom right corner
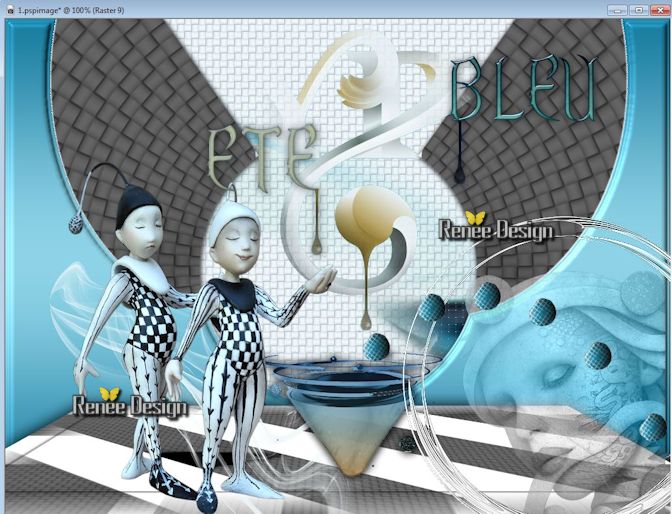
51.Layers- Arrange- Move down
-
Layer Palette -double click on this Layer and set the Blend Mode to " Luminance Legacy " Opacity of the layer down to : 63%
This is what you should have now
46.
Layers- Merge-Merge Visible
47.
Image - Add borders-Symmetric checked:2 pixels FG-Color
48.
Image - Add borders-Symmetric checked:1 pixel BG-Color
49.
Image - Add borders-Symmetric checked:5 pixels FG-Color
50.
Image - Add borders-Symmetric checked:50 pixels BG-Color
51.
Activate Magic Wand and click in the border of 50 pixels
Activate Flood fill tool and fill the selection with the linear gradient
52. Effects- Plugins - Flaming Pear -Tachyon
53.
Selections-Modify-Contract 5 pixels
54.
Selections- Promote selection to layer
55. Effects- Plugins - Flaming Pear -Twist use settings below
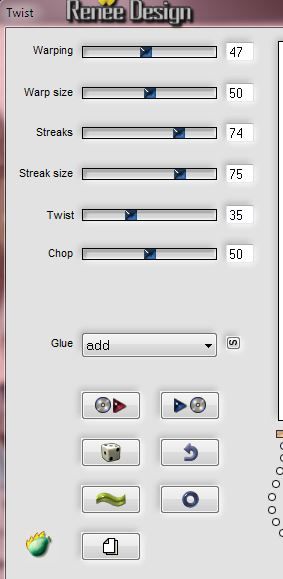
Filter needs more time
-
Layer Palette -double click on this Layer and set the Blend Mode to " Exclusion " and lower the opacity down to: 55%
Selections- Deselect All
56.
Image - Add borders-Symmetric checked: 25 pixels background color
57.
Image- Resize 995 pixels Width
58.
Activate the tube ''ete_beu_titre" -raster 2 and 3 Edit- Copy- Edit-Paste as a new layer and place
(
Blend mode "Normal" and the other in Blend mode "Screen " -
or whatever you like)
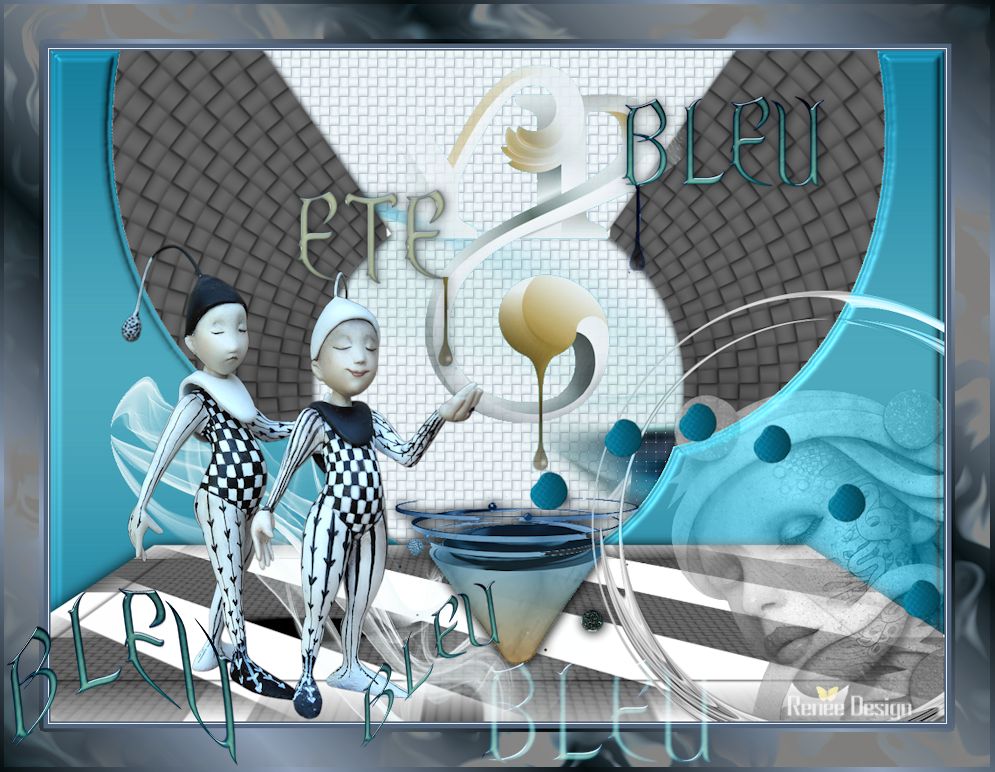
59.
Layers- Merge- Merge All
I hope you enjoyed this lesson
Renée
This lesson was written by Renée 7/08/2014
Created the
le 08/2014
*
Any resemblance with an existing lesson is merely a coincidence
* Don't forget to thank the people who work for us and with us. I named the tubeurs - Testers and the translators.
Thanks Renée.
|
 Translations


 All rights reserved