|
New
Let's start the lesson.
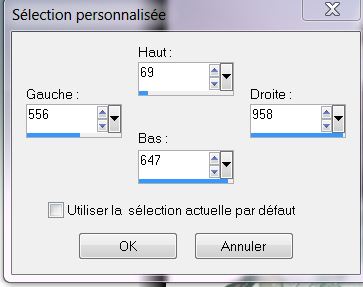
1. Material Properties: Foreground color to this color: #f5fffe Background color to this color : #6c83a5 2. Ouvrir votre fond '' femme de glace_fond1'' 3. Promote Background Layer =Raster 1 4. Selections-Custom Selection with these settings
5. Selections- Promote selection to layer 6. Effects-3D Effects-Chisel with these settings-Color: #6c83a5
7. Layers- New Raster layer 8. Open the tube ''Glass-tubed by A PSP Devil'' Edit/Copy-Edit paste into selection 9. Selections- Deselect All
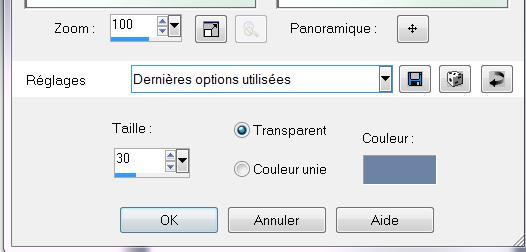
10. Effects-Plugins -EyeCandy 5
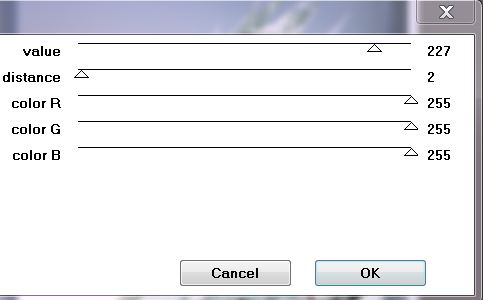
Impact / perpective shadow -Tab-Settings/User settings choose my preset 11. Layers- New Raster layer 12. Selections - load/save selection- load selection from disk and select my file ''renee_femme de glace_1'' 13. -Activate Flood Fill Tool and fill the selection with the background color 14. Selections- Deselect All 15. Effects- Plugins –Penta Com– Color dot
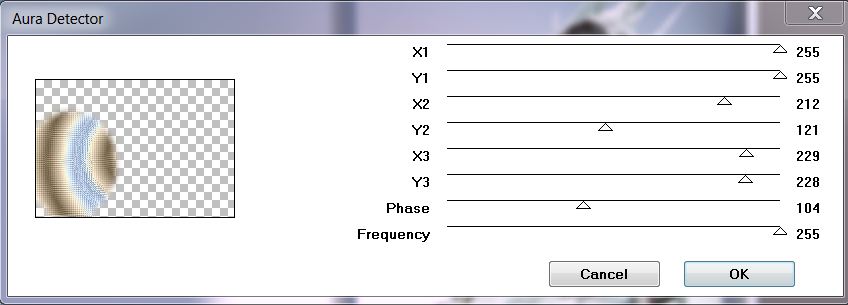
16. Effects- Plugins - VM Extravanga – Aura detector
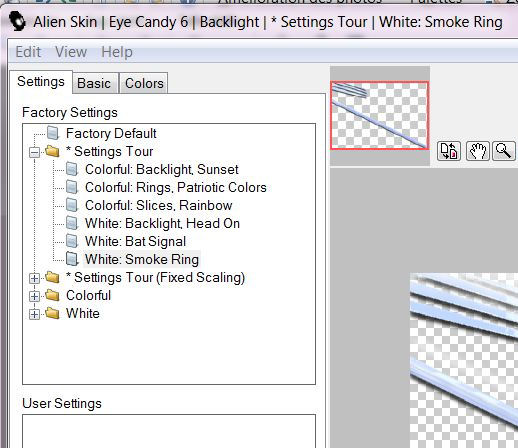
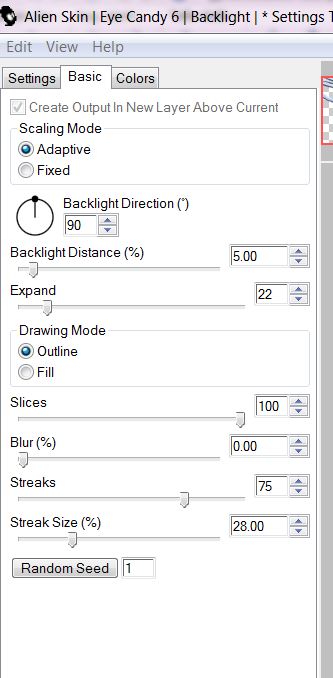
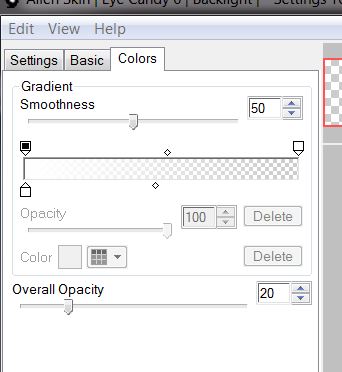
17. Layer Palette -Double click on this Layer and set the Blend Mode to "Hard Light " Reduce the opacity of this layer to 59% 18. Layers- Duplicate- Image Flip 19. Layers- Merge- Merge Down 20. Open the tube ''renee_femme de glace_image 1''/Edit/copy-Edit/paste as a new Layer (do not move, it is the right place) ) 21. Effects- Plugins -Eye Candy 6 / Black light/setting tour/white : Smoke ring( Effects- Plugins-Eye Candy 5 Black light with the same settings for a good result )
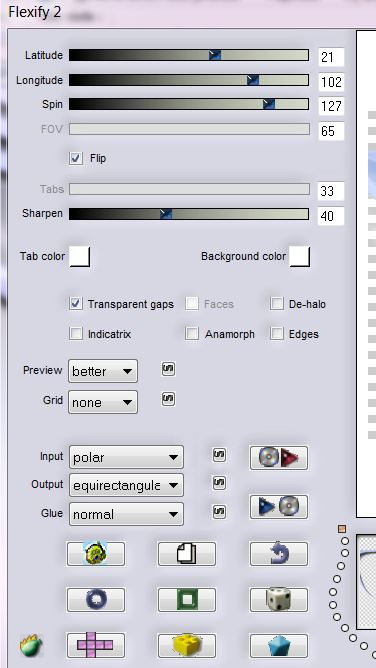
22. Effects- Plugins – Flaming Pear Flexify 2
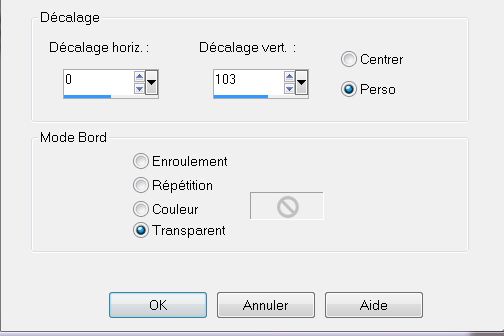
- Effects- Image Effects- Offset with these settings
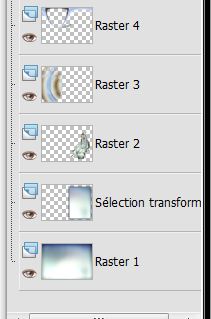
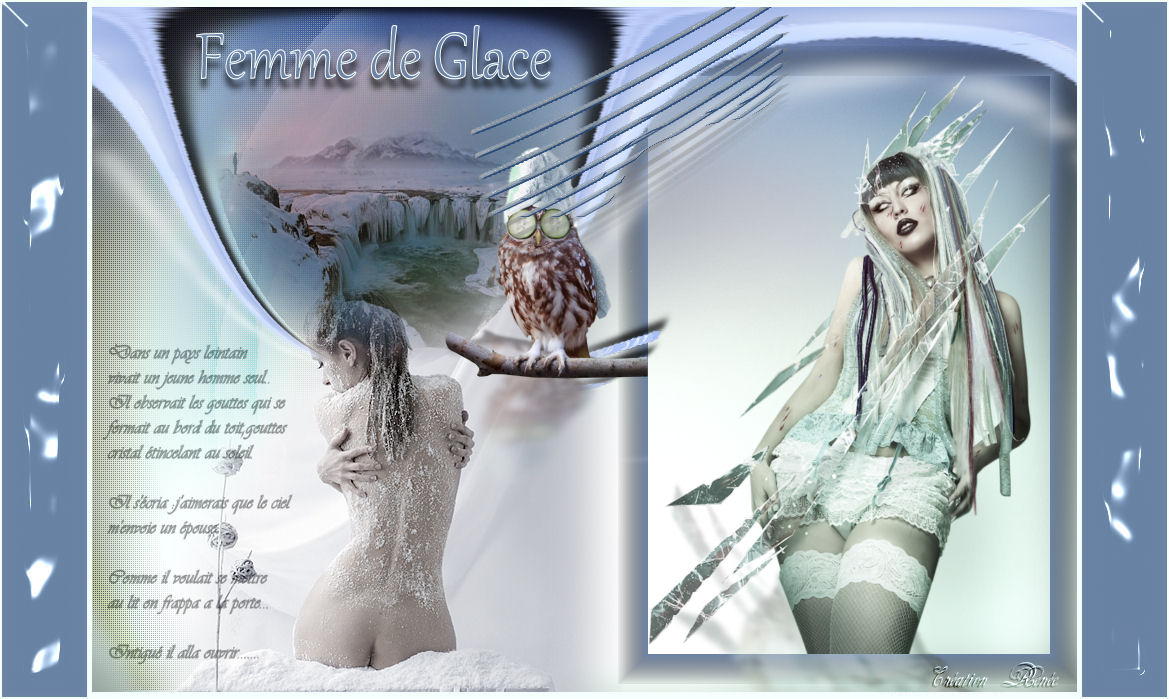
- You should have this result:
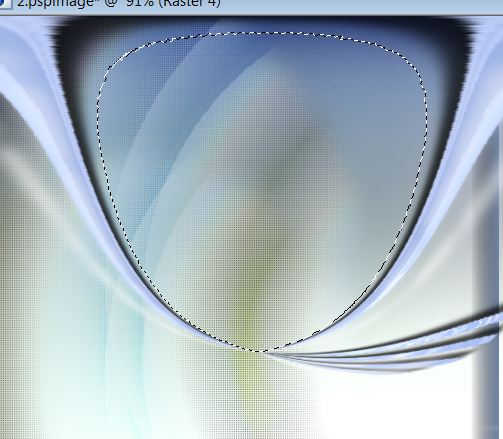
- Activate Magic Wand with these settings
24. Select inside the frame like this
25. Layers- New Raster layer 26. Open the tube ''Treagen3338_18_02_12'' Edit/Copy-Edit paste into selection - Selections- Deselect All 27. Open the tube ''renee_la femme de glace_texte'' Edit/copy-Edit paste as a new layer on your working area and move 28. Layer Palette -Double click on this Layer and set the Blend Mode to "Luminance " Reduce the opacity of this layer to: 43% 29. Open the tube '' aclis_woman_02_08_2012'' Edit/copy-Edit paste as a new layer on your working area and move 30. Layers- New Raster layer 31. Selections - load/save selection- load selection from disk and select my file ''renee_la femme de glace_2'' 32. Material Properties: Put your foreground/background into a linear gradient as configured //Activate Flood Fill Tool and fill the selection with the gradient
33. Selections- Deselect All 34. Effects- Plugins - MV's / Panopwarp with these settings
35. Effects- Plugins - Mura's Meister /copies with these settings
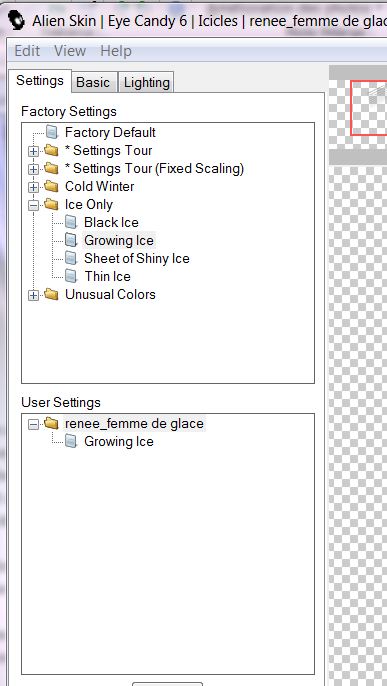
36. Effects- Plugins EyeCandy 6 /Icles-Tab- Settings/User settings and chooce my preset ''renee_femme de glace_Growing ice''
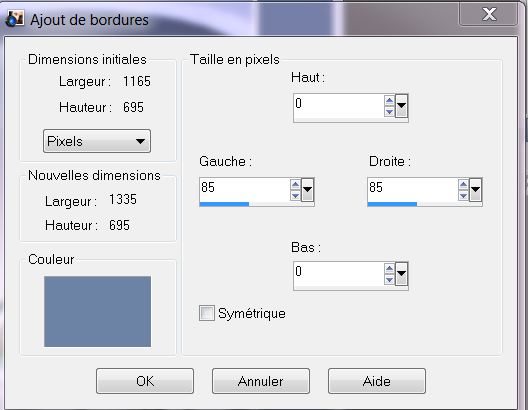
37. Open the tube ''Make-Over-tubed by A PSP Devil'' - Image-Resize 35% Edit/copy-Edit paste as a new layer on your working area and move 38. Layers- Arrange- Move Down 39. Effects- Plugins -EyeCandy 5 Impact /Perspective shadow tab Settings/User settings choose my preset: ''renee_femme de glace_hiboux'' 40. Layers-Merge-Merge All 41. Image - Add borders-Symmetric checked: 5 pixels FG-Color #f5fffe 42. Image - Add borders-Asymmetric with these settings -BG-Color #6c83a5
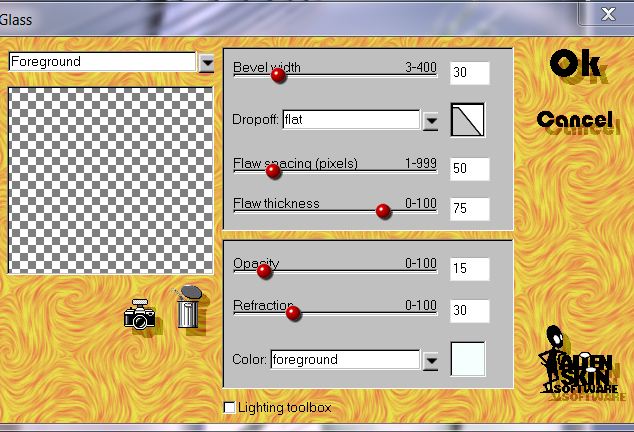
43. With the magic wand -select the two borders with 85 pixels 44. Selections- Promote selection to Layer 45. Effects- Plugins - Alien Skin-Black Box/ Glass2.1(into the zipfile )
46. Selections- Deselect All 47. Image - Add borders-Symmetric checked: 2 pixels FG-Color 48. Open the tube text/ Edit/copy -Edit/paste as a new Layer and place. Or write your own text Save as JPG
*
I am part of Tutorial Writers Inc. My tutorials are regularly recorded. ReneeGraphisme_All rights reserved
|
 Translations