|
New
Translations here
FRIVOLE
Tube are of
If it is your intention to share these tubes or these lessons in a group,club or forum please ask permission to the owner .
The tube may not be send without the lesson .
Please do not make changes to the tube, because this tube was made for this lesson only.
It is forbidden to share this tutorial without a link to the original lesson.
Thank you very much Renée * * These tubes were received from tubeurs sharing groups Or found by me searsching on the net.
I Am grateful to have been given permission these beautiful tubes so please use any copyright information as needed. If one of these tubes is yours? Contact me. so I can make a link to your site or remove it. Thank you very much Renée
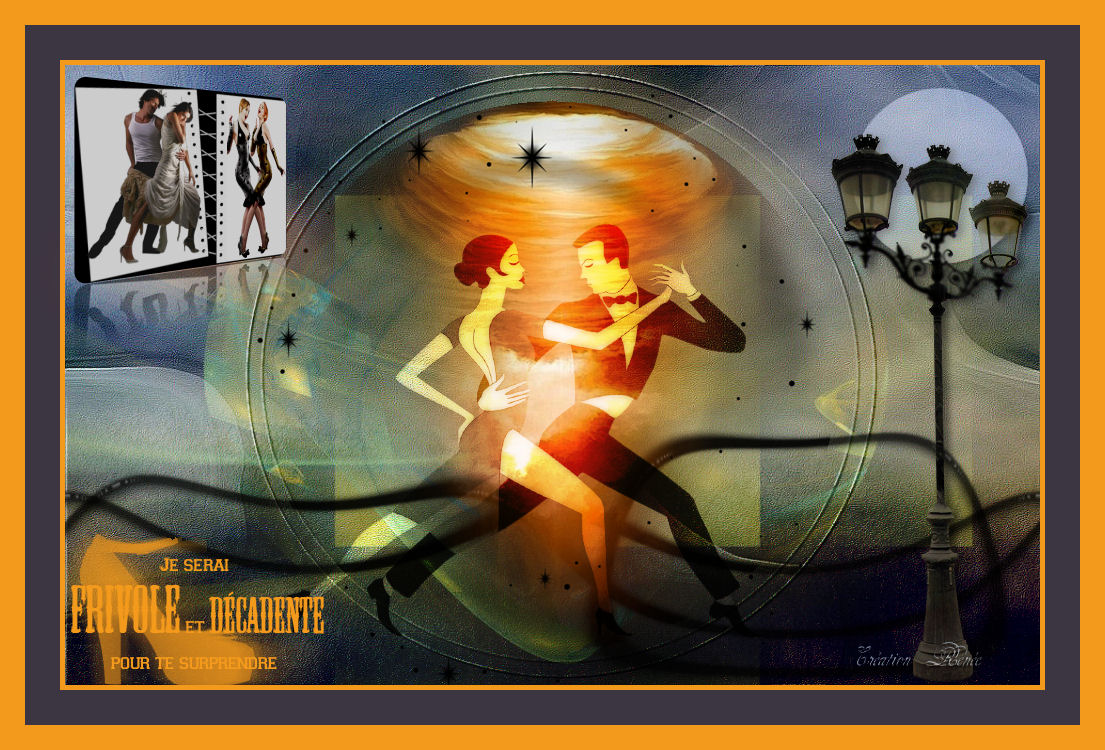
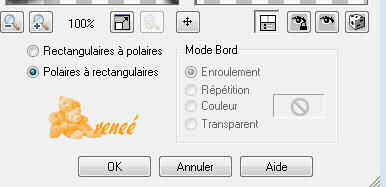
Let's start the lesson. 1. File: Open a new transparent image of 975 x 620 pixels 2. Selections- Select All 3. Open the tube fond « Layers-by-12df8 »/ Edit- opy - Edit -Paste into selection 4. Layers- New Raster Layer 5. Open the tube« Jhanna-126-baground '' Edit- opy - Edit -Paste into selection 6. Selections- Deselect All .In the Layer- Palette- Double click on this Layer and set the Blend Mode to "Hard Light " 7. Open the tube« tube cercle « Edit/ Copy-Edit - Paste as new layer on your working image do not move it is the right place 8. Layers- Duplicate 9. Effects- Image Effects- Offset with these settings: H= -50 and V =0 10. Layers- Duplicate 11. Effects- Image Effects- Offset with these settings: H=150 and V =0 12. Layers- Merge- Mere Down and Repeat 1x -On this Merged Layer 13. Effects- Distortions Effects-Polar Coordinates-Rectangular to Polar
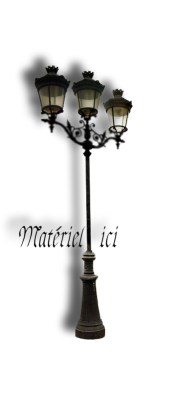
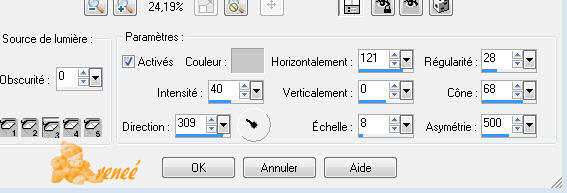
14. Image Flip 15.Layers- New Raster Layer 16. Effects- Distortions Effects-Polar Coordinates-Rectangular to Polar " @renee-danse1" 17. Open the tube " 1228506091-feerie"/ Edit- opy - Edit -Paste into selection 18. Selections- Deselect All 19. Open the tube " tube es-tango "/ Edit/ Copy-Edit - Paste as new layer on your working image and move -In the Layer- Palette- Double click on this Layer and set the Blend Mode to "Overlay " Set the layer opacity of this layer to 87% 20. 21. Layers- New Raster Layer 22. Effects- Distortions Effects-Polar Coordinates-Rectangular to Polar « matou-frivole ''Activate Flood Fill Tool and fill the selection with this color #f3991b 23. Selections- Deselect All -With your Move Tool move to the bottom left corner (see completed) 24. Open the tube "fantasyLights-Dirt2-PS7-124 " / Edit/ Copy-Edit - Paste as new layer on your working image 25. Open the tube "farol68 / Edit/ Copy-Edit - Paste as new layer on your working image and move 25. Effects- 3 D Effects- Drop Shadow with these settings: 2/5/65/12 black 26. Open the tube " transparent" /Edit/ Copy-Edit - Paste as new layer on your working image 27. Effects- Illumination Effects- Lights use settings below
28. Layers- Merge- Merge Layers Visible 29. Image - Add borders-Symmetric checked:5 pixels #f3991b 30. Image - Add borders-Symmetric checked:35 pixels #3c3542 31.Image - Add borders-Symmetric checked: 25 pixels #f3991b 32. Open the tube « pochette renee« / Edit/ Copy-Edit - Paste as new layer on your working image and move- Layers- Merge- Merge Layer all . Save as JPEG
I am part of the Tutorial Writers Inc. My tutorials are registered regularly ReneeGraphisme_All rights reserved
*
|
 Translations


.png)