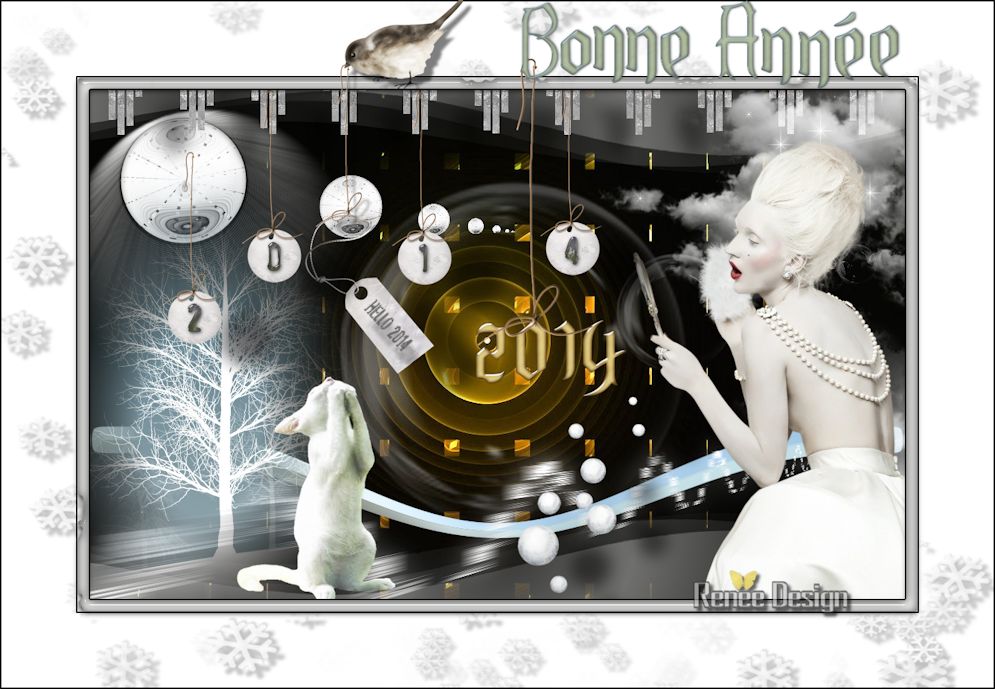
Hello 2014
Let's start the lesson .
1.
Open the Backgroundimage fond ''hello_2014'' /Promote Background Layer=Raster 1
2.Layers - New raster layer/ Activate Flood Fill Tool and fill the layer with color white
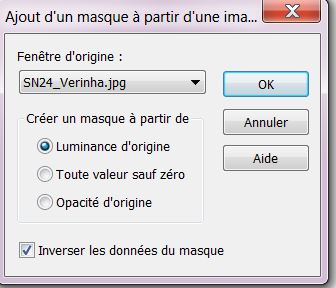
3. Layers-New Mask Layer From Image and choose Mask:
"SN24_Verinha.jpg"
Layers- Merge- Merge- Group
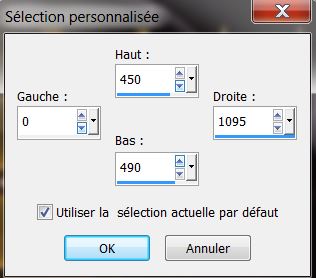
5. Selection Tool ( S ) Custom selection use settings below
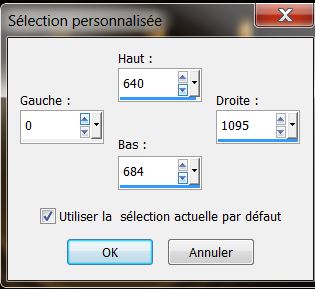
6. Delete /
Selections- Deselect All
7. Effects- Distortions Effects- Wave with these settings

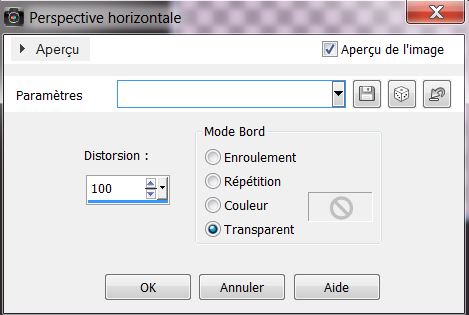
8. Effects- Geometric Effects- Perspective Horizontal
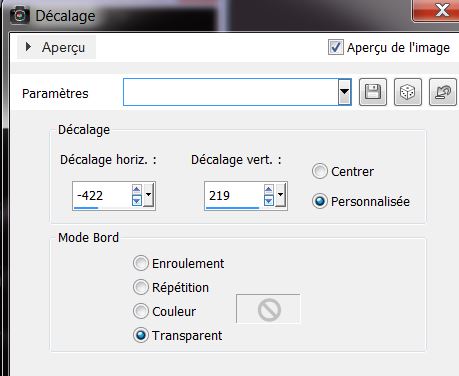
9. Effects - Images Effects - Offset with these settings
H = 0 and V = -125
10. Effects - 3D Effects - Drop Shadow with these settings: 0/0/75/35 color white
11.
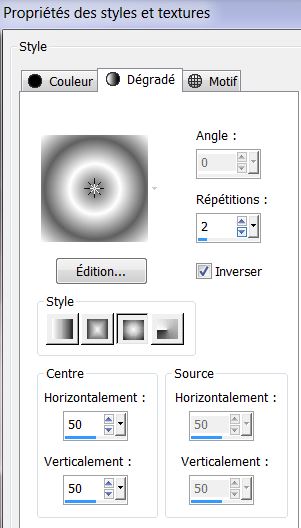
Material Properties: Foreground color to color white #ffffff// Background color to this color : #606060
Prepare a Sunburst Gradient as configured
12. Layers - New raster layer
13. Selections - load/save selection - load selection from disk and choose my selection: ''hello_1''
Activate Flood fill tool and fill the selection with the gradient
14.
Selections- Deselect All
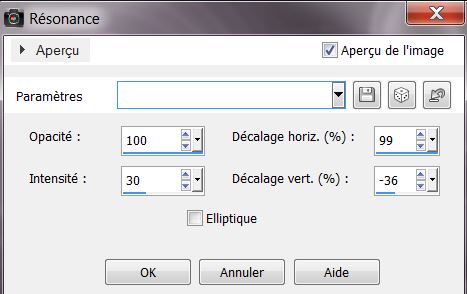
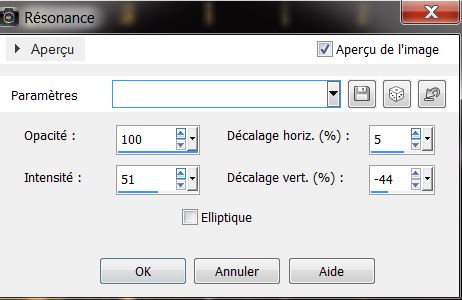
15. Effects- Reflextion Effects-Feedback with these settings
16. Image-Resize 65 % Resize all Layers not checked
17. Effects- Reflextion Effects-Feedback with these settings ( with the same settings )
18. Layers - New raster layer
19. Selection Tool ( S ) Custom selection use settings below
20. Activate Flood fill tool and fill the selection with the backgroundcolor / Selections- Deselect All
21. Effects- Plugins -
EyeCandy 5 Impact - Chrome- tab Settings/User settings choose my preset:''Hello_2014_chrome''
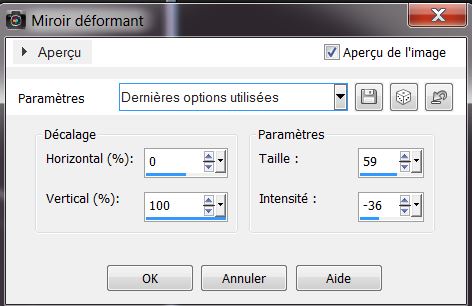
22.Effects-Distortion Effects- Warp with these settings
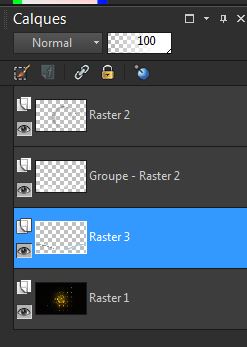
23.Layers- Arrange- Move 2x Down
Layer Palette look like this now:
24. Activate the top of the Layer-Palette
25. Open the tube
''hello_2014_lune'' Edit/copy-Edit paste as a new layer on your working area
26. Effects - Image Effects - Offset with these settings
27. Layers- Duplicate
28. Layer- Palette: Activate raster 4
/ Effects-Plugins - Eyecandy 5 Impact Blacklight - tab Settings/User settings choose my preset:-
''hello_2014_blacklight''
In the Layerpalette, set Blend Mode to Hard Light
Layer-Palette:activate the layer above ( copy layer raster 4)
28. Effects- Reflextion Effects-Feedback with these settings
29. Layers - New raster layer
30. Selections - load/save selection - load selection from disk and choose my selection: ''hello_2014_2''
31. Activate Flood fill tool and fill the selection with the gradient
32.
Selections- Deselect All
33. Effects- Plugins -Unlimited- &<Bkg Kaleidoscope/
kaleidoscope 5 - settings 128/ 0
Layer Palette - Opacity of this layer to 61%
34. Open the tube ''Leny-winter31''
Edit/Copy -Edit - Paste as new layer on your working area /With your move tool move to the left
35. Layers - New raster layer
36. Selection Tool ( S ) Custom selection use settings below

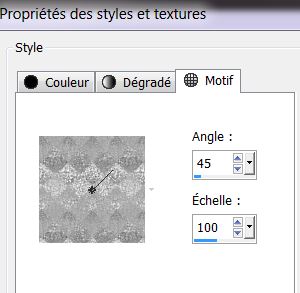
37. Open the Pattern ''Blaze''
in PSP use settings below
-
Activate Flood fill tool and fill the selection with the Pattern Blaze
38. Selections- Deselect All
39. Effects- Plugins -Unlimited- &< Bkg Designer sf10 III>
VME Shoutin'!

40. Image-Flip/move up against the top edge
41. Open the tube
''hello2014-nuages /Edit/copy-Edit paste as a new layer.
With your move tool:move to the top right corner
42. Open the tube ''hello2014_boule_ficelle '' /Edit/copy-Edit paste as a new layer. Layers Duplicate 3 times and move
43. Open the tube ''Alies
1VR548-woman-26062013 '' /Edit/copy-Edit paste as a new layer.With your move tool:move to the right side
44. Open the tube ''pleeease- cat
-mm"" /Edit/copy-Edit paste as a new layer and move .
/Image-Resize 80%
All layers not checked
45. Open the tube
''hello2014_boules_de_neige'' /Edit/copy-Edit paste as a new layer and move .
46. Open the tube
''hello2014_etiquette'' /Edit/copy-Edit paste as a new layer and move .
47. Text Tool: Font 'chrome'' write 2014 and place
48. Image - Add borders-Symmetric checked: 2
pixels color black
49. Image - Add borders-Symmetric checked:
15 pixels color white
50. Image - Add borders-Symmetric checked: 2
pixels color black
51. Image - Add borders-Symmetric checked:
100 pixels color white
52. Magic Wand : click with your magic wand in the border of 15
pixels
Effects-Plugins -Eye Candy
5 Impact Glass Tab-Settings-Preset -Clear
53. Selections- Deselect All
54. Magic Wand : click with your magic wand in the border of 100
pixels// Open the tube "" cadre"" Edit/Copy-Edit Paste into selection
55. Selections- Deselect All
56. Image - Add borders-Symmetric checked: 2
pixels color black
57. Open the tube
''hello2014_oiseau '' /Edit/copy-Edit paste as a new layer and move .
58. Open the tube''titre'' Image Resize 75% /Edit/copy-Edit paste as a new layer and move .
59. Open the tube
''ficelle"/ Edit/copy-Edit paste as a new layer and move .
60. Layers- Merge Merge All
Image-Resize 995 pixels
Width
Save as JPG
*

I wish all a happy 2014 I hope to see you again with my tutorial
*
I hope you enjoyed this lesson
Renée
This lesson was written by Renée 13/11/2013
introduction
1/12/2014
Any resemblance with an existing lesson is merely a coincidence *
* Don't forget to thank the people who work for us and with us. I named the tubeurs - Testers and the translators.
Thanks Renée.
|

 Translations