|
New
Translations here
Jasmine
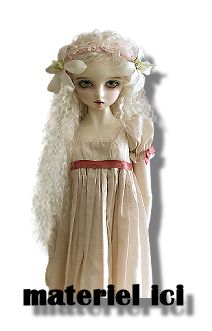
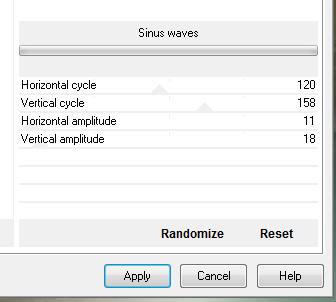
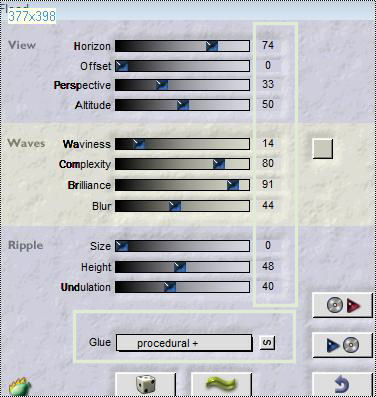
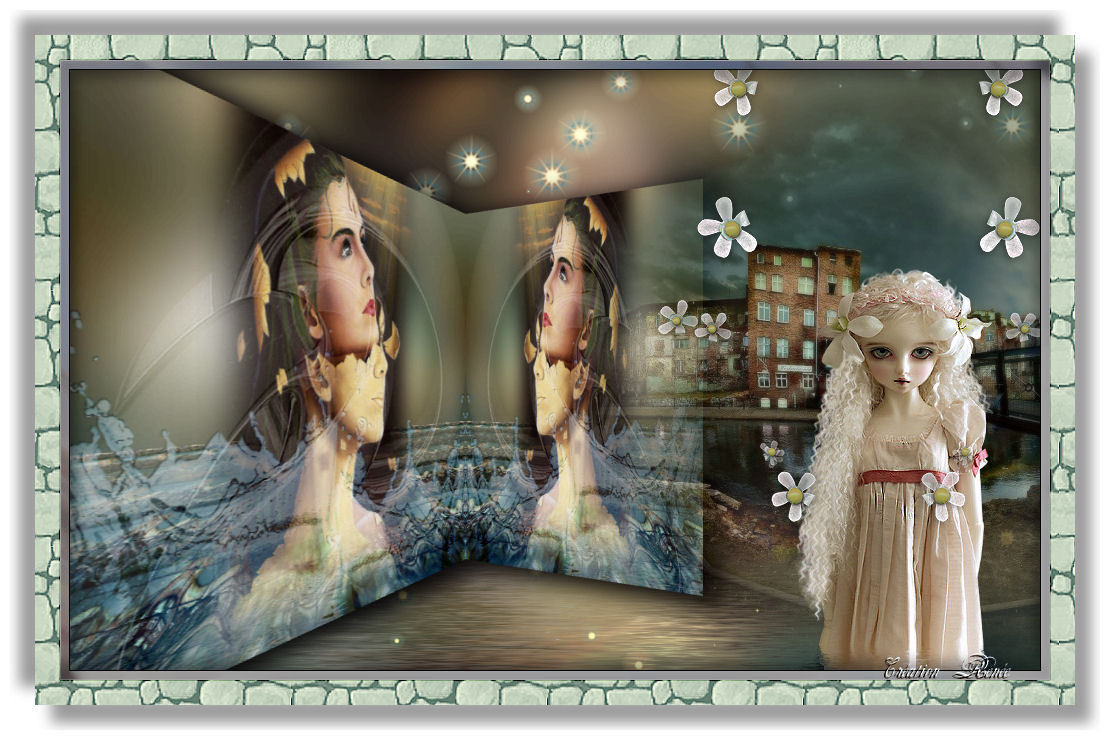
-Let's start the lesson. 1. File - New - Transparent - New Image 990 x 620 pixels 2. Selections- Select All -Open the Image ''image1 '' Edit/copy-Edit paste into selection-/Selections- Deselect All 3. Layers- New raster layer 4. Selections- Select All 5. Open the tube ''aaabibichealcove002'' Edit/copy-Edit paste into selection 6. Selections- Deselect All 7. Effects- Plugins - Neology /Sinus waves with these settings (Filter and Preset is included into the zipfile)
8. Effects- Plugins - Neology /Digital Weaver 75/137 9. Effects-Edge Effects-Enhance 10. Effects-Plugins- Mura'sMeister /Perspective Tilling with these settings
- On the same layer 11. Selections - load/save selection- load selection from disk and select my file ''renee-jasmine'' 12. Effects- Plugins - Flaming Pear /flood with these settings-Color #C9CAB8
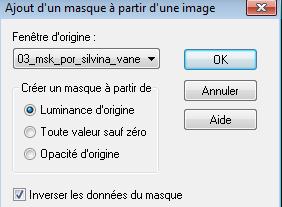
13. Selections-Deselect All 14. Layers- New raster layer 15. Set your foreground color to #e0ebd5-//Food Fill Tool :fill the layer with the foregroundcolor 16. Layers- New Mask layer from Image and select: ''03_mask_por_silvina_orsi''
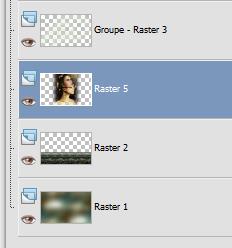
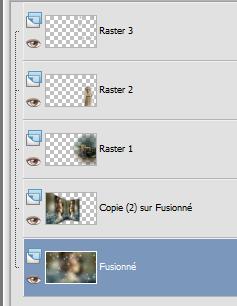
17. Effects-Used Defined Filter-Emboss3 using the default setting 18. Open the tube ''couverture de livre '' Edit/copy-Edit paste as a new layer on your working area . Do not move !! 19. Layers- Arrange-Move Down (under Groupe-raster 3 --Layer Palette look like this now.You should have this result
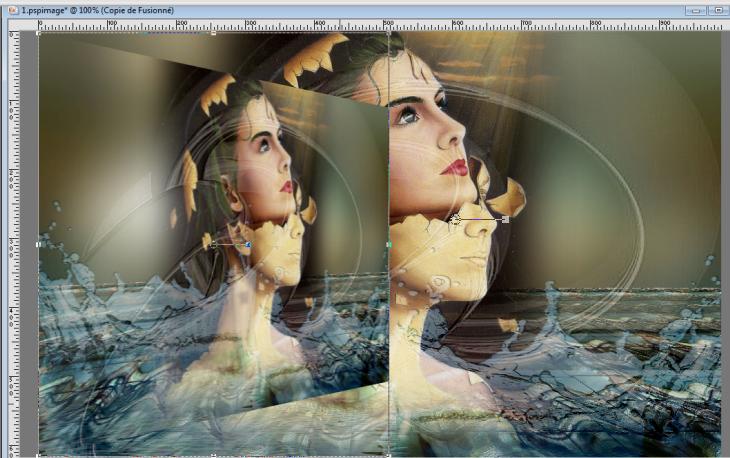
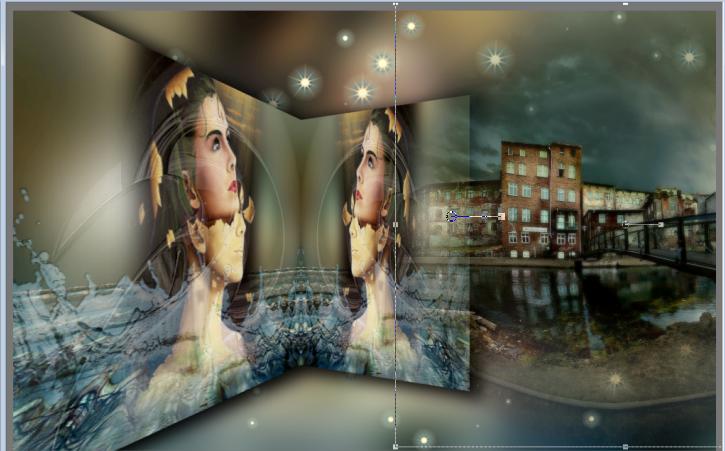
- Activate the top of the layer-Palette 20. Open the tube ''renee-jasmine-image-eau '' Edit -/Copy -Edit - Paste as new layer on your working area.With your move tool move to the bottom 21. Double click on this layer and set the Blendmode to Hard Light and set the layer opacity of this layer to 67% 22. Layers-Merge- Merge All 23. Layers-Duplicate 24. Effects-Plugins - Andromeda perspective /Side walls /it open 25. -Activate your Pick Tool (K) Mode Scale place it in the right place as shown in the example below
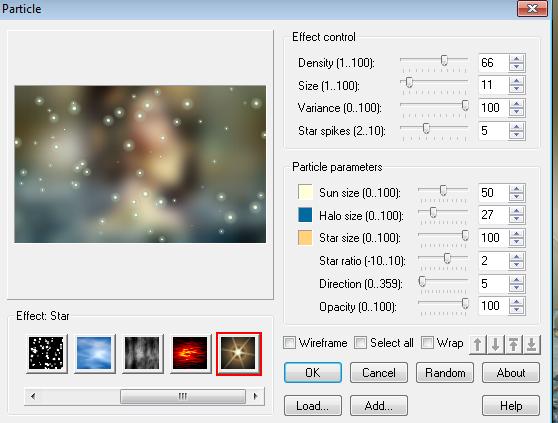
26. Layers-Duplicate /Image Mirror 27. Place these layers exactly against each other 28. Layers- Merge- Merge- Down ( merge these 2 images ) 29. Activate the bottom of the layer-Palette /Adjust-Blur-Gaussian Blur: Radius 25 - Stay on this layer 30. Effects-Plugins- Ulead Particle /with these settings-Colors #FFFFE1 - #1260A1 - #FBD289
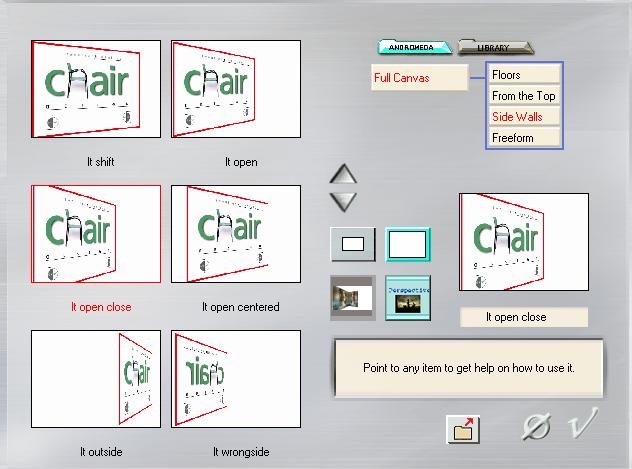
- Activate the second layer from the bottom of the Layer Palette 31. Effects- Plugins-Andromeda /side walls /perspective/Preset - ''It open close''
32. Effects-Plugins - EyeCandy5/Impact /perspective shadow-tab Settings/User settings choose my preset: ''renee-jasmine'' 33. Open the tube ''aaabibichealcove002 / Edit -/Copy -Edit - Paste as new layer on your working area. With your Move Tool move as shown below
34. Open the tube ''Johanna -fillette'' Image Resize with 65% Edit -/Copy -Edit - Paste as new layer on your working area. With your move tool move to the right side 35. Open the tube ''renee-jasmine-fleur '' Edit -/Copy -Edit - Paste as new layer on your working area. With your move tool move to the - Activate the bottom of the layer palette
36. Effects-Plugins-Flaming pear /Flood with these settings-Color #C9CAB8
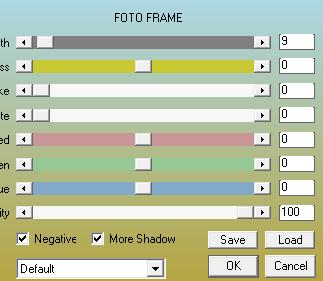
- Activate raster 2 ( the girl)/Repeat-Effects-Plugins - Flaming pear with the same settings but Horizon at 95 37. Layers-Merge- Merge All 38. Effects-Plugins -AAA Frame - Foto Frame with these settings
39. Image - Add borders-Symmetric checked: 25 pixels #3b5457 40. Image - Add borders-Symmetric checked: 35 pixels white 41. With the Magic Wand select the Border of 25 pixels 42. Set the Backgroundcolor to #3b5457 --Effects-Plugins -ICNETFILTER/Render/Stones(tiled-fore/background) 128 43. Effects-Edge Effects-Enhance 44. Effects-3D effects-Drop Shadow with these settings 18/16/4020 black Repeat: Effects-3D effects-Drop Shadow with these settings -18/ -16 Save as JPG
I hope you enjoyed this lesson Renée This lesson was written by Renée Placing February 2011 * Any resemblance with an existing lesson is merely a coincidence * * Don't forget to thank the people who work for us and with us. I named the tubeurs - Testers and the translators. Thanks Renée.
I am part of Tutorial Writers Inc. My tutorials are regularly recorded ReneeGraphisme_All rights reserved
*
|
 Translations