|
New
Translations here
UN JOUR D'AUTOMNE
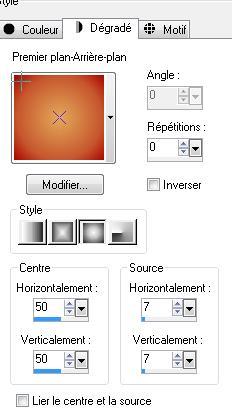
Let's start the lesson. 1. Open the image "fond soir automne" Window - Duplicate (or shift+D) - Close the original and proceed on the copy -Do not close !! 2. Layers- New Raster Layer 3. Selections –load/save selection –load selection from disc and choose: '' @renee -automne 1'' Color-palette:Set your foreground color to color #e3a95a- Set your background color to color #aa0200-Set your foreground to gradient 'Foreground-background' -Sunburst -configured like this. ****Attention:Fill Tool use settings below
!!!!!!!Attentions:Do not forget to reset your flood fill tool to 100%
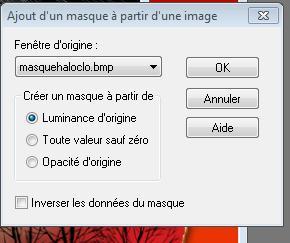
-Activate Flood Fill Tool and fill the selection with the gradient 4. Layers- New Mask layer from Image and select Mask "masquehaloclo"
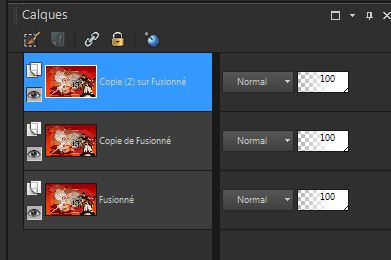
Layers- Merge- Merge Group 5. Effects- Edge Effects- Enhance More-Repeat 1x 6. Selections- Deselect All 7. Open the tube "plateforme" /Edit/ Copy-Edit - Paste as new layer on your working image and move 8. Open the tube « fleurcalice » /Edit/ Copy-Edit - Paste as new layer on your working image and move 9. Layers- Merge- Merge Down 10. Open the tube « missilly-man-jan2010 »/ Image Resize to 80% /Edit/ Copy-Edit - Paste as new layer on your working image and move 11. Open the tube « claudiaviza-mujer1973 »/ Image Resize to 65%/Image Mirror /Edit/ Copy-Edit - Paste as new layer on your working image and move 13. Layers- Merge- Merge Visible 14. Layers- Duplicate and repeat 1x
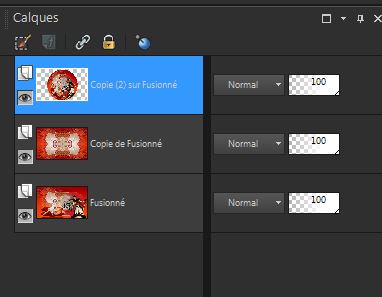
Activate the top of the layer palette 15. Effects- Geometric Effects - Circle / transparent 16. In the Layer Palette-activate the Layer underneath Effects- Plugins - Simple /Top left mirror 17. Activate the top of the layer palette Effects- Plugins - FM Tile tools - blend emboss using the default settings You should have this result as shown in the print screen below
18. Layers- New Raster Layer Layers- Arrange- Move Down 19. Selections- Select All 20. Open the tube '' billes ''Edit/Copy- Edit Paste into selection 21. Selections- Select All 22. Open the tube « buste « Edit/ Copy-Edit - Paste as new layer on your working image and move /Image Resize to 80% resize all layers not checked 23. Layers- Duplicate and move 24. Open the tube « kikirou1648 »/ Image Resize to 55%- Edit/ Copy-Edit - Paste as new layer on your working image and move 25. With your lasso tool / select parts of the tube you are interested in this creation / paste them to come on 2 parts 26. Open your Pen Tool and draw a line (continue the string to connect the two parts of the tube )Set the foregroundcolor to color: #362a19> with these settings
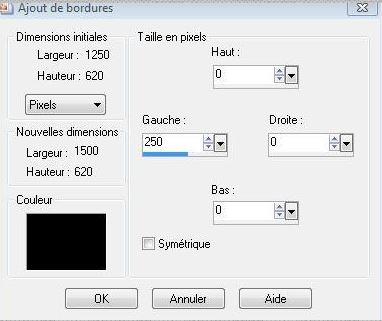
27. Image - Add borders-Symmetric checked: 10 pixels black 28. Promote Background Layer 29. Image - Add borders-Asymmetric 250 pixels left-color black
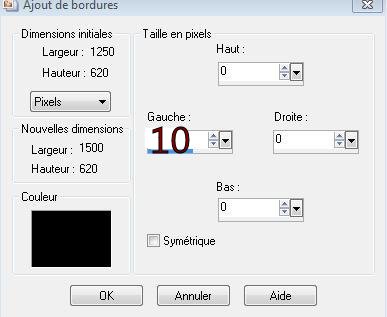
30. Layers- New Raster Layer 31. Selections –load/save selection –load selection from disc and choose: '' @renee-automne2'' 32. Open the Image « fond soir d'automne « / Edit/Copy- Edit Paste into selection 33. Selections- Deselect All 34. Image - Add borders-Asymmetric 10 pixels left-color black 35. Open the tube « mujer1973 » Image Resize to 60% -Edit/ Copy-Edit - Paste as new layer on your working image and move to the left 36. Layers-Duplicate -move slightly to the top left (see finished image) In the Layer- Palette- Double click on this layer and set the Blend Mode to "Hard Light " Set the layer opacity of this layer to 65% Save as JPEG
I am part of the Tutorial Writers Inc. My tutorials are registered regularly ReneeGraphisme_All rights reserved
*
|

 Translations


2011