|
New
Translations here
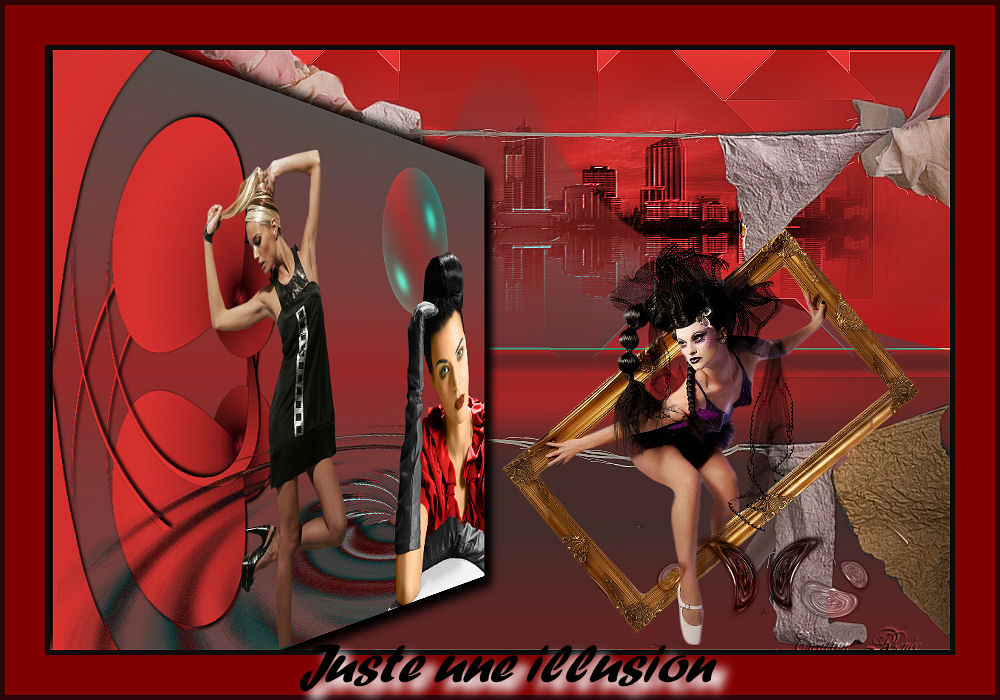
Juste une illusion
Let's start the lesson. 1.
Properties foreground:-Set your foreground color to: #2e0407 2. Open the background image ''fond2'' Window - Duplicate (or shift+D) - Close the original and proceed on the copy -Promote Background Layer =Raster 1 3.Layers- Duplicate - ------------------------------------------------------------------------------------------
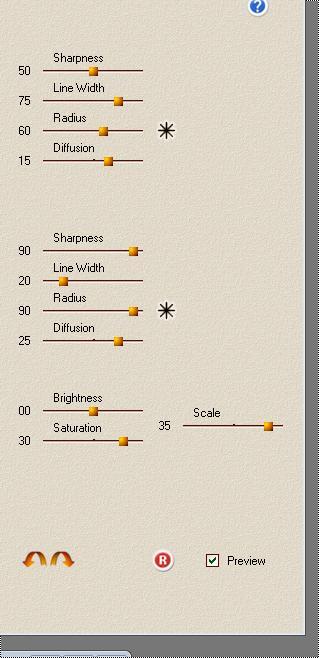
We will create a tube and save it in png if you want to keep it 1.Open the background image ''fond 1'' of 550 x 450 pixels /Window - Duplicate (or shift+D) - Close the original and proceed on the copy -Promote Background Layer =Raster 1 2. Effects- Plugins -Photoshopfun II /Kylie with these settings 243 /0 3. Effects- Plugins- FMTile tools /blend emboss use settings below
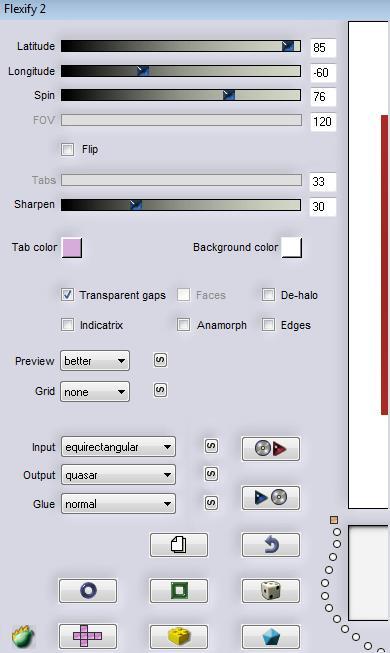
4. Effects- Plugins -Flaming pear /Flexify 2 **attention -flip not checked !!!!We need a transparent background !!! **
5. Effects- 3 D Effects- Drop Shadow with these settings 3/3/100/5 black 6. Edit-Copy !!
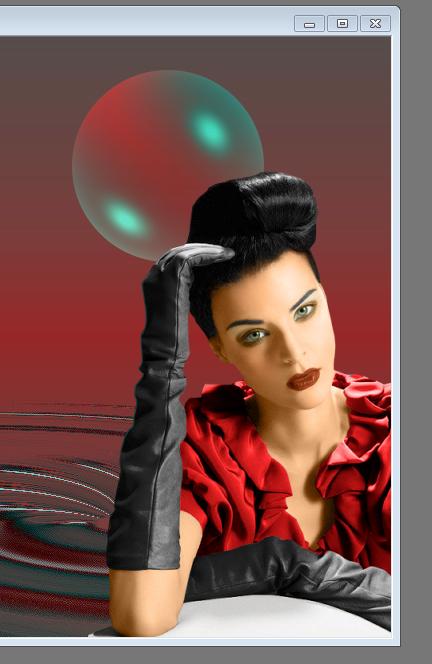
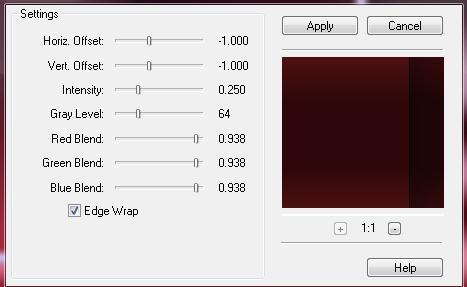
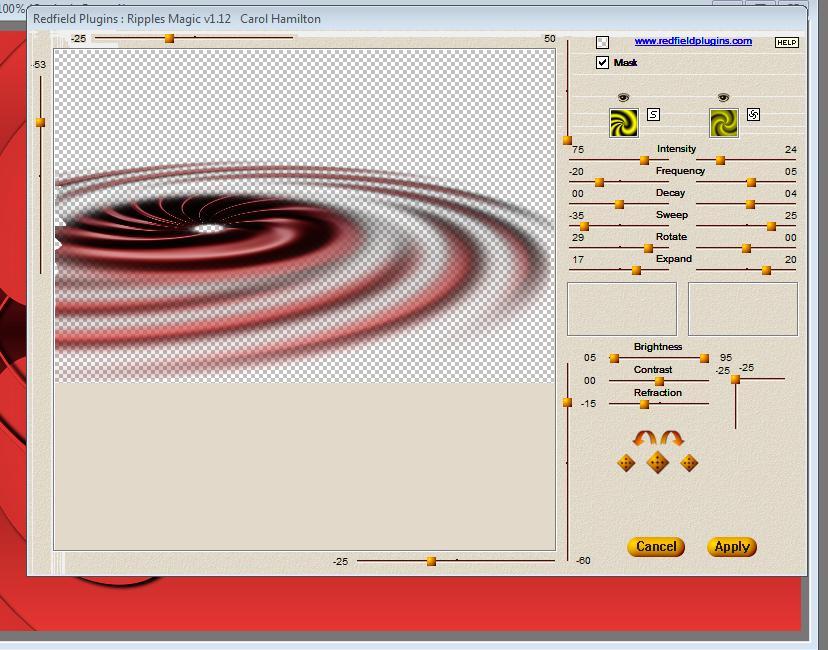
Tube is finished save as PNG ---------------------------------------------------------------------------------------------------------------------------------------------------------------------------------- 5. Open your image you created earlier on in the lesson 6. Edit-Paste as a new Layer (Image is still in your PSP memory) Place the tube on the bottom left 7. Layers- Duplicate-Image Flip ********************************************************************************* FOR THOSE WHO WANT CREATE -EFFECT REDFIELD OTHERWISE SKIP THIS STEP>>>(Do you have problems with this- " image effect Redfield "" is into the zipfile and paste as a new layer on your working area and move) Layers- New Raster Layer /Set your foreground to gradient 'Foreground-background' - Linear - Angle 0 - Repeats 0- Invert not checked-Activate Flood Fill Tool and fill the layer with the gradient -Effects- Plugins-Redfield /Ripples magic attention-flip not checked look at the settings please Mask- not checked -we need a transparent background
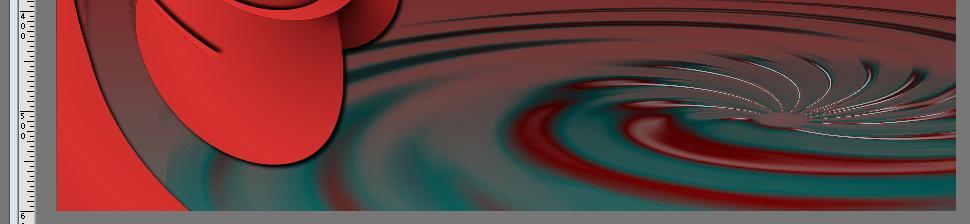
- Image Mirror - Opacity of this layer a little down and put it in the bottom right corner - Effects-Edge Effects- Enhance -Double click on this Layer and set the Blend Mode to "Difference" 8. For users of the filter- Continue with step 11 9. In the Layer Palette -Make Copy of Raster 1 active and paste "tube redfield" as a new layer on your working image and move to the bottom right side -Double click on this layer and set the Blend Mode to "Difference"
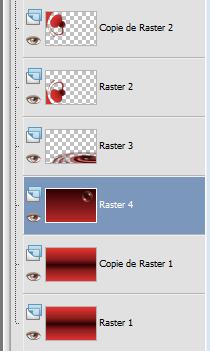
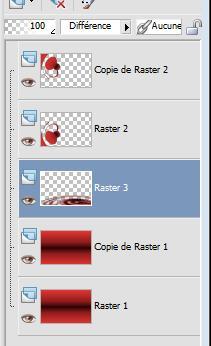
10. Layer Palette look like this now 11. In the Layer Palette-Activate the Copy Layer of Raster 1 12. Layers- New Raster Layer 13. Set your foreground to gradient 'Foreground-background' - Linear - Angle 0 - Repeats 0- Invert checked-Activate Flood Fill Tool and fill the layer with the gradient 14. Layer Palette - Double click on this Layer and set the Blend Mode to "Exclusion" Attention for this filter 15. Effects- Plugins -Ulead effect / Particle effect - Bubble 1. 2. 3. **With the mouse you cant move the balls
- Layer Palette look like this now
16. In the Layer Palette activate Raster 3 /Layers- Arrange- Bring to Top 17. Keep top layer active 18. Open the tube «anita design 06-12-2011 »/Image Resize to 80 % Edit/ Copy-Edit - Paste as new layer on your working image - **Activate Pick Tool (K) and place order to obtain this effect as shown in the example below**
20. Open the tube « yvonne tube «Edit/ Copy-Edit - Paste as new layer on your working image - Activate Pick Tool (K) and place as shown
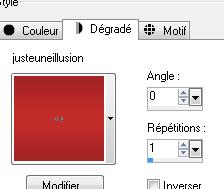
21. Activate the bottom of the layer palette =Raster 1 /and - On this Merged Layer 22. Effects- Plugins - Andromeda perspective /side walls /Preset It open close - Repeat -Andromeda perspective with the same settingsand it will be 450 pixels from the edge ok * Move slightly to the left against the edge 23. Effects- 3 D Effects- Drop Shadow with these settings: 9/10/100/15 black Repeat- Effects 3 D Effects Drop Shadow but negative -9 and -10 /100 /15 black 24. Activate the bottom of the layer palette =Raster 1 /Open the top layer - Stay on this layer 25.Properties foreground: Change foreground material into gradient and select : ''juste une illusion'' -Put your foreground on the linear gradient with settings below - invert not checked
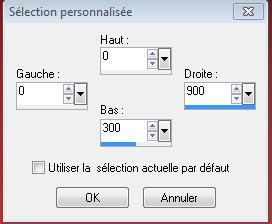
26. Selection Tool ( S ) Custom selection -Rectangle use settings below
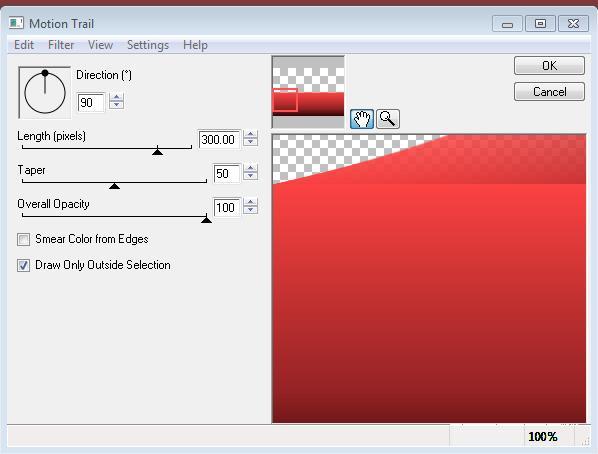
27. Layers- New Raster Layer 28. Activate Flood Fill Tool and fill the selection with the foreground gradient 29. Selections- Deselect All/ Layer Palette - Double click on this Layer and set the Blend Mode to "Exclusion" 30. Image Flip 31.Selections All- Selections Float -Selections – Defloat. 32. Effects- Plugins - EyeCandy 4000 /Motion Trail use settings below
33. Selections- Deselect All 34. Effects- 3 D Effects- Drop Shadow with these settings: 9/10/100/15 black 35. Activate the bottom of the layer palette =Raster 1 36. Layers- New Raster Layer 37. Selections –load/save selection –load selection from disc and choose my selection: '@renee-danse1 ''/Activate Flood Fill Tool and fill the selection with the foreground gradient 38. Selections- Deselect All 39. Effects- Plugins - Muras meister /copies use settings below
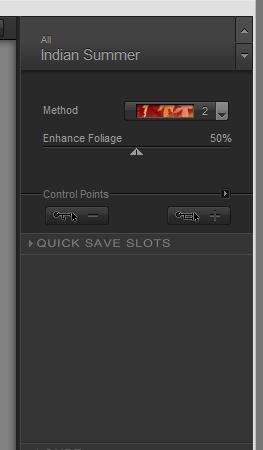
40. Effects- Edge Effects- Enhance 41. Effects- Plugins -Nick Color EffexPro.3/Indian Summer
42. Layer Palette - Double click on this Layer and set the Blend Mode to "Luminance" 43. In the Layer Palette- Make raster 3 active 44. Layers- New Raster Layer 45. Selection Tool ( S ) Custom selection -Rectangle use settings below
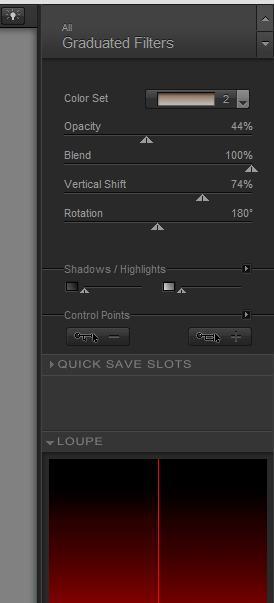
46. Open the tube « cytiscape « Edit- Copy- Edit Paste into selection 47. Selections- Deselect All 48. Effects- Plugins - Eyecandy 5 Impact /perpsective shadow/ Preset - reflect in front 49. To replace the top of the layers palette 50. Layers- New Raster Layer 51. Selections –load/save selection –load selection from disc and choose my selection: ''renee juste une illusion 5'' / -Activate Flood Fill Tool and fill the selection with the foreground gradient 52. Effects- Plugins - Nick Color Effex Pro.3/ Graduated Filters/ Color set 2
53. Effects- Plugins -Redfield/Fractalius with these settings
54. Open the tube'' barre illusion '' Edit/ Copy-Edit - Paste as new layer on your working image and do not move 55. Layers- Merge- Merge Layers Down 56. Effects-Plugins- FM tile tools - Blend using the default settings 57. Double click on this Layer and set the Blend Mode to "Hard Light " 58 . Layer arranged under raster 4/( paysage) 59. Open the tube '' linge'' Edit/ Copy-Edit - Paste as new layer on your working image and move to the top right corner (Look at the completed picture) 60. Open the tube « woman 388 by Hebe « Image Resize to 65% / Edit/ Copy-Edit - Paste as new layer on your working image and move to the bottom right side 61. Open the tube "débris de verre"" Edit/opy-Edit -Past as a new Layer and move on the bottom right side -Open the broken glass tube and place to the missing part of leg and slightly erase- Look at the completed picture 62 .Is all in place??? 63. Layers- Merge - Merge Visible 64. Image - Add borders-Symmetric checked: 5 pixels black 65. Adjust- Sharpness- Sharpen 66. Image - Add borders-Symmetric checked: 40 pixels #800000 67. Image - Add borders-Symmetric checked: 3 pixels black 68. Click on your Text Tool/font « juliet « (Included into the zipfile) and write your text. Or take my text. 69. Effects- 3 D Effects- Drop Shadow with these settings 0/0/0/85/25 with this color #d5312e Save as JPEG
I am part of the Tutorial Writers Inc. My tutorials are registered regularly ReneeGraphisme_All rights reserved
*
|
 Translations


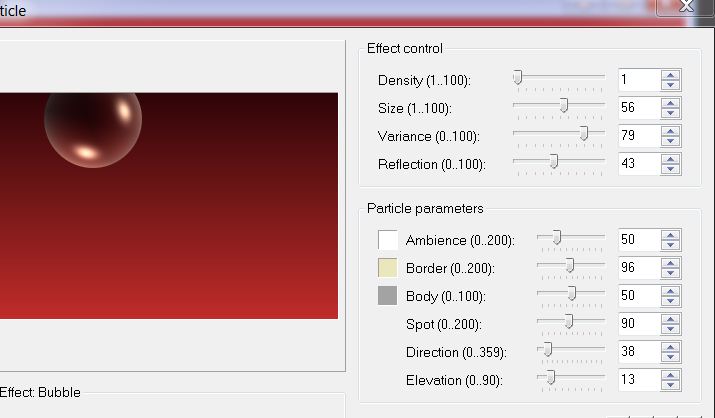 Click Density 1
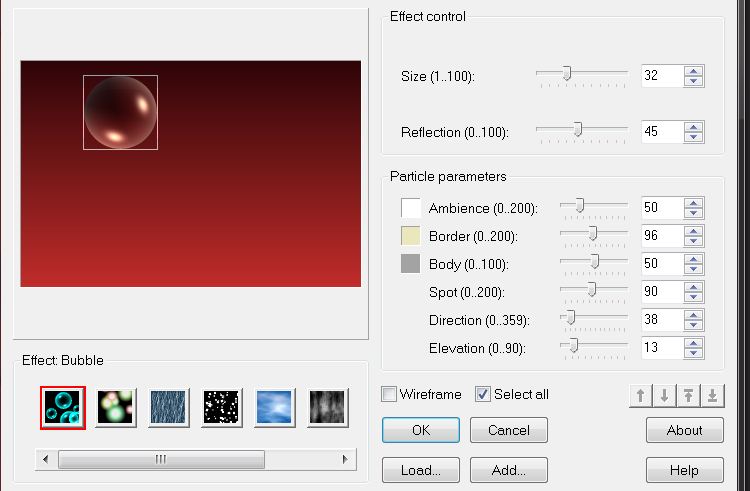 click sur select all
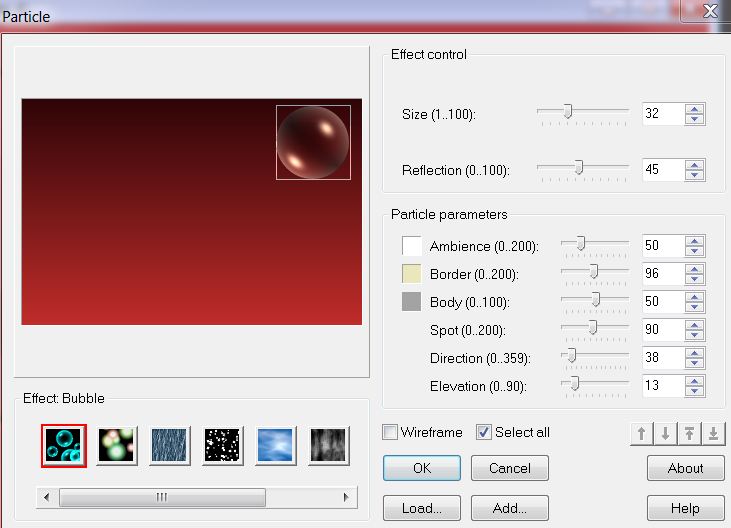 Move it to the right - As shown in the example and OK