|
Let's begin
1. Open the tube "fond_la_colline_bleue" - Window -
duplicate. Close the original. We will work on the copy
2. Color palette - foreground color to #5b6f87 and
background black
3. Create a sunburst gradient
4. Layers - new layer - fill this layer with the
gradient
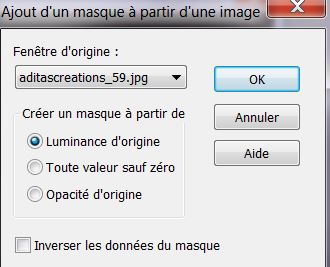
5. Layers - New mask layer from image
"aditascreation_59.jpg"
6. Layers - merge group
7. Open the tube "AABibichescenery390" and paste as new
layer
8. Image - Mirror
9. With select tool (K) pull out like this to 720 pixels
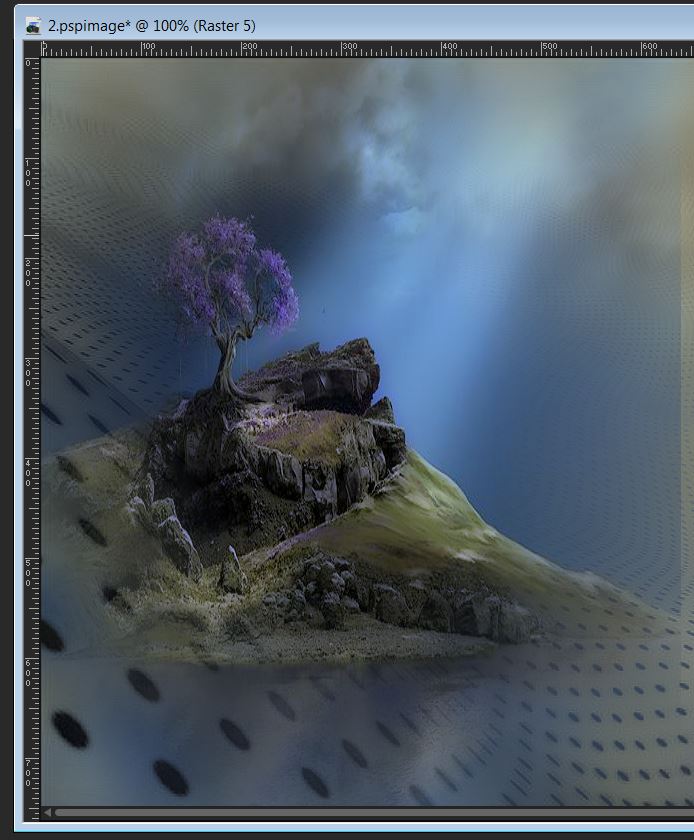
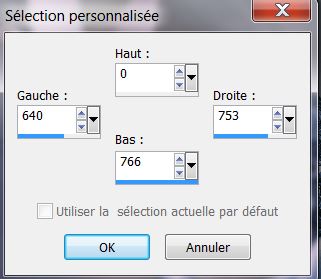
10. Selection tool - custom selection
11. Adjust - blur - gaussian blur @ 22
12. Selections - deselect
13. Open the tube "image_paysage_100" Paste as new layer
/ move to the right as shown
14. Layers - Arrange - move down and change the blend
mode to Luminance Legacy
15. Activate Raster 1 / Layers - add a new layer
16. Selections - load selection from disk
"colline_bleue_1"
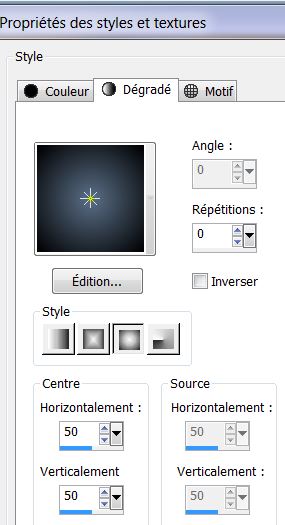
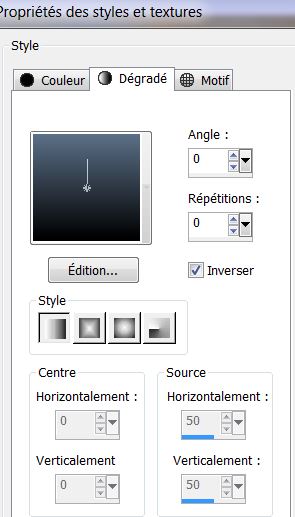
17. Prepare a linear gradient with foreground color
#5b6f87 and black background (like this)
18. Fill the selection with the gradient - Effects - 3D
effects - drop shadow 10/10/50/5 black
19. Selections - select none
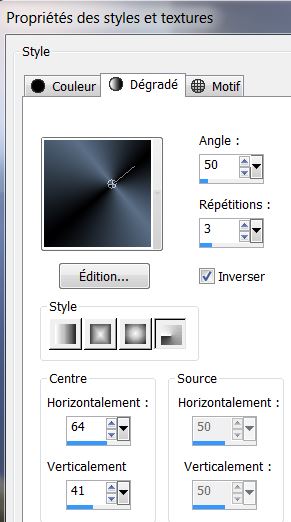
20. Activate the top layer
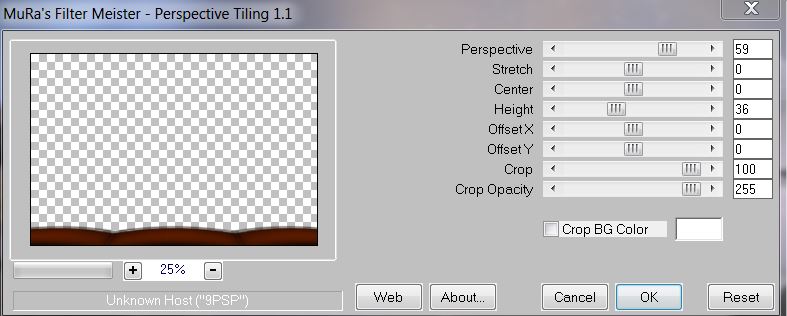
21. Open the tube "image_cercles" Paste as a new layer
22. Effects - mura's meister - perspective tiling
23. Layers - Arrange - move down 3 times - Change the
opacity of the layer to 69
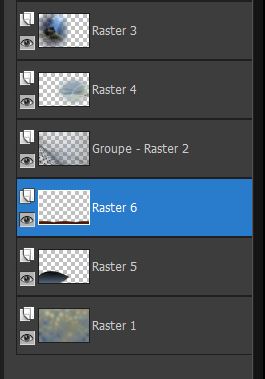
Your palette should look like this:
24. Activate the top layer
of the layers palette
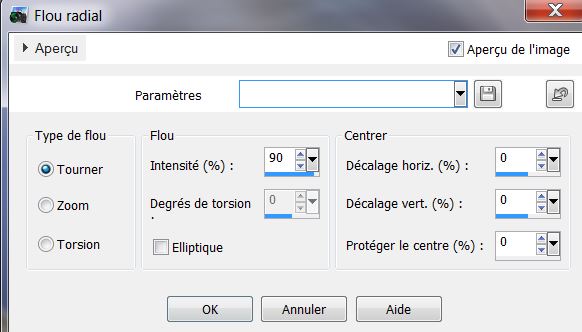
25. Layers - add a new raster layer / fill with the
color black
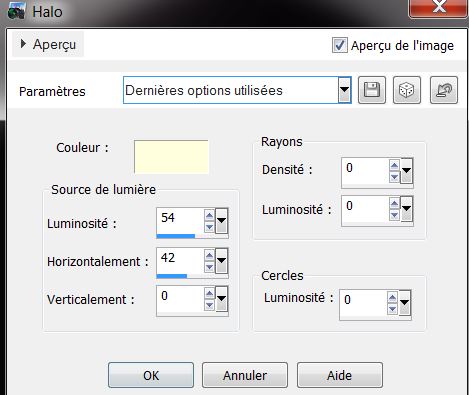
26. Effects - Illumination effect - Sunburst with this
color #fefedc
27. Effects - Ulead effect - particle
Click on picture Cloud / set parameters (as shown on the
left)
/ Click on LOAD
and get clouds3 ok and ok (see image on the right)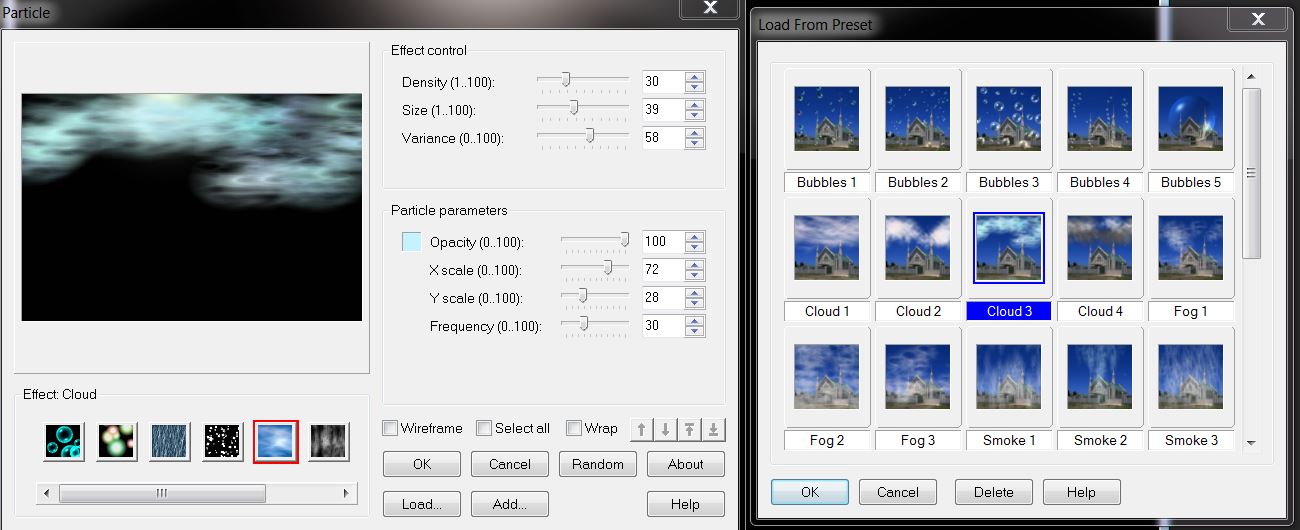
28. Effects - Transparency - Eliminate Black (attention
this filter does not work well for psp14 and PSP 15 if
used in Filters Unlimited - check effect obtained)
29. Set layer opacity to 69 and mode to hard light
30. Repeat the sunburst effect / with this color #fefedc
31. Start with your colors (foreground #5b6f87 and
background black)/ prepare a Radial Gradient configured
like this
32. Layers - add a new layer and load the selection
"colline_bleue_2" / fill with the gradient paint tool
set like this! - Opacity 78

33. Selections - Deselect
34. Adjust blur - gaussian blur at 25
35. Set the layer opacity to 73
36. Layers - add a new raster layer / color palette -
Change the foreground color to #ffffff
37. Selections - load selection ''colline_bleue_3" and
fill the selection with white
38. Selections - Deselect
39. Adjust blur - radial blur
40. Effects - Edge effect - Enhance More
41. Change then the layer blend mode to Overlay
42. Effects - EyeCandy 5 Impact - perspective shadow /
Preset "colline_bleue_persp"
43. Open the tube "masque01_bea2013" - Activate raster 1
44. Mirror image / Edit copy/ edit paste as new layer
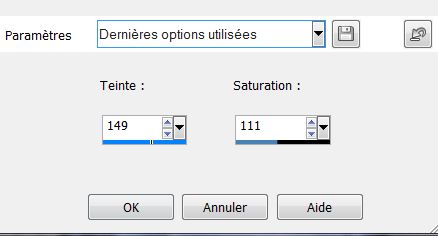
45. Adjust hue and saturation - colorize
46. Place like this and put it into Overlay Mode
47. Open the tube "0904bea_2013" Click on calque02 /
mirror image / edit copy / edit paste as new layer
48. Adjust - hue and saturation / same parameters as
above
Place as shown in the final result
49. Open the tube "yoka_bloemen_bleue2007" click on
raster 2/ copy and paste as a new layer
50. Place bottom right / Layers - Arrange - move down (under
the previous tube) - Return to the top of the Layers
palette
51. Open the tube "Yoka-DUI080213" and paste as a new
layer in place
52. Open the tube "lune'' and paste it in place
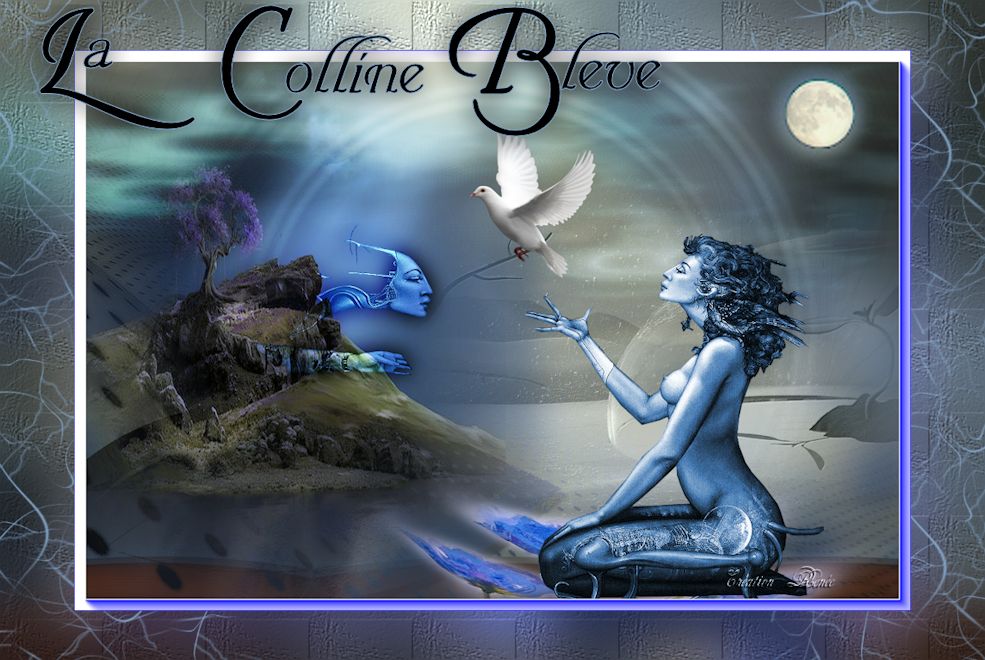
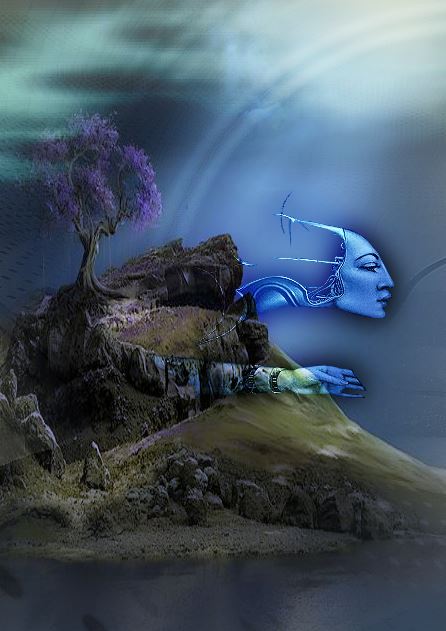
53. Check everything is in place - Layers - Merge
Visible
54. Edit copy
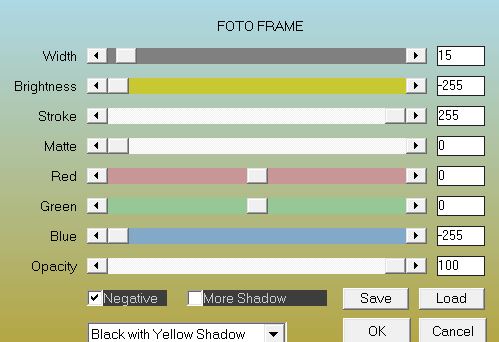
55. Effects - AAA Frame - Foto frame (negative attention
is checked)
56. Image Resize to 85% all layers unchecked
57. Select the transparent border with your magic wand
58. Edit and paste in to the selection your previously
copied image
59. Adjust blur / gaussian blur @ 32
60. Effects - texture effect / Load the
texture"008_glass" from your materials file/ textures
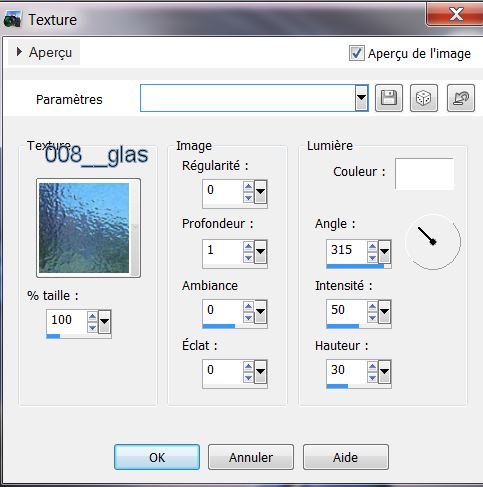
61. DO NOT DESELECT
62. Colors Palette - change foreground to #99b8d6
63. Open brush tool / take "tpdust" size 500 - normal
mode and apply like this:
64. Apply down on
the left - and to your taste on the other side / view
complete (it will apply only in the selection - see
finished part)
65. Selections - deselect
66. Paste the "titre" tube in place as shown
67. Layers - Merge all and resize to 985 pixels wide
*
All finished
Thanks

|