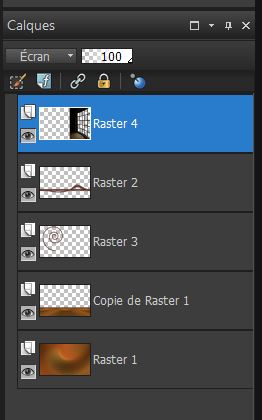
|
New
Translations here
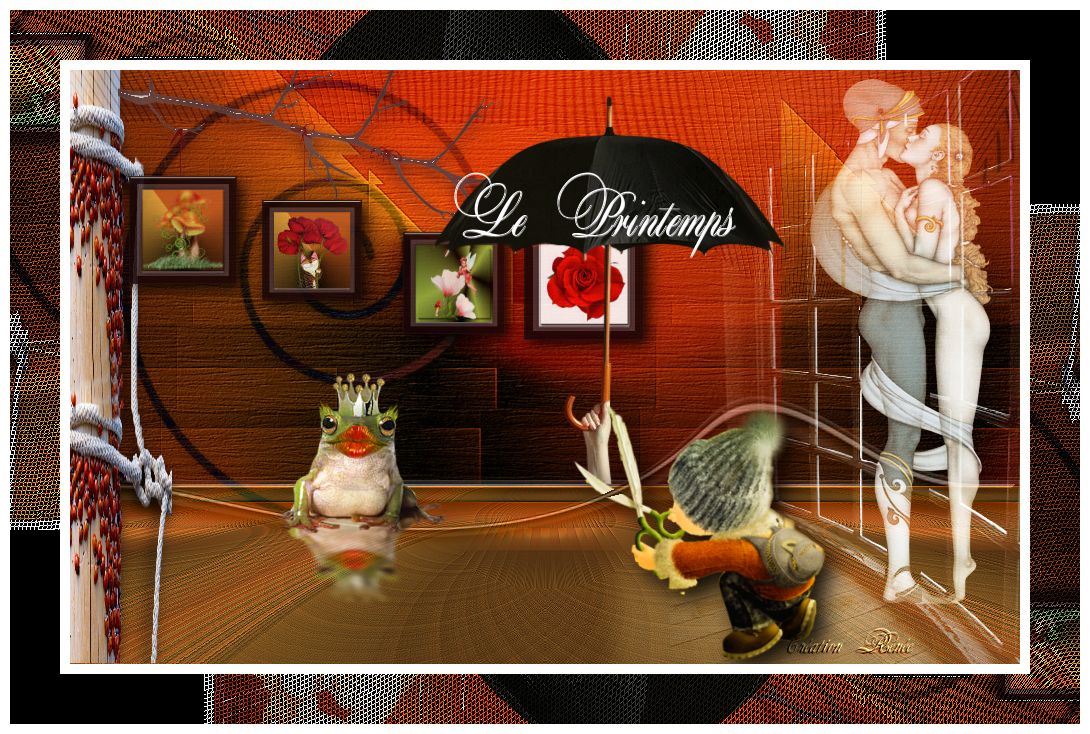
Le Printemps
Let's start the lesson.
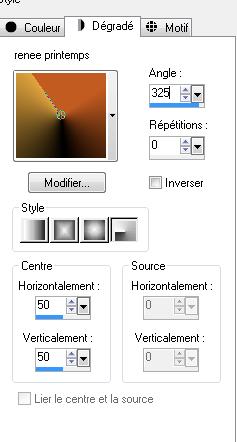
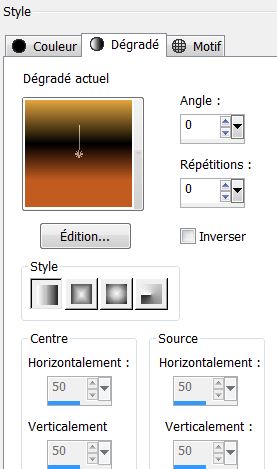
1. File - New - Transparent - New Image 950 x 594 pixels 2. Preparation: Material of the foreground - select my file : ''renee printemps'' Put your foreground on the radial gradient with settings below
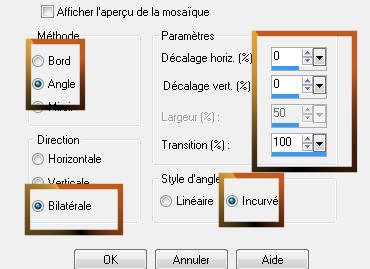
3. Effects- Image Effects- Seamless Tiling with settings below
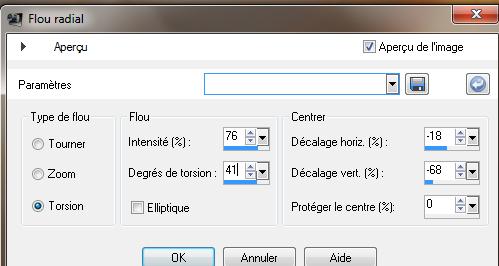
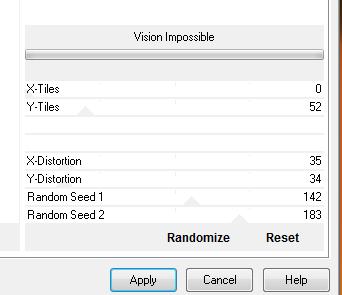
4. Adjust-Blur-Radial Blur with these settings 5. Layers-Duplicate 6. Effects-Plugins - VM Distorsion /Vision impossible
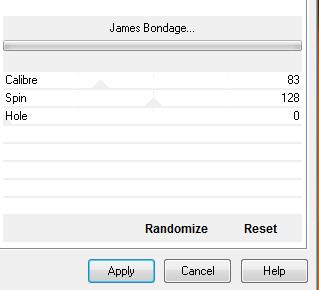
7. Effects-Plugins - VM Extravanga/ James Bondage
8. Layers-Duplicate /Image Mirror Set the layer opacity of this layer to 42 % 9. Layers-Merge Merge Down 10. Effects - Edge Effects - Enhance and Repeat 1x
This lesson was made in version X2 , but can easily be made in previous version.With PSP 14/15/16/17 merging down layers with different blend mode and/or opacity, can result in a slightly different
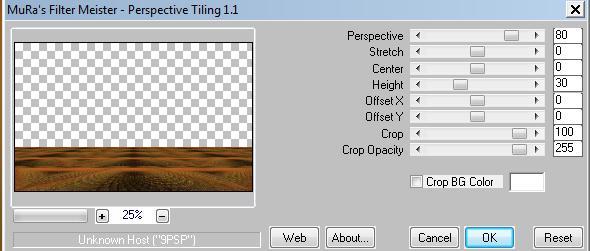
11. Effects-Plugins - Mura's Meister /Perspective tiling
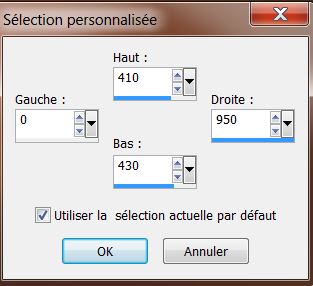
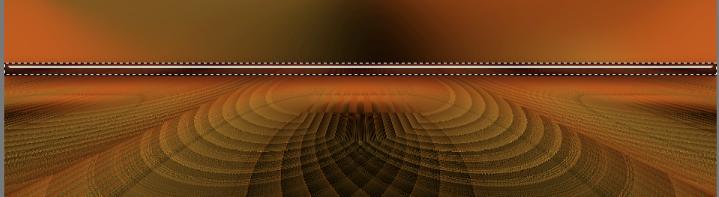
12. Selection Tool(S)-Custom Selections with these settings
13. Layers- New raster layer /Properties foreground- Change your radial gradient into a lineair with settings below:
Activate Flood Fill Tool and fill the selection with the linear gradient
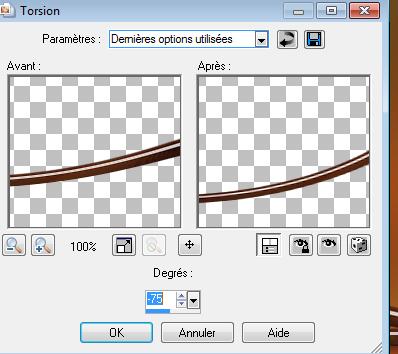
15. Selections-Deselect All Layers-Duplicate 16. Effects-Distortion Effects-Twirl-Degrees -75
- Repeat: Effects-Distortion Effects-Twirl with the same setting - Layers- Merge- Merge Down Double click on this layer and set the Blendmode to Luminance Legacy and set the layer opacity of this layer to 51 17. Open the tube ''renee-printemps '' Edit - Copy -Edit - Paste as new layer on your working image and move as shown in the example below Double click on this layer and set the Blendmode to Difference and set the layer opacity of this layer to 42%
- Layers-Arrange-Move Down 18. Activate the top of the layer-Palette 19. Open the tube ''senga window '' Edit - Copy -Edit - Paste as new layer on your working image and move - Double click on this layer and set the Blendmode to Screen /Effects-Edge Effects-Enhance
- Layer Palette look like this now-You should have this result
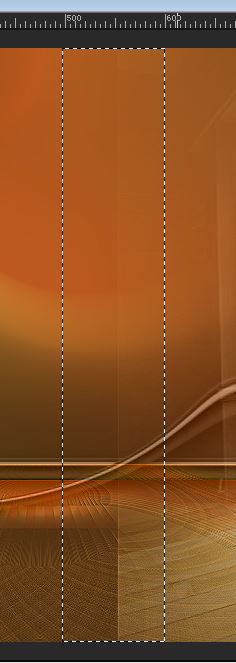
- Selection Tool -(S) Rectangle – Draw a selection as shown below -Adjust-Blur-Gaussian Blur : Radius 15 Selection-Deselect All
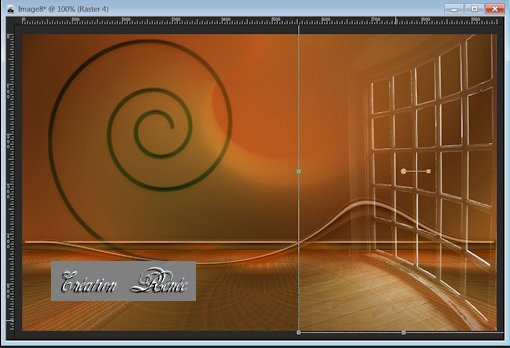
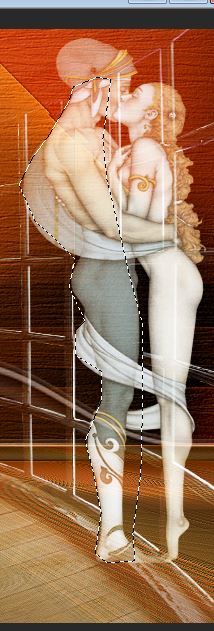
20. In the layer palette: make '' copy of raster 1 ''active 21. Selections - load/save selection - load selection from disk and select my file: ''renee -printemps'' 22. Layers- New raster layer -Open the ''renee-image-fond-printemps ''' Edit/Copy- Edit paste into selection - Double click on this layer and set the Blendmode to Overlay - Selections-Deselect All - Activate the top of the layer-Palette 23. Open the tube ''Mtm_Ma-P63-secret '' Image Resize 60% -Edit - Copy -Edit - Paste as new layer on your working image and move In the layer palette: make raster 4 active (la grille)-Freehand Selection Tool-Lasso-Draw a selection as shown below and Delete
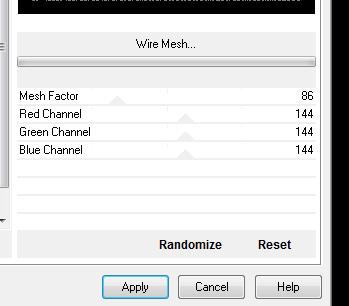
24. Open the tube '' senga -bois modifié '' -Edit - Copy -Edit - Paste as new layer on your working image and move 25. Open the tube ''renee-printemps-image2'' -Edit - Copy -Edit - Paste as new layer on your working image and move Effects-Edge Effects-Enhance 26. Layers-Arrange-Move Down Activate the top of the layer-Palette 27. Open the tube ''senga-frog'' -Edit - Copy -Edit - Paste as new layer on your working image and move -------------------------------------------------------------------------------------------------------------------------------------------------------------------- Information for "branch" tube To construct the tree branch and take the tube' arbre guismo modifie'' -Open your tube ''renee cadre -printemps '' /select inside and paste images to your taste/Image Resize 30% and place them under the branch 'calguimodecore'' -Or take the tube from me '' arbre guismo modifie"and then do as follows --------------------------------------------------------------------------------------------------------------------------------------------------------------------- 28. Open the tube '' arbre guismo modifie'' -Layers Merge-Merge Visible-Edit-Copy-Edit- Paste as new layer and move to the left upper corner (see finished image ) - Set the layer opacity of this layer to 93% 29. Open the tube ''alies parapluie '' Edit-Copy-Edit- Paste as new layer and move 30. Open the tube ''gamin espiegle'' Edit-Copy-Edit- Paste as new layer ( place so that it looks like he cuts the rope) 31. Layers Merge-Merge Visible 32. Image - Add borders-Symmetric checked:10 pixels #ffffff 33. Image - Add borders-Symmetric checked:50 pixels #000000 34. Activate Magic Wand and click in the black border of 50 pixels 35. Effects-Plugins -Tramage /Wire Mesh
36. Selections-Promote selection to layer - Selections-Deselect All 37. Layers-Duplicate-Image Mirror-Image Flip -Set the opacity of this layer to 49% 38. Layers-Merge-Merge-Down 39. Effects-Edge Effects-Enhance 40. Image - Add borders-Symmetric checked:10 pixels #ffffff Open the tube text- Edit/copy- Edit/ paste as new layer on your working image and move. Ore write your own text.
Save as JPG
I am part of Tutorial Writers Inc. My tutorials are regularly recordedt ReneeGraphisme_All rights reserved
*
|
 Translations