|
Translations here
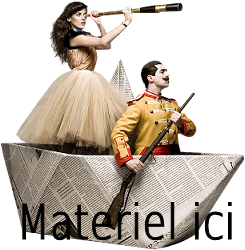
Les Ombres
New
Let's start the lesson. 1. Open the image "fond" Window - Duplicate (or shift+D) - Close the original and proceed on the copy -Promote Background Layer =Raster 1 2. Layers-New raster layer -Flood Fill Tool: fill the layer with color #bdca3b 3. Layers- New Mask layer from Image and select Mask ''m25 '' Source Luminance - Layers-Merge-Merge-group 4. Effects-User Defined Filter- Emboss3 using the default setting - Layers-Arrange-Move Down 5. Effects-Plugins - Simple / pizza slice mirror - Activate the top of the layer palette 6. Effects-Plugins - Simple /Pizza slice mirror - Stay on this layer 7. Selections –load/save selection –load selection from disc and choose: ''renee -jeux ombres''/ Hit the Delete Key of your Keyboard 8. Selections-Deselect All 9. Effects-Geometric Effects-perspective horizontal with these settings
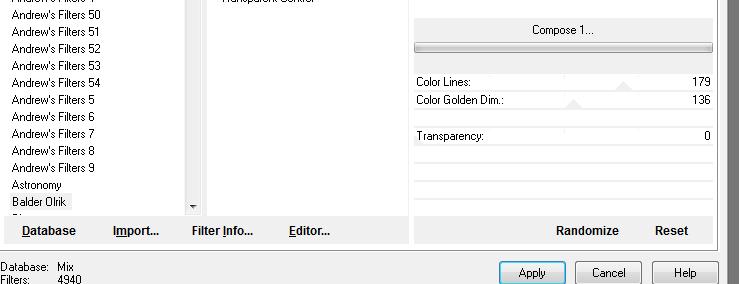
- Double click on this layer and set the Blendmode to Hard Light 10. Effects-Plugins - Andromeda perspective /side walls / Preste - it open 11. Open the tube ''1231-road-misted4'' Edit/copy- Edit/ paste as new layer on your working image- Move Tool-move to the right Double click on this layer and set the Blendmode to Lighten 12. Layers-New raster layer 13. Effects-Plugins -Unlimited - Balder Olrik /Compose1
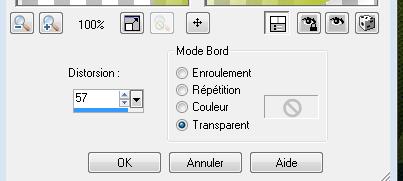
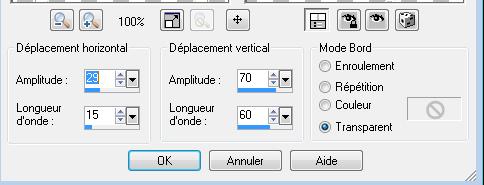
14. Effects-Geometric Effects -Circle transparent 15. Effects-Distortion Effects-Wave with these settings
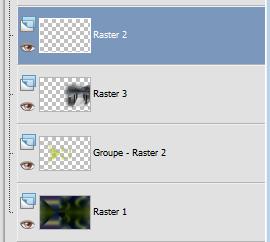
- Double click on this layer and set the Blendmode to Luminance - In the layer palette-Make raster 2 aktive
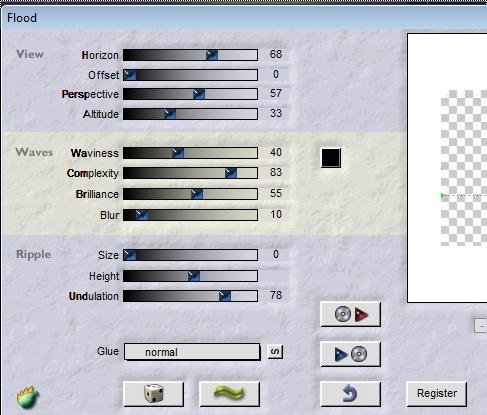
16. Effects-Plugins - Flaming pear /flood with these settings
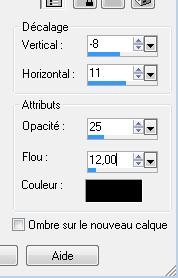
17. In the layer palette: Make '' groupe-raster 2 ''aktive -Effects-Plugins Flaming pear /flood with the same settings 18. Open the tube ''Joanie_couple_03_03_2012''/Image Resize with 65% -Edit/copy- Edit/ paste as new layer on your working image- 19. Effects-Plugins -Eyecandy5 perspective shadow/ Preset - reflect behind 20. Open the tube ''paquebot '' Image Resize with 50% resize all layers not checked 21. Open the tube ''fleur d'eau '' -Edit/copy- Edit/ paste as new layer on your working image/Double click on this layer and set the Blendmode to Hard Light 22. Open the ''ginatube femme -749'' Image Resize with 60% -Edit/copy- Edit/ paste as new layer on your working image 23. Effects-3D Effects-Drop Shadow with these settings:
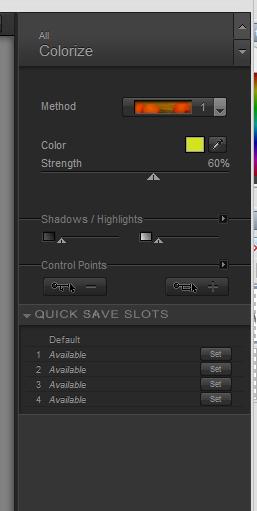
24. Effekte-Plugins - Nick Color effex Pro.3/Colorize-1 Method with these settings
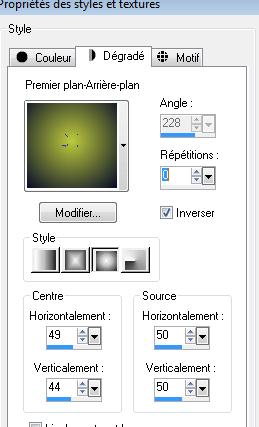
25. Open the ''bulles les ombres '' Edit/copy- Edit/ paste as new layer on your working image - Double click on this layer and set the Blendmode to Hard Light /Set the layer opacity of this layer to 77% 26. Layers-New raster layer Material Properties:Set your foreground color to: #030929-Set your background color to#bdca3b Set your foreground to gradient 'Foreground-background' -Nova with settings below /Flood Fill Tool: fill the layer with the gradient
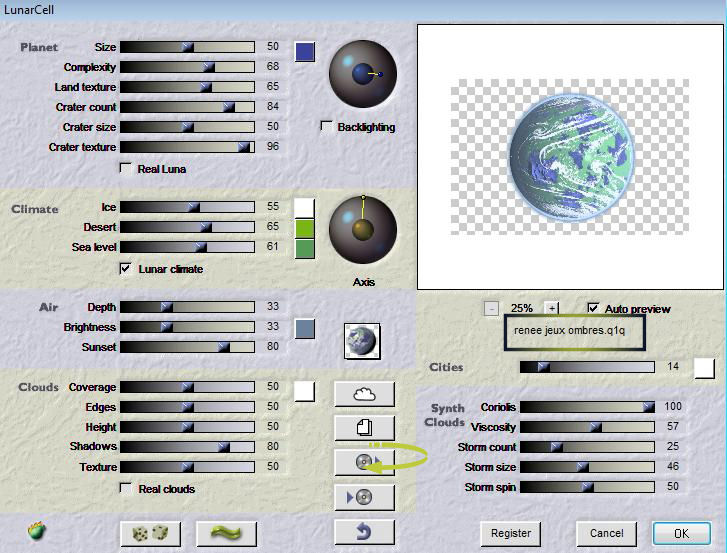
27. Effects-Plugins - Flaming pear/ lunarCell /look for your preset ''renee jeux ombre.q1q'' and OK
28. Layers-Resize with 25%/Double click on this layer and set the Blendmode to luminance Legacy 29. layers-Duplicate /Move Tool-move a little down- Set the opacity of this layer to 24% 30. Layers-Merge- Merge All 31. Layers-New raster layer 32. Activate the Brush Tool and choose the brush numéro 6'' with these settings
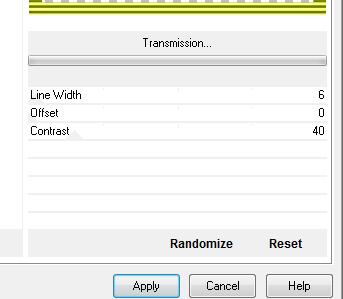
*Set the foreground color to #bdca3b -Stamp your brush 2x in the right place by using your foreground color 33. Set the layer opacity of this layer to 75% 34. Image - Add borders-Symmetric checked: 45 pixels #bdca3b 35. With the magic wand -select the border of 45 pixels 36.Selections-Promote selection to layer 37. Effects -Plugins- VM Extravanga/transmission
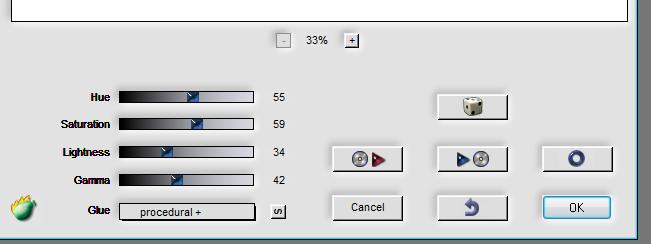
38. Effects-Plugins - Flaming pear / Kyoto with settings below
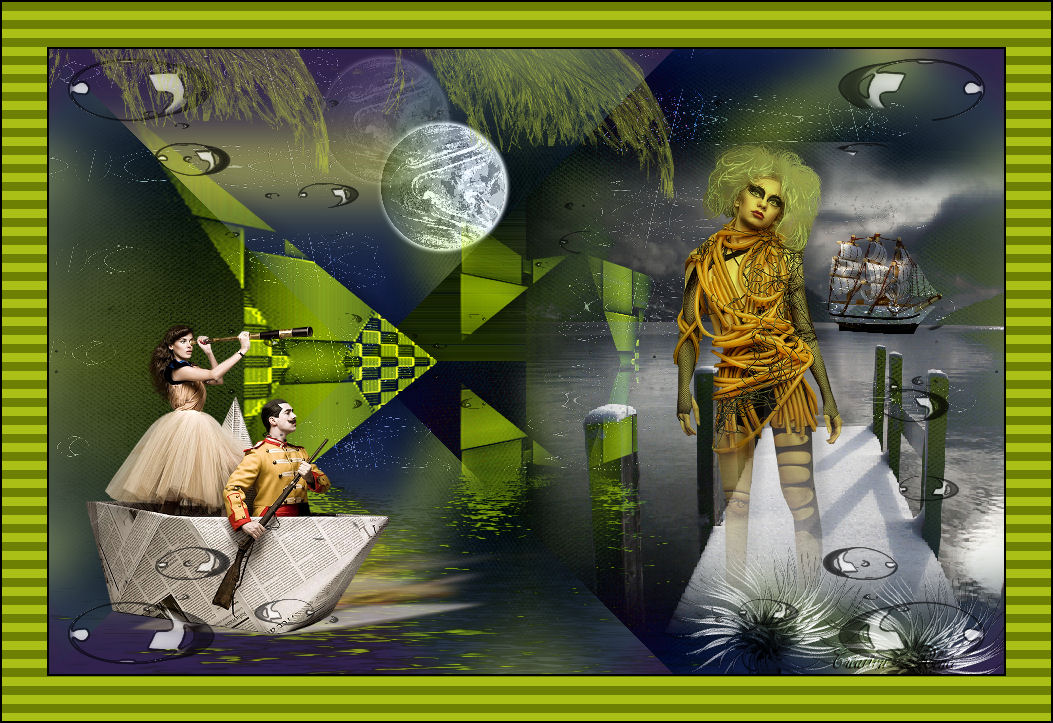
39. Image - Add borders-Symmetric checked: 2 pixels black Save as JPG
I hope you enjoyed this lesson Renée
edited and update april 2010 Any resemblance with an existing lesson is merely a coincidence * * Don't forget to thank the people who work for us and with us. I named the tubeurs - Testers and the translators. Thanks Renée
I am part of Tutorial Writers Inc. My tutorials are regularly recordedt ReneeGraphisme_All rights reserved
*
|
 Translations