|
New
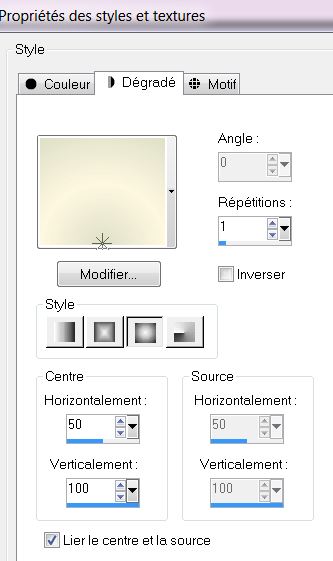
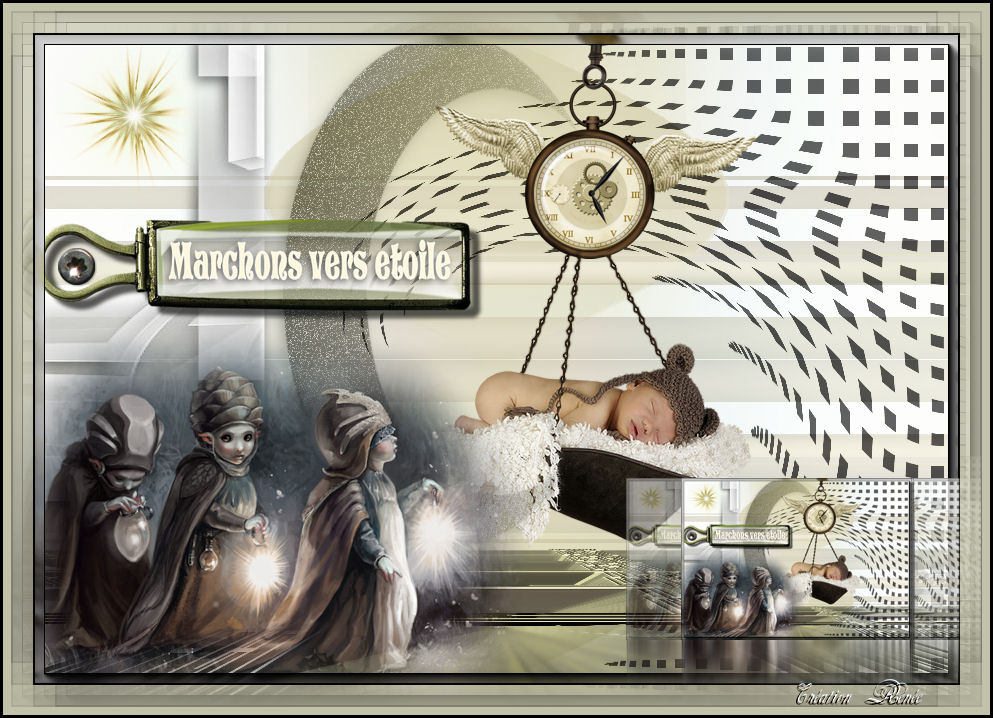
Translations here Deze pagina vertalen  Let's start the lesson. Follow the star . 1. Open a new transparent image of925 x 650 pixels 2. Material Properties: Foreground color to this color:#dee0c8 Background color to this color : #fef7e0 3. Put your foreground/background into a sunburst gradient as configured
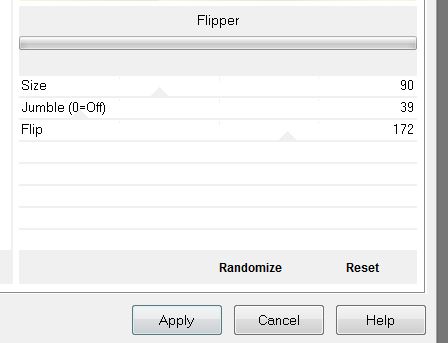
4. Activate Flood Fill Tool and fill the layer with the gradient 5. Effects- Plugins - VM Distorsion- Flipper
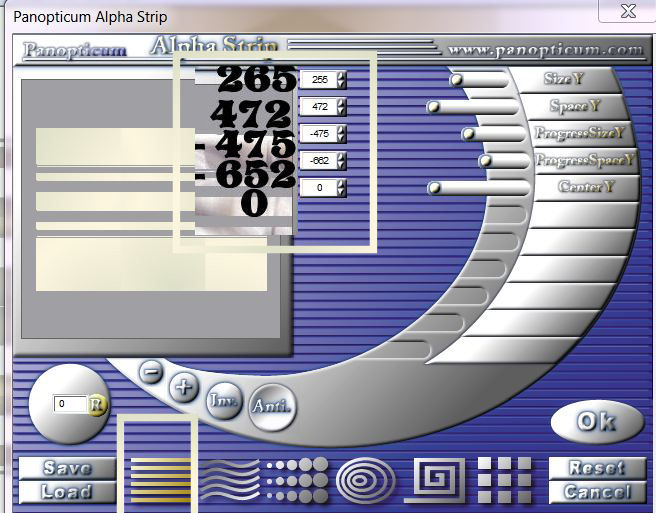
6. Layers- Duplicate 7. Effects- Plugins Panopticum -Alpha Strip use settings below
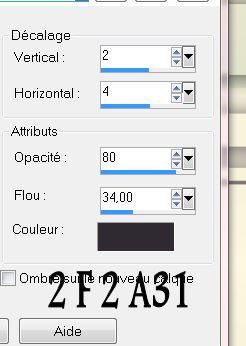
8. Effects - 3D Effects - Drop shadow with these settings:
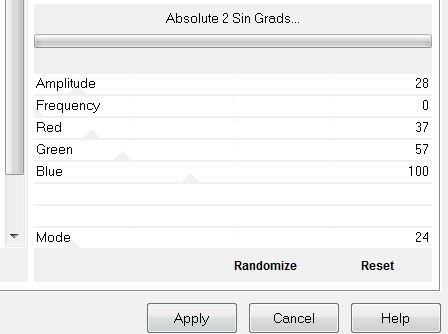
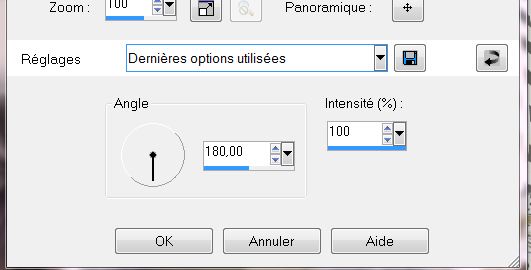
9. Effects- Plugins - Alf's Power Sines / Absolute 2 Sin Grads...
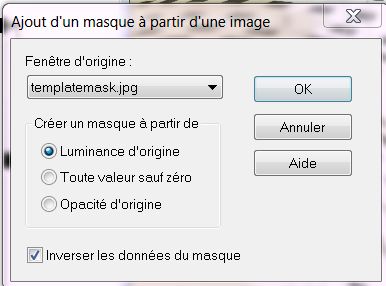
10. Effects- Plugins -Nick Color Effex - Pro3 / BI-ColorFilters/Color set Brown 1 11. Effects- Plugins - Simple / 4 way average 12. Open the tube ''image 1-damier ''Edit/Copy -Edit - Paste as new layer on your working area /Do not move ! 13. Effects- Plugins - Eye Candy Impact 5/perspective shadow -Tab -Settings -Preset -drop shadow blury 14. Layer Palette - Double click on this layer and set the Blendmode to "Hard Light " and set the layer opacity of this layer to 62% 15. Layers - New raster layer 16. Activate Flood Fill Tool and fill the layer with the foregroundcolor 17. Layers- New Mask layer from Image and choose Mask: ''Templatemask''
18. Layers- Merge-Merge Group 19. Effects - 3D Effects - Drop shadow with these settings: 5/4/80/12 color black 20. Layers- Duplicate-Layers-Merge-Merge Down 21. Effects- Plugins - Mura's Meister /Perspective tilling /Reset and OK
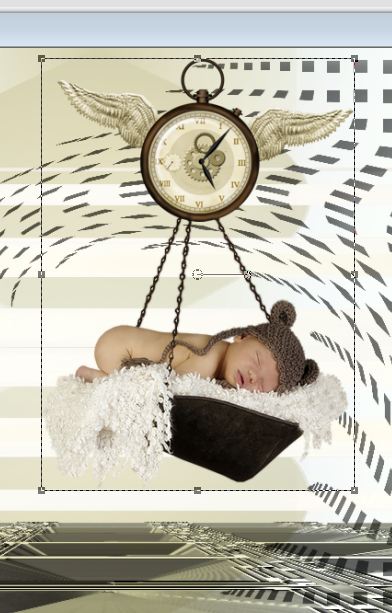
22. Activate Raster Deform Tool -Activate Raster Deform Tool: click on the-Preset ''renee_marchons vers etoile -deformation"and OK (Preset into the zip file) '' 23. Effects- Plugins Eye Candy5- Extrude Tab-Settings-User Settings and choose my preset'' @-renee -marchons vers la lumiere'' 24. Layer Palette - Double click on this layer and set the Blendmode to "Hard Light " 25. Open the tube ''Graces TLC_FeatherWeight ''- activate raster 1 of the tube (''modified'') / Edit/Copy -Edit - Paste as new layer on your working area - With your move tool:move to the Top like this
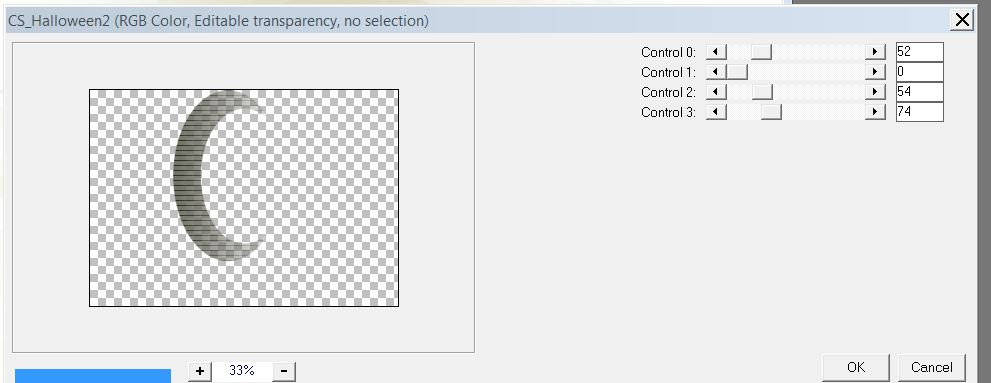
26. Open the tube ''attache marchons vers etoile '' Edit/copy-Edit paste as a new layer on your working area 27. With your Move Tool : move against the top edge 28. Layer-New Raster Layer 29. Selections - load/save selection - load selection from disk and choose my selection:''renee_marchons vers l'etoile'' 30. Activate Flood Fill Tool and fill the selection with the foregroundcolor 31. Selections- Deselect All 32. Effects- Plugins - Unlimited Ė Blur/ Dimensia / Cosmological Constant setting 6 33. Effects- Plugins - Carolaine et Sensibility/ CS_Halloween 2 use settings below
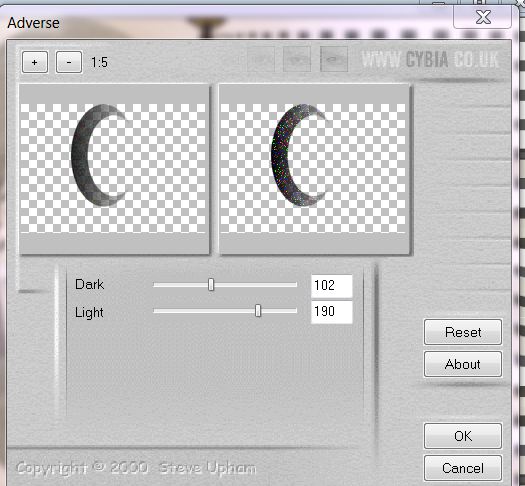
34. Effects- Plugins - Mezzy /Adverse with these settings
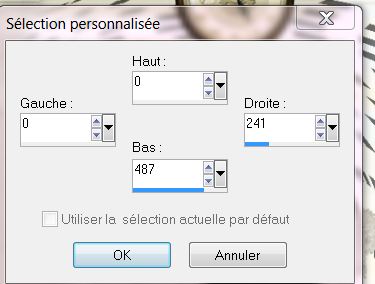
35. Layer Palette - Double click on this layer and set the Blendmode to "Luminance " and set the layer opacity of this layer to 53% 36. Effects- 3D Effects- Drop Shadom with these settings 5/ -4 /52/19 color black 37. Layers - New raster layer 38.Selection Tool ( S ) Custom selection use settings below
39. Open the tube ''renee_marchons vers etoile_image 1 ''Edit/Copy -Edit - Paste into selection 40. Selections- Deselect All 41. Open the tube ''Little Lights Ė misted tube of A PS®Devil'' Image Resize 75 % /Edit/copy-Edit paste as a new layer. With your move tool move to the left 42. Open the tube ''titre -marchons vers etoile" Edit/copy-Edit paste as a new layer. With your move tool move to the left 43. Open the tube du ''clou'' Edit/copy-Edit paste as a new layer. With your move tool move to the left 44. Open the tube ''etoile '' Edit/copy-Edit paste as a new layer. With your move tool move to the left 45. Layers- Merge-Merge Visible 46. Effects- Plugins AAA Frame - Foto frame
47. Layers- Duplicate Image Resize 25% (Resize all the layers not checked) 48. Layers- Duplicate
49. Layer Palette: activate layer -copy 2 (merged) -Adjust- Blur- Motion Blur with these settings
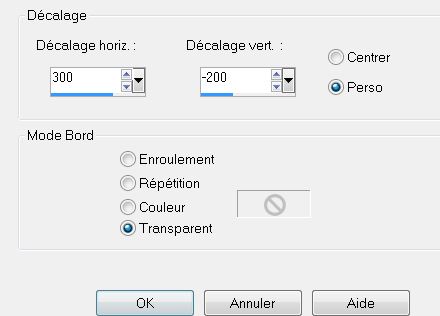
50. Activate the top of the layer-Palette /Layers- Merge -Merge Down 51. Effects- Image Effects- Offset with these settings
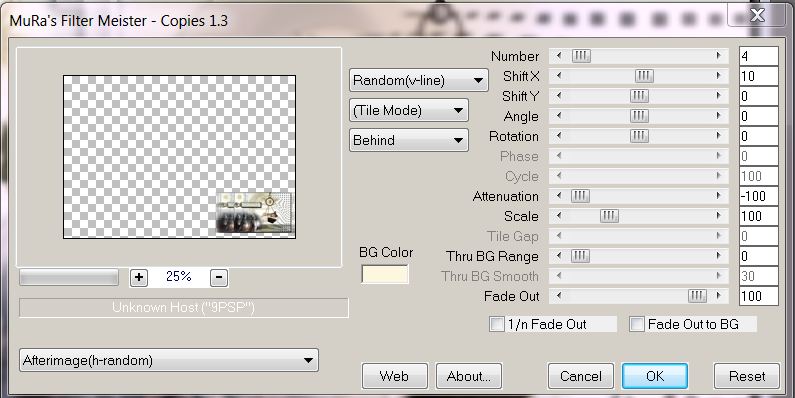
52. Effects- Plugins - Mura's Meister Copies with these settings
53 Image - Add borders-Symmetric checked: 1 pixels color black 54. Image - Add borders-Symmetric checked: 30 pixels #c2c1a9 55. Activate Magic Wand and click in the border of 30 pixels 56. Effects-Plugins -Unlimited- Blur / Transblur 22/9 57. Selections- Deselect All 58. Image - Add borders-Symmetric checked: 3 pixels color black Save as JPG - I hope you enjoyed this lesson This lesson was written by Renée 7/12/2012 Thanks Renée Any resemblance with an existing lesson is merely a coincidence * * Don't forget to thank the people who work for us and with us. I named the tubeurs - Testers and the translators. Thanks Renée. * 2014 reçu de TWInc I am part of Tutorial Writers Inc My tutorials are regularly recorded. ReneeGraphisme_All rights reserved
|
 Translations