|
modifié pour adapter a 2014
Best wishes to 2014 DOWNLOAD material here
Let's start the lesson.
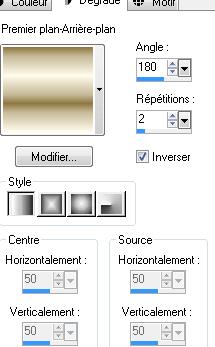
2. Material Properties: Foreground color to this color:#fefbec -Background color to this color : #8e7742 -Activate Flood Fill Tool and fill the layer with the backgroundcolor #8e7742 3. Material Properties : Put your foreground/background into a linear gradient with settings below.
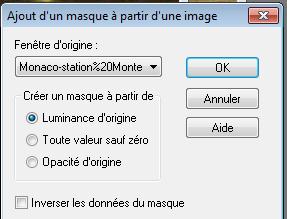
4. Layers - New raster layer 5. Activate Flood Fill Tool and fill the layer with the gradient 6. Layers- New Mask layer from Image and choose Mask:« monaco station.jpg »
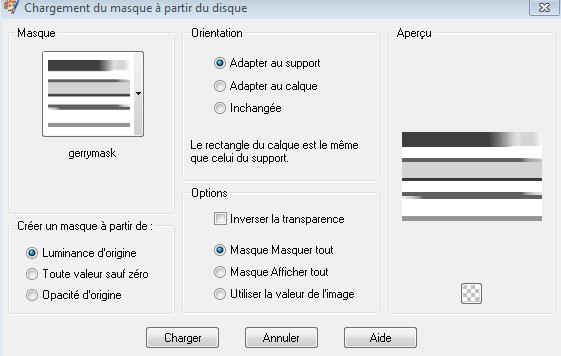
7. Layers- Merge -Merge Group 8. Effects- Edge Effects-Enhance 9. Layers - New raster layer 10. Selections - load/save selection - load selection from disk and choose '' @renee fete2012 '' - Open de tube « newton 12 »Edit/Copy-Edit paste into selection 11. Selections- Deselect All - In the Layerpalette, set Blend Mode to Luminance Legacy 12. Effects- Edge Effects-Enhance More 13. Layers - New raster layer /Activate Flood Fill Tool and fill the layer with the gradient 14. Layers- Layers-load/save Maske Load Mask from Disk and select Mask:''gerrymask.jpg''
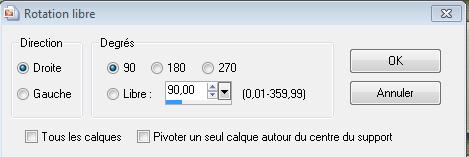
15. Layers- Merge -Merge Group 16. Effects- Edge Effects-Enhance More 17. Effects- 3D Effects- Drop Shadow with these settings 9/1/100/9 color black 18. Layers-Duplicate 19. Image - Free Rotate: 90 to the right
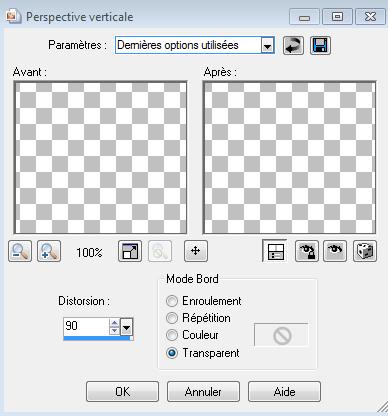
20. Effects- Geometric Effects- Perspective- vertical
21. Effects - Images Effects - Offset with these settings H= -100 and V = 0
- Activate Raster Deform Tool
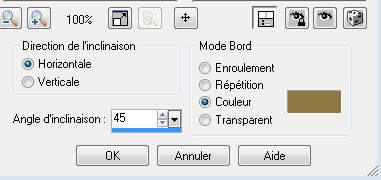
22. Layers - New raster layer 23. Selections - load/save selection - load selection from disk and choose ''@renee-fete2012-2 ' Open the tube « SBWinters 1 »Edit/Copy-Edit paste into selection 24. Selections -Select All -Selection Modify -Select-Selection Borders - Outside 3 pixels Activate Flood Fill Tool and fill the selection with the gradient 25. Selections- Deselect All 26. Layers - New raster layer 27. Selections - load/save selection - load selection from disk and choose "@renee-fete2012-3 " / Activate Flood Fill Tool and fill the selection with this color # fefbec 28. Selections- Deselect All 29. Effects- Geometric Effects -Skew - Color #8e7742
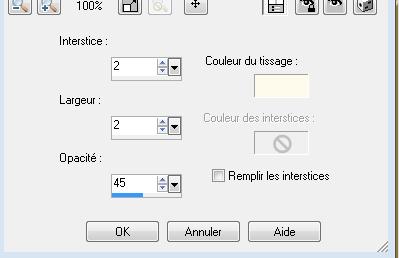
30. Effects- Textureffects-Weave use settings below
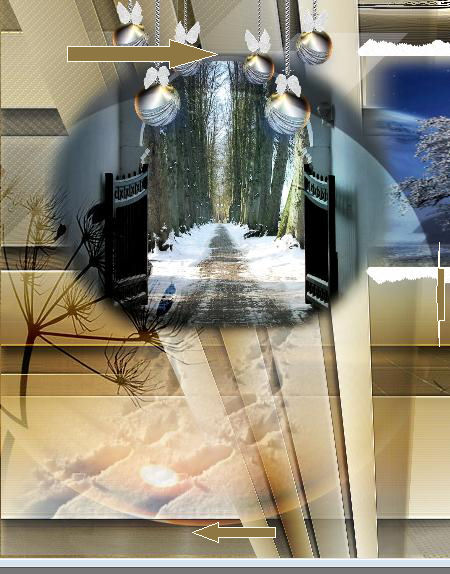
-In the Layerpalette, set Blend Mode to Luminance /Opacity of this layer to 34% 31. Image do not Mirror !!!!! 32. Layers - New raster layer 33. Selections - load/save selection - load selection from disk and choose " @renee-fete2012-4 " - Open the tube « Liza misted Winter1 « Edit/copy-Edit paste into selection 34. Selections- Deselect All 35. Open the tube »boules de Noël «Edit/copy-Edit paste as a new layer. Move to the upper left corner 36. Open the tube « pas dans la neige «Edit/copy-Edit paste as a new layer. Move to the left corner 37. Open the tube « Liza misted Sundown »Edit/copy -Edit - paste as new layer on your working area
38. Open the tube « neige « Edit/copy -Edit - paste as new layer on your working area and move 39. Layers-Duplicate /Image Flip /and move 40. Open the tube " bouteille "Edit / copy -Edit - paste as new layer on your working area and move /In the Layerpalette, set Blend Mode to Luminance Legacy 41. Open the tube « 2012 »Edit /copy -Edit - paste as new layer on your working area and move 42. Open the tube « alies »w-12022010 »Image Resize 65% Edit/copy-Edit paste as a new layer. Move to the right corner
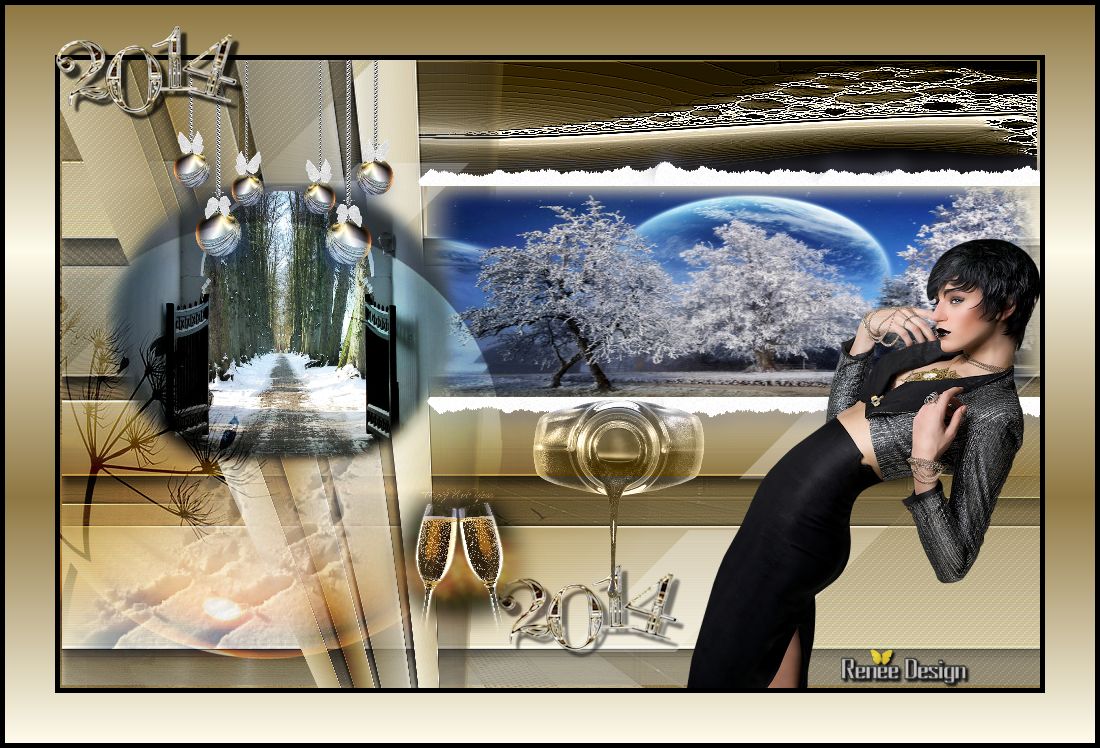
43. Open the tube « calguismistcoupedechampagne12119 » Image Resize 15% Edit/copy-Edit paste as a new layer and move 44. Open the tube ''du texte'' Edit/copy -Edit - paste as new layer on your working area and move *well make sure everything is in place 45. Layers- Merge-Merge All 46. Image - Add borders-Symmetric checked:5 pixels #0c0c0f 47. Image - Add borders-Symmetric checked:50 pixels color white 48. Magic Wand : click with your magic wand in the border of 50 pixels / Activate Flood Fill Tool and fill the selection with the gradient 49. Selections- Deselect All 50. Image - Add borders-Symmetric checked:5 pixels #0c0c0f I hope you enjoyed this lesson Renée
Placing 8/12/2013 Any resemblance with an existing lesson is merely a coincidence * * Don't forget to thank the people who work for us and with us. I named the tubeurs - Testers and the translators. Thanks Renée I am part of Tutorial Writers Inc. My tutorials are regularly recorded. ReneeGraphisme__All rights reserved . Happy holidays to you and your family
*
|