|
Let's start the lesson .
1. Open the image:''fond_oracle'' / Promote to Raster Layer = Raster 1
2. Layers-Duplicate
3. Layers-New Mask Layer From Image and choose Mask:''mask_100''

4. Layers-Merge - Merge-Group (we see nothing for now)
5. Effects - 3D Effects - Drop shadow/black
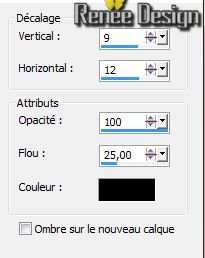
6. Selections - load/save selection- load selection from disk and select my file: ''oracle_1''
7. Effects - 3D Effects - Drop shadow/black
 Repeat:
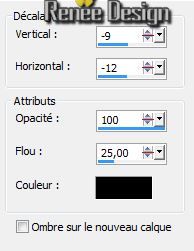
8. Promote selection to Layer
9.Layer-Palette: activate layer underneath (Group Copy of Raster 1) /Delete
Selections-Deselect All
10. Stay on this layer(Group -Copie of Raster 1)
11. Effects-Plugins-Unlimited -
Factory Gallery B -Button de luxe /default
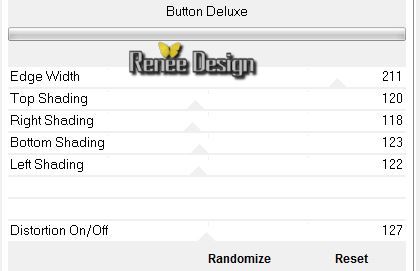
12.Activate the top of the layers-Palette
13. Layers-New raster layer
14. Selections - load/save selection- load selection from disk and select my file: ''oracle_2''
15. Activate the tube ''oracle_image-1''
/Edit-Copy-Edit-Paste into selection
16. Selections-Modify-Select-Selection Borders with these settings
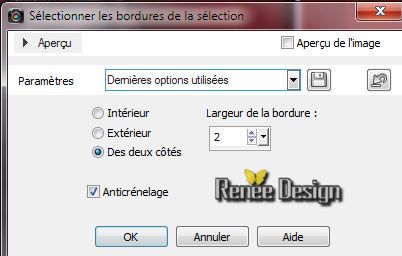
17. Layers-New raster layer /Activate Flood Fill Tool and fill the selection with color white
Selections-Deselect All
18. Effects-Plugins -Unlimited
- Factory Gallery B -Button de luxe / default

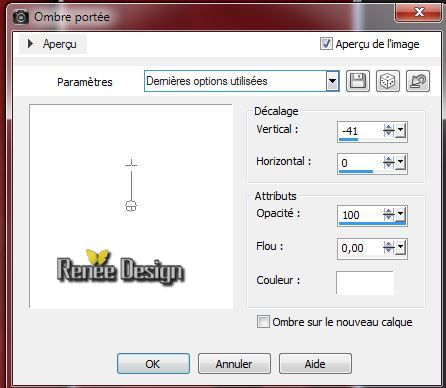
19. Effects - 3D Effects - Drop shadow/white
20. Selections - load/save selection- load selection from disk and select my file: ''oracle_3''
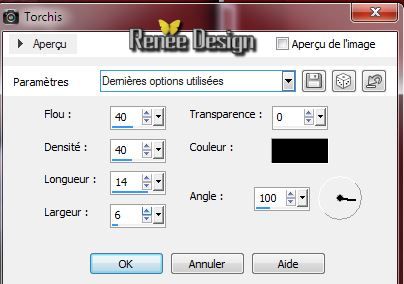
21. Effects - Textureffects -Straw Wall
22. Effects - EyeCandy 5
-Impact - Perspective shadowtab Settings/User Settings and choose my preset ''oracle_shadow''
Selections-Deselect All
Your work and Layer Palette look like this now:
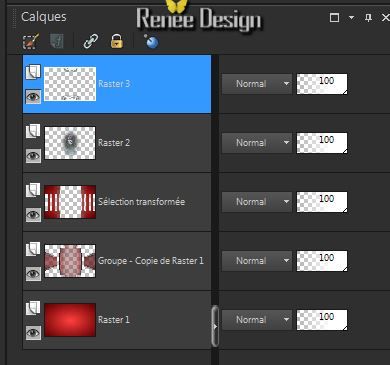
Activate the bottom of the layer-Palette ( Raster 1)
23. Selections - load/save selection- load selection from disk and select my file: ''oracle_4''
24. Promote selection to Layer
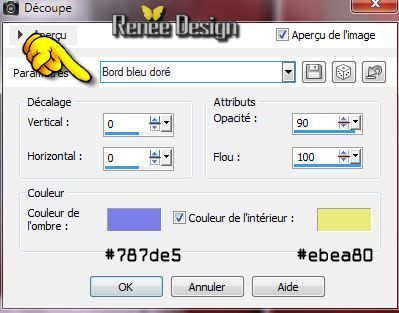
25. Effects -3D Effects-Cutout/with these settings
-Selections-Deselect All
26. Effects - 3D Effects - Drop shadow: 0/0/75/56 black
Activate the top of the layers-Palette
27. Activate the tube
''oracle-barres''/ Edit-Copy-Edit Paste as a new layer
28. Selections - load/save selection- load selection from disk and select my file: ''oracle_5'' place the tube in the selection-it is very important
Selections-Deselect All
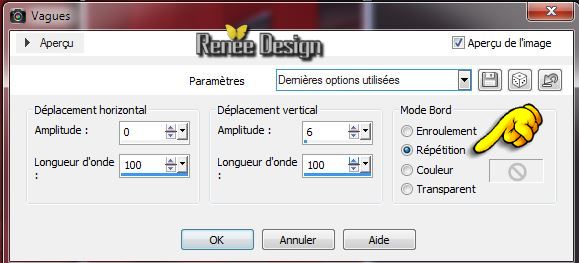
29. Effects-Distortion Effects-Wave with these settings
30. Layers-Duplicate
/Image Mirror/Layers-Merge-Merge-Down
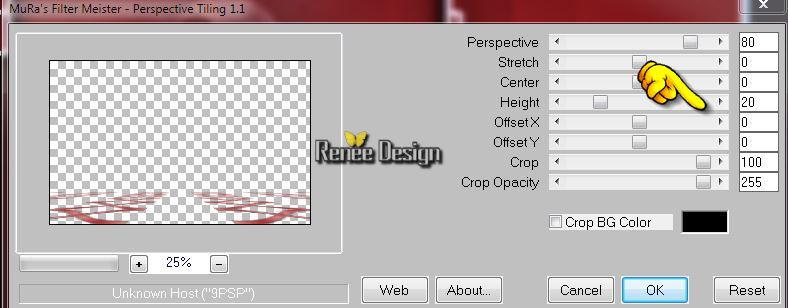
31. Effects-Plugins-Mura's Meister -Perpsective Tilling
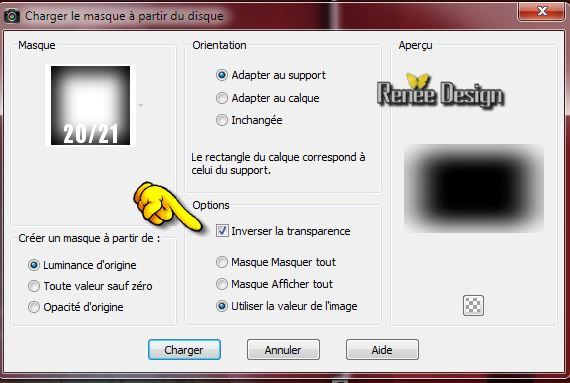
32. Layers-Maske- Load/Save Mask -Load Mask From Disk and choose: "20/21.PspMask"
- Layers-Duplicate
- Layers-Duplicate
- Layers-Merge - Merge-Group
33. Effects - 3D Effects - Drop Shadow: 1/1/100/0 black
34. Activate the tube ''KRYSSURREALISME-10-06-14-206.pspimage''/activate raster 1 of the tube' Image Resize: 75%
-Edit-copy- Edit - paste as new layer on your working area and move
35. Layer Palette: change your Blend Mode to "Luminance-Legacy"
36. Layers-New raster layer
37. Selections - load/save selection- load selection from disk and select my file: ''oracle_6''
38. Pot of Paint-Opacity down: 18 .Foreground color to color: #545260 Flood Fill Tool: fill the selection with the FG-Color 1x
39. Layer Palette: change your Blend Mode to "Screen"
40. Activate the tube
''oracle_texte'' /Edit/copy-Edit paste as a new layer. Edit/copy-Edit paste as a new layer and move in the right place(move into the selection)
41. Selections-Invert/Delete
42. Opacity of this layer to 51%
Selections-Deselect All
43. Activate the tube ''oracle_reflet
''/Edit/copy-Edit paste as a new layer.
Move to a good place like this
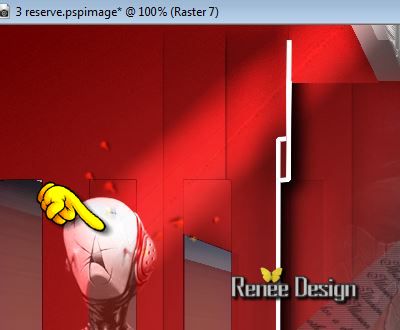
- Layer Palette: change your Blend Mode to "Overlay"
44. Layers-New raster layer
45. Selections - load/save selection- load selection from disk and select my file:'' oracle_7''
-
Pot of Paint-Opacity down: 80%. Flood Fill Tool: fill the selection with color black
46. Effet - Modules
Externes - Eye Candy 5 Impact - Brushed metal-tab Settings/User Settings and choose my preset ''oracle_metal''
Selections-Deselect All
47. Activate the tube "oracle_cailloux
/Edit-Copy-Edit Paste as a new layer
/With your move tool place it to the right
- Layer Palette: change your Blend Mode to "Hard Light"
48.Activate the tube ''KRYSSURREALISME-10-06-14-204.pspimage''activate raster 1 of the tube/Image Resize: 85 % /Image Mirror
-Edit-Copy-Edit Paste as a new layer /With your move tool place it to the right
49. Layers-New raster layer
Note: At point 50 you have a selection, move the tube "cable"into the selection .Or...follow the selection in point 50 and you get the same effect as with the tube
50. Selections - load/save selection- load selection from disk and select my file: ''oracle_8''
-Material of the foreground :select gradient: metallique''
Linear -with these settings:
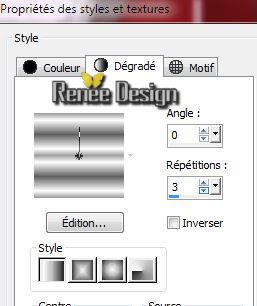
51. Flood Fill Tool: fill the selection with the gradient
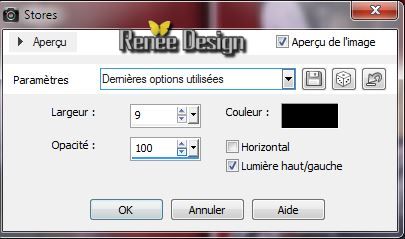
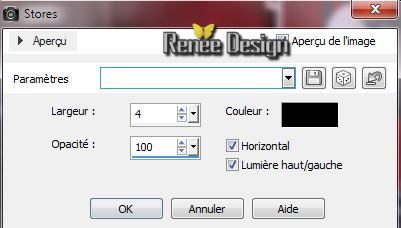
52. Effects - Texture Effects Blind/black
Selections-Deselect All
53.Effects - 3D Effects - Drop shadow:
1/1/100/0 black
54. Activate the tube ''oracle_piece"
/ Edit - Copy -Edit - Paste as new layer on your working area and move
-Layer Palette: change your Blend Mode to "Hard Light" .Reduce the opacity of this layer to:81%
55. Layers-New raster layer
56. Activate Pen Tool-Line Style:''barbedwire Width 2 '(or your choice)

- Foreground color to gradient .Draw a line like this
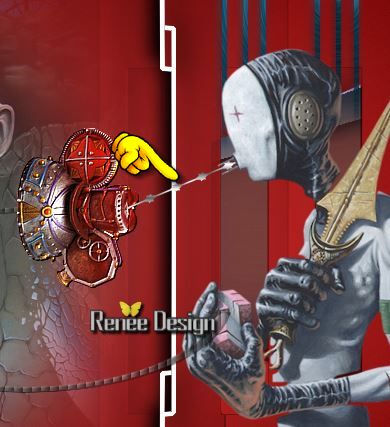
-Convert to raster layer
57. Layers-Merge-Merge Visible
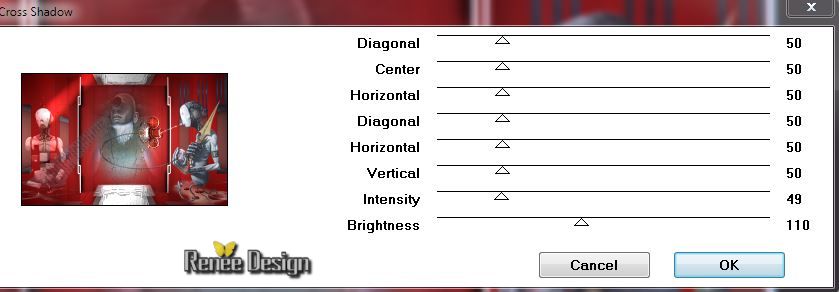
58. Effects-Plugins - Graphic Plus - Cross shadow
59. Image - Add Borders - Symmetric 2 pixels black
60. Edit-Copy!!!!
61. Image - Add Borders - Symmetric 50 pixels white
62. Image - Add Borders - Symmetric 1 pixel black
63. Image - Add Borders - Symmetric 30 pixels white
64. With your magic wand select the border of: 30 pixels
65. Edit-Paste into selection
(Image is still in your PSP memory)
66. Adjust-Blur-Gaussian Blur: Radius: 15
67. Effects- Texture Effects - Blind/black
Selections-Deselect All
68. Image - Add Borders - Symmetric 5 pixels white
69. Open the ''titre_oracle''
and place Or write your own text ( tube"
KRYSSTP27-12-12-14.pspimage" into the zip-file)
70. Layers - Merge - Merge all layers (flatten)
Image Resize: 995
pixels Width
I hope you enjoyed this lesson
Renée
This lesson was written by Renée the
Created 24/05/2014
06/2014
*
Any resemblance with an existing lesson is merely a coincidence
*
* Don't forget to thank the people who work for us and with us. I named the tubeurs - Testers and the translators.
Thanks Renée. |