|
Let's begin .
Open your Color palette
1.
File: Open the image ''fond_peterio'' /Promote to background layer =Raster 1
2.
Layers - New raster Layer
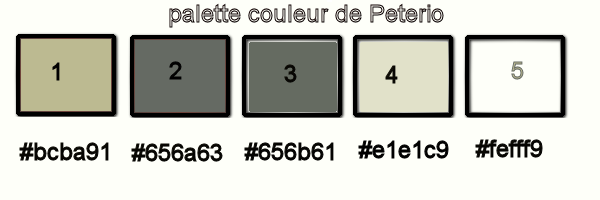
Color palette - Foreground color to color 1. Backgroundcolor to color 2
3.
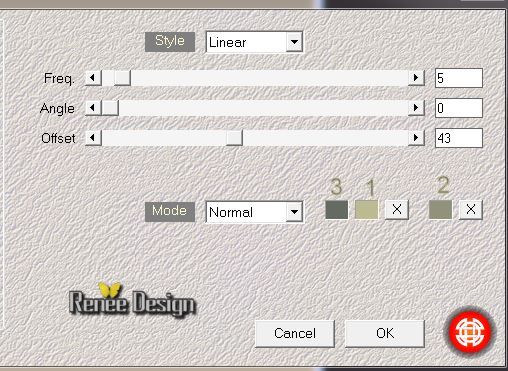
Effects -Plugins -Medhi /Wavy lab
4.
Effects -Plugins -EyeCandy 5 - Textures and choose my preset
''peterio_texture_brique''
5.
Layers - Properties: change the Blend Mode to "Overlay"/ and lower the opacity down to
89%
6.
Layers- Load/save mask-Load mask from disk and choose mask:
''20/21''

-
Layers-Duplicate
-
Repeat: Layers-Duplicate (for expanding effect)
-
Layers- Merge - Merge Group
7.
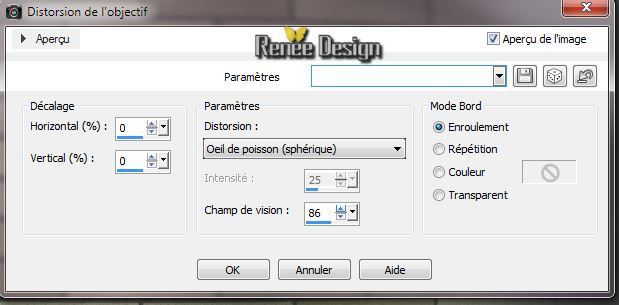
Effects - Distortion Effects -Lens Distortion-Fisheye (Spherical)
8.
Effects- Plugins - Graphic Plus -
Emboss /all 0
9.
Selections - load/save selection- load selection from disk and select my file ''peterio_1" / Click 2
x
DELETE 
10.
Selections - Deselect all
11.
Activate the tube ''image1_by_Peterio'' / Edit/copy-Edit/paste as a new layer
12.
Layers- Arrange- Move Down
13.
Aktivate the top of the layer palette - Layers- Merge- Merge Down
14.
Effects - Plugins / VM Toolbox - Dynamic
Diffusion / 9/2
15.
Effects- Image Effects-Offset
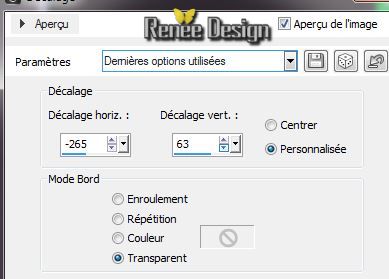
16.
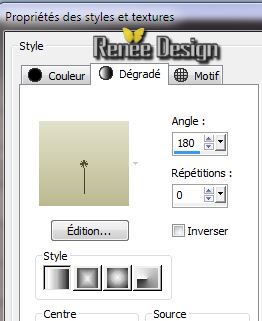
Color palette: Foreground color to color no 4. Background color to color no 1
Material Properties: Change material from the foreground into foreground/background linear gradient with these settings
17.
Layers - New raster layer- Flood fill tool: fill the layer with the gradient
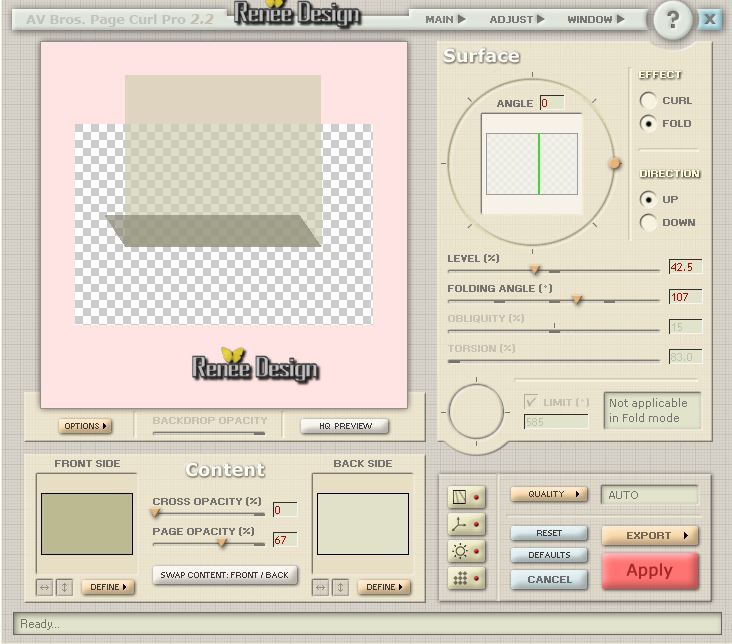
18.
Effects - Plugins - AVBros Page Curl-Preset
"Peterio_page.avcps''
For one who does not want or can not use the filter -The result-effect is in the folder png/
And paste as a new layer(but tried this filter is amazing)
To bring the preset in the filter
AV Bros
-Click
on Main /then Load Settings(relative) and select my file "Peterio_page.avcps''/for this result
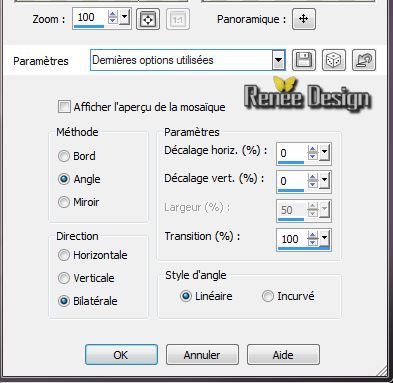
19.
Effetcts - Image-Effects- Seamless Tilling
20.Adjust-Sharpen- Sharpen More
21.
Effects- Plugins Unlimited-<BKG & Designer sf10I/
Cruncher 69/20
22. Effects
- Edge Effects - Enhance
23.
Selections- Gustom Selections with these settings
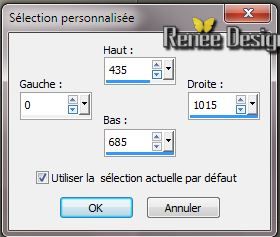
24.
Adjust-Blur-Motion Blur
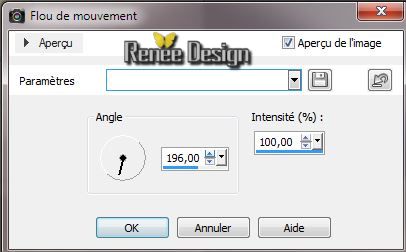
Keep selection
25.
Effects - Plugins- L & K's / Pia
a 85
26.
Effects -Plugins -Mura's Meister /
Perspective Tilling default
27.
Selections-Promote selection to layer
28. Activate the layer underneath/ and Delete
Selections - Deselect all
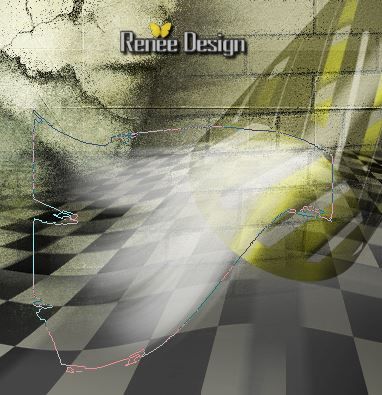
This is the result
29. Layer palette: activate Raster 2 - Layers- Arrange-Bring to top. Layer palette: Blend Mode to : "Hard Light"
30. Layer palette: activate Raster 3
31.
Selections- Gustom Selections with these settings
32.
Adjust-Blur- Gaussian Blur: Radius 30
33.
Selections-Promote selection to layer
34.
Selections-Select All
35.
Effects- Plugins Unlimited- & <BKG & Designer sf10I/
Cruncher 20/20
36. Layers- Arrange-Bring to top
Layer palette: activate layer: sélection transformée
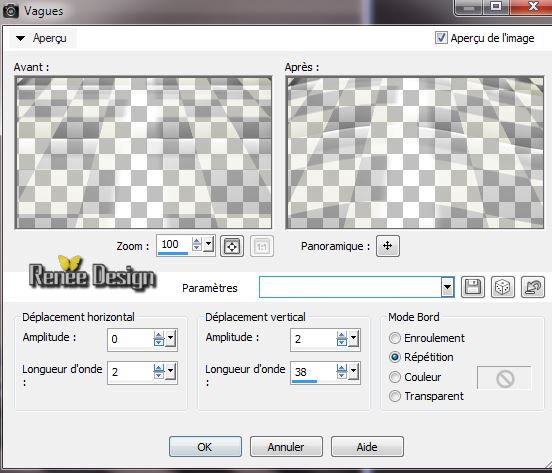
37. Effects
- Distortion Effects - Wave
Aktivate the top of the layer palette
38.
Layers - New raster Layer
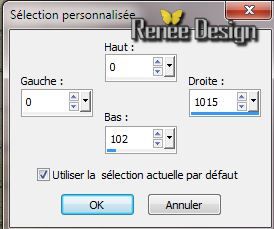
39.
Selections-Gustom Selection with these settings
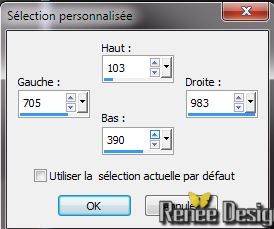
40.
Pot of Paint-opacity 65 %. Flood Fill Tool: fill the selection with the gradient
41.Selections - Deselect all
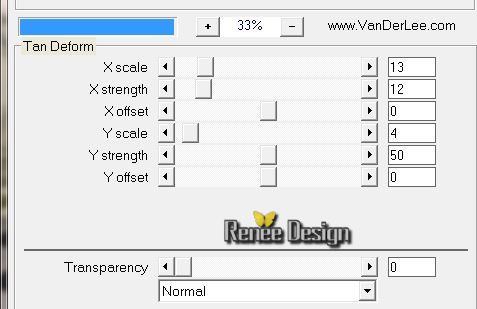
42.
Effects -Plugins -Vanderlee - Unpplugged
X/Tan Deform
43.
Selections - load/save selection- load selection from disk and select my file 'peterio_2''/ Delete
Attention : erase the small line down the work
-
Selections - Deselect all
44. Layers- Duplicate /Image Mirror
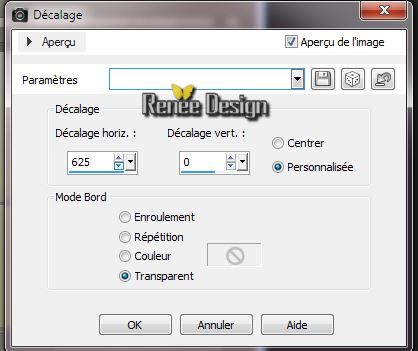
45. Effects
-Image Effects- Offset
46.
Layers- Merge- Merge Down
47. Effects- 3D Effects- Drop Shadow 5/5/65/0 black
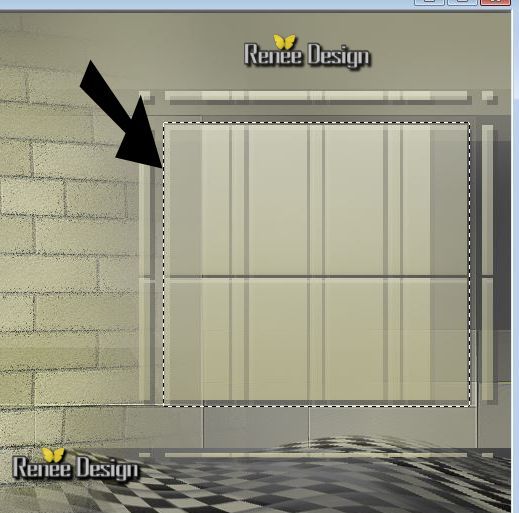
48.Selection Tool (S)-Rectangle. Draw a rectangle see example below / then / Delete
49.
Layers- New raster layer
50.
Activate the tube ''peterio_fenetre''/ Edit/copy-Edit paste into selection
51.
Selections - Deselect all
52. Layer palette: Blend Mode to : "Hard Light" and lower the opacity down to 81%
53.
Layer palette_ activate the layer underneath (Raster4)
54. Effects
-Plugins - Eye Candy 5 Impact - Extrude and choose my preset
''peterio_extrude''
Aktivate the top of the layer palette
55.
Activate the tube ''peterio_grille'' /Edit/copy-Edit paste as a new layer (do not move it is in the right place)
56. Effects
-Plugins - AVBros page curl
To understand this design as much as possible, I have already modified the form
We will create the tube
1.
We will load the presets
>>Clic Main / Load Settings
>>>''peterio.avcps''
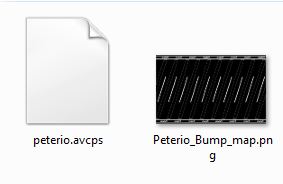
2.
Click on "Define" under "Backside.Then open a window and locate the preset" >> Peterio_bump_map .png ( So to the left under Frontside you see that yellow tube and next to the black.Apply and Oké
You can see that these letters are reversed, but that comes well after the processing of your filter!
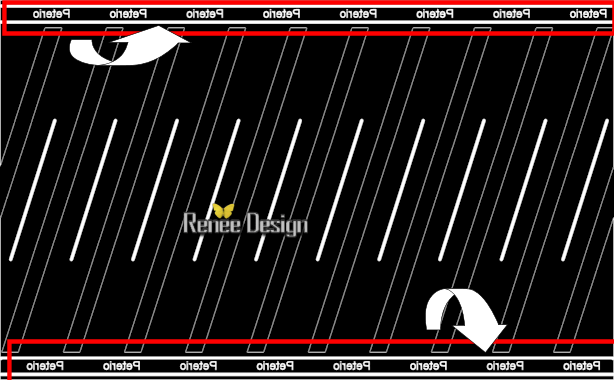
(or if you just want to be a foreground color or background)
If you wish to use the presets here below the description to make it manually.
See arrow, click on each icon >> To open=
Lighting- 3D transformation- Bends- Bump Mapping
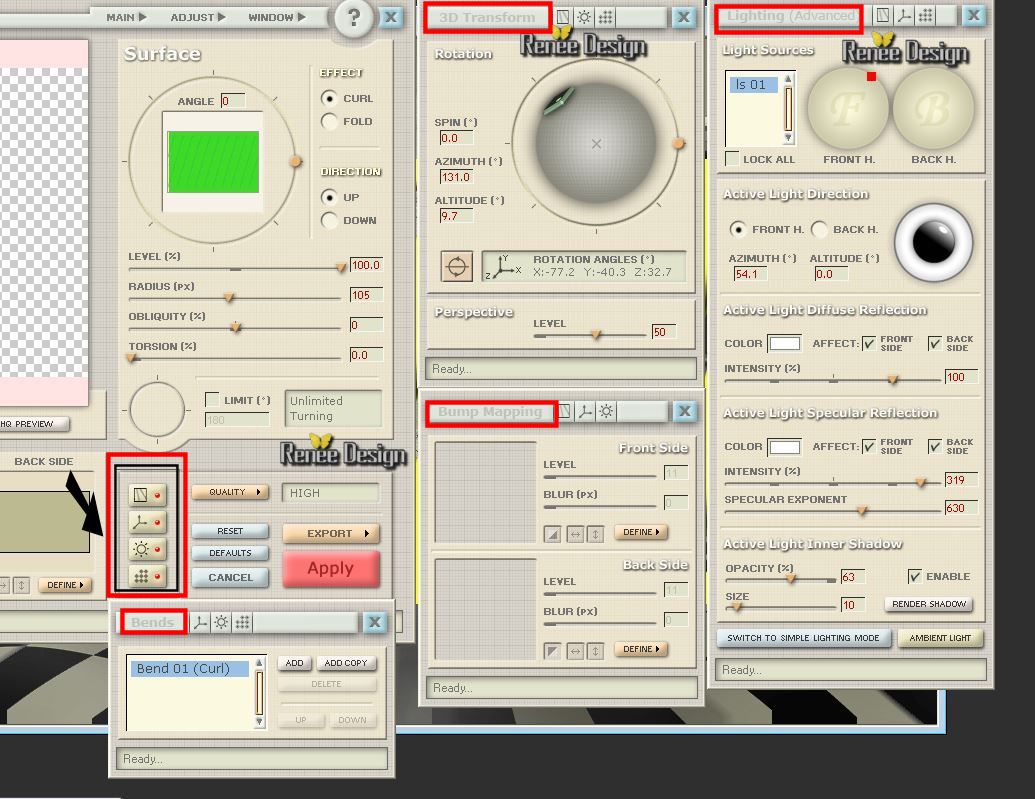
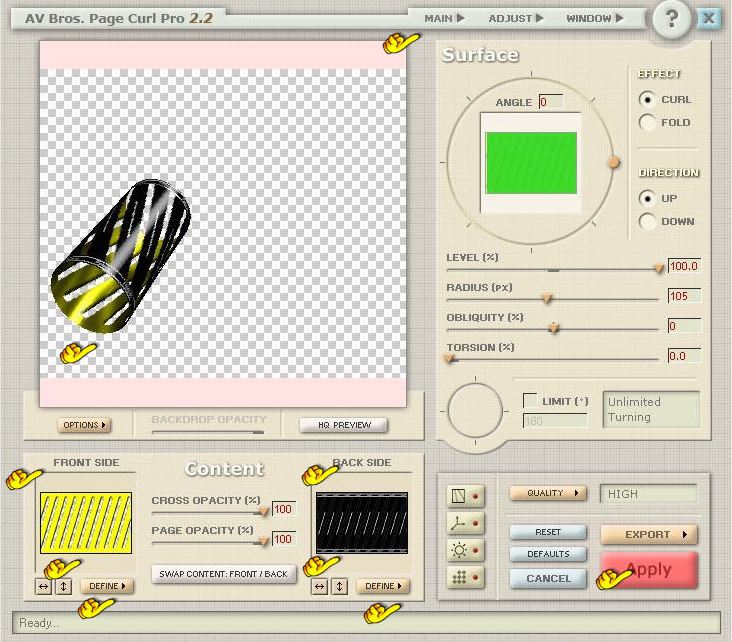
If the settings are correct and you say ok then the letters upside down.
By mirroring and turn the letters come to be in the right direction
57. Layer palette: Blend Mode to : "Soft Light" and place
58.
Layers - New raster Layer
Color palette - Foreground color to color white
59. Activate Brush Tool and select my file ''petorio_1'' / /File- Export-Gustom Brush/ Give it a name
''petorio_1''
60. Open the Brush
''petorio_1'' Stamp with your foreground color white the brush as shown in the example below
61. Layer palette: Blend Mode to : "Screen" and lower the opacity down to 79%
62.
Activate the tube ''Krys-24-03-14-Cybernetique-010.png'' /
Edit/copy-Edit paste as a new layer and place
63. Layer palette: Blend Mode to :"Overlay"
Layers- Arrange- Move Down
64. Aktivate the top of the layer palette
65. Layers - New raster layer/Flood Fill Tool: fill the layer with black
66.
Layers- New mask layer from image and choose mask: ''masque _preterio''
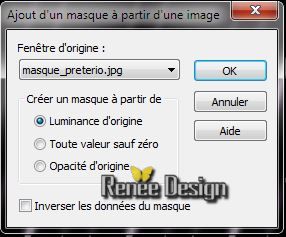
-
Layers- Merge- Merge Group
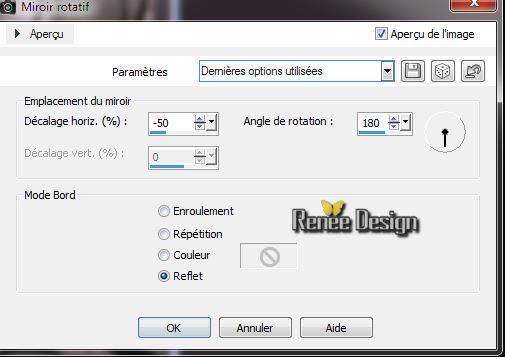
67. Effects-Reflection Effects -Rotating Mirror
68. Effects
- Distortion Effects - Polar Coordinates-Rectangular to Polar
/Transparent
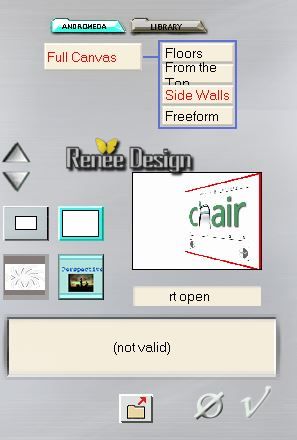
69. Effects
- Plugins Andromeda - Perspective/ Side walls /rt open (2
x)
70.
Effects-Plugins - Eye Candy 5 Glass - and choose my preset
''peterio_glass''
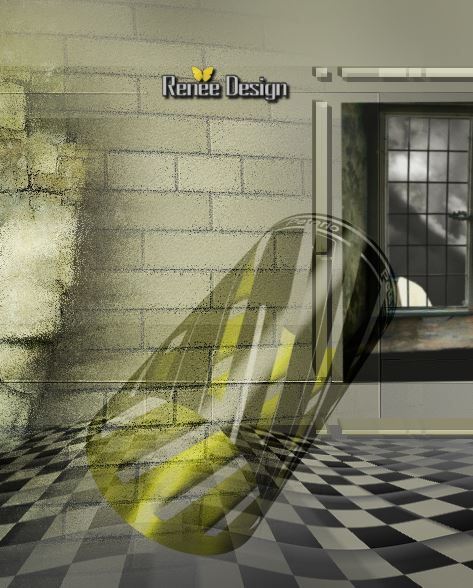
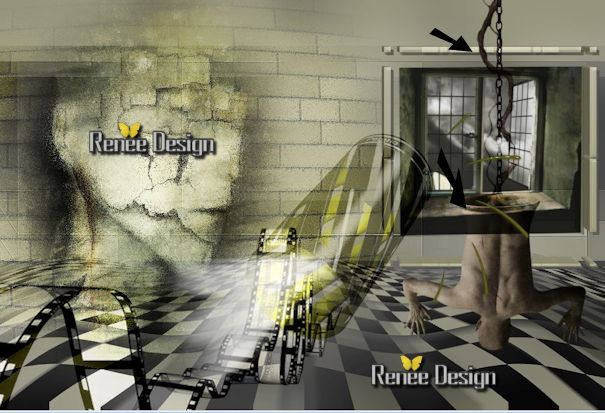
This is the result
Layer Palette: activate raster 4 (the window frame)
71.
Activate the tube '' KRYSSURREALISME-25-03-2014-137.pspimage''
Activate raster 1 of your tube./Edit/copy -Edit paste as a new layer
place like this
Aktivate the top of the layer palette
72.
Activate the tube ''peterio_spot'' /Edit/copy- Edit paste as a new layer
73.
Layers- Merge- Merge Visible
74.
Activate the tube '' KRYSSURREALISME-25-03-2014-137.pspimage''
.Activate raster 11 of your tube Edit/copy
- Edit paste as a new layer/ Layer palette- . Blend Mode to "Overlay "
75.
Activate the tube ''
KRYSSURREALISME-25-03-2014-137.pspimage'' Activate raster12 of your tube / Edit/copy
- Edit paste as a new layer /
Layer palette- .Blend Mode to "Soft Light "
76.
Layers - New raster Layer
77.
Activate Brush tool and select my file: ''
peterio_wave_brushes.pspimage''
File:
Export- Custom Brush /Give it a name
''peterio_wave_brushes.''
78. Open the Brush- '' peterio_wave_brushes'' with these settings

79.
Color palette - Foreground color to color no 4 .Stamp the brush as shown in the example below
(eraser that little line away see below)

80. Effects
- Edge Effects - Enhance
81.
Activate Brush tool and select my file: '' Peterio_pinceau_texte.pspimage''
File:
Export- Custom Brush /Give it a name"'' Peterio_pinceau_texte.pspimage''
82. Open the Brush "Peterio_pinceau_texte"/Color palette: Foreground color to color no 5/with these settings

Stamp the brush (in the roll of film)
83. Effects
- 3D Effects-Drop Shadow 2/1/80/0 black
84.Layers- Merge- Merge Visible
85. Image - Add Borders - Symmetric 2 pixels color 3
86. Image - Add Borders - Symmetric 2 pixels color 1
87. Image - Add Borders - Symmetric 20 pixels color 5
88. Image - Add Borders - Symmetric 2 pixels color 3
89. Image - Add Borders - Symmetric 2 pixels color 1
90. Image - Add Borders - Symmetric 40 pixels color 5
91. Image - Add Borders - Symmetric 2 pixels color 3
92. Open the tube titre '' Peterio '' Edit/copy -Edit/paste as a new Layer and place (Or write your own text)
93. Image
Resize 1015 pixels Width
I hope you enjoyed this lesson
Renée
This lesson was written by Renée the
25/03/2014
Created the 10/04/2014
*
Any resemblance with an existing lesson is merely a coincidence
*
Don't forget to thank the people who work for us and with us. I named the tubeurs - Testers and the translators.
Thanks Renée | 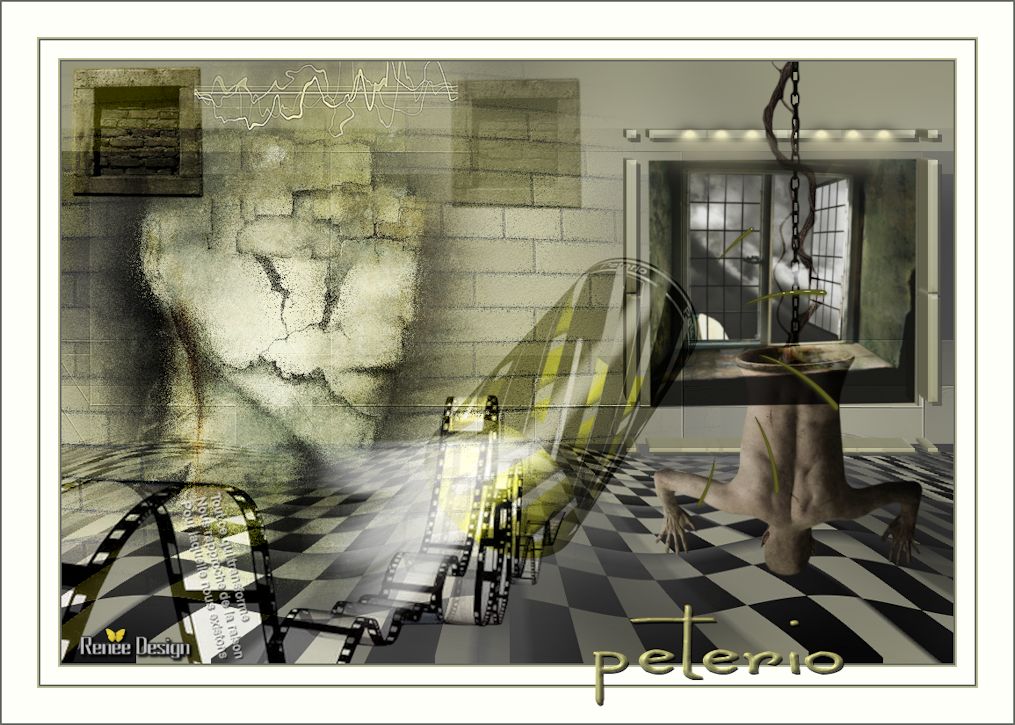
 Translations