|
New
Translations here
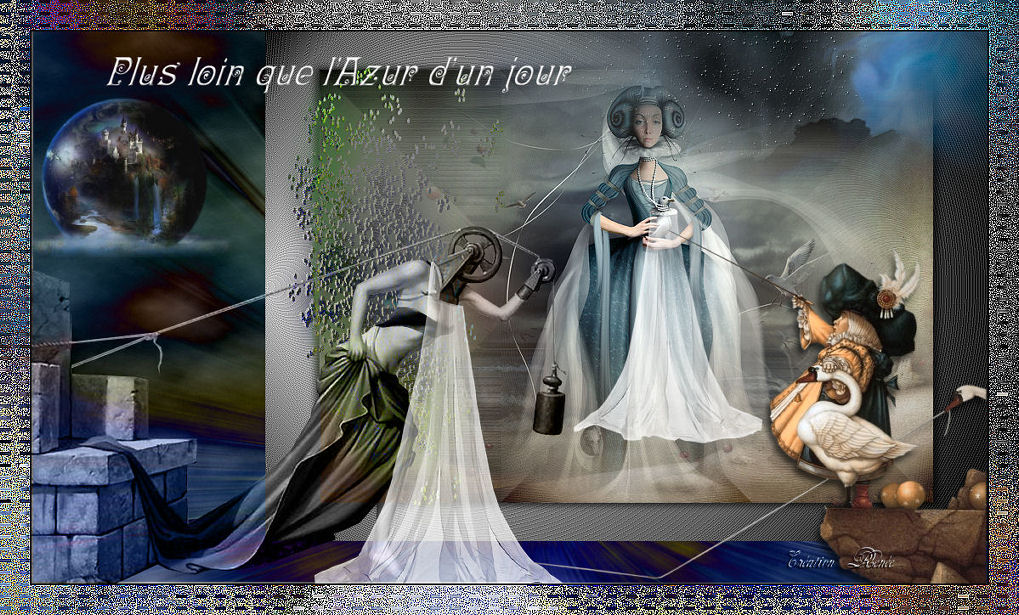
Plus loin que l'azur d'un jour These Plugins are used for this Tutorial Simple /pizza slice mirror FMTile Tools /blend emboss Nick color pro 3.0 /indian summer You can find my filters :http://www.reneegraphisme.fr/filtres/Mes%20filtres.html *****************
Tube are of JHanna- Aclis- Astertube
-CiBijoux
If it is your intention to share these tubes or these lessons in a group,club or forum please ask permission to the owner . The tube may not be send without the lesson . Please do not make changes to the tube, because this tube was made for this lesson only. It is forbidden to share this tutorial without a link to the original lesson. Thank you very much Renée * * These tubes were received from tubeurs sharing groups Or found by me searsching on the net. I Am grateful to have been given permission these beautiful tubes so please use any copyright information as needed. If one of these tubes is yours? Contact me. so I can make a link to your site or remove it. Thank you very much Renée
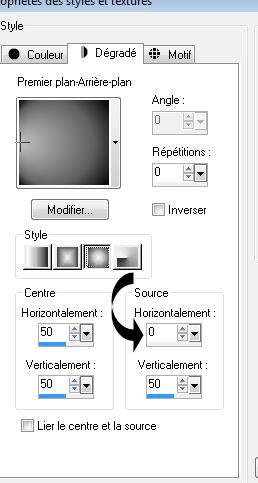
Let's start the lesson. 1. Open a new transparent image of 850 x 600 pixels 2. Color-palette:Set your foreground color to #c0c0c0 - Set your background color to color black 3. Activate Flood Fill Tool and fill the layer with the foreground color 4. Layers- New Raster Layer 5. Propereties Foreground: foreground/background sunburst gradient with settings below
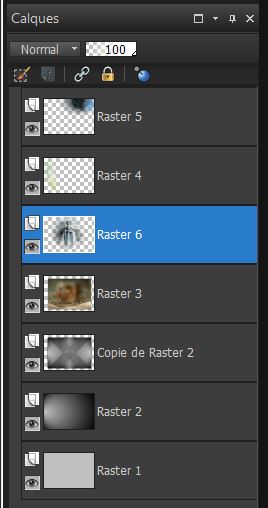
6. Effects- Edge Effects -Enhance More- Repeat 1x/ faire 2 fois 7. Layers- Duplicate 8. Effects- Plugins -Simple /Pizza slice Mirror 9. Layers- Duplicate 10. Image Mirror /-Set the layer opacity of this layer to 40% 11. Layers- Merge- Merge- Down 12. Image Resize 85% Resize all Layers not checked 13. Effects- 3 D Effects- Drop Shadow with these settings 2/5/70/12 color black - Repeat drop Shadow-Negative -2 /-5 14. Layers- New Raster Layer 15. Selections –load/save selection –load selection from disc and select my selection: ''@renee monde jhanna'' 16. Open the tube '' Jhanna background ''Edit/ Copy-Edit - Paste into Selection/Selections- Deselect All -Double click on this Layer and set the Blend Mode to "Hard Light "-Set the layer opacity of this layer to 55% 17. Open the tube « stellaire « - Edit/ Copy-Edit - Paste as new layer on your working image 18. Effects- Image Effects- Offset with these settings H - 275 and V = 0 Double click on this Layer and set the Blend Mode to "Difference""-Set the layer opacity of this layer to 89% 19. Open the tube ''ciel '' - Edit/ Copy-Edit - Paste as new layer on your working image/ With your Move Tool: move it to the upper right 20. Effects- Plugins -FMTile Tools/Blend Emboss using the default settings 21.- Activate the top of the layer palette 22. Open the tube « aclis-fantasy-19-08-2008 » Edit/ Copy-Edit - Paste as new layer on your working image/ Layers- Arrange- Move 2x Down Layer Palette look like this now
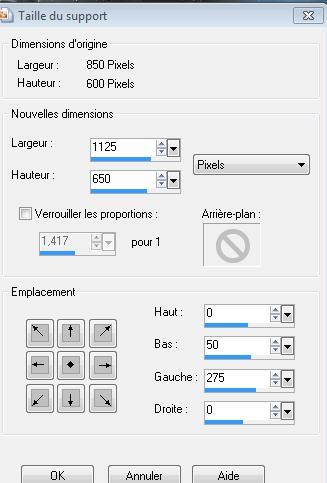
23 .Layers- Merge- Merge- Visible 24. Image- Canvas Size with these settings
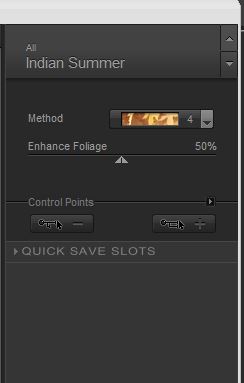
25. Layers- New Raster Layer 26. Effects- Filter-Mura's Meister- Clouds 27. Layers- Arrange- Move Down - Activate the bottom of the layer palette 28. Layers- New Raster Layer 29. Selections –load/save selection –load selection from disc and select my selection: ''@renee monde Jhanna2'' 30. Open the tube '' FNF fractale'' Edit/ Copy-Edit - Paste into Selection/Double click on this Layer and set the Blend Mode to "Difference" 31. Selections- Deselect All Activate the top of the layer palette 32. Open the tube « pandora aster tube « activate raster 1 of the tube 33. Image Mirror/ Edit/ Copy-Edit - Paste as new layer on your working image Double click on this Layer and set the Blend Mode to "Luminance -Legacy" Open the same tube -activate raster 4 of the tube ( tube voilage ) - Edit/ Copy-Edit - Paste as new layer on your working image/Double click on this Layer and set the Blend Mode to "Normal " 34. Open the tube '' montreur d'oie '' Edit/ Copy-Edit - Paste as new layer on your working image 35. Effects- 3 D Effects- Drop Shadow with these settings 7/-4 /65 /10 color black 36. Effects- Plugins -Nick Color effex Pro 3.0 /Indian summer /Method=4
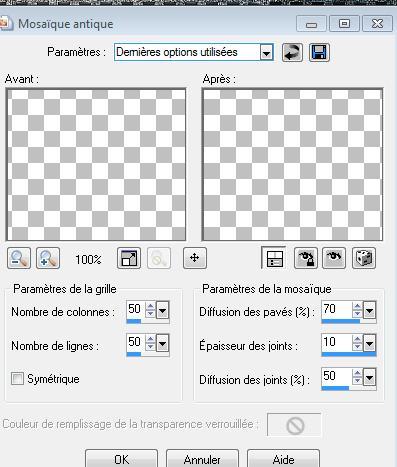
37. Open the tube '' planete'' de cibijoux Edit/ Copy-Edit - Paste as new layer on your working image 38. Layers- Merge- Merge Visible 39. Edit/Copy !!! 40. Image - Add borders-Symmetric checked: 2 pixels color black 41. Image - Add borders-Symmetric checked: 35 pixels color white 42. Activate the magic wand and select the border of 35 pixels 43. Edit/ Copy-Edit - Paste into Selection (Image is still in your PSP memory) 44. Effects- Textur Effects-Mosaic Antique with these settings
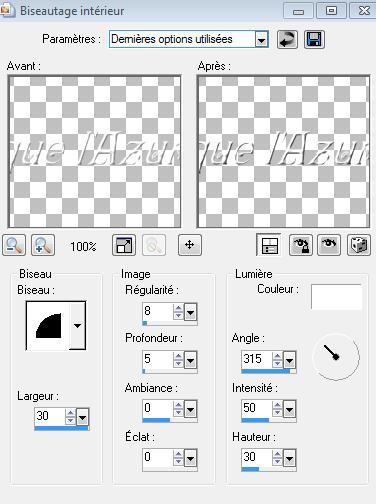
45. Effects- Edge Effects- Enhance More 46. Selections- Deselect All 47. Click on your Text Tool-Font« Ringlet « Size 48 Foregroundcolor #ffffff Write your text- Plus loin que l'azur d'un jour 48. Effects- 3 D Effects- Inner Bevel with these settings
I hope you enjoyed this lesson I am part of the Tutorial Writers Inc. My tutorials are registered regularly ReneeGraphisme_All rights reserved
Any resemblance with an existing lesson is a coincidence * Do not forget to thank the people who work with us and for us I have appointed the tubeurs and translators Thanks Renée
|
 Translations