|


Translated by
Sally
The Prisoner
Materials click here

FILTERS
*
Fantastic Machine
Flaming pear
VM Toolbox
Andromeda
EyeCandy5
L & K /elvira
Simple
Manekenain/Mezzo force/this filter does not work in
psp15. The effect is in the folder
*
click here
http://www.reneegraphisme.fr/filtres/Mes
filtres.html
*******************
TUBES
are
WDD - NIKITA and
HEBE
These
tubes were received from tubeurs sharing groups
Or found by me
searching on the net
I am grateful to have
been given permission these beautiful tubes so
please use any
copyright information as needed
If one of these tubes
is yours,
Contact me
so I can make a link
to your site
or remove it
Thank you Renee
|
Before you start
*
Open hardware
Open / tubes
and close duplicate
originals
Minimize mask
down your PSP
Put filters
in their
proper folders
Brushes and other tools
in their records
- Psp
respective
To import
presets /
Double-click the file
it will
automatically move
|
Let's begin
1. Open a new transparent image 950 x 525 pixels
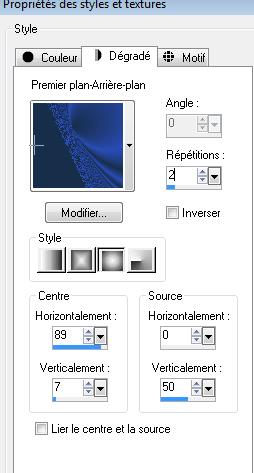
2. Colour Palette - foreground #182e4a and background #2a4cb6
3. Prepare a sunburst gradient configured like this/ fill with the
gradient
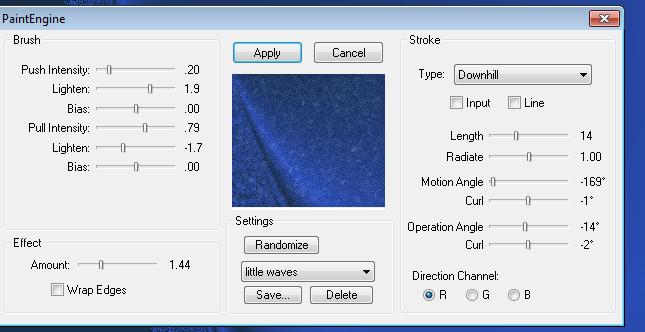
4. Effects - Plugins - Fantastic Machine / Paint Engine
5
With your lasso tool.
select the left side like this
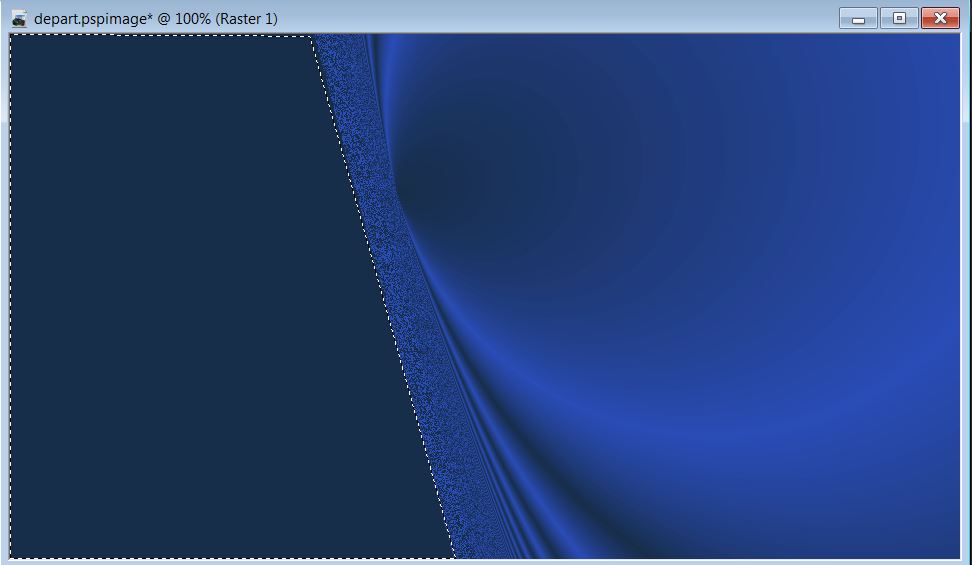
6. Layers / add a new layer / paste tube "renee -mur" in the
selection
7. Selections - Select none
8. Effect - edge effect - enhance more / set the layer mode to
exclusion
9. Open the tube "renee-prisonnier" and paste as new layer
10. Effects - Image effects - offset/ H = 31 and V = 0
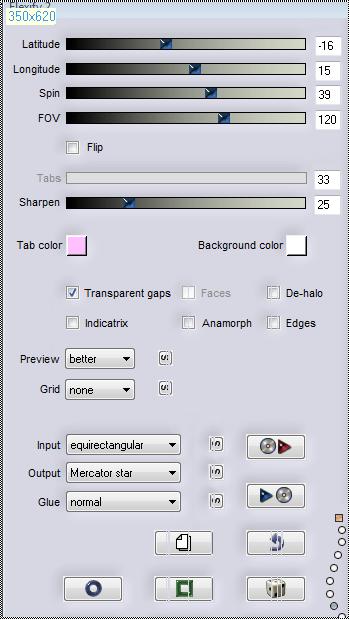
11. Effects - Flaming pear - Flexify2
12. Paste the tube "maggie-184" as a new layer / Place it on the
right edge and set the blend mode to hard light
13. Layers - add a new layer / and fill it with white
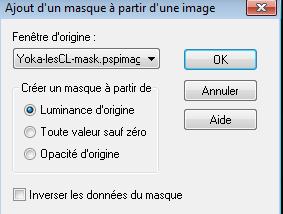
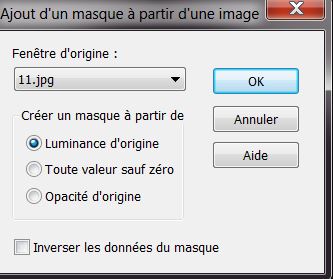
14. Layers - new mask layer from an image - "YOKA lesCl-mask"/
Layers - merge group
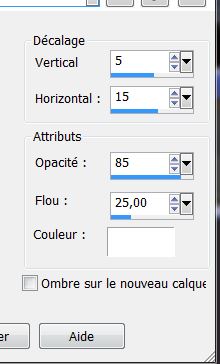
15. Effect - 3-D Drop Shadow 5/0/65/15 black
16. Open "escalier ombre" tube - Paste as new layer
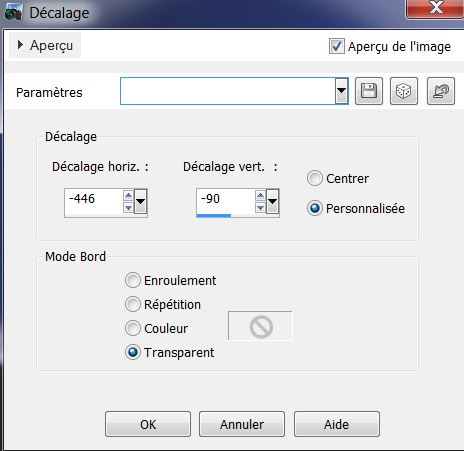
17. Effect - Image effects/ Offset
18. Adjust - sharpness/ sharpen more and change the blend mode to
hard light
19. Paste the tube "1228505924_feerie" as a new layer / pace as
shown and change mode to Luminance
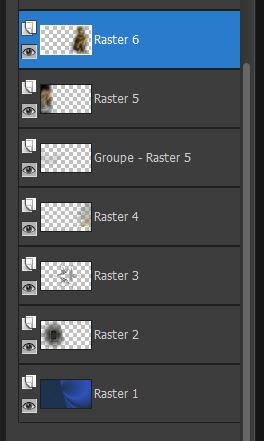
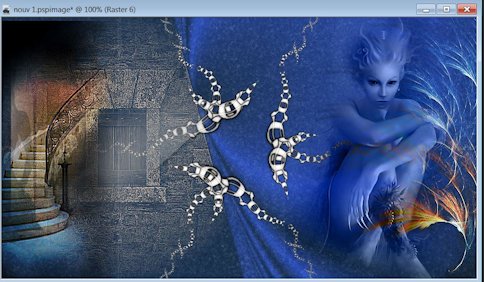
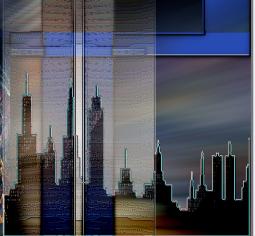
20. Everything should look like this
21. Click on the bottom layer - Raster 1
22. Paste the tube ''renee -ruban '' as new layer
23. Click on the top layer of the Layers palette
24. Selections / Load selection "renee prisonnier 1"
25. Layers - Add a new layer Layer
26. Paste ''renee prisonnier cadre'' into the selection
27. Selections- Modify/ contract 8 pixels / Paste tube ''WDD-F-0073''
into the selection / deselect
28. Set the layer mode to Overlay
29. FM Tile Tools - Saturation emboss/ default
30. Paste image ''renee-image4'' / move with your select tool (K)
and place as follows
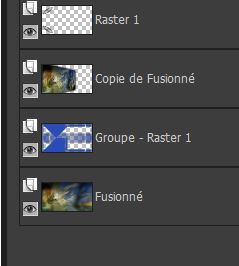
31. Layers - merge visible
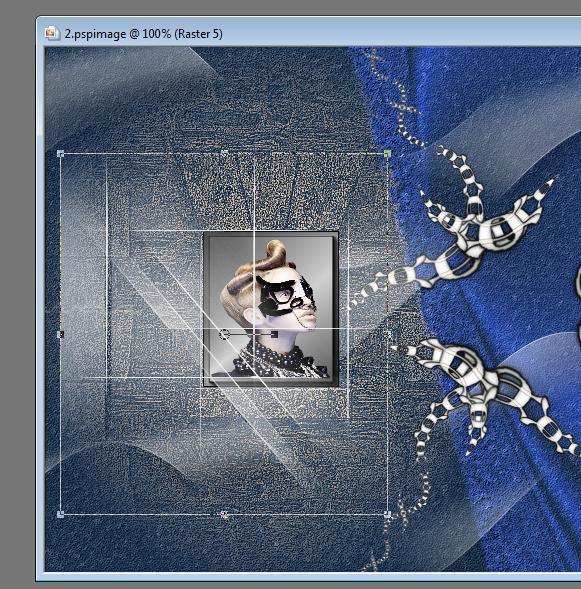
31. Layers - merge visible
32. Layers / Duplicate
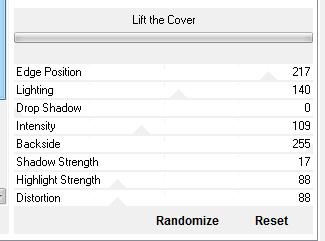
33. Effects - VM Toolbox / lift the cover
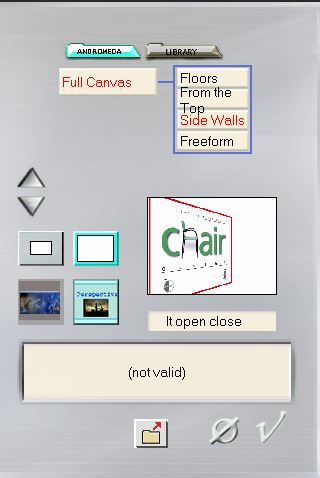
34. Effects - Andromeda Perspective / Side Walls / It open close
34. Effects - Andromeda Perspective / Side Walls / It open close
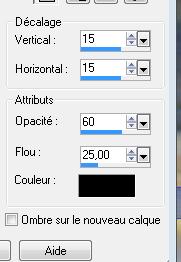
35. Effects - 3-D effects - Drop Shadow
Repeat H-15 / V-15
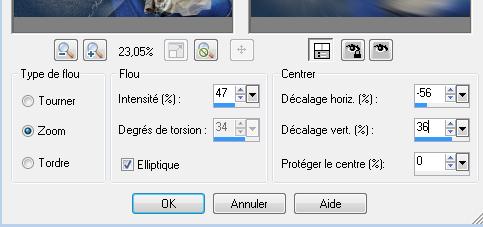
36 Click on the bottom layer -. The merged layer
/Adjust blur / radial blur
37. Layers - add a new layer / and fill it with color #2a4cb6
38. Layers - New mask layer from image/ "11.jpg"
39. Layers/ Merge Group / Edge Effects - enhance more
40. Effects - 3D effects / Drop shadow
41.Effect - Simple - Pizza Slice Mirror / change the layer mode to
Luminance (you can not see anything at the moment)
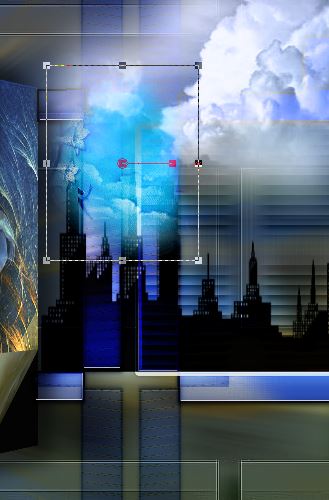
42. Open the tube "renee-prisonnier image-4" copy and paste it in
place/ move to the left edge
43. Layers duplicate / image flip
44. Layers / merge down
. you're here
45. Click on the bottom layer/ merged - Effects - Nik Software color
effex pro / Bi Color - set 2
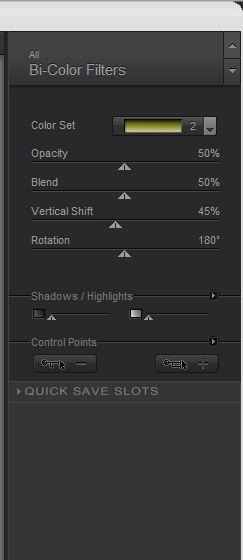
46. Repeat the same effect on the 3rd layer (copy merged)
47. Click the top of the Layers palette / Selections - load the
selection "renee-prisonnier2"
Layers - Add a new layer
48. Open the tube "image_5" and paste into the selection / Select
none
49. Effects - EyeCandy5 Impact - glass / preset "renee prisonnier"
50. Layers - duplicate
51. Effects Land K's / Elvida @ 25
52. Effects / Simple - Center tile / Blend mode to soft light
53 Layers - add a new layer
54. Open the brush tool / import "City-Scape'' into your brushes/
brush size 328 with black and apply on the right as shown
55. Set the layer blend mode to
Overlay / Effects - 3-D effects - Drop Shadow
56. Open the tube ''renee-volet'' / mode luminance / opacity 63 /
move to the right - see finished
57. Layers - Arrange - arrange down
58. Paste the tube ''nuages''/ Move to the top right corner/
Luminance Legacy mode
59. Open the tube "petit nuage" / place as shown / Set the mode to
hard light
60. Image - add borders 2 pixels black
61. Image - add borders 45 pixels white
62. Image - add borders 2 pixels black
63. Using the magic wand select the white part of 45 pixels
64. Filters - Plugins - Manekenain/ Mezzo Forte Ice (if you do not
have this filter effect, paste the png which is in the download
folder)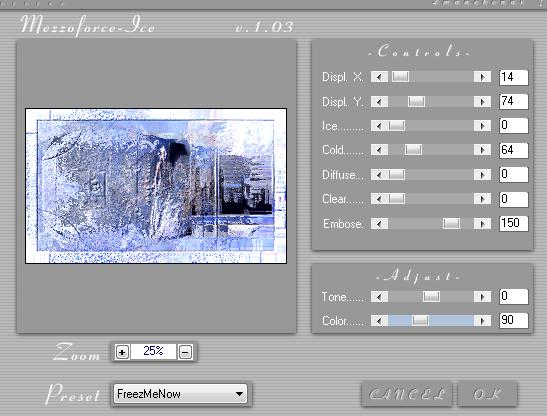
65. Effects -
Edge effects - enhance more
66. Selections -Invert
67. Effects - 3-D effects Drop shadow 0/0/100/20 black
68. Selections - Select none
69. Open the tube ''woman_41_by_hebe''/ resize to 70% and paste as
shown
70. Repeat the drop shadow (it will still be in memory)
71. Image - add borders 2 pixels black and paste the text tube as
shown.
*
All Done
Thanks Sally
*
I am part of Tutorial
Writers Inc.
My tutorials are
regularly recorded
.


|
Your creations here
 |
|