New
 Translations
|
In [Dutch translated ] by Marion Here
|
In [English translated ] by Marion Here
|
In [Italien translated ] by Graziella Here
|
In [German translated ] by Marion Here
|
Translations here
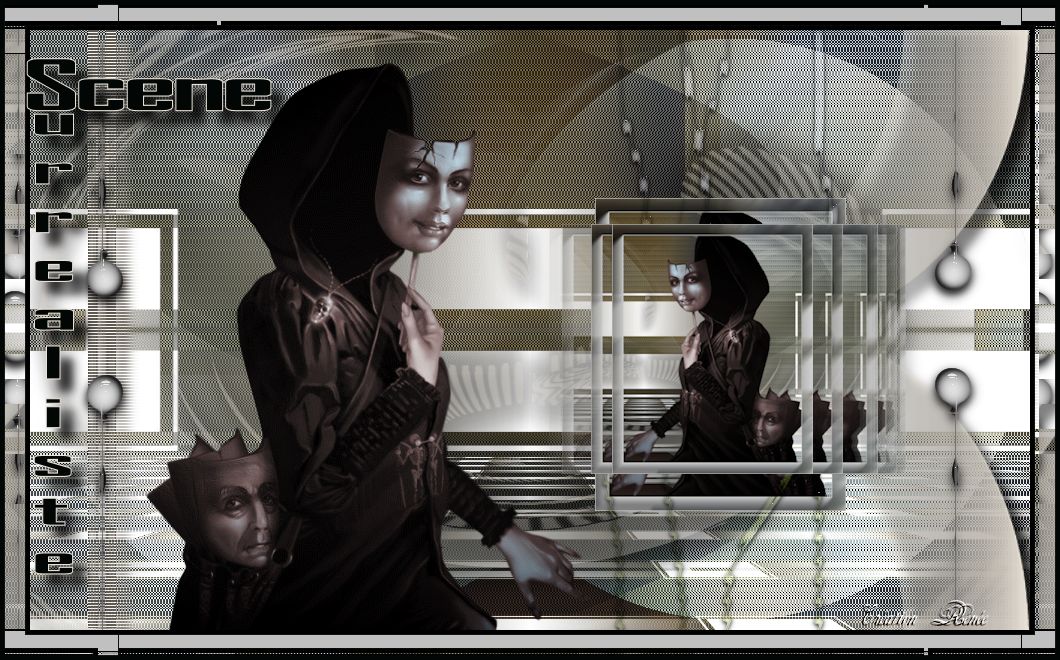
Scène Surréaliste
DOWNLOAD material here
|
These Plugins are used for this Tutorial Unlimited-Special Effects2- Border White Fade2 VM Distorsion / Flipper Alf's Power Sines /Absolute 2 Sin Grads Effet Nick Color Pro3.0/Bi -color AP01 Lines / Innovation /Siverlining Eyecandy5-Impact Mura's meister /Perpective tilling Simple Mura's Meister EyeCandy6 VM Distorsion / Flip chop You can find my filters here |
*
|
Tube are of Devil * ATTENTION : If it is your intention to share these tubes or these lessons in a group, please ask permission to the owner . The tube may not be send without the lesson . Please do not make changes to the tube, because this tube was made for this lesson only. It is forbidden to share this tutorial without a link to the original lesson. Thank you very much Renée * These tubes were received from tubeurs sharing groups. Or found by me searsching on the net. I Am grateful to have been given permission these beautiful tubes so please use any copyright information as needed. If one of these tubes is yours? Contact me so I can make a link to your site or remove it. Thanks Renée |
|
Before you start * Open PSP . Open your material . Open / tubes duplicate and close originals Open then Minimize the mask in PSP Put filters in their proper folders. Brushes and other tools in their respective folders To import presets Eye candy 5 / Double-click the file it will automatically install
* For older versions of PSP may be that you are having trouble opening the tubes
Just click OK and the tube can be used. Thanks Renée
|
Let's start the lesson.
1. File - New - New Transparent Image: 1000 x 600 pixels
2. Selections- Select All// Open the Backgroundimage ''fond_scene _surrealiste'' Edit/copy-Edit paste into selection
3. Selections-Deselect All
4. Adjust-Blur- Gaussian Blur: Radius 15%
5. Open the tube ''renee_scene_surrealiste_image_1'' Edit/copy-Edit paste as a new layer on your working area
6. Effects- Plugins -Unlimited-Special Effects2- Border White Fade2
7. Material Properties: Foreground color to this color: #7c7c7d -Background color to this color: #e8e1d6
8. Prepare a Sunburst Gradient as configured
9. Layers- New raster layer -Activate Flood fill tool and fill the layer with the gradient
10. Effects -Plugins -VM Distorsion / Flipper 88/44/197
11. Effects- Plugins -Alf's Power Sines /Absolute 2 Sin Grads
12. Effects- Plugins -Nick Color Pro3.0/Bi -color /color set /green brown2
13. Effects- Plugins -AP01 Lines / Innovation /Silverlining with these settings
14. Layers-Duplicate- Image Mirror- Opacity of the layer down to 50 % Layers-Merge- Merge Down
15. Layer-Palette: Change the Blend Mode to :Hard Light
16. Open the tube ''renee_scene_surrealiste_image_barres ''Edit/copy-Edit paste as a new layer on your working area
- Do not move it is in the right place
17. Effects- Plugins -Eyecandy5-Impact - perspective shadow-tab Settings/User settings choose my preset: ''renee_scene_surrealiste_persp1''
18. Layers-Duplicate
19. Effects- Plugins -Simple -Zoom out and flip
20. Effects- Plugins - Mura's meister /Perpective tilling use the default setting
21. -Activate your Pick Tool (K) Mode Scale push from top to bottom down to 420
22. Adjust- Brightness and Contrast -Fill Light/Clarity with these settings
23. Layers- New raster layer
24. Selections - load/save selection - load selection from disk and choose my selection: ''renee_scene_surrealiste1'
25. Pot of Paint: Change the opacity of the color to 41 % -Properties Foreground: FG-Color #e8e1d6 -
Activate Flood Fill Tool and fill the selection with the foreground color #e8e1d6 (do not forget to reset the settings of your paint pot to 100% )
26. Selections-Deselect All
27. Effects- Distortion Effects- Polar Coordinates-Rectangular to polair
28. Repeat: Effects- Distortion Effects- Polar Coordinates-Rectangular to polair- with the same settings
29. Effects - 3D Effects - Drop shadow with these settings
- Repeat - Effects - 3D Effects - Drop shadow with these settings V-19/ H -5
30. Open the tube ''So many faces-By Devil'' - Edit/copy-Edit paste as a new layer on your working area
31. Layers- Merge- Merge Visible
32. Window Duplicate- At the copy
33. Activate Crop Tool: Draw a form like this
- Click apply
34. On your cropped image /Image resize to 465 x 580 pixels
35. On your cropped image
36. Effects-Plugins -AAA Frames - Foto frame with these settings
37. Image Resize to 54% resize all layers not checked
38. Edit/copy /Edit paste as a new layer on your working area
39. Image Mirror
40. Effects- Image Effects-Offset use settings below
41. Layers-Duplicate
42. Image Resize to 80% resize all layers not checked
43. Effects- Plugins -Mura's Meister / copies with these settings
44. Effects- Image Effects-Offset use settings below
45. Activate the top of the layer Palette
46. Layers- New raster layer
47. Selections - load/save selection - load selection from disk and choose my selection: ''renee_scene_surrealiste 2'
48. Activate Flood Fill Tool and fill the selection with the foreground color :#e8e1d6
49. Selections-Deselect All
50. Effects- Plugins -Simple -Top bottom Wrap
51. Effects- Plugins - Eyecandy6 -perspective /drop /height 1
52. Layers- Arrange- Move Down
- Layer palette look like this now
53. Open the tube ''renee_scene_surrealiste_barres_2" Edit/copy-Edit paste as a new layer on your working area and move to the left side
54. Open the tube ''renee_scene_surrealiste_gouttes'' Edit/copy-Edit paste as a new layer on your working area
- With your Move Tool place it to the left side
55. Layers - Duplicate /Image Mirror
- In the layer Palette: activate raster 1
56. Open the tube ''renee_scene_surrealiste_deco -Edit/copy-Edit paste as a new layer on your working area
57. Effects- Image Effects-Offset use settings below
58. Layer-Palette: Change the Blend Mode to Hard Light and set the layer opacity of this layer to 81%
- Layer palette look like this now
59. Image - Add borders-Symmetric checked: 5 pixels black
60. Image - Add borders-Symmetric checked: 20 pixels #c0c0c0
61. Image - Add borders-Symmetric checked: 5 pixels black
62. With the magic wand select the border of 20 pixels
63. Effects- Plugins -VM Distorsion / Flip chop 28/10
- Repeat : Effects- Plugins -VM Distorsion / Flip chop 28/10
64. Selections-Deselect All
65. Activate the tube "text "/Edit/copy-Edit paste as a new layer on your working area / Ore write your own text
Save as JPG
I hope you enjoyed this lesson
Renée
This lesson was written by Renée
26/02/2013
*
Any resemblance with an existing lesson is merely a coincidence *
* Don't forget to thank the people who work for us and with us. I named the tubeurs - Testers and the translators.
Thanks Renée.
I am part of Tutorial Writers Inc.
My tutorials are regularly recorded.
ReneeGraphisme_All rights reserved


