|
Let's Start
-
Material Properties: Foreground color to color: #eadcc1 Background color to color : #7c644a
-
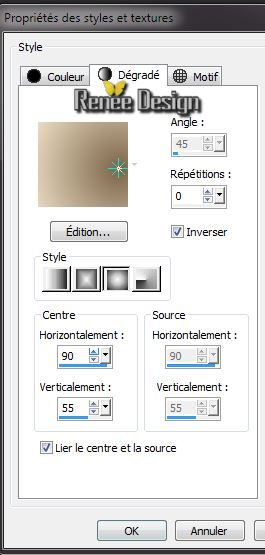
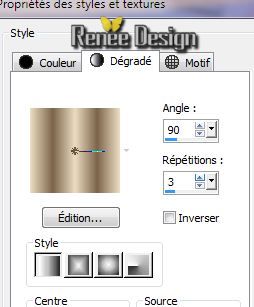
Prepare a Sunburst Gradient as configured
1.
File - New - New Image: 1015 x 655 pixels transparent
2.
Flood Fill Tool: Fill the layer with the gradient
3.
Layers - New Raster Layer
4.
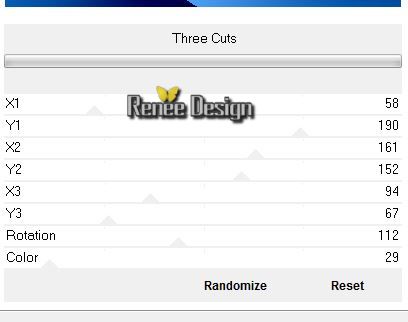
Effects -Plugins - VM Instant Art - Three
Cuts
-
Change the Blend mode to "Multiply"
5.
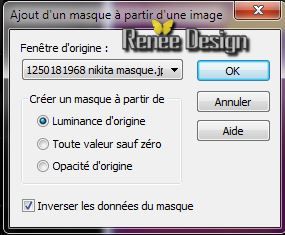
Layers- New Mask layer from Image and choose Mask:
''1250181968 nikita masque.jpg''
6.
Layers- Merge- Merge Group
7.
Effects - Image Effects- Seamless Tiling
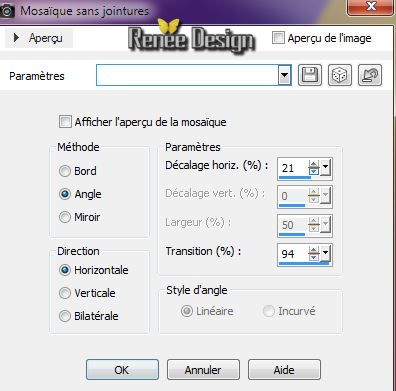
8.
Effects - Plugins- L and K's / Dimitri /
100
9.
Layers- Merge- Merge- Down
10.
Effects -Plugins - Simple - 4 Way
Average
11. Layers - New Raster Layer
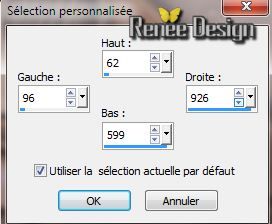
12.
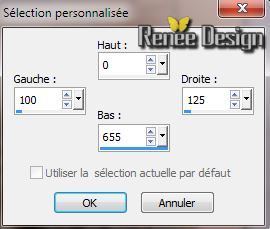
Selections-Custom selection with these settings
13. Activate tube '' KrysMiststeampunk-25-04-14-021''/ Edit/copy-Edit past into selection
14. Effects -
3D Effects- Drop Shadow 1/1/100/11 black
15.
Selections - Deselect all
16. Layers- Duplicate
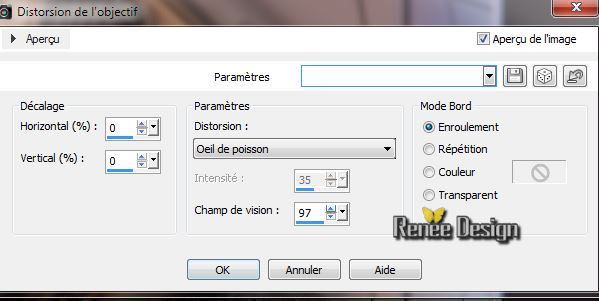
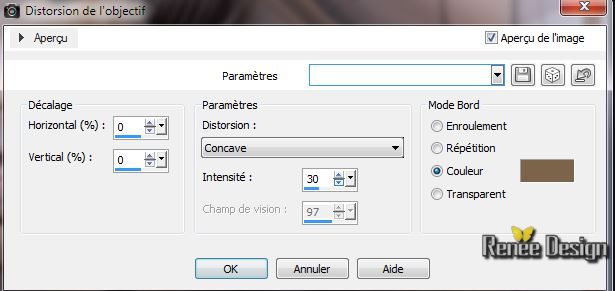
17. Effects-
Distortion Effects -Lens Distortion-Fisheye
18. Effects -
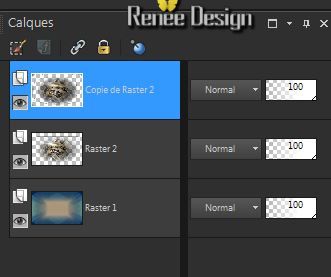
3D Effects- Drop Shadow 1/1/100/11 black
Layer Palette look like this now:
19. Effects-
Distortion Effects - Lens Distortion- Barrel- Color-BG-Color
20. With your magic wand- mode Add-shift /RGB .

21.Select the 4 brown parts like this
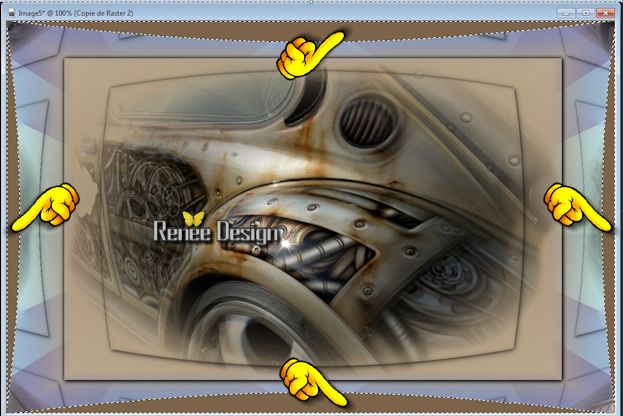
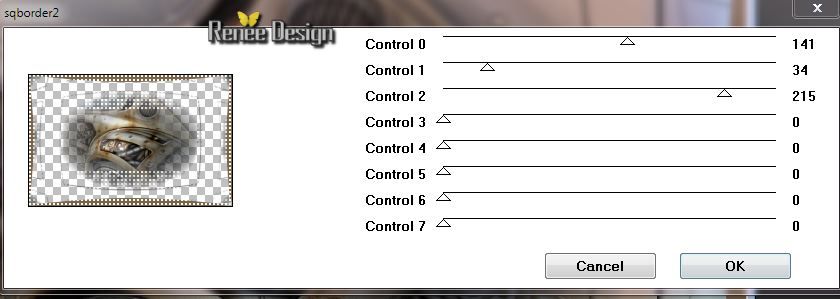
22.
Effects - Plugins - AFS Import-
Sqborder2/ default 141/34/215
23.
Selections- Promote selection to layer
24.
Selections- Select none
25.
Effects - Plugins - EyeCandy 5 Impact -
Perspective shadow-Preset
''steampunk-12_shadow''
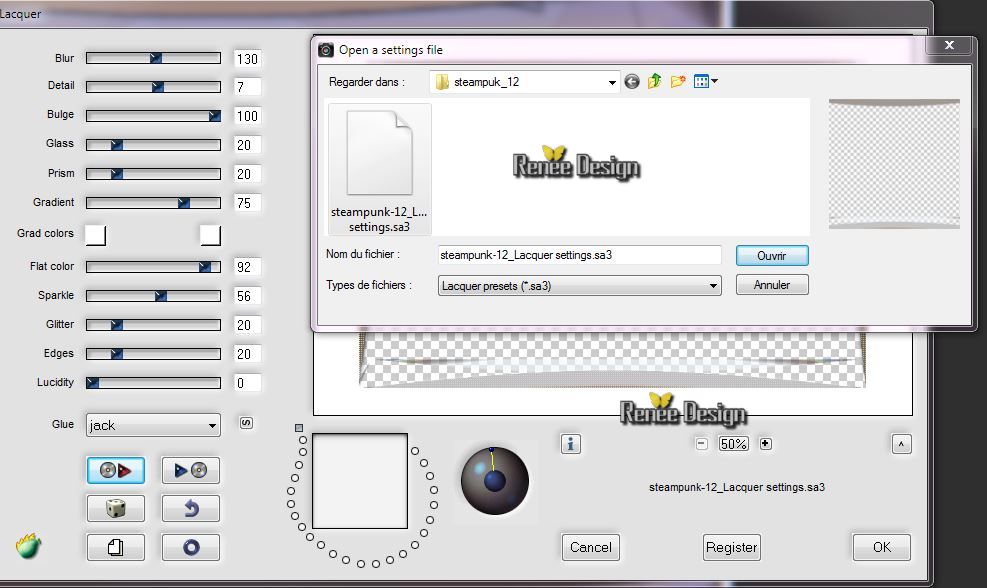
26. Effects
_Plugins - Flaming Pear - Lacquer /Preset/ click on the red arrow and load your preset "
steampunk-12_Lacquer settings'' Is in the zip-file>Presets
Or manually set
(If you have another version of the filter, just take the preset and automatically will change some data,In «Glue» jack is not there (Grad colors white and
black « Glue »normal mode)
27.Activate the bottom of the layer palette (Raster 1)
28. Effects
-Plugins - Adjust Variation /click 1 X on original and 2 X on Lighter
29. Layers- Merge- Merge Visible
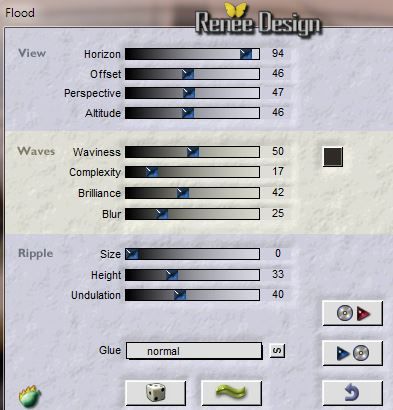
30. Effects
-Plugins -Flaming Pear - Flood
31.
Layers- Duplicate
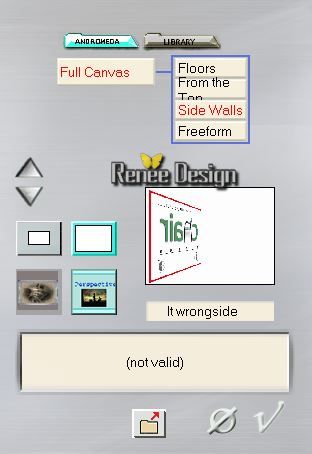
32. Effects -
Plugins - Andromeda - Perspective / Side Walls /Preset /IT
Wrongside
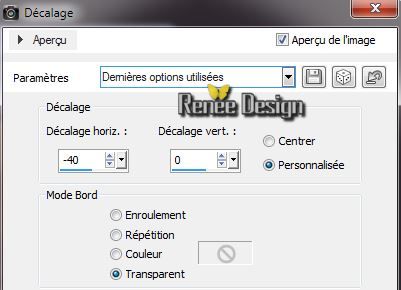
33. Effects -
Image Effects-Offset
34. Activate the bottom of the layer palette (fusionné)
35.
Effects - Plugins - Simple -Top left
mirror
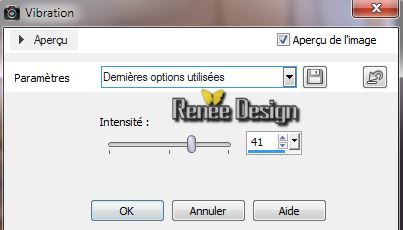
36. Adjust-Heu and Saturation- Vibrancy
37. Activate your top layer in your layer palette
38. Layers- Newe raster layer
39.
Selections-Custom selection with these settings
40.
Prepare a linear gradient configured like this.
41. Flood Fill Tool: Fill the selection with the gradient
42.
Selections- Select none
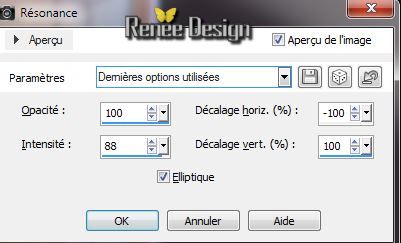
43. Effects -
Reflections Effects- Feedback
44 . Change the blend mode to "Overlay"
45. Layers- Duplicate
46.Effects- Distortion Effects- Polar Coordinates-Rectangular to polar
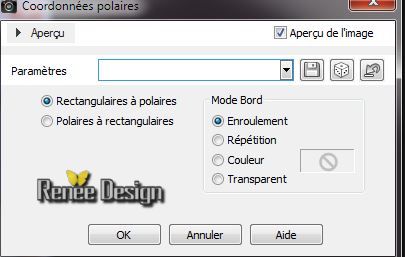 C C
47. Layers-Merge- Merge- Down
Let the blend mode to "Overlay" .Opacity 69%
48.Activate the bottom of the layer palette (fusionné)
49.
Layers- Duplicate
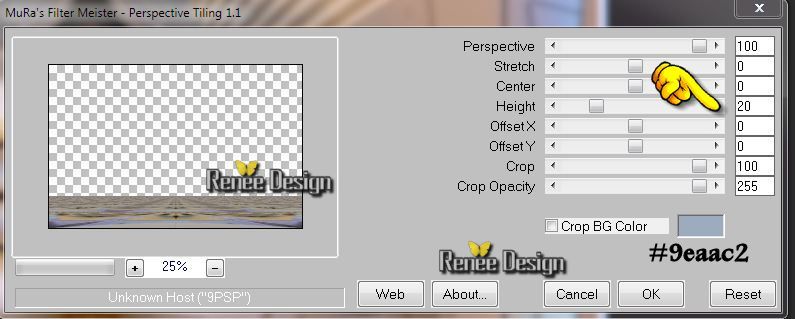
50. Effects-Plugins - Mura's Meister - Perspective
Tilling
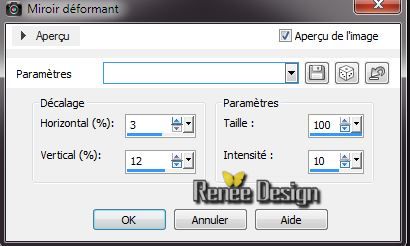
51.Effects -
Distortion Effects -Warp
52. Effects -
3D Effects- Drop Shadow /with the same settings
Activate the top of the layerpalette
53. Activate tube ''KrysMiststeampunk-25-04-14-051.pspimage''(remove the watermark on the left) /Image Resize 55 %/ Edit/copy -Edit/paste as a new Layer and place the tube at the right place
54.
Layers- Merge- Merge Visible
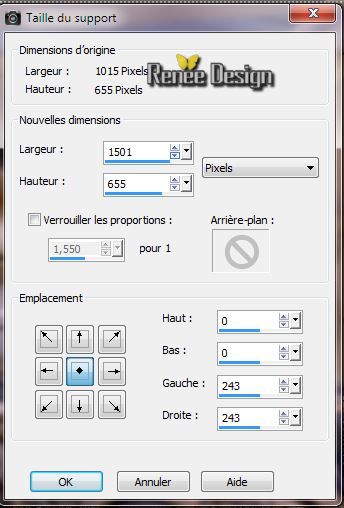
55. Image -
Canvas Size
56.With the magic wand select the transparent left side
57. Layers - New Raster Layer
58. Activate tube ''steampunk_12_image1"/Edit/copy-Edit past into selection
59. Effects -
3D Effects- Drop Shadow 8/14/100/11 black
60.
Selections - Deselect all
61. Layers- Duplicate- Image mirror
62. Activate tube "montant retravaillé"
(KRYSSTEAMPUNK-25-O4-14-052BIS )''/Edit/copy -Edit/paste as a new Layer
move as shown

63. Activate tube "KRYSSTEAMPUNK-25-O4-14-052BIS '' activate
raster 1 of this tube/Image Resize 45% /Edit/copy -Edit/paste as a new Layer and place the tube at the right place
64. Activate tube''steampunk_12_titre '' Edit/copy -Edit/paste as a new Layer and place the tube at the right place .Change the blend mode to "Hard Light"
65. Activate tube:"Steampunk_12-Affice"Edit/copy -Edit/paste as a new Layer and place the tube at the right place
66.
Layers- Merge- Merge Visible
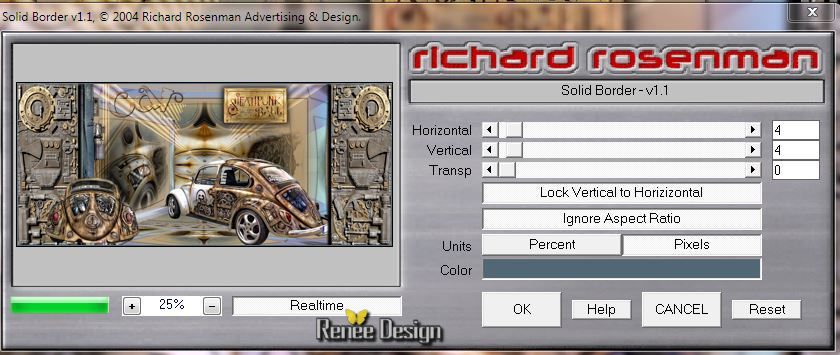
67. Effects
-Plugins - Richard Rosenman - Solid border /color
#56606c
68. Image - Add Borders - Symmetric checked: 10 pixels white
69. Image
Resize 70%

I hope you enjoyed this lesson
Renée
This lesson was written by Renée 26-04-2014
Created the
2/05/2014
*
Any resemblance with an existing lesson is merely a coincidence
*
Don't forget to thank the people who work for us and with us. I named the tubeurs - Testers and the translators.
Thanks Renée | 
 Translations