|
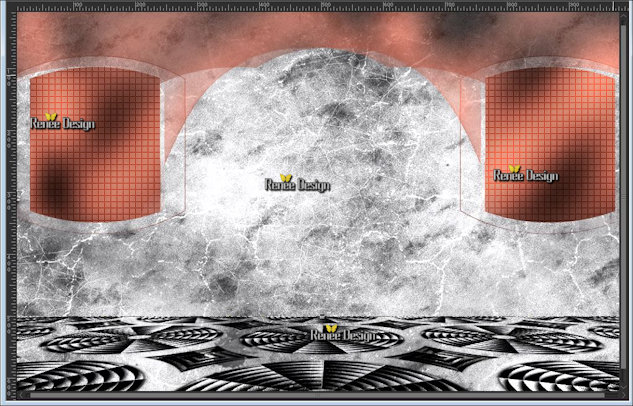
Let's start the lesson.
-
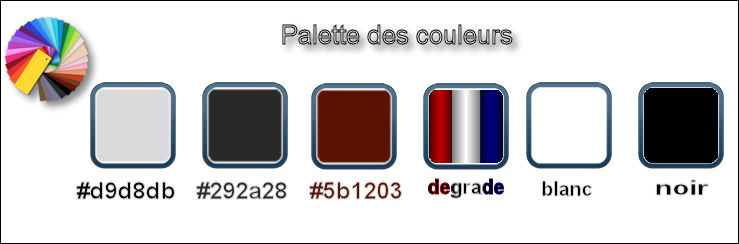
Color-palette:Set your foreground color to color #d9d8db
-Set your background color to color: #5b1203
1.
Open the image ‘’fond_Steampunk_36.jpg’’- Window - Duplicate (or shift+D) - Close the original and proceed on the copy -Promote Background Layer =Raster 1
2.
Effects –Plugins- Unlimited - Photo Aging Kit-Cracked Paper with these settings 243/191
3. Layers- Duplicate
4. Effects
–Plugins – VM Toolbox- Seamless Tile use the settings below
5. Effects- 3 D Effects- Drop Shadow with these settings: 2/17/50/30 black
- Layer Palette - Double click on this Layer and set the Blend Mode to " Hard Light "
6. Layers- New Raster Layer
7.
Selections –load/save selection –load selection from disc and choose my selection: ‘’
STpunk36_1 »
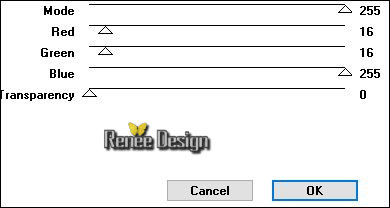
8. Activate Flood Fill Tool and fill the selection with the backgroundcolor
Selections- Deselect All
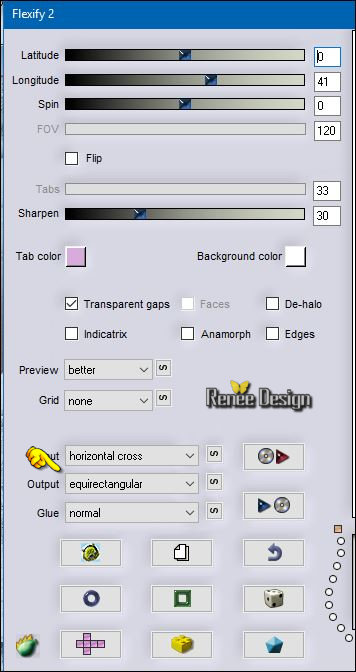
9. Effects
–Plugins– Flaming Pear –Flexify 2 use the settings below
10. Effects- Image Effects- Offset with these settings H = 0 and V = 99 -Transparent
11. Layers- Duplicate
12. Image -
Mirror ( CTRL B)
- Layers- Merge Merge Down
13.
Selections –load/save selection –load selection from disc and choose my selection:« STpunk36_2 »
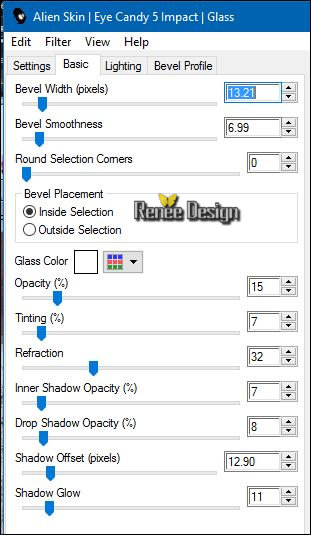
14.
Effects –Plugins– EyeCandy 5-Impact – Glass -tab Settings/User settings choose my Preset
‘’ Steampunk_36_glass”
Selections- Deselect All
15.
Selections –load/save selection –load selection from disc and choose my selection:‘’STpunk36_3’’
16.
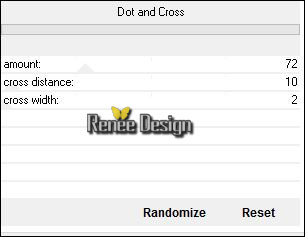
Effects –Plugins-Unlimited –Penta Com – Dot and Cross use the settings below
Selections- Deselect All
17.
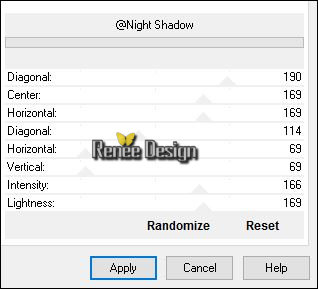
Effects –Plugins-Unlimited - &<Background Designers IV>
@Night Shadow use the settings below
Layer Palette -Activate the Layer underneath =Copy of Raster 1
- Color-palette: Set your background color to color: #292a28(The background color is important to the effects of the filter)
18. Effects
–Plugins -Unlimited - &<BKg Designer sf10 II>- Daggers Done
with these settings:161/76
19. Effects- 3 D Effects- Drop Shadow using the default settings
20.
Effects-Plugins- Unlimited - °v° Kiwi`s Oelfilter- Setzboard a
23
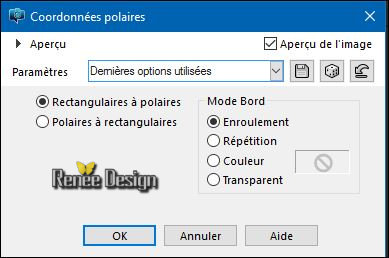
21. Effects- Distortions Effects-Polar Coordinates-Rectangular to Polar-Wrap
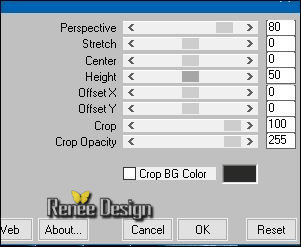
22. Effects
–Plugins– Mura’s Meister –Perspective
Tilling use the settings below
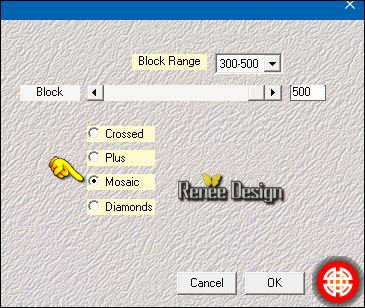
23.
Activate your Pick Tool (K) Mode Scale -Pull the top Node down to 500 px as shown in the example below
24. Effects- Distortion Effects- Punch strength 28
- In the Layer-Palette: Make Raster 1 active
25. Layers- New Raster Laye
26.
Selections –load/save selection –load selection from disc and choose my selection:‘’STpunk36_4’’
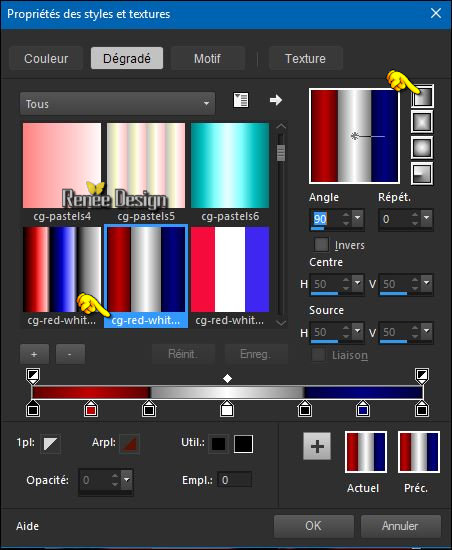
- Material palette:Change foreground material into gradient and select my file in the list « cg-red-white-blue-2 » Prepare a linear gradient configured like this.
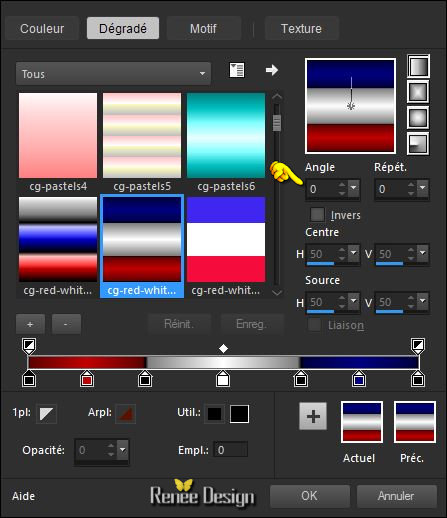
27. Activate Flood Fill Tool and fill the selection with the gradient
Selections- Deselect All
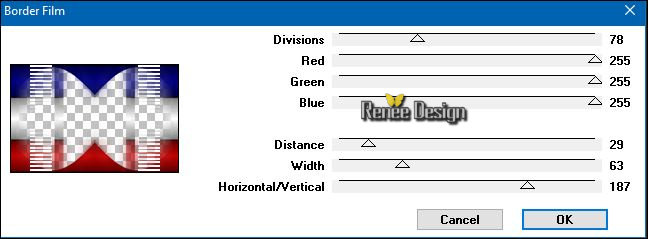
28. Effects
– Plugins– Alf’s Border FX-Border Film use the settings below
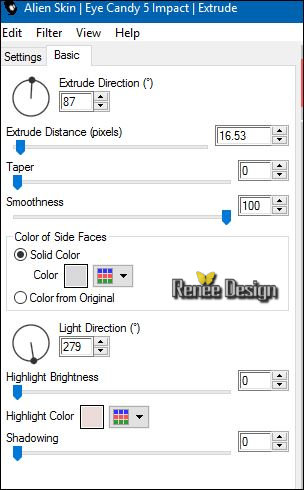
29. Effects
–Plugins– EyeCandy 5 Impact –Extrude-tab Settings/User settings choose my Preset ‘’
Steampunk_36_extrude’’
- Activate the top of the layer palette
30. Activate the tube ‘’ steampunk_36_image_1.png’’
- Edit/ Copy-Edit - Paste as new layer on your working image
- With your arrow keys on the keyboard
.jpg) upwards until it abuts against the edge upwards until it abuts against the edge
31. Effects- 3 D Effects- Drop Shadow using the default settings
32. Activate the tube ’’element_scrapt_nighti’’
Edit/ Copy-Edit - Paste as new layer on your working image
- Move as shown in the example below
33. Effects- 3 D Effects- Drop Shadow with these settings: 1/1/100/3 black
- Color-palette:Set your foreground color to color #d9d8db -Set your background color to color:#5b1203
34. Layers- New Raster Layer
35.
Selections –load/save selection –load selection from disc and choose my selection:‘’STpunk36_5’’
36. Activate Flood Fill Tool and fill the selection with the background color
37. Effects- Art Media Effects- Brush Strokes use the settings below
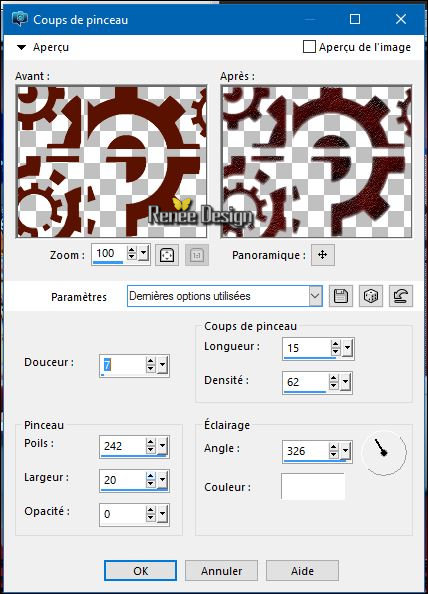
Selections- Deselect All
38. Effects- 3 D Effects- Drop Shadow with the same settings
39. Activate the tube ‘’ element1_nighti.png’’
- Edit/ Copy-Edit - Paste as new layer on your working image
- Move to the left
- Properties Foreground:change foreground to linear gradient with these settings
40. Layers- New Raster Layer
41.
Selections –load/save selection –load selection from disc and choose my selection:»
STpunk36_6 »
42. Activate Flood Fill Tool and fill the selection with the gradient
Selections- Deselect All
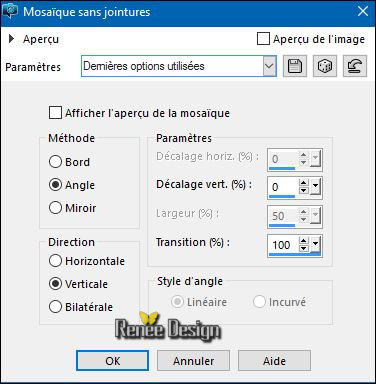
43. Effects-Image Effects-Seamless Tiling use the settings below
44. Layers- Duplicate
45. Image
Mirror (CTRL B)–Image Flip(CTRL I)
46. Layers- Merge -Merge Down
47. Effects
–Plugins- [AFS IMPORT]- sqborder2 /using the default settings 141/34/215/0/0/0/0
48. Effects
–Plugins- Medhi- Sorting Tiles use the settings below
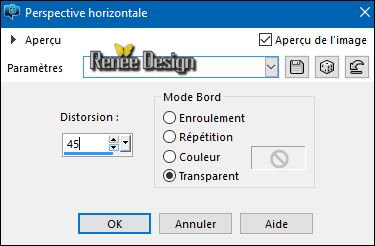
49. Effects- Geometric Effects– Perspective horizontal with these settings
50. Layers- Duplicate-Image Flip (CTRL I)
51. Objects-Make Same Size-Both
52. Layer Palette - Double click on this Layer and set the Blend Mode to "Screen "
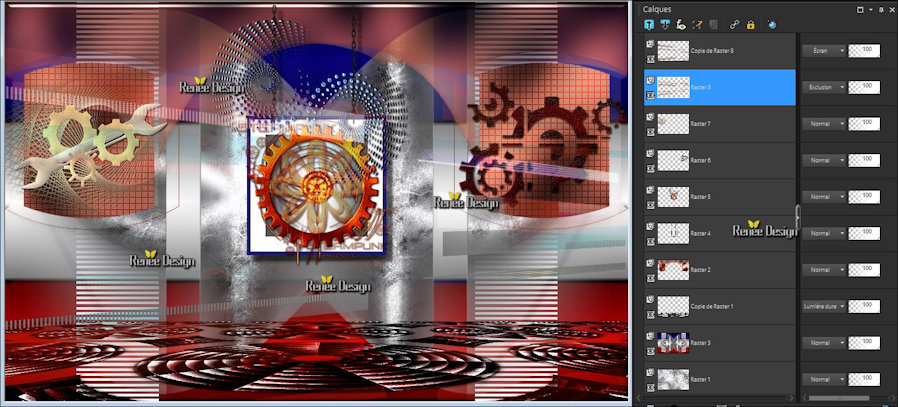
53. In the Layer-Palette-Make Raster 8 active -Layer Palette - Double click on this Layer and set the Blend Mode to "Exclusion"
Your work and Layer Palette look like this now
- Activate the top of the layer palette
54. Open the Brush image ‘’ Pinceau_steampunk36’’ in your PSP
55. File- Export Custom Brush (Give it a name)
56. Activate Brush Tool and select my file in the list ‘’ Pinceau_steampunk36’’ with these settings

57. Layers- New Raster Layer
–
Stamp your brush at the right place by using your foreground gradient
as shown in the example below
58. Effects- 3 D Effects- Drop Shadow with the same settings
59. Image - Add borders-Symmetric checked:1 pixel black
60.
Selections- Select All
61. Image - Add borders-Symmetric checked: 60 pixels #ffffff
62.
Promote Background Layer
63.
Selections- Invert
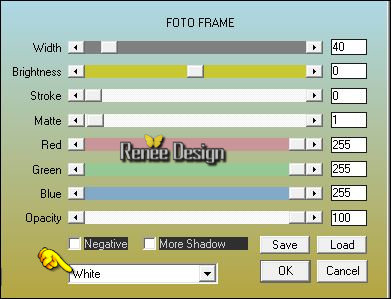
64. Effects
-Plugins–AAA Frame -Foto Frame use the settings below
Selections- Deselect All
65.
Selections –load/save selection –load selection from disc and choose my selection:‘’
STpunk36_7’’
66. Color-palette:Set your foreground color to color #c53336-Activate Flood Fill Tool and fill the selection with the foregroundcolor
67. Effects- 3 D Effects- Drop Shadow with these settings: 1/1/100/3 black
Selections- Deselect All
68. Activate the tube ‘’ Steampunk_36_image_titre.png »
- Edit/ Copy-Edit - Paste as new layer on your working image
- Move to the bottom right
69. Image - Add borders-Symmetric checked: 1 pixel black
70. Image - Add borders-Symmetric checked:25 pixels #ffffff
71. Activate the tube ‘’ Renee_tube_Steampunk_36.pspimage’’
- Edit/ Copy-Edit - Paste as new layer on your working image
-
Move to the bottom left
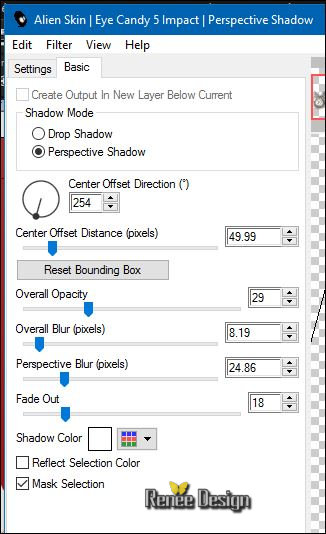
71.
Effects –Plugins–EyeCandy 5 Impact –Perspective
Shadow-tab Settings/User settings choose my Preset ‘’ Steampunk_36_Shadow’’
72. Image - Add borders-Symmetric checked: 1 pixel black
73. Image
Resize to 1005 pixels width
74. Activate the tube ‘’ steampunk_36_image_2 »
-Edit/ Copy-Edit - Paste as new layer on your working image and move
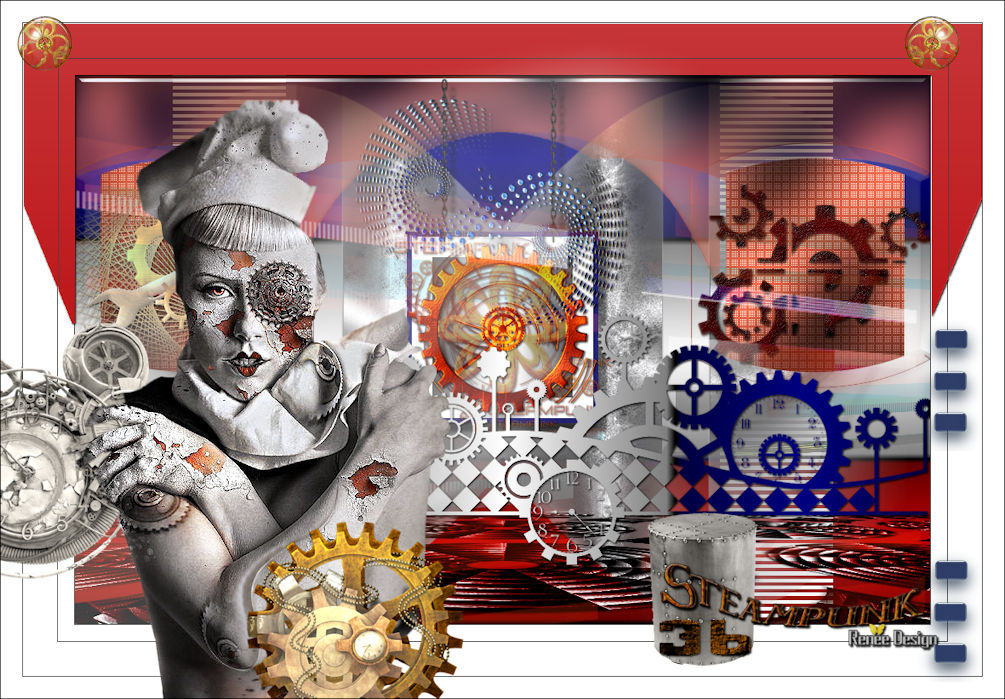
- Layers- Merge- Merge All
Save as JPEG
I hope you enjoyed this lesson
Renée
This lesson was written by Renée 31/03/2016
Edited and Update
2016
*
Any resemblance with an existing lesson is a coincidence
* Do not forget to thank the people who work with us and for us I have appointed the tubeurs and translators
Thanks Renée
| 
 Translations


 When you see this logo the filter is imported in Unlimited

 All rights reserved