|
New
Translations here
TIME FLIES
These Plugins are used for this Tutorial Factory D/Vortex Toadies /weaver Visual manipulation and transmission Dynasty plugins/ bars italian editor /picture and picture Andromeda perspective Toadies Sucking Toad bevel II.2 Eye candy5 /perspective FM Tile tools /blend emboss You can find my filters here http://www.reneegraphisme.fr/filtres/Mes filtres.html *-*-* Tube are of ATTENTION !!
If it is your intention to share these tubes or these lessons in a group,club or forum please ask permission to the owner .
The tube may not be send without the lesson . Please do not make changes to the tube, because this tube was made for this lesson only. It is forbidden to share this tutorial without a link to the original lesson. Thank you very much Renée * * These tubes were received from tubeurs sharing groups Or found by me searsching on the net. I Am grateful to have been given permission these beautiful tubes so please use any copyright information as needed. If one of these tubes is yours? Contact me. so I can make a link to your site or remove it. Thank you very much Renée
Let's Start
1. File - New - Open a new transparent image 900 x 600 pixels 2. Color-palette:Set your foreground color to color # ea3c0a - Set your background color to color #cfde64 3. Selections- Select All//Open the Image « fond nature «-Edit/ Copy-Edit - Paste into selection 4. Selections- Deselect All 5. Effects- Plugins -Unlimited -Factory D/ Vortex 225/114 6. Selections –load/save selection –load selection from disc and choose my selection: " @renee-foret1" / Delete 7. Layers- New Raster Layer //Set your foreground to gradient 'Foreground-background' -Linear -configured like this. /Activate Flood Fill Tool and fill the layer with the gradient
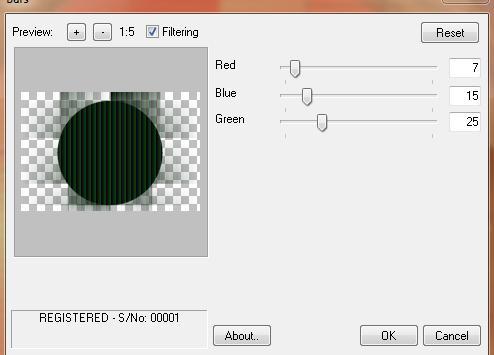
8. Layers- Duplicate 9. Effects- Plugins -Unlimted 2.0 - Toadies /Weaver 127/98/255 10. Effects- Edge Effects- Enhance 11. Effects- Plugins -Unlimited 2.0 -Visual manipulation / Transmission 25/25/0 12. Layers- Merge Merge Down 13. Layers- Duplicate 14. Effects- Plugins -Dynasty Plugins /bars use settings below
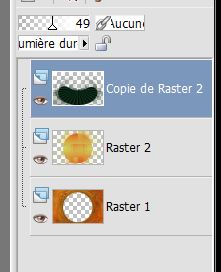
15. In the Layer- Palette- Double click and set the Blend Mode to "Hard Light " -Set the layer opacity of this layer to 49% 16. Effects- Distortions Effects-Polar Coordinates-Rectangular to Polar-Repeat checked - You should have this result as shown in the print screen below
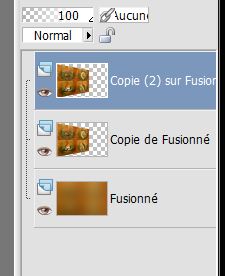
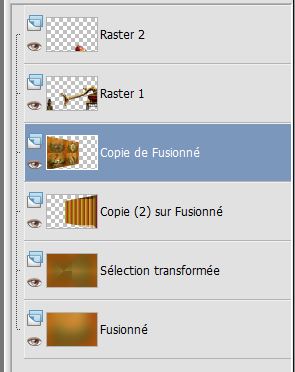
17. Layers- Merge- Merge Visible 18. Layers- Duplicate 19. Effects- Plugins -Unlimited 2.0 - Italian editor /Picture in Picture 255/0 20. Layers- New Raster Layer 21. Selections –load/save selection –load selection from disc and choose my selection: @renee-foret2 /Open the tube « gusimofruirsautumn14092011 »-Edit/ Copy-Edit - Paste into selection 22. Selections- Deselect All-Effects- Edge Effects- Enhance 23. Layers- New Raster Layer 24. Selections –load/save selection –load selection from disc and choose my selection: ''@renee-foret3'' 25. Open the tube « guismoclock71010 »-Edit/ Copy-Edit - Paste into selection 26. Selections- Deselect All 27. Layers- New Raster Layer 28. Selections –load/save selection –load selection from disc and choose my selection: ''@renee-foret4'' 29. Open the tube ''guismoherissson10092011 '' -Edit/ Copy-Edit - Paste into selection //In the Layer- Palette- Double click and set the Blend Mode to "Luminance- Legacy " 30. Selections- Deselect All 31. Open the tube " bymonique-42-3236 "-Edit/ Copy-Edit - Paste as new layer on your working image and move// In the Layer- Palette- Double click and set the Blend Mode to "Luminance " 32. Layers- Merge- Merge Visible 33. Layers- Duplicate 34. Activate the bottom of the layer palette /Adjust- Blur- Gaussian Blur: Radius : 100 35. Activate the Copy of merged layer in the layer palette 36. Effects- Plugins -Andromeda perspective - Side walls /It open / 37. Layers- Duplicate - You should have this result as shown in the print screen below
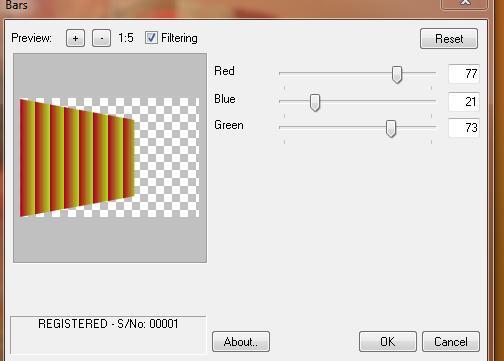
38. Activate the Copy 2 of merged layer in the layer palette 39. Effects- Plugins - Dynasty plugin/bars use settings below
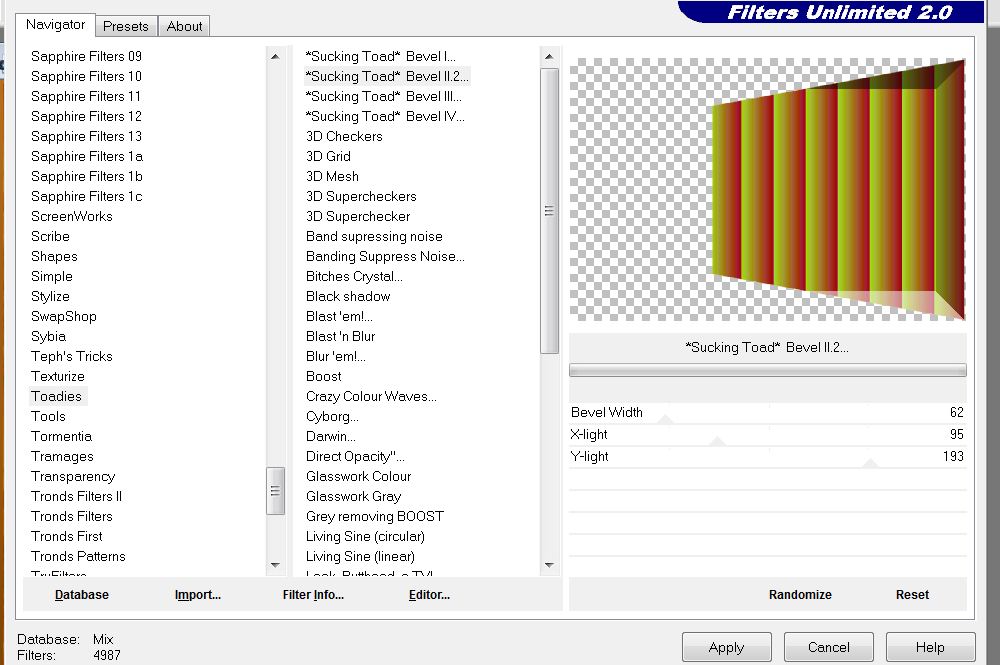
40. Image Mirror 41. Effects- Plugins -Unlimited2.0 -Toadies *sucking Toad Bevel II.2
42. Layers- Arrange- Move Down 43. Activate the bottom of the layer palette 44. Selections- Select All 45. Selections- Promote selection to Layer 46. Effects- Plugins -Simple /Pizza slice Mirror 47. Selections- Deselect All 48. Open the tube « guismopredatorsnack8092011 »// Edit/ Copy-Edit - Paste as new layer on your working image and move to the right 49. Effects- 3 D Effects- Drop Shadow with these settings 4/4/65/10 black 50. Open the tube « calguismocitrouilledecor180 »//Edit/ Copy-Edit - Paste as new layer on your working image and move 51. Effects- Plugins-- Eyecandy5/Perspective-/ preset '' drop shadow blury'' *You should have this result as shown in the print screen below
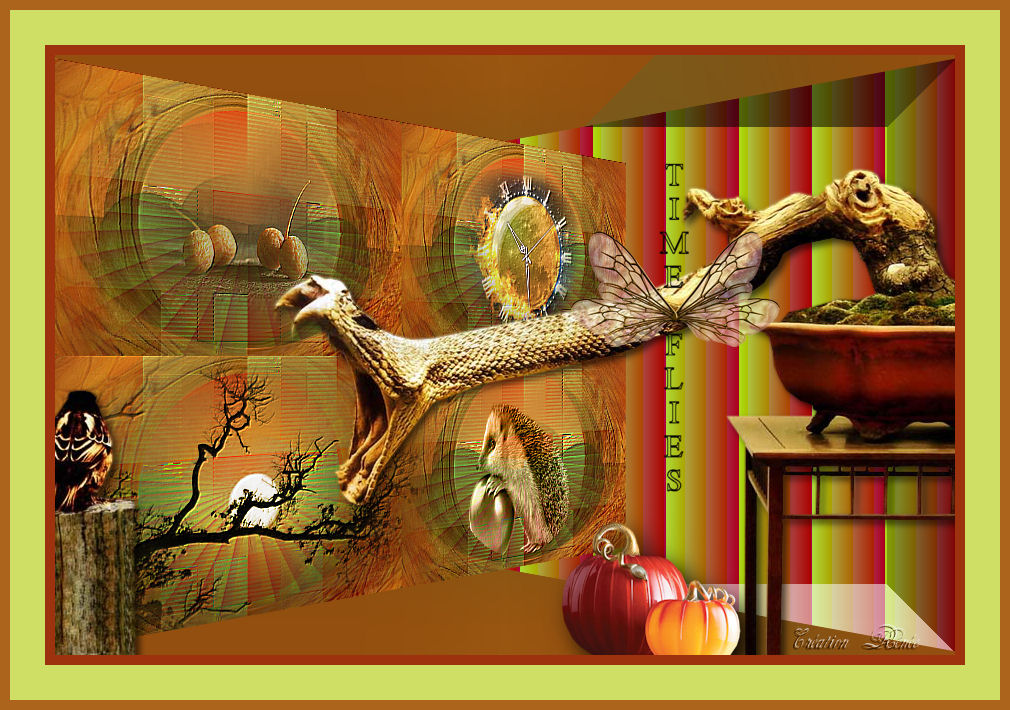
52. Activate the bottom of the layer palette(=merged layer) 53. Effects- Plugins -FMTile Tools /Blend Emboss using the default settings 54. Open the tube " texte"- Edit/Copy -Edit paste as new layer on your working image and move -Ore write your own text 55. Image - Add borders-Symmetric checked: 10 pixels #9c330e 56. Image - Add borders-Symmetric checked: 35 pixels #cfde64 57. Image - Add borders-Symmetric checked: 5 pixels #9c330e Save as JPEG I hope you enjoyed this lesson Renée This lesson was written by Renée Edited and Update 2009 Renée
|
 Translations