|
New
Translations here
UN FLASH
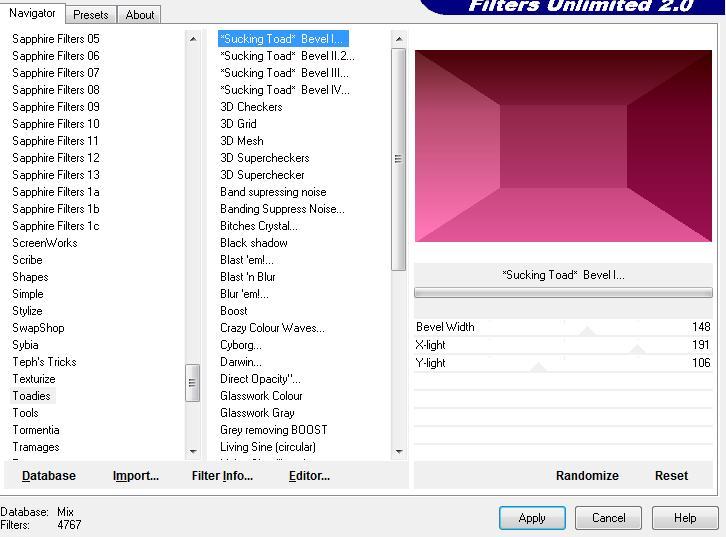
Let's start the lesson. 1. File: Open a new transparent image of 1000 x 650 2. Color-palette:Set your foreground color to color #d14487 -Set your background color to color #4f080c 3. Set your foreground to gradient 'Foreground-background' - Linear - Angle 0 - Repeats 0- Invert not checked. 4. Activate Flood Fill Tool and fill the layer with the gradient 5. Effects- Plugins - Unlimited - Toadies / Sucking Toad bevel!..use settings below
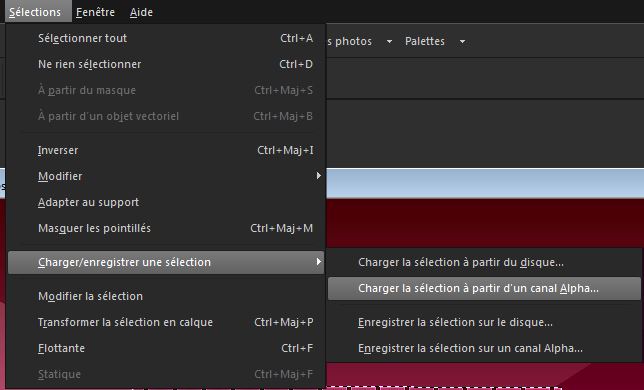
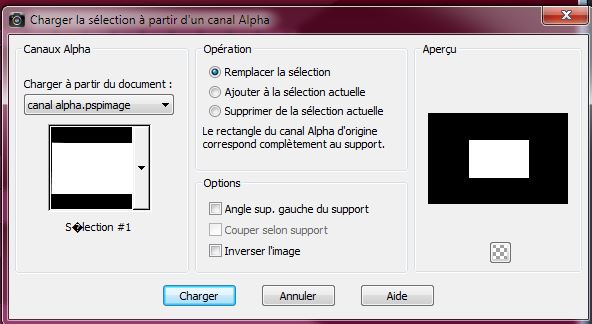
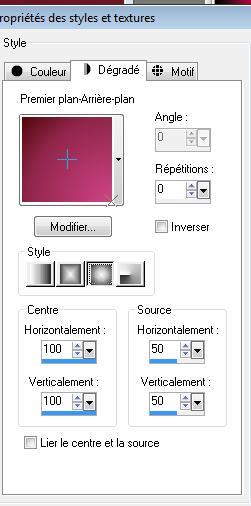
6. Layers- New Raster Layer 7.Open your AlphaChannel Back to work-Selections - Load/Save Selection - Load Selection from Alpha Channel - Selection #1 8. Set your foreground to gradient 'Foreground-background' - Sunburst with these settings-Activate Flood Fill Tool and fill the selection with the gradient
9. Effects- Plugins -Unlimited - Blackground mania/ medieval impression 148/98/103 10. Effects- Edge Effects- Enhance 11. Layers- Duplicate 12. Effects- Plugins -Unlimited - Andrews Collection57 /Colour twist use settings below
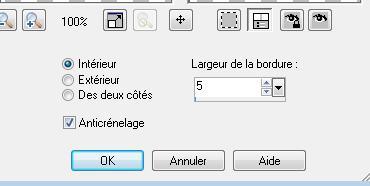
13. Layer Palette - Double click on this Layer and set the Blend Mode to "Multiply " 14. Selections-Modify-Select Selection Borders with these settings-In side
15. Activate Flood Fill Tool and fill the selection with #d14487 16. Effects-3 D Effects- Chisel with these settings
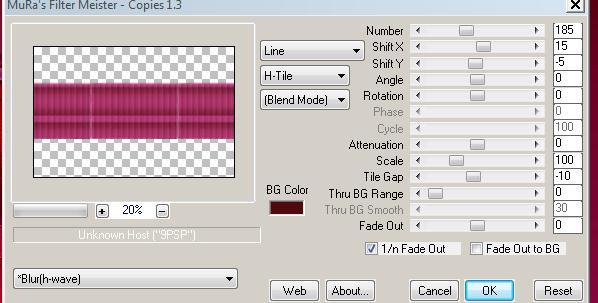
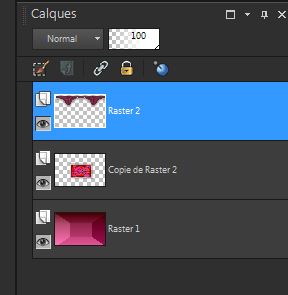
17. Selections- Deselect All 18. In the Layer Plaette-activate the layer underneath = (raster 2) 18. Effects- Plugins -Mura's meister /copies use settings below
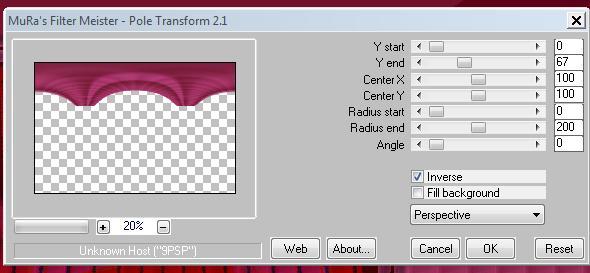
Plugins need time 19.Effects- Plugins -Mura's meister/ pôle transformation with these settings
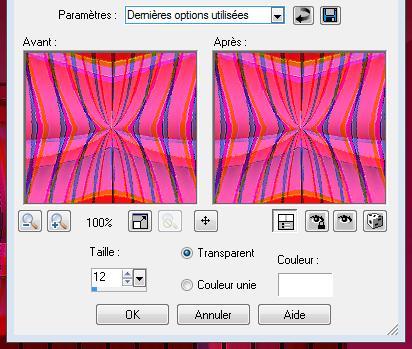
20. Effects- Plugins-EyeCandy 5 Impact/Glass -tab Settings/User settings choose my preset "@renee-flash1" 21. Layers- Arrange- Bring to Top You should have this result as shown in the print screen below
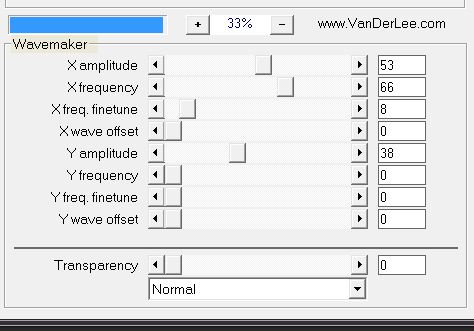
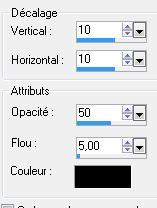
-Activate the bottom of the layers palette = (Raster 1) 22. Selections –load/save selection –load selection from disc and choose my selection:''@renee-flash2'' 23. Selections- Promote selection to Layer 24. Effects- Plugins-Vanderlee - Unplugged /Wavemaker use settings below 25. Effect- Plugins-Adjust variations / dark to slightly darken Selections- Deselect All 26. Open the tube image "cadre" /Image Resize to 80% all layers not checked--Edit/ Copy-Edit - Paste as new layer on your working image and move to the left 27. Open the tube ''attache'' -Edit/ Copy-Edit - Paste as new layer on your working image/Image Flip and move Open the tube ''horloge '' -Edit/ Copy-Edit - Paste as new layer on your working image and move -Layer Palette - Double click on this Layer and set the Blend Mode to "Exclusion" /Effects- Edge Effects- Enhance 28. Layers- Merge- Merge Layer 2 x Down (cadre+horloge+attache ) 29. Effects- 3 D Efects- Drop Shadow with these settings
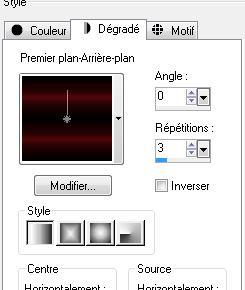
- Stay on this layer 30. Layers- New Raster Layer 31. Color-palette:Set your foreground color to color black 31. Selections –load/save selection –load selection from disc and choose my selection:'@renee-flash3'' 32. Set your foreground to gradient 'Foreground-background' - Linear - with these settings
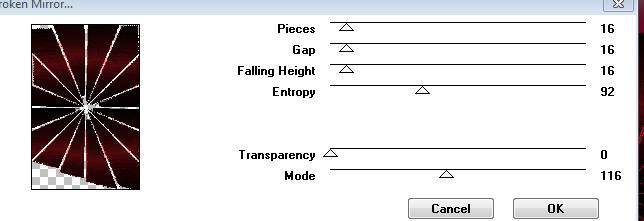
33. Activate Flood Fill Tool and fill the selection with the gradient 34. Effects- Plugins - Vm Distorsion /brokken mirror use settings below
35. Selections-Modify-Select Selection Borders with these settings-In side
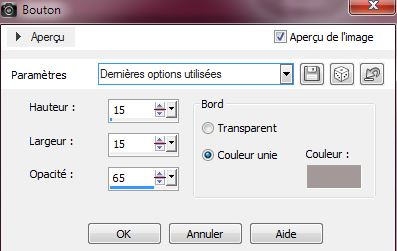
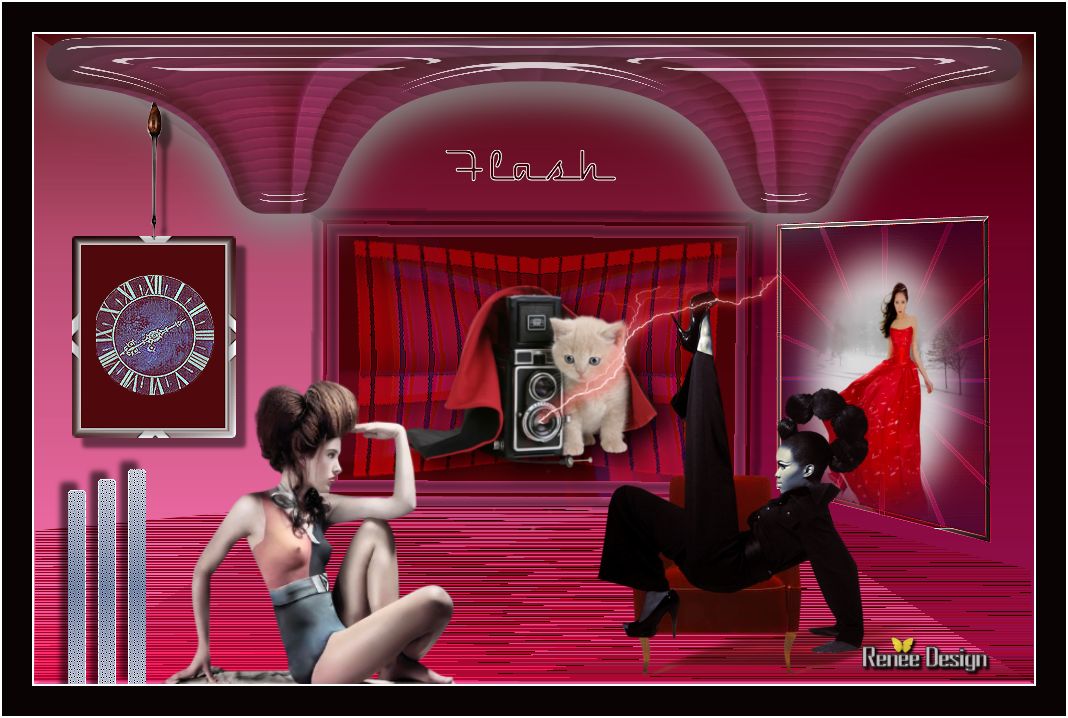
36. Layers- New Raster Layer -Activate Flood Fill Tool and fill the selection with color #4f080c 37. Effects- 3 D Effects- Bouton with these settings / Color #a39998 38. Layers- Merge- Merge Layers Down 39. Selections- Deselect All 40. Effects- Edge Effects- Enhance More 41. Selections –load/save selection –load selection from disc and choose my selection: @renee-flash3 42. Layers- New Raster Layer 43. Open the tube «gothic_charm_mist_1216_Beauty_09 »Edit/ Copy-Edit - Paste into selection 44. Selections- Deselect All 45. Open the tube « fauteuil rouge « -Edit/ Copy-Edit - Paste as new layer on your working image and move 46. Effects- Plugins - Eyecandy 5 Impact /perpsective shadow /Preset :reflect behind 47. Open the tube « betsie 683-19-02-2011 » Image Resize to 65% -Edit/ Copy-Edit - Paste as new layer on your working image and move 48. Open the tube « chat photographe »-Edit/ Copy-Edit - Paste as new layer on your working image and move 49. Effects- Plugins-Eyecandy 5 perspective shadow - preset drop shadow blurry 50. Open the tube « texte flash »-Edit/ Copy-Edit - Paste as new layer on your working image and move 51. Open the tube « effet eclaire » -Edit/ Copy-Edit - Paste as new layer on your working image and move 52. Open the tube »femme 115 « -Edit/ Copy-Edit - Paste as new layer on your working image and move 53. Open the tube "forme1" -Edit/ Copy-Edit - Paste as new layer on your working image and move 54. Open the tube "horloge "-Edit/ Copy-Edit - Paste as new layer on your working image and move 55. All in place? Layers- Merge- Merge- All 56. Image - Add borders-Symmetric checked: 2 pixels #ffffff 57. Image - Add borders-Symmetric checked: 30 pixels black 58. Image - Add borders-Symmetric checked: 2 pixels #ffffff Save as JPEG
I hope you enjoyed this lesson Renée This lesson was written by Renée Edited and Update 2009 *
Any resemblance with an existing lesson is a coincidence * Do not forget to thank the people who work with us and for us I have appointed the tubeurs and translators Thanks Renée * I am part of the Tutorial Writers Inc. My tutorials are registered regularly ReneeGraphisme_All rights reserved
*
|
 Translations